This is really a riff on my Smoky Mountain Beehive cocktail recipe, but with a pop of elderflower sweetness instead of honey.
2 parts Laphroaig scotch
1 part St. Germain
1/2 part orange juice
1/2 part seltzer
Pour it all over ice and shake it the fuck up. Drink this shit on the rocks, and maybe add a leaf of basil or mint to top it off. Another name for this concoction is the Boutineer. St. German can be substituted with aloe drink, and scotch can be substituted with rye.
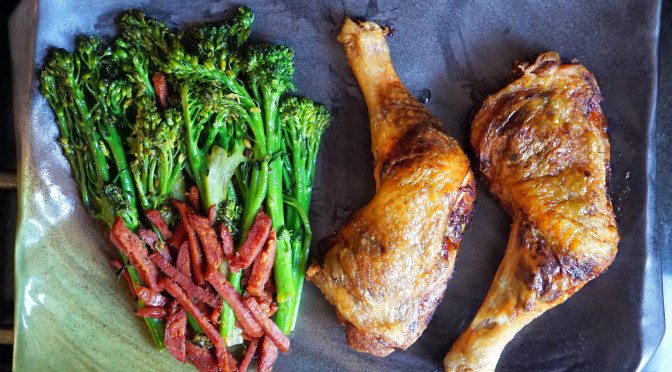
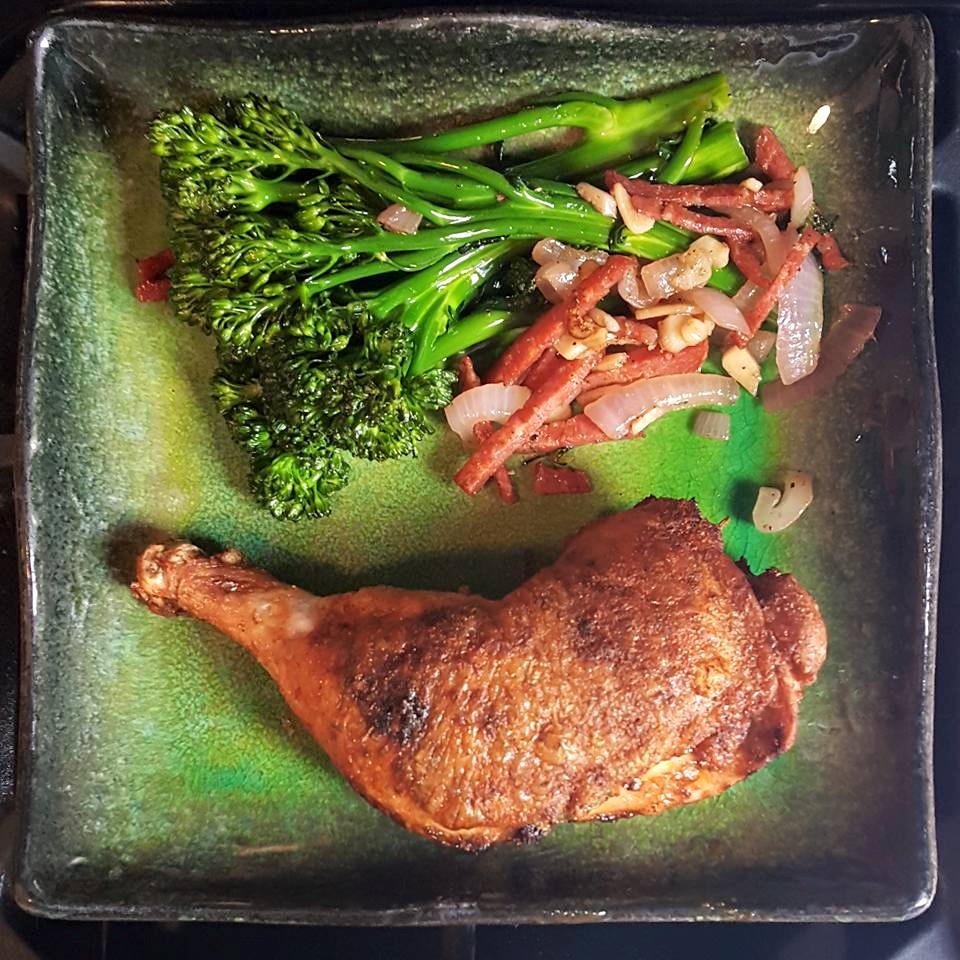
This recipe is pretty easy to execute, and every time I make it, it delivers with amazing flavor and texture. Crispy skin lemon and herb chicken legs with sautéed chorizo broccolini.
What The Fuck Do You Need?
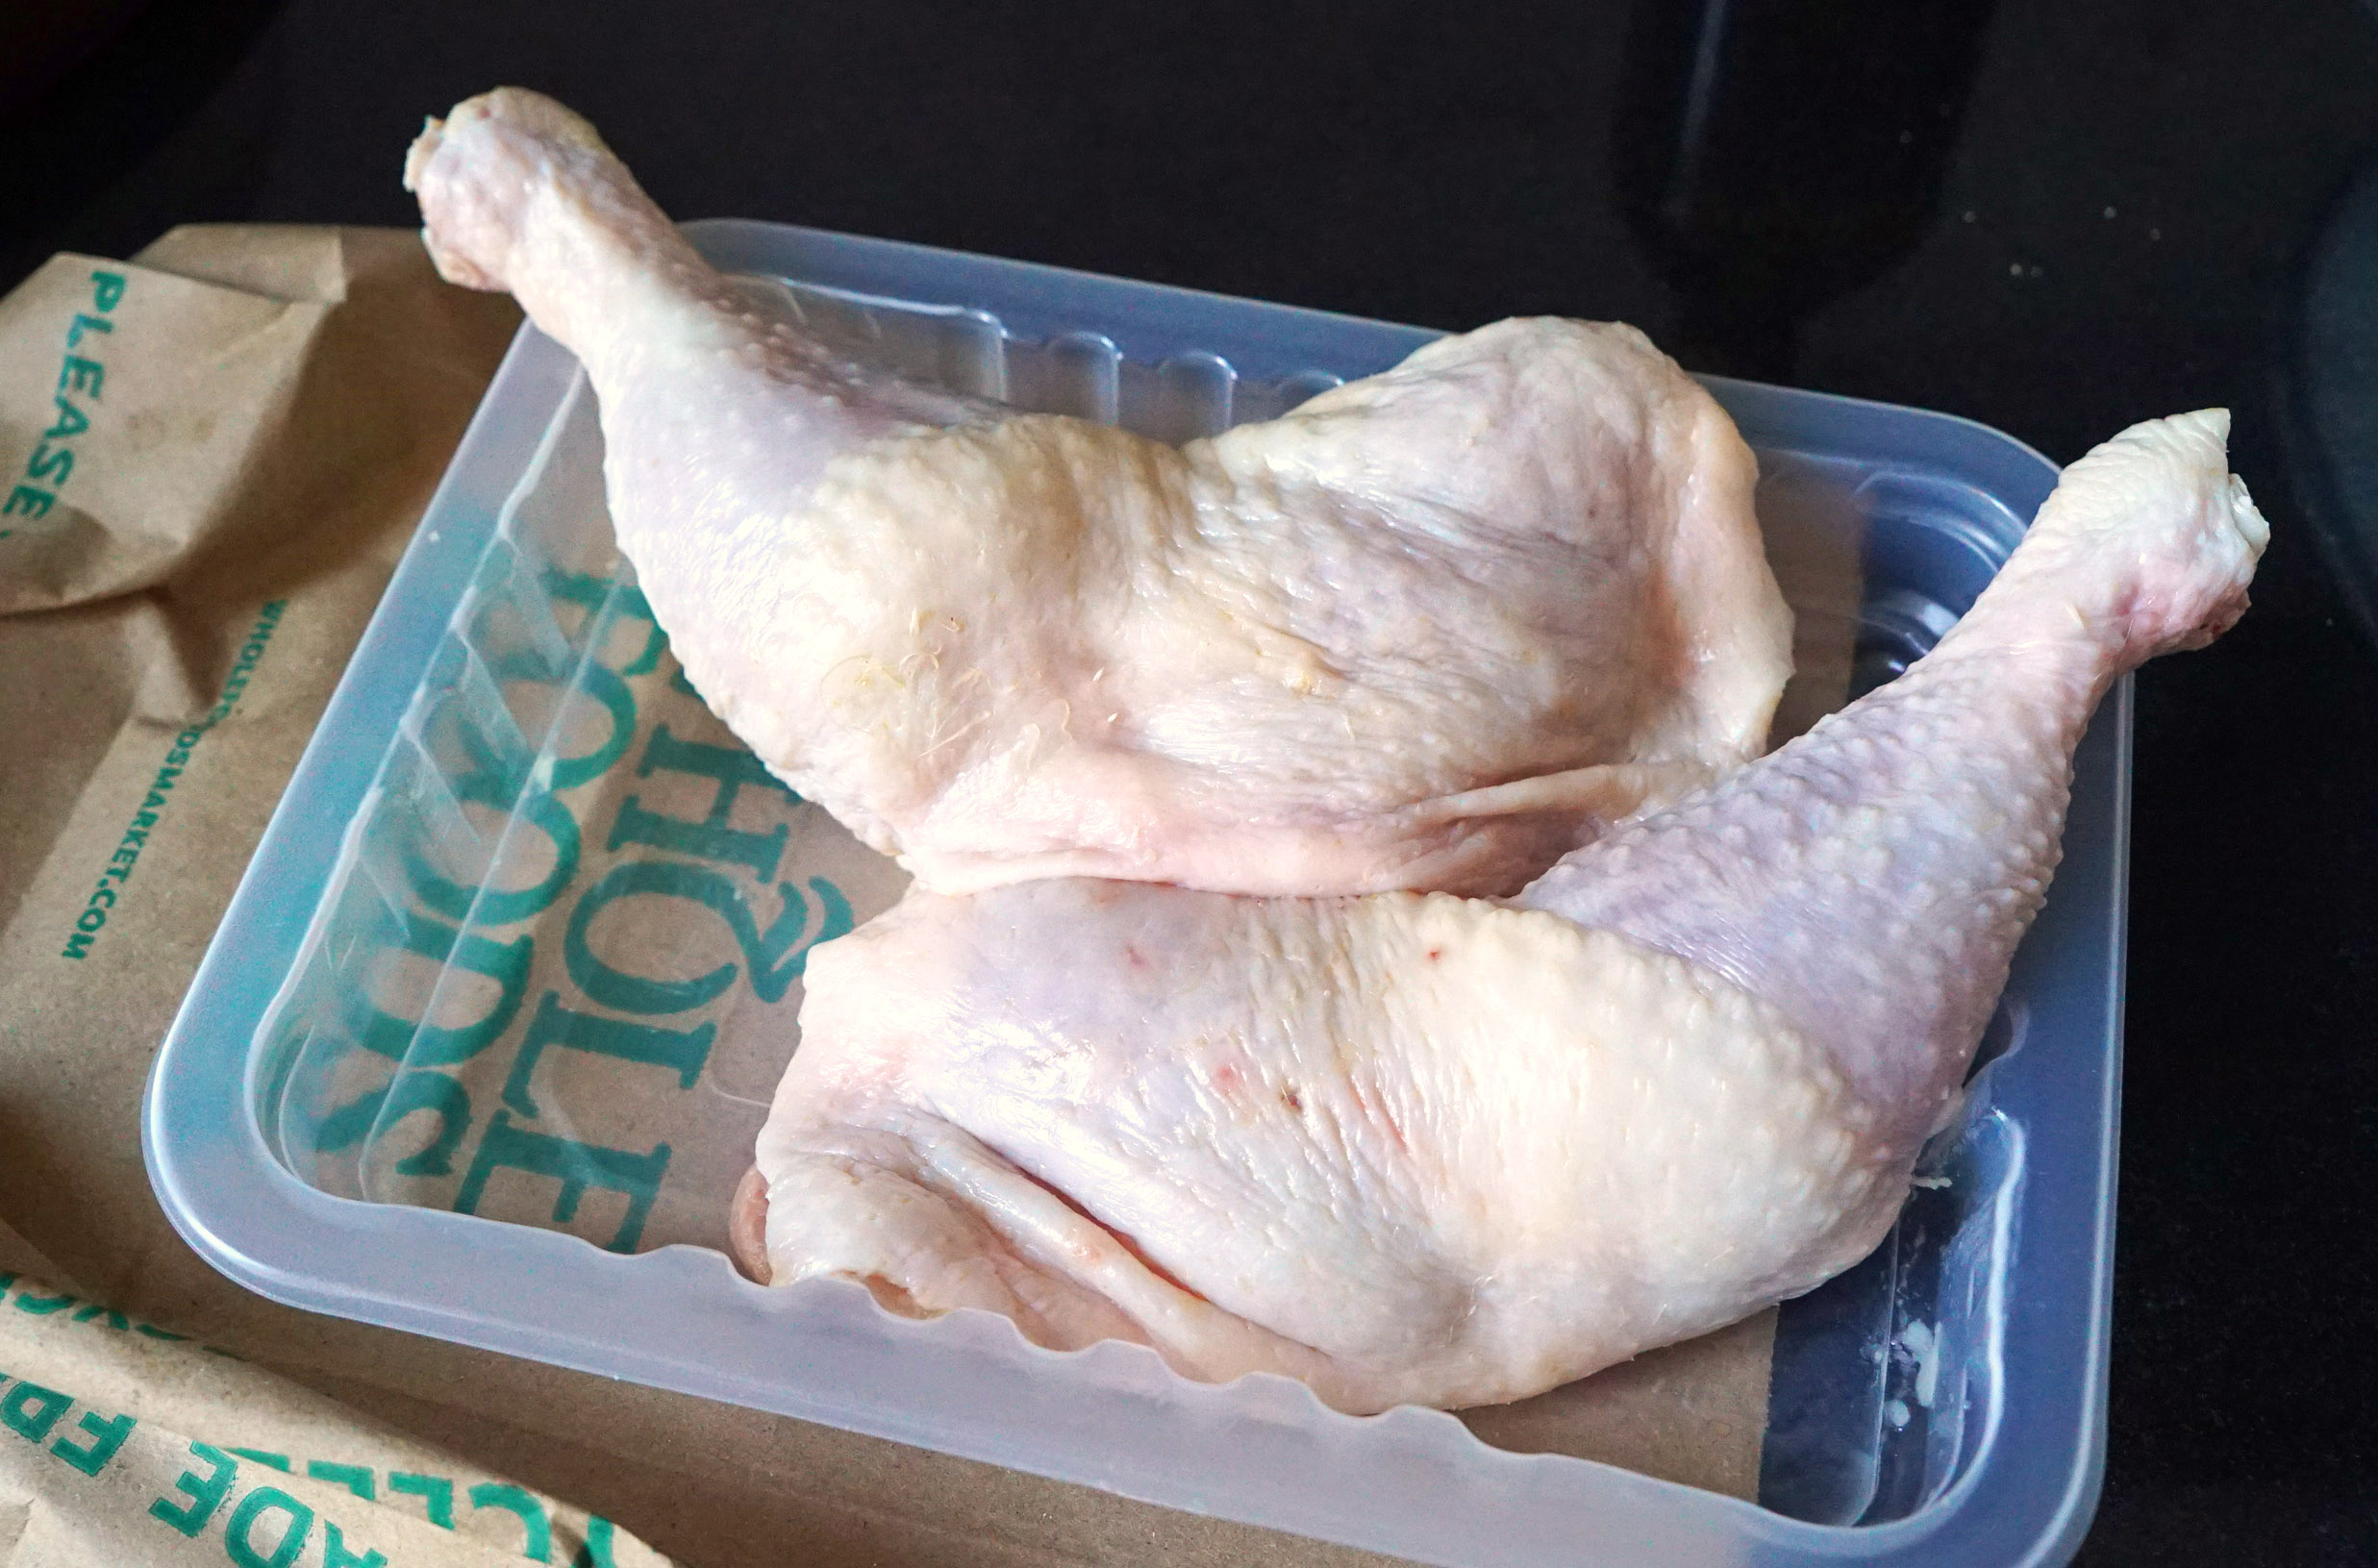
Two chicken legs (thigh and drum X 2)
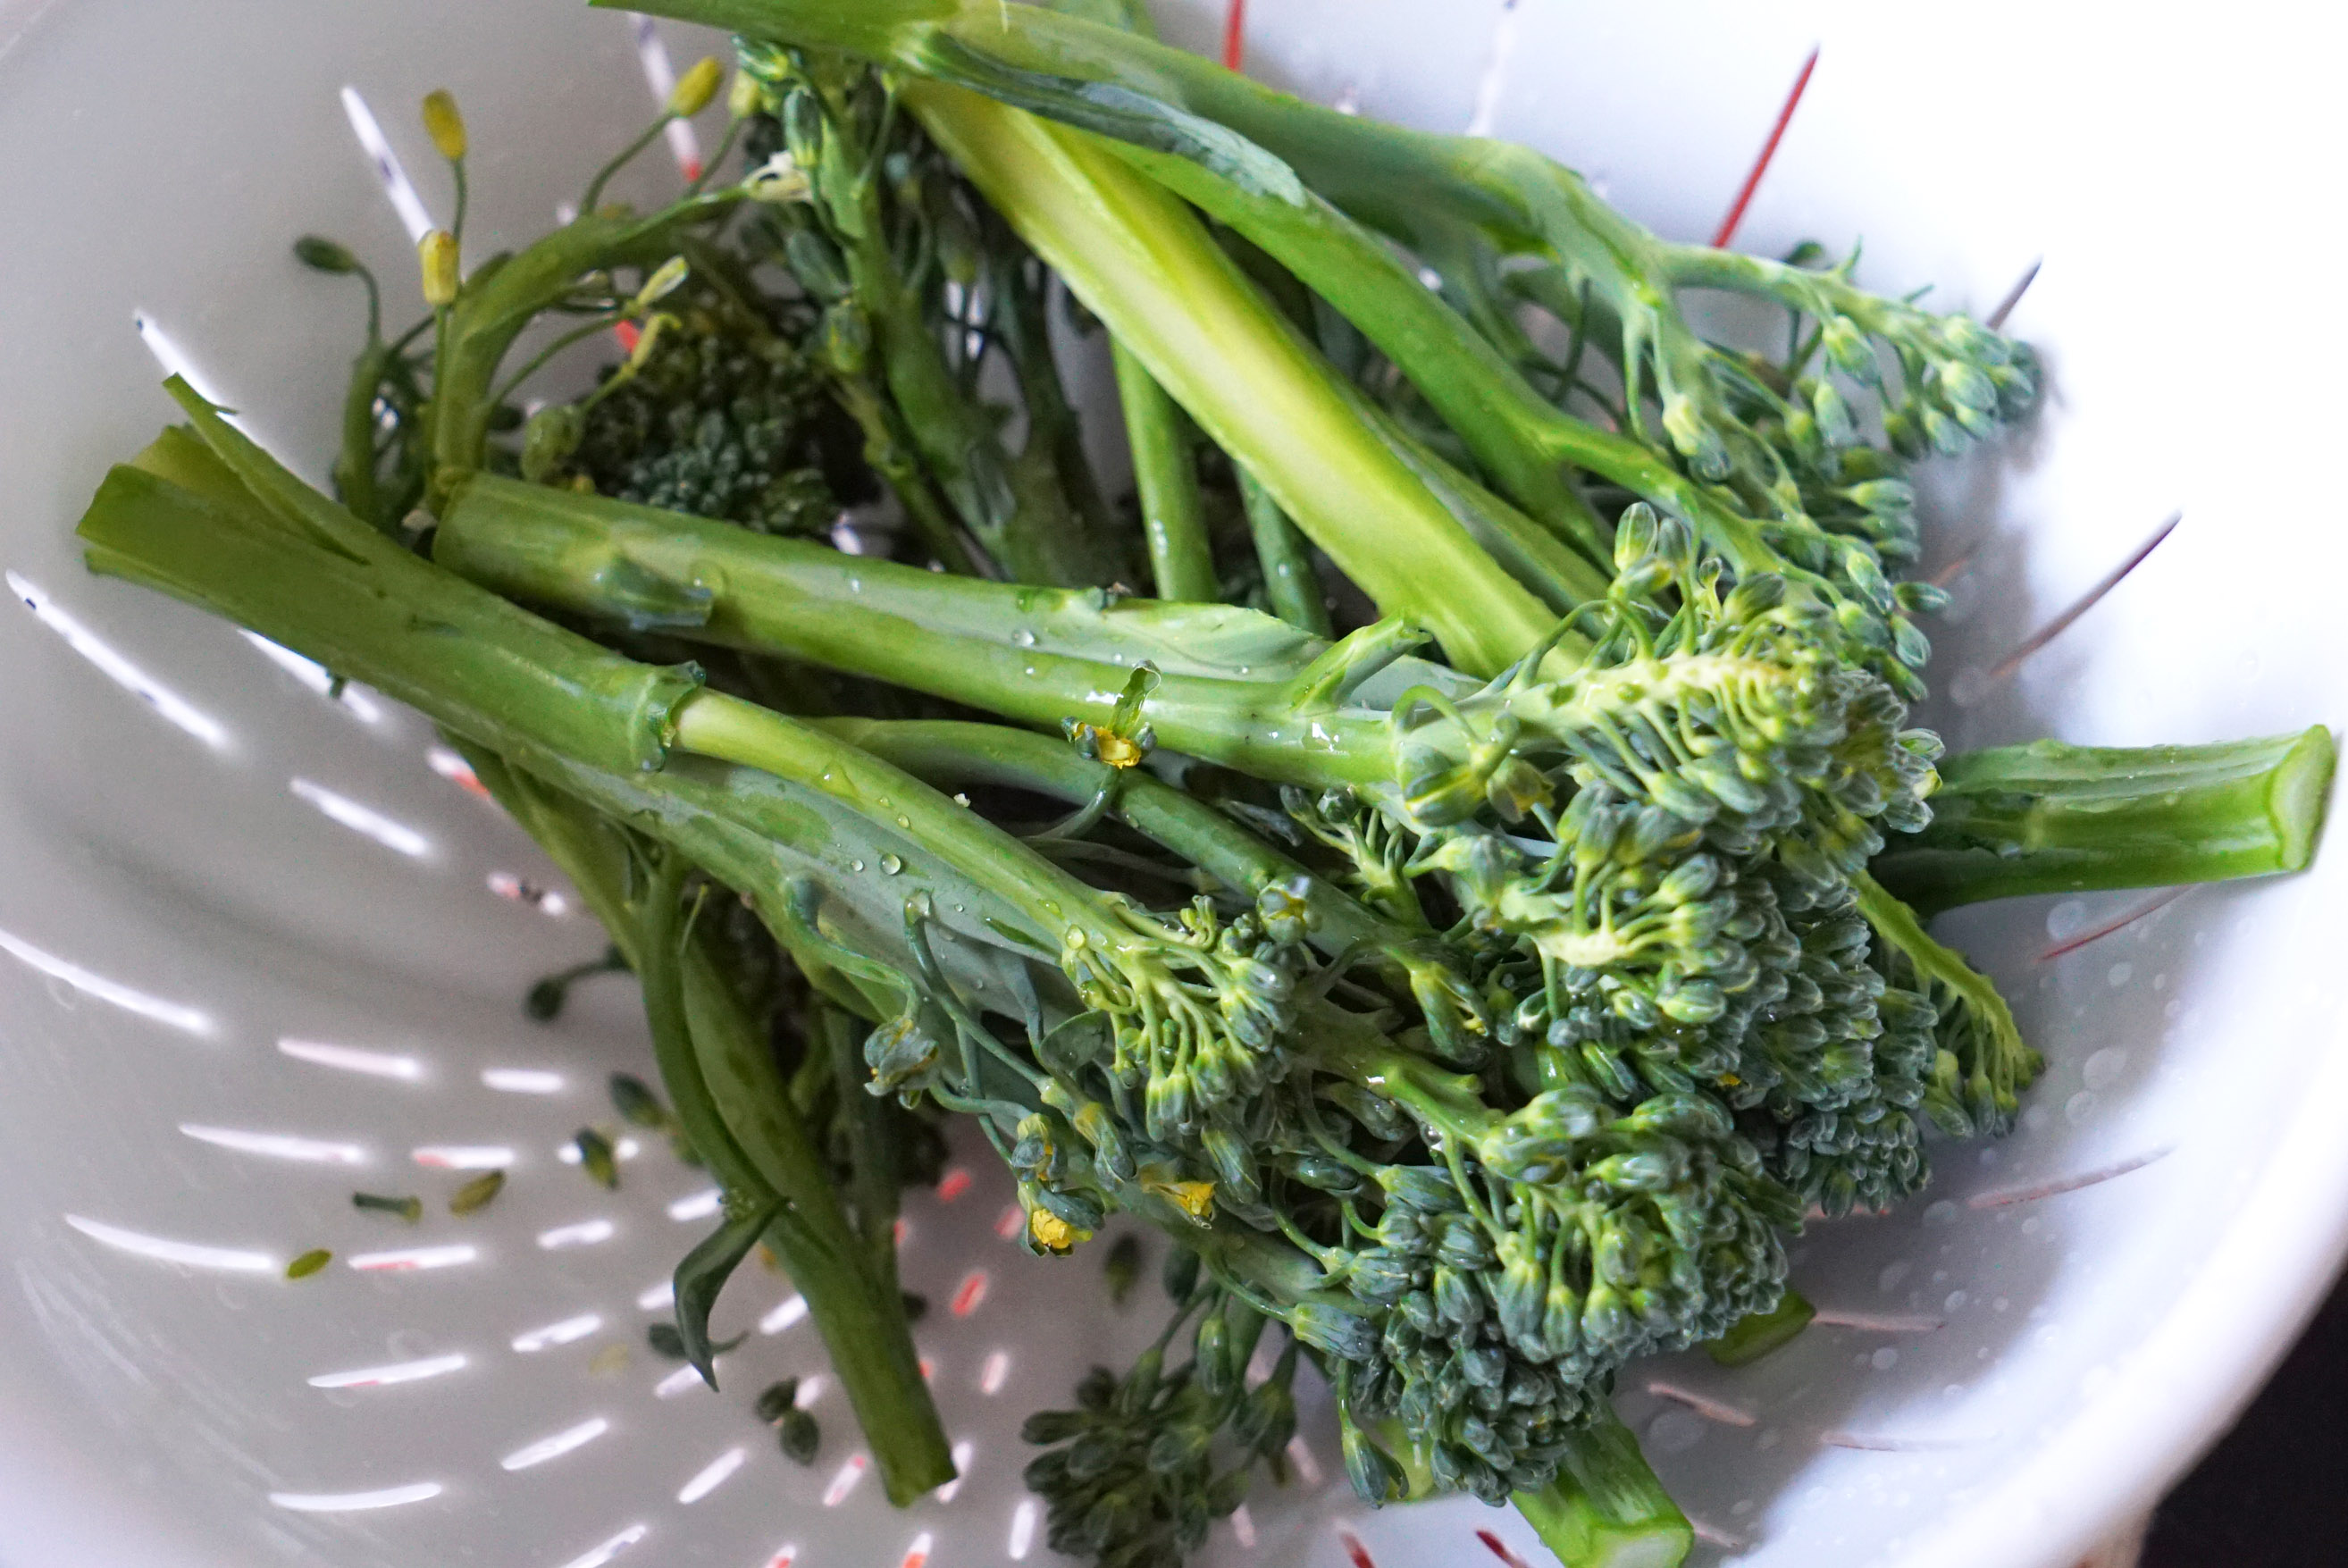
One bundle of broccolini (aka baby broccoli)
Lemon juice
Oregano
Salt
Cracked black pepper
Onion powder
Garlic powder
Crushed red pepper
Vegetable oil
Butter
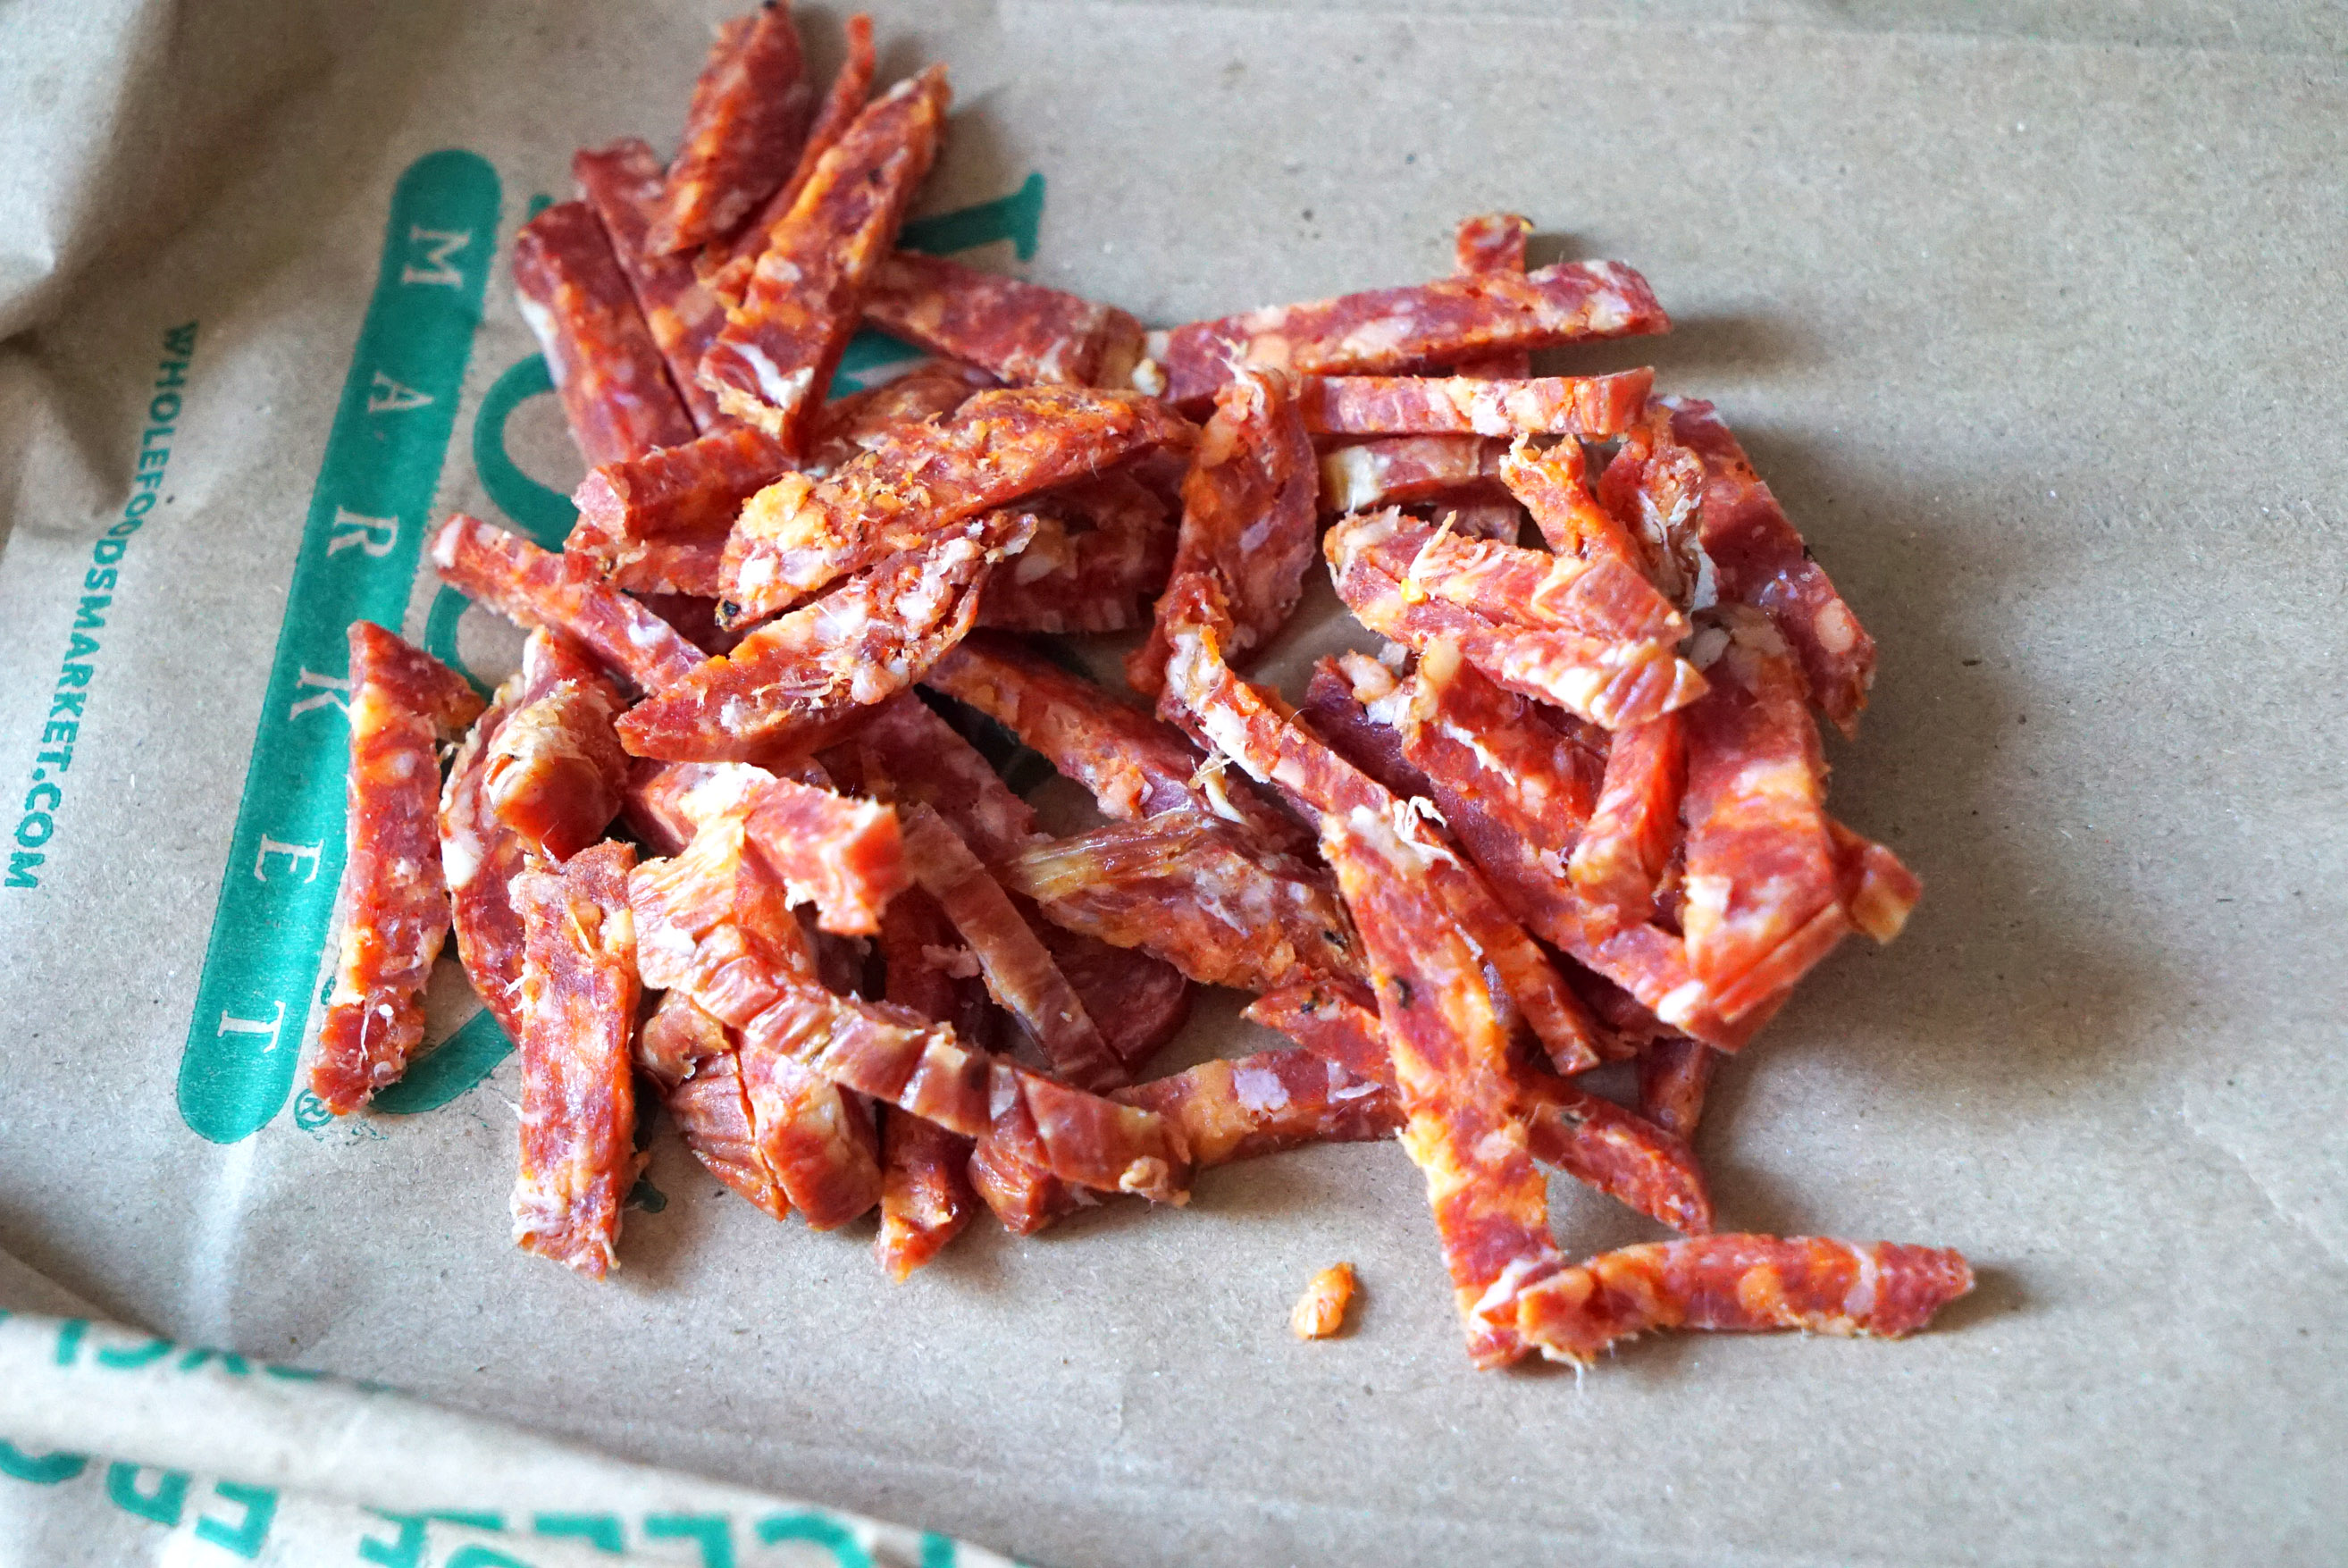
Dry, cured sausage (the hard kind, like a pepperoni or chorizo)
How The Fuck Do You Make It?
STEP 1
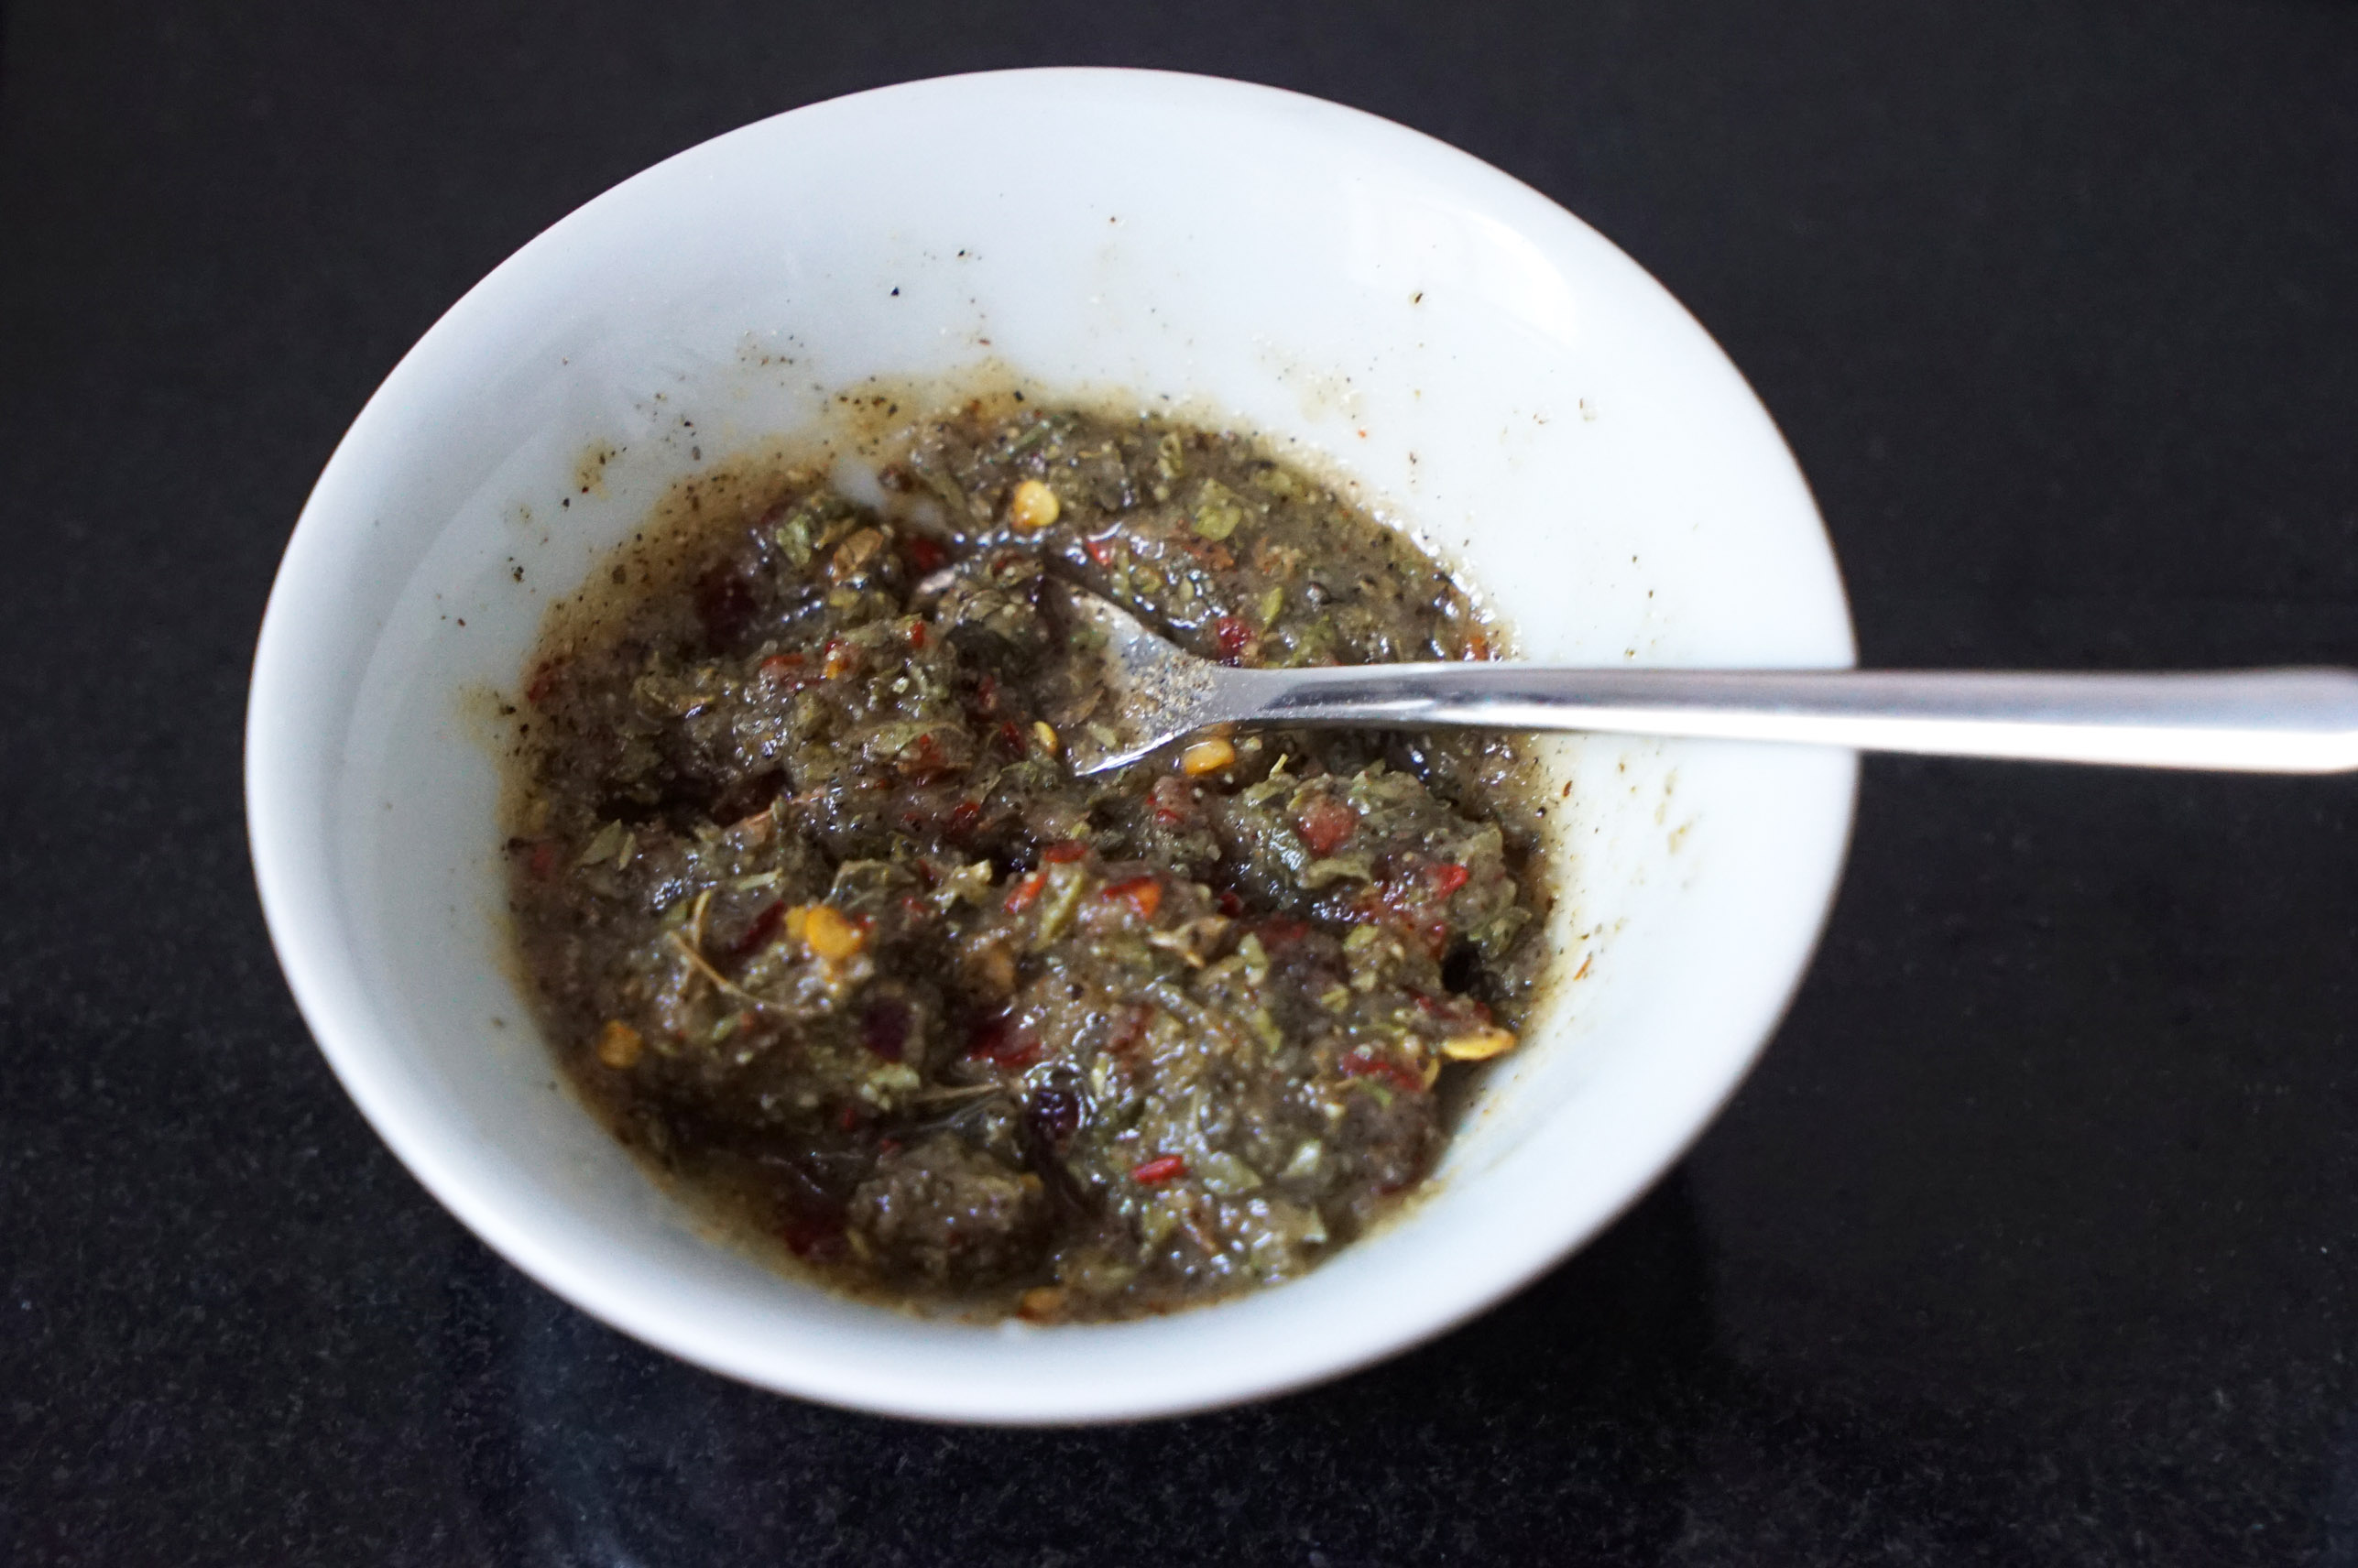
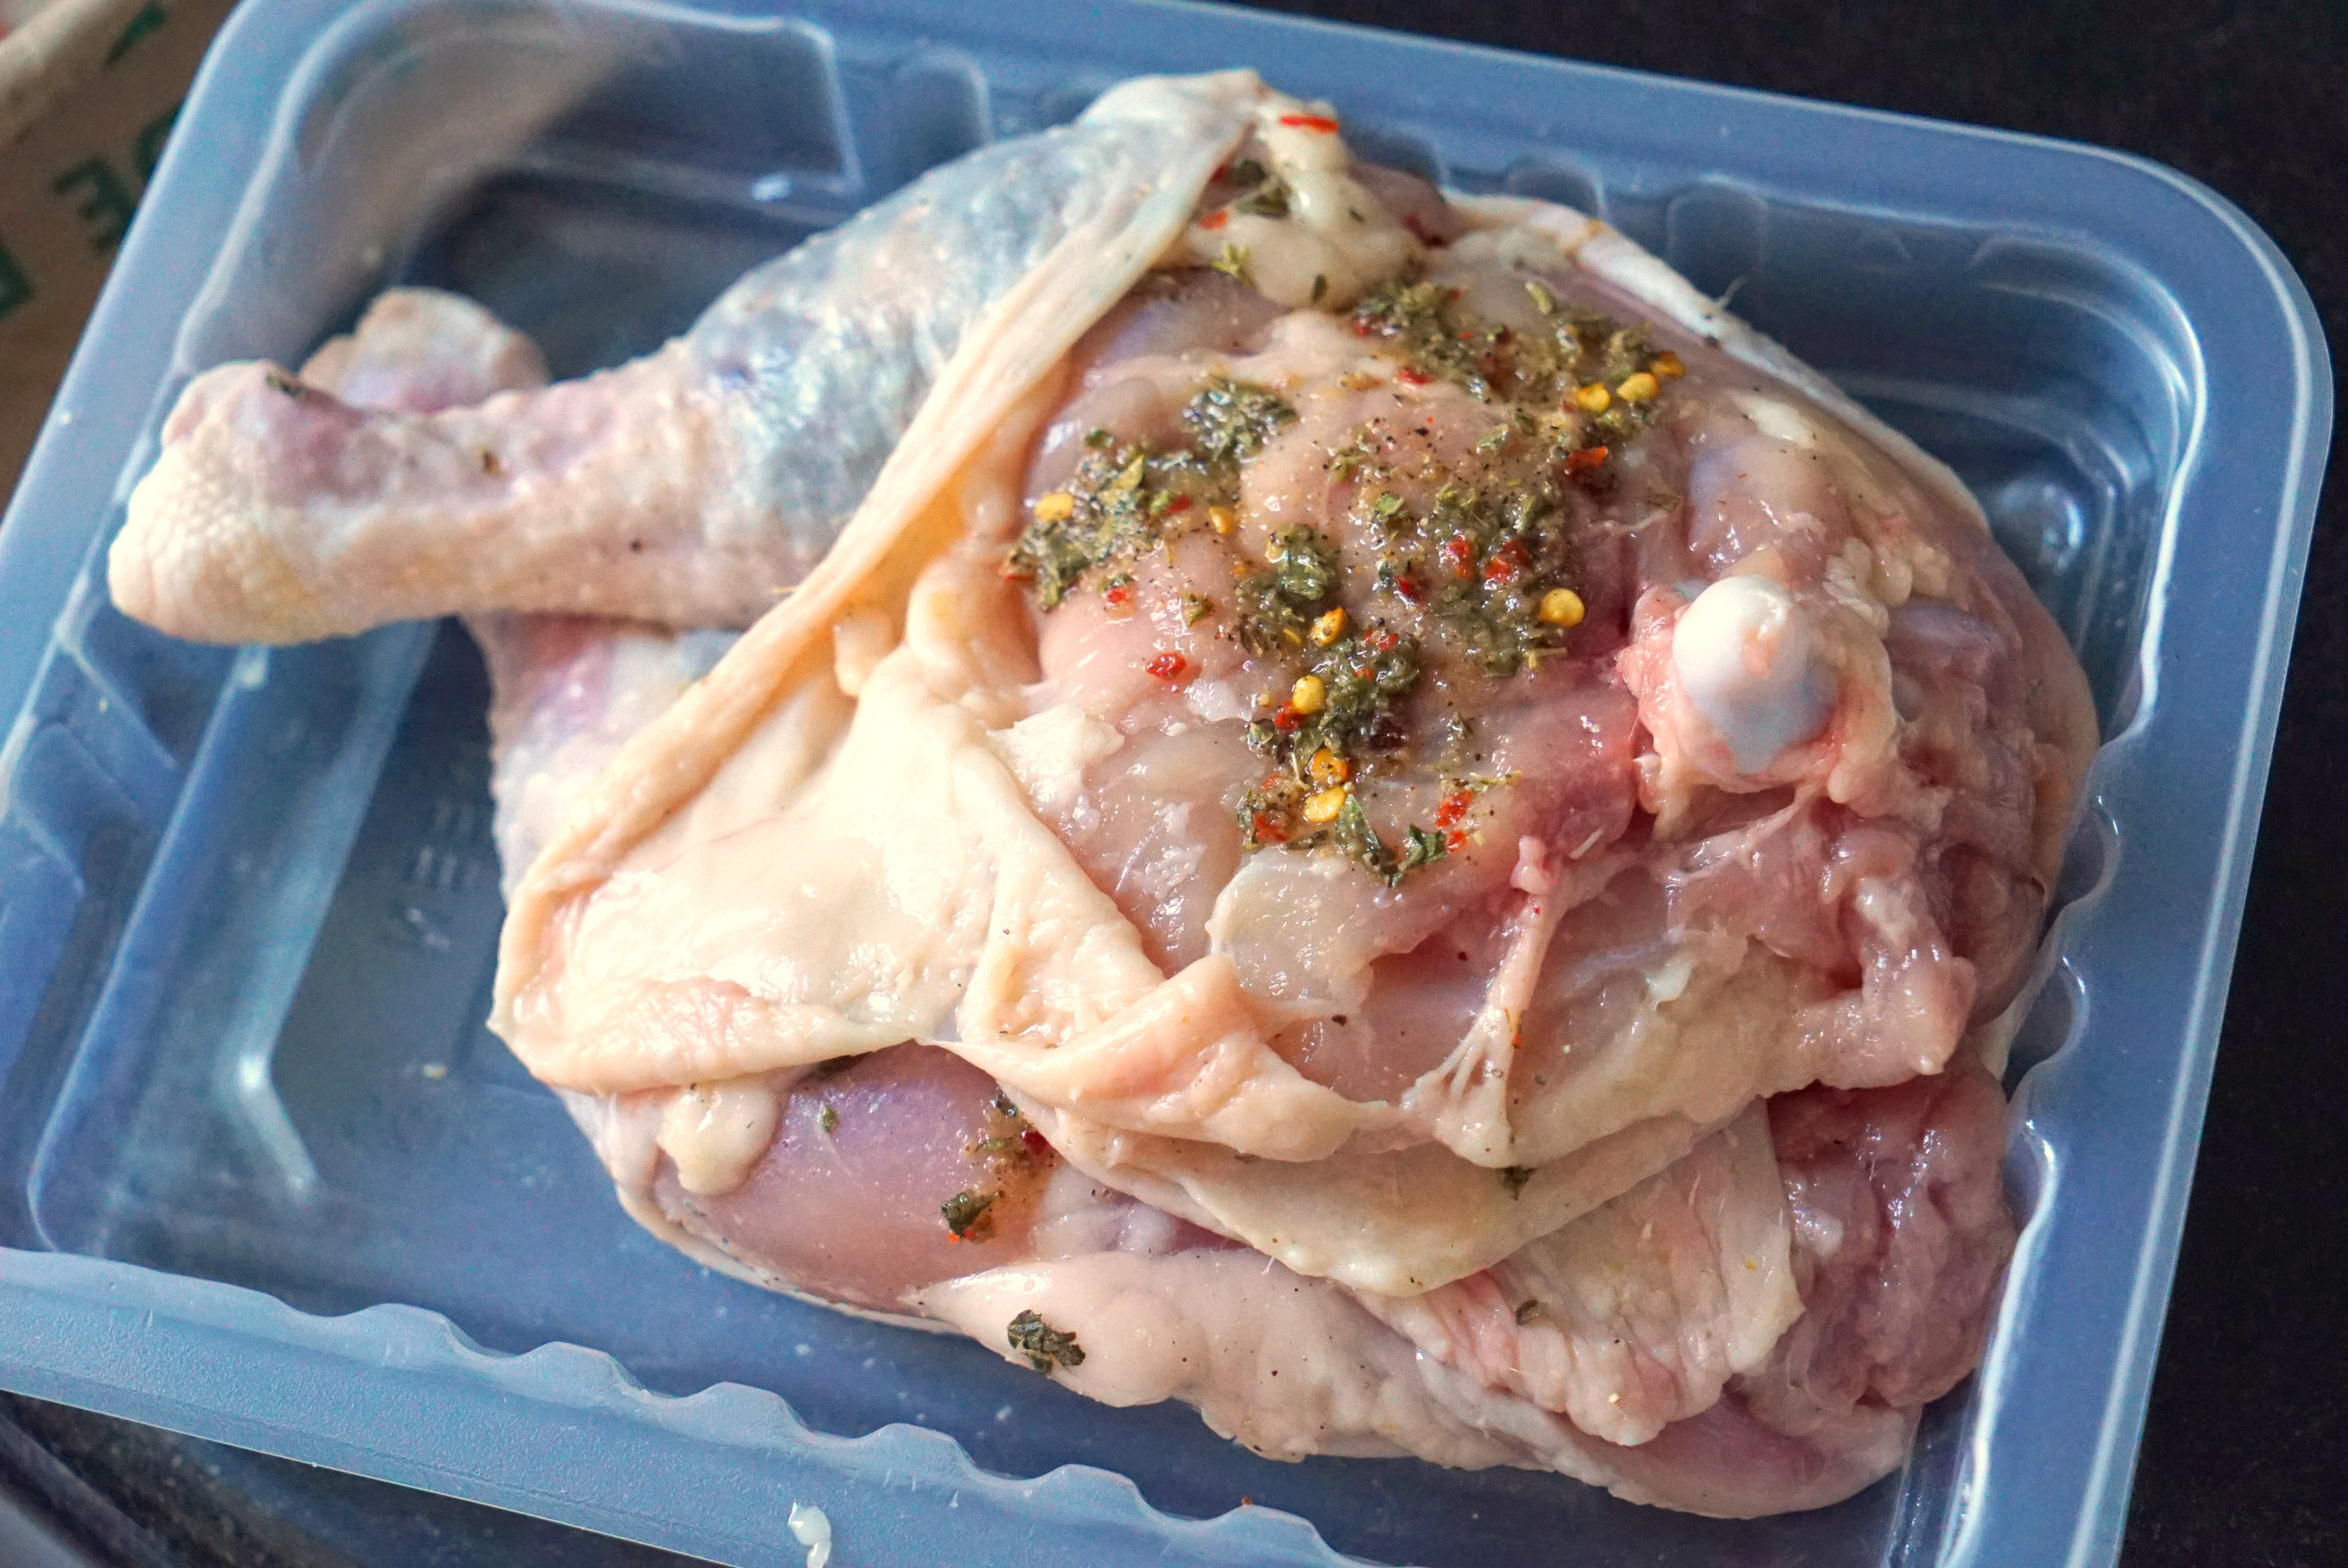
The first thing you need to do is make the lemon-herb paste. This is basically made “to taste,” so you can vary the proportions and amounts to your liking. Just keep the consistency to a paste and not too liquidy. Combine your salt, cracked black pepper, crushed red pepper, oregano, onion powder and garlic powder into a small dish or bowl and add lemon juice. Stir until mixed into a paste.
That shit is going to smell amazing: very Greek/Italian. Try not to shove it down your throat just yet, because you need it for the later steps.
STEP 2
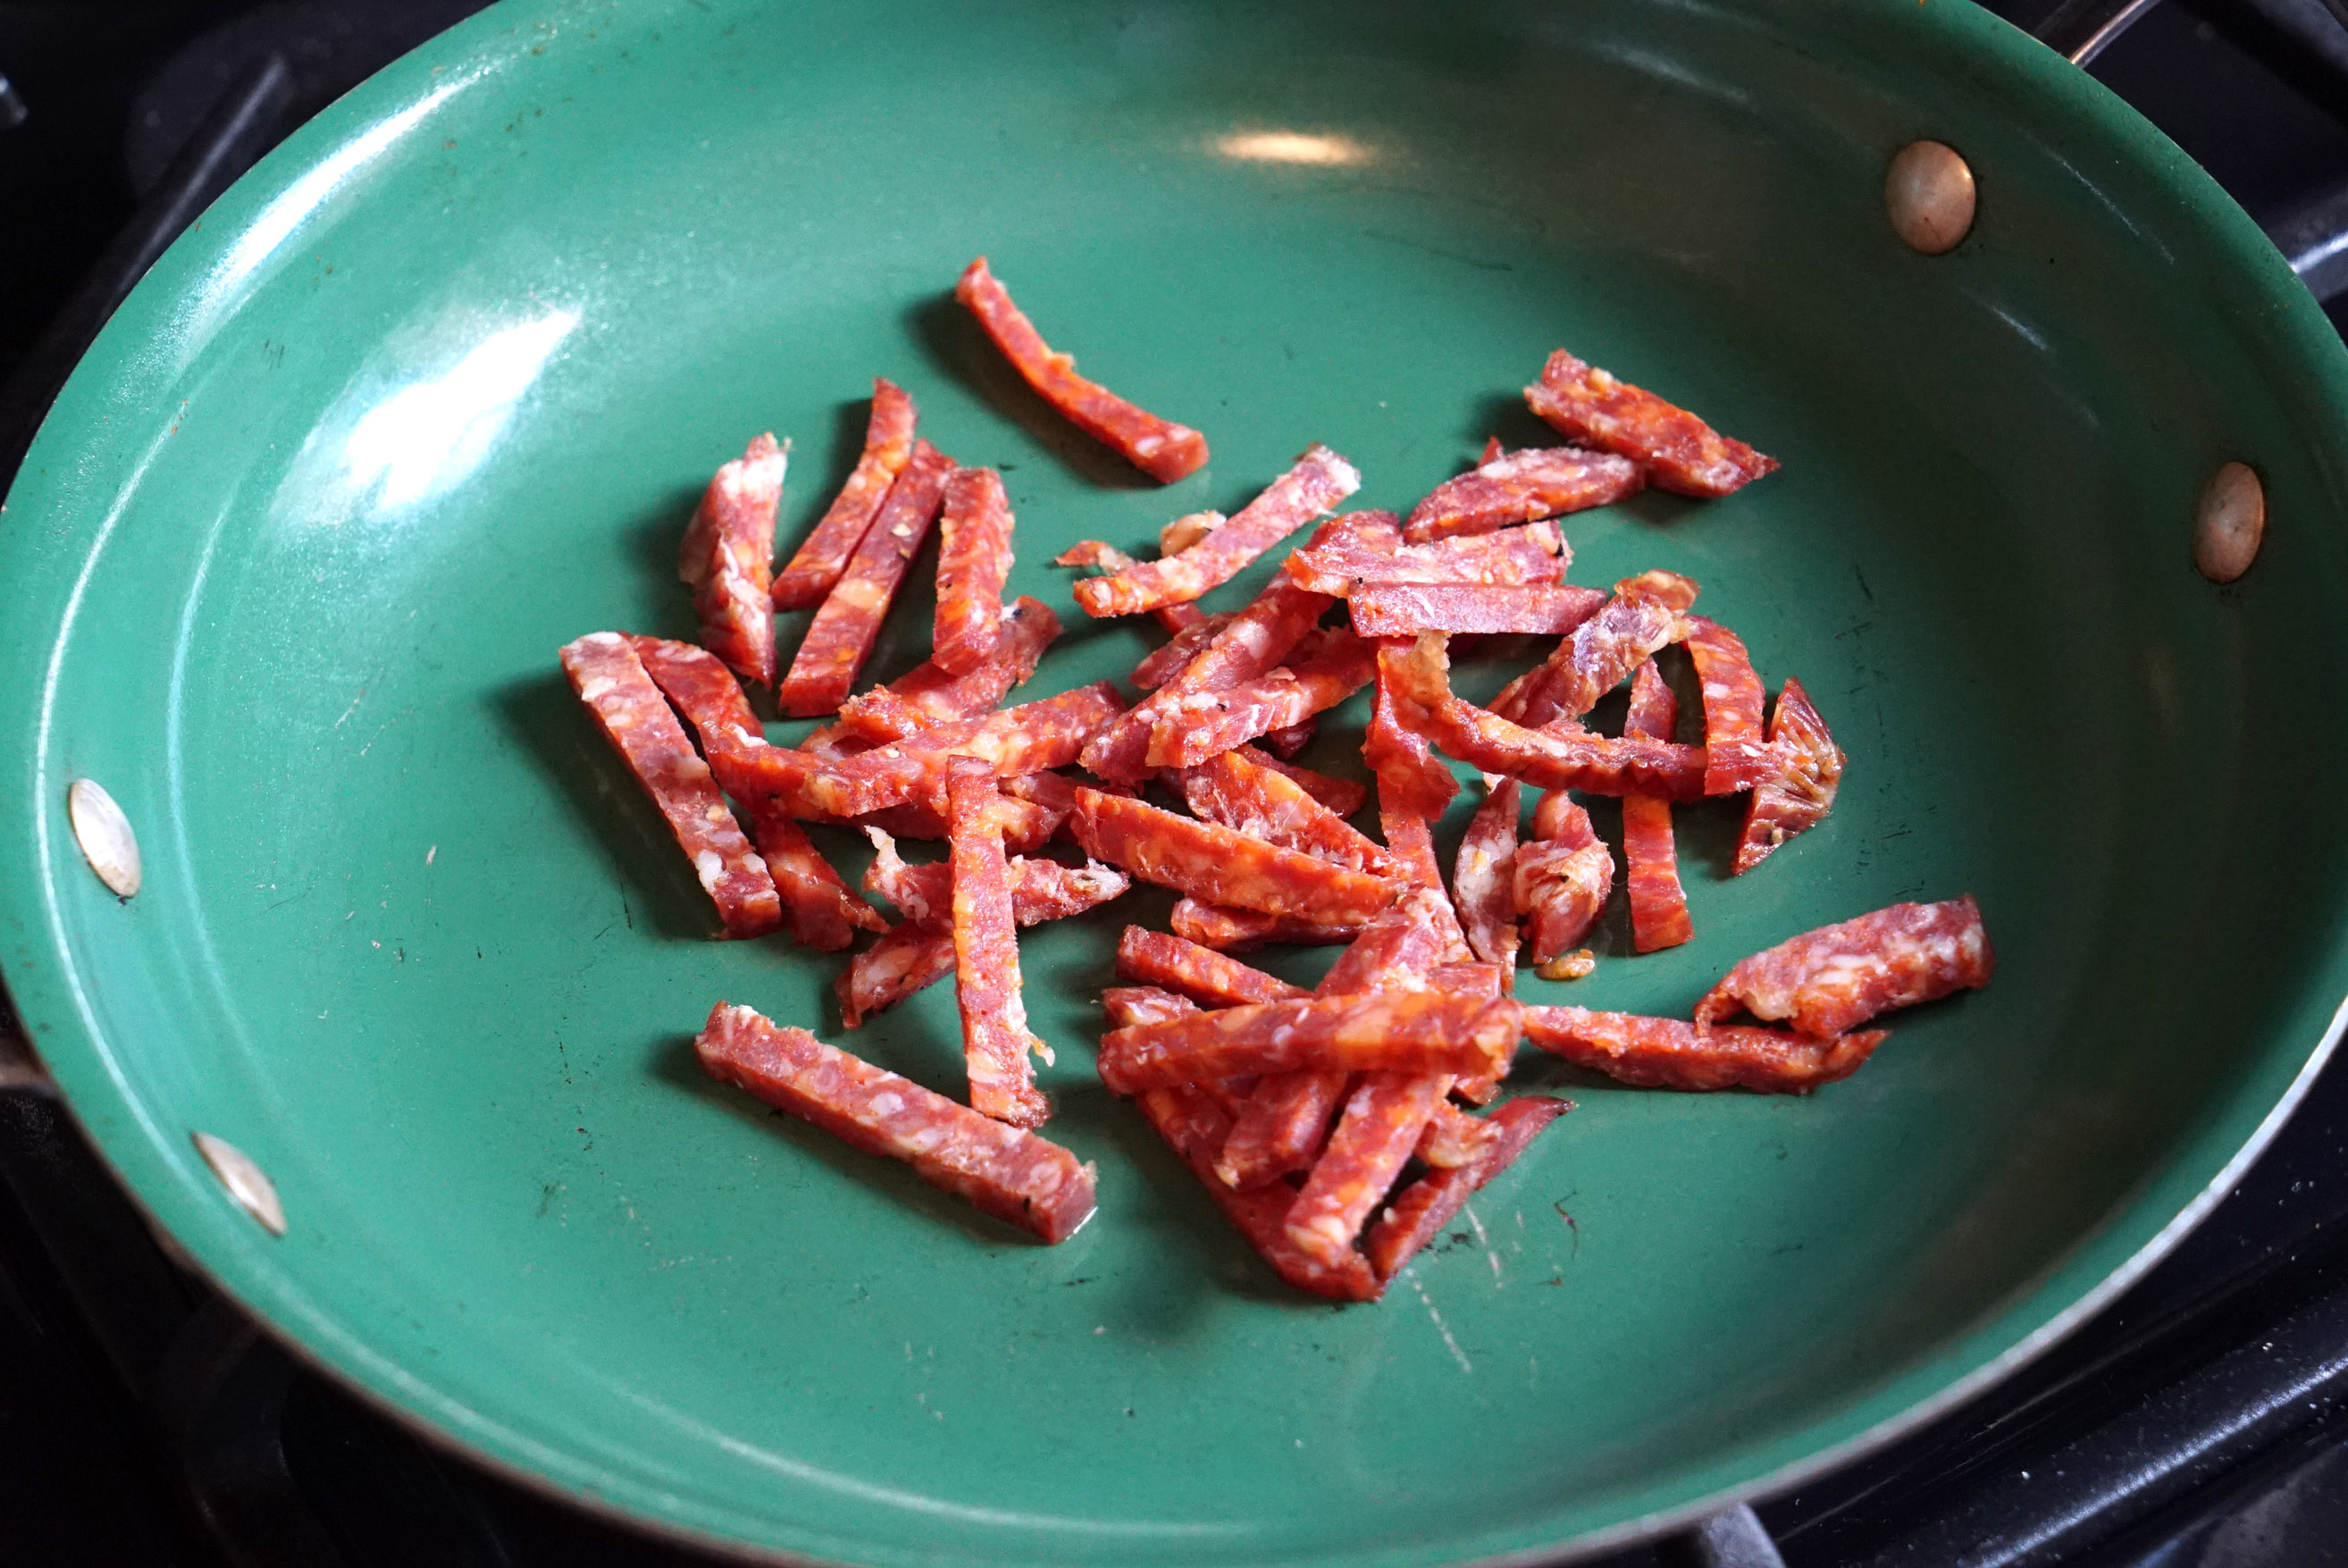
pre-heat your oven to 350, rinse and prep your broccolini, and chop up your sausage as such:
STEP 3
Next, you’re going to shove some butter and your lemon-herb paste underneath the chicken skin, without completely removing the skin from the meat, of course. Spread it around evenly so you don’t get any blank spaces of flavor. Don’t worry either – you’d be surprised how much the butter helps to slosh the spices around once it gets cooking. Get down into those drumsticks too!
STEP 4
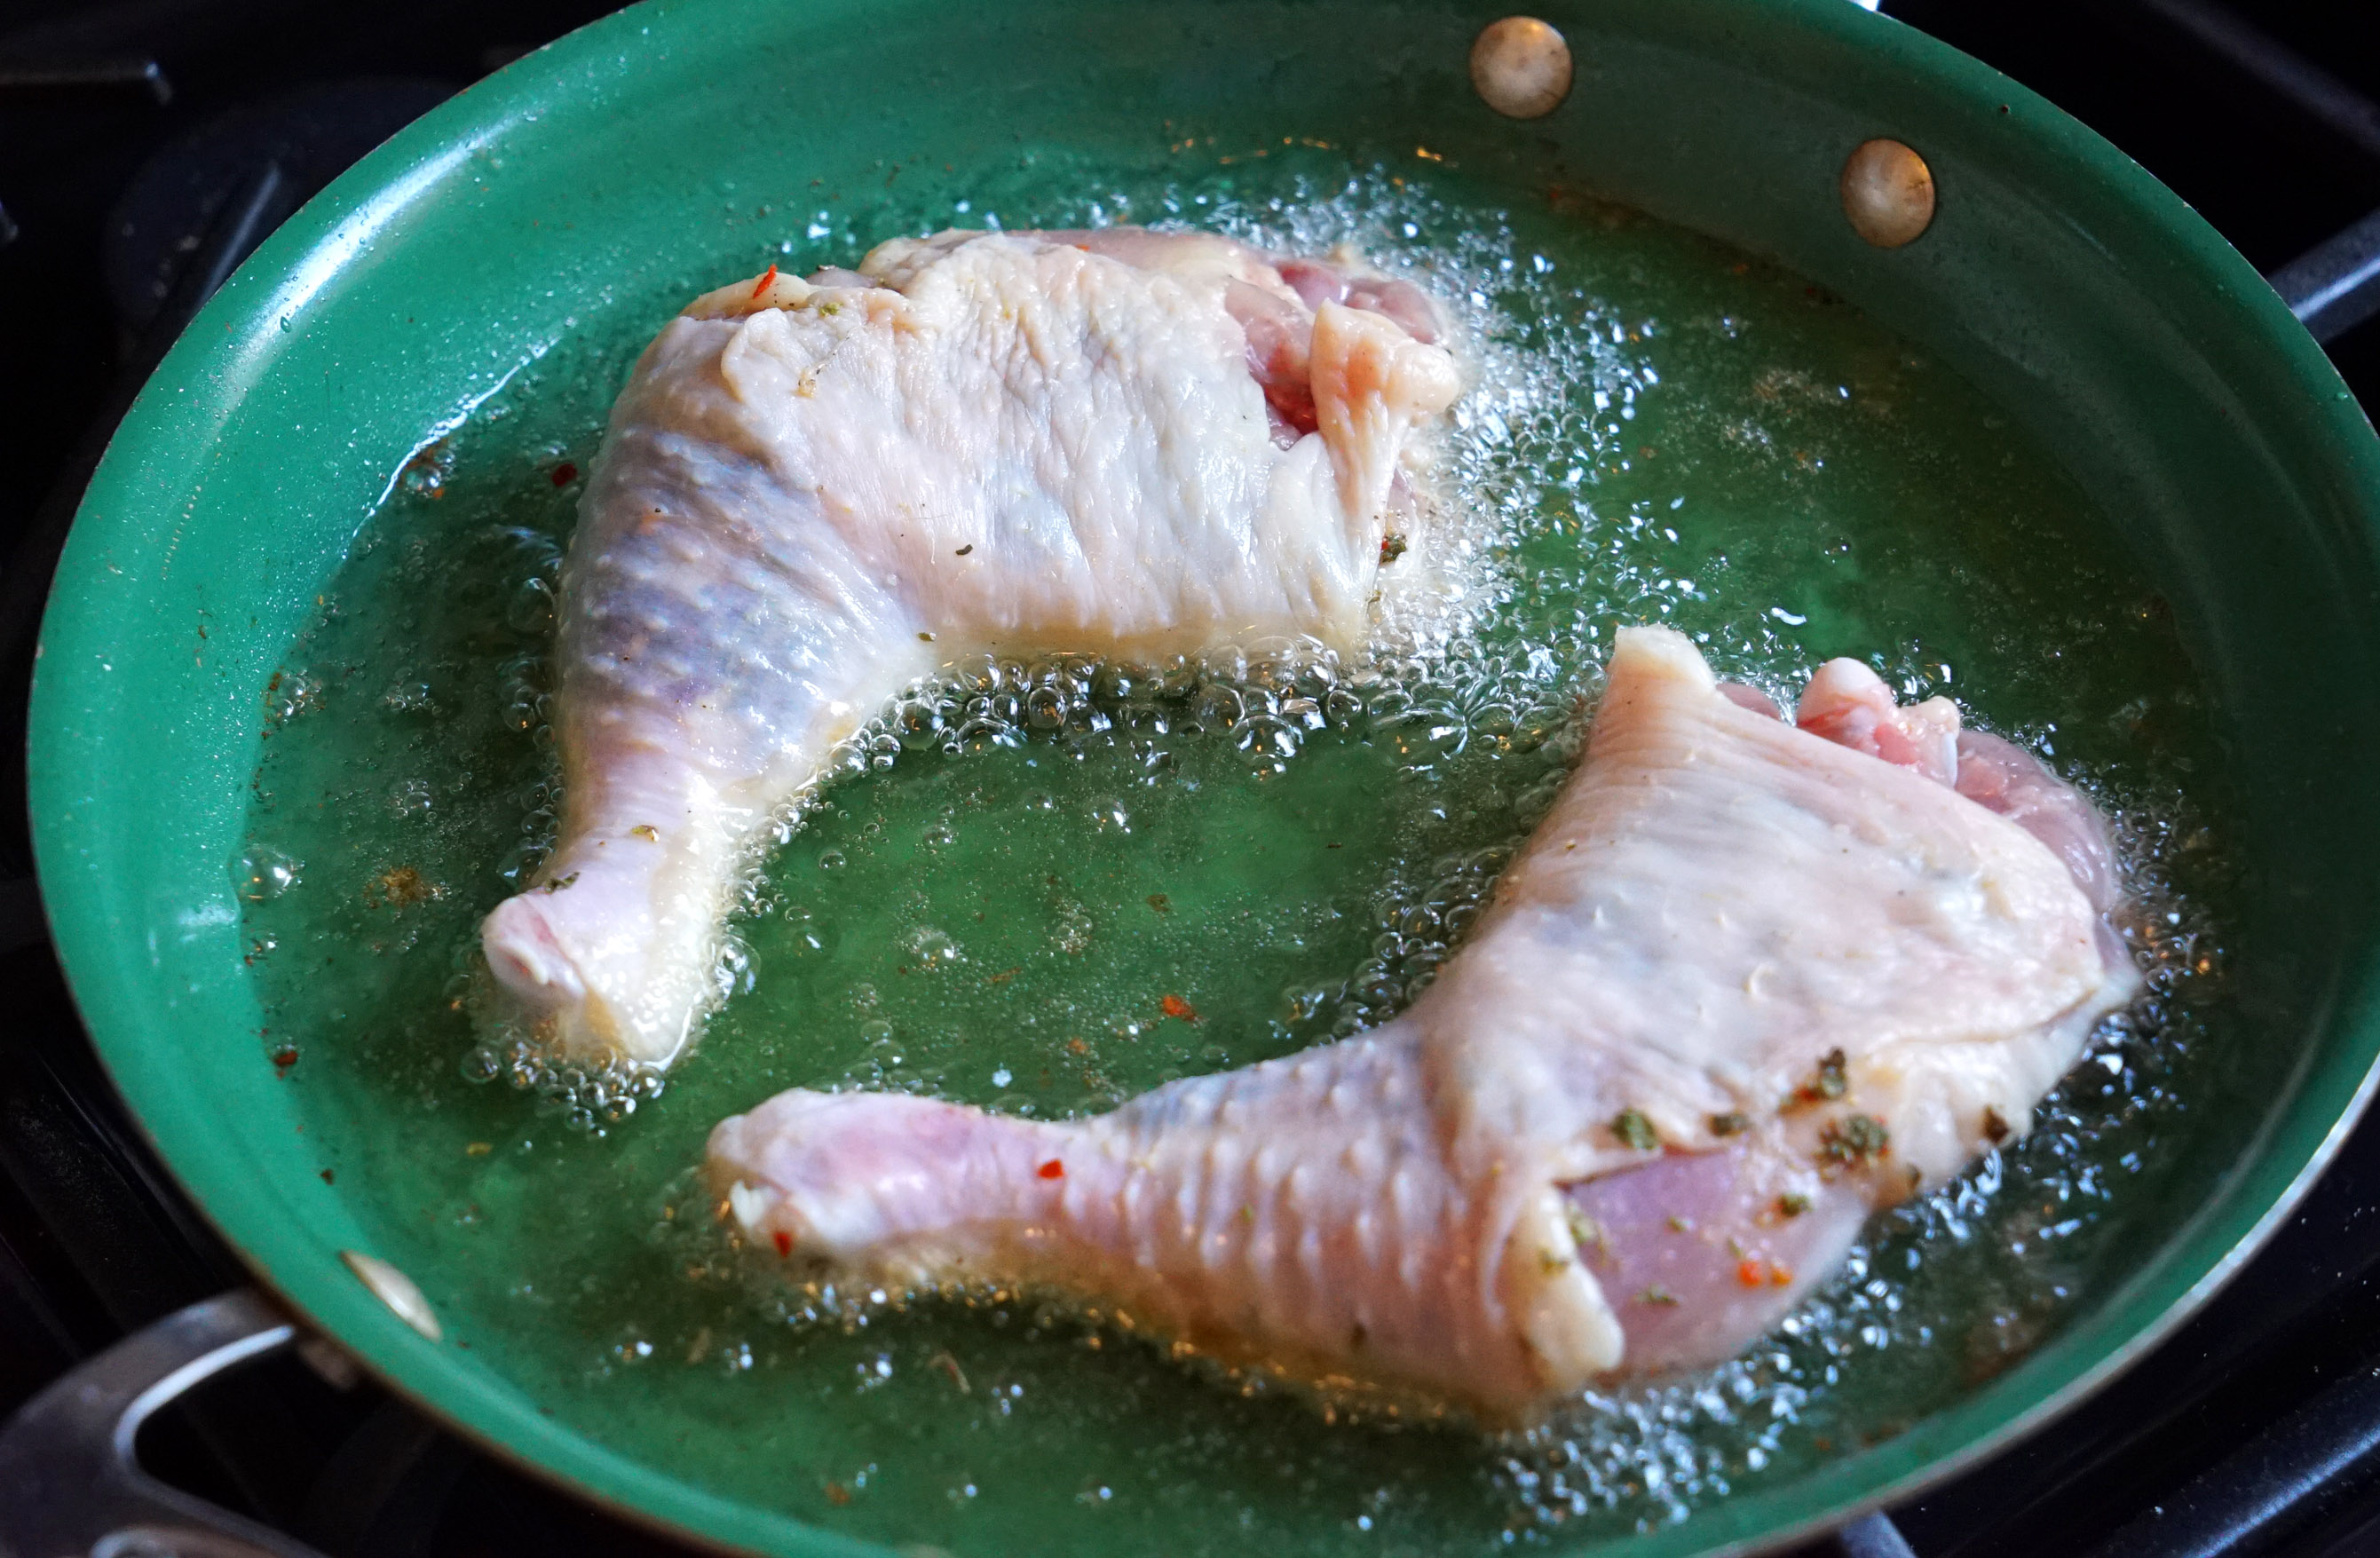
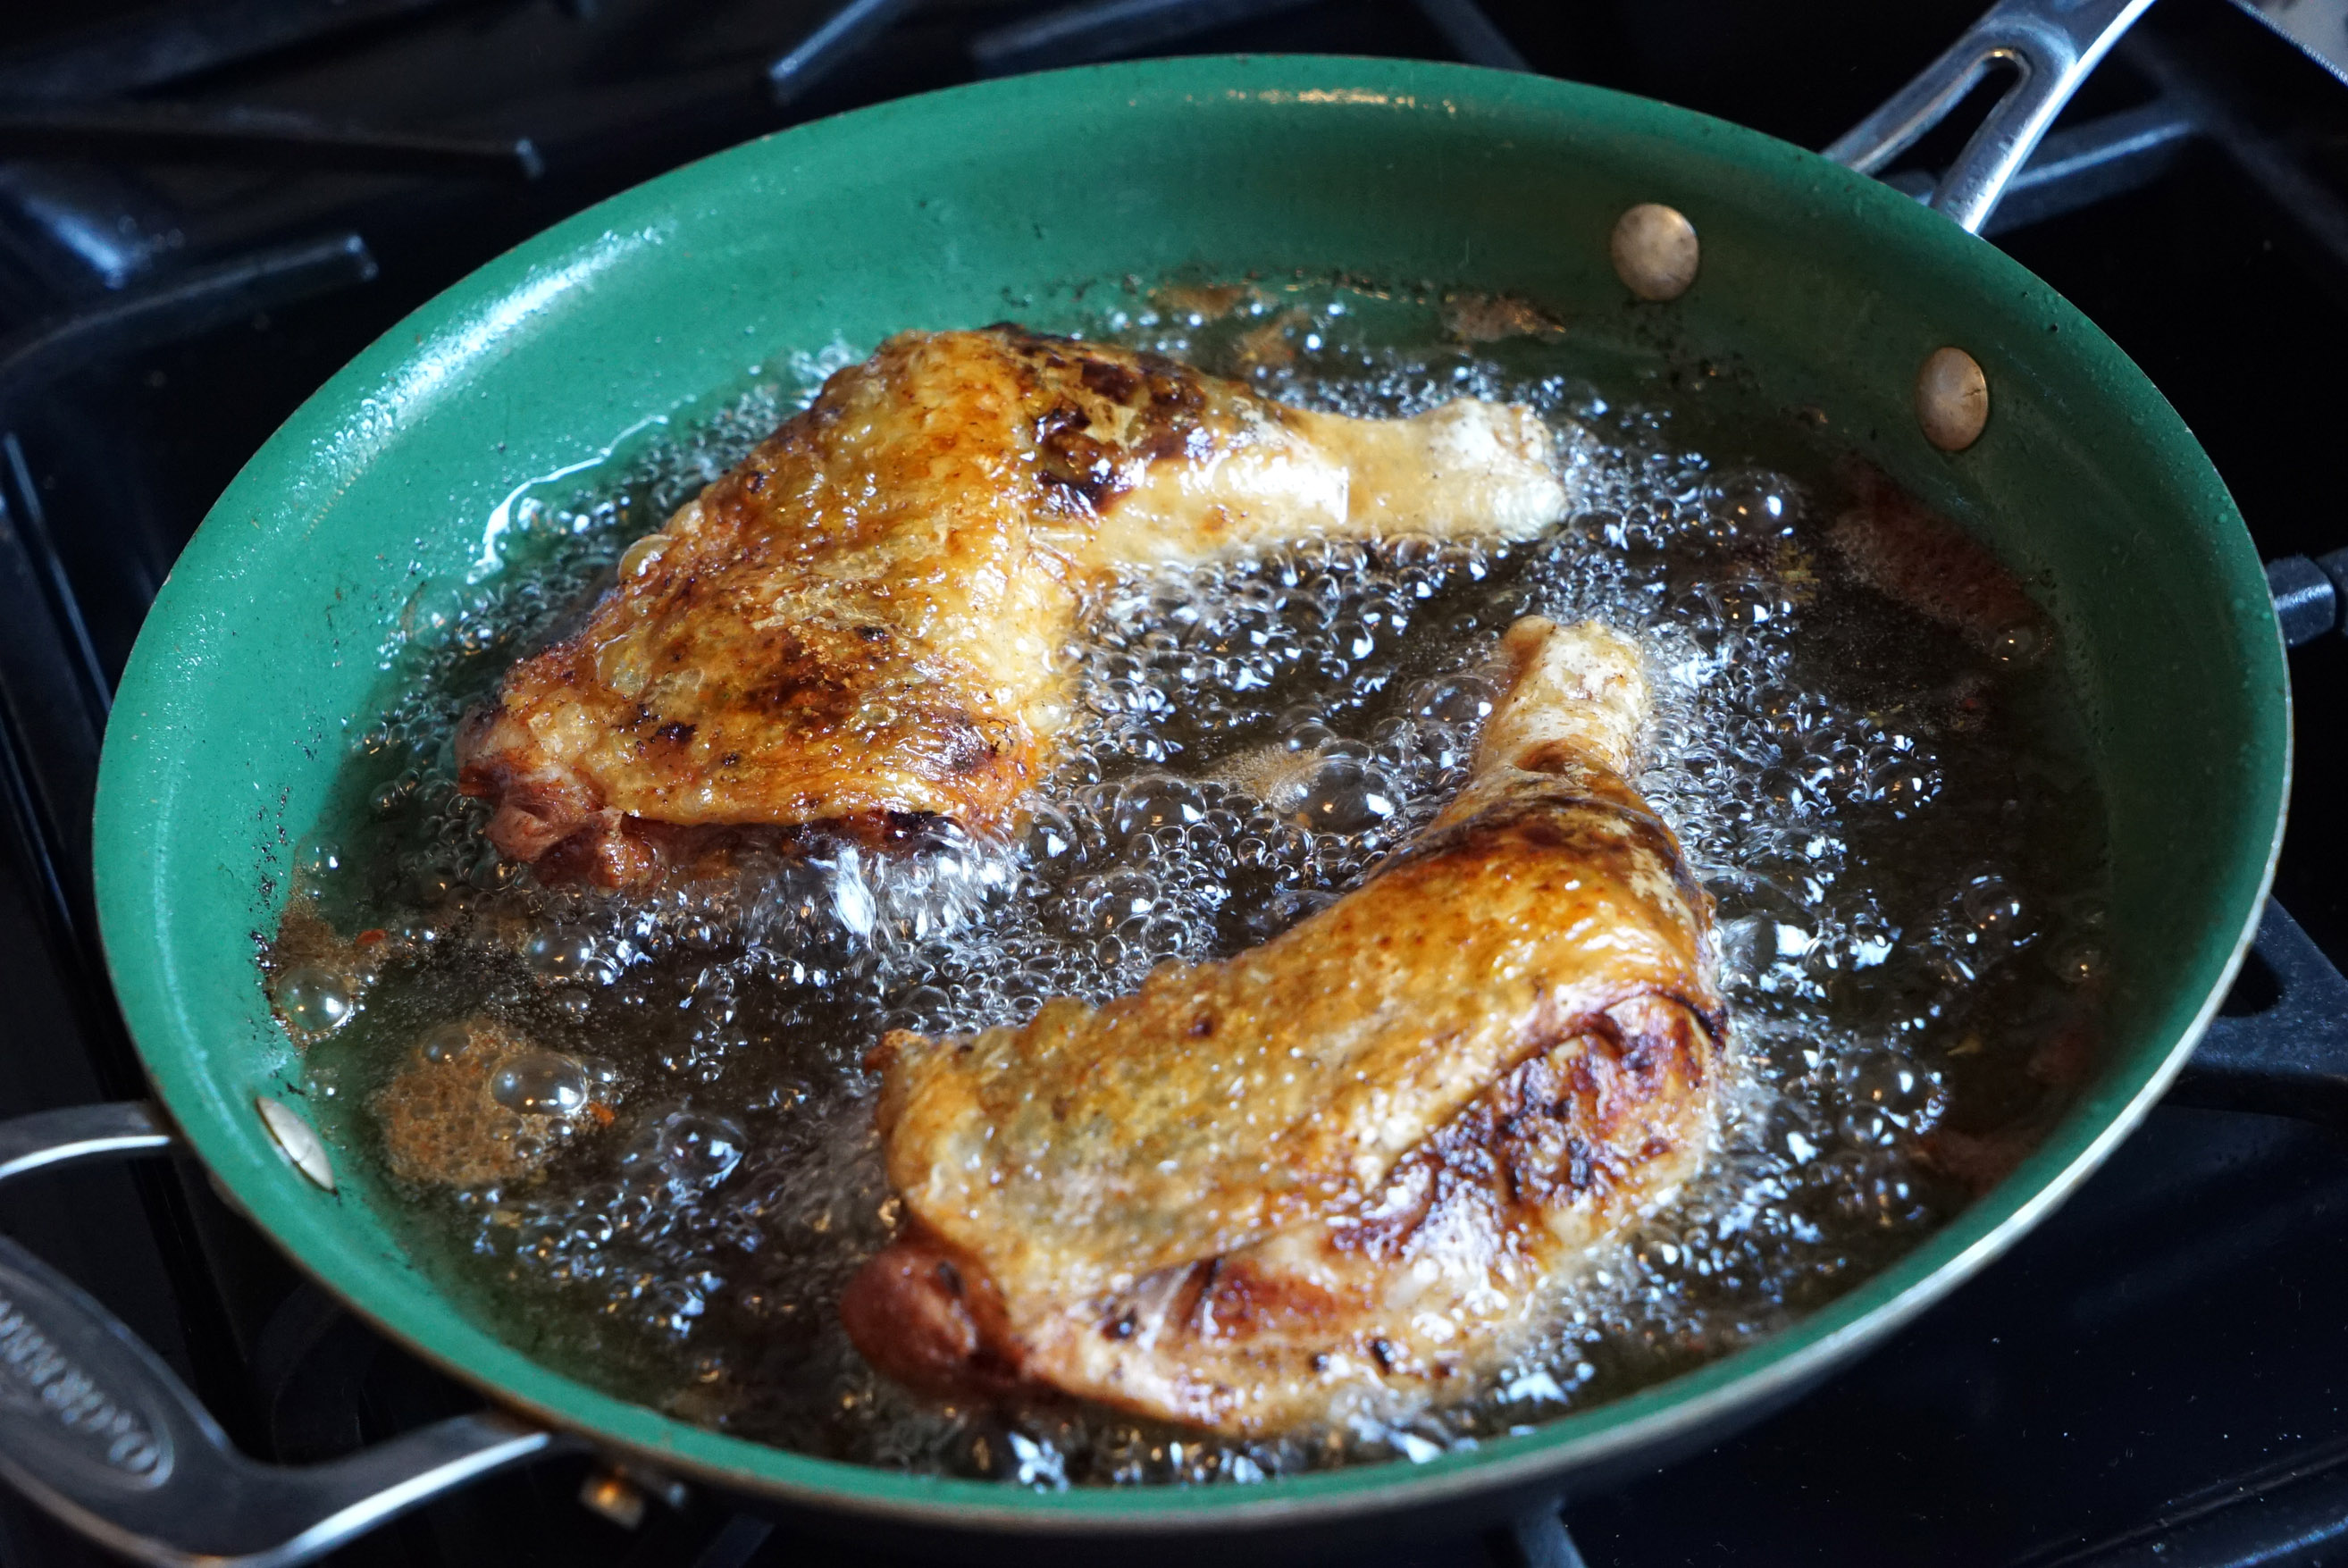
Get your vegetable oil in a pan and heat it up. You shouldn’t need more than two cups of oil. Just enough to get the majority of the chicken skin into the hot oil should do the trick. Then drop your chicken legs in, top-side down.
You’re going to flip these bitches once they get golden and crispy. Try to keep the skin covering the meat too on the bottom side when you flip it (that part of the skin doesn’t quite connect to the meat as well as it does in other areas).
STEP 5
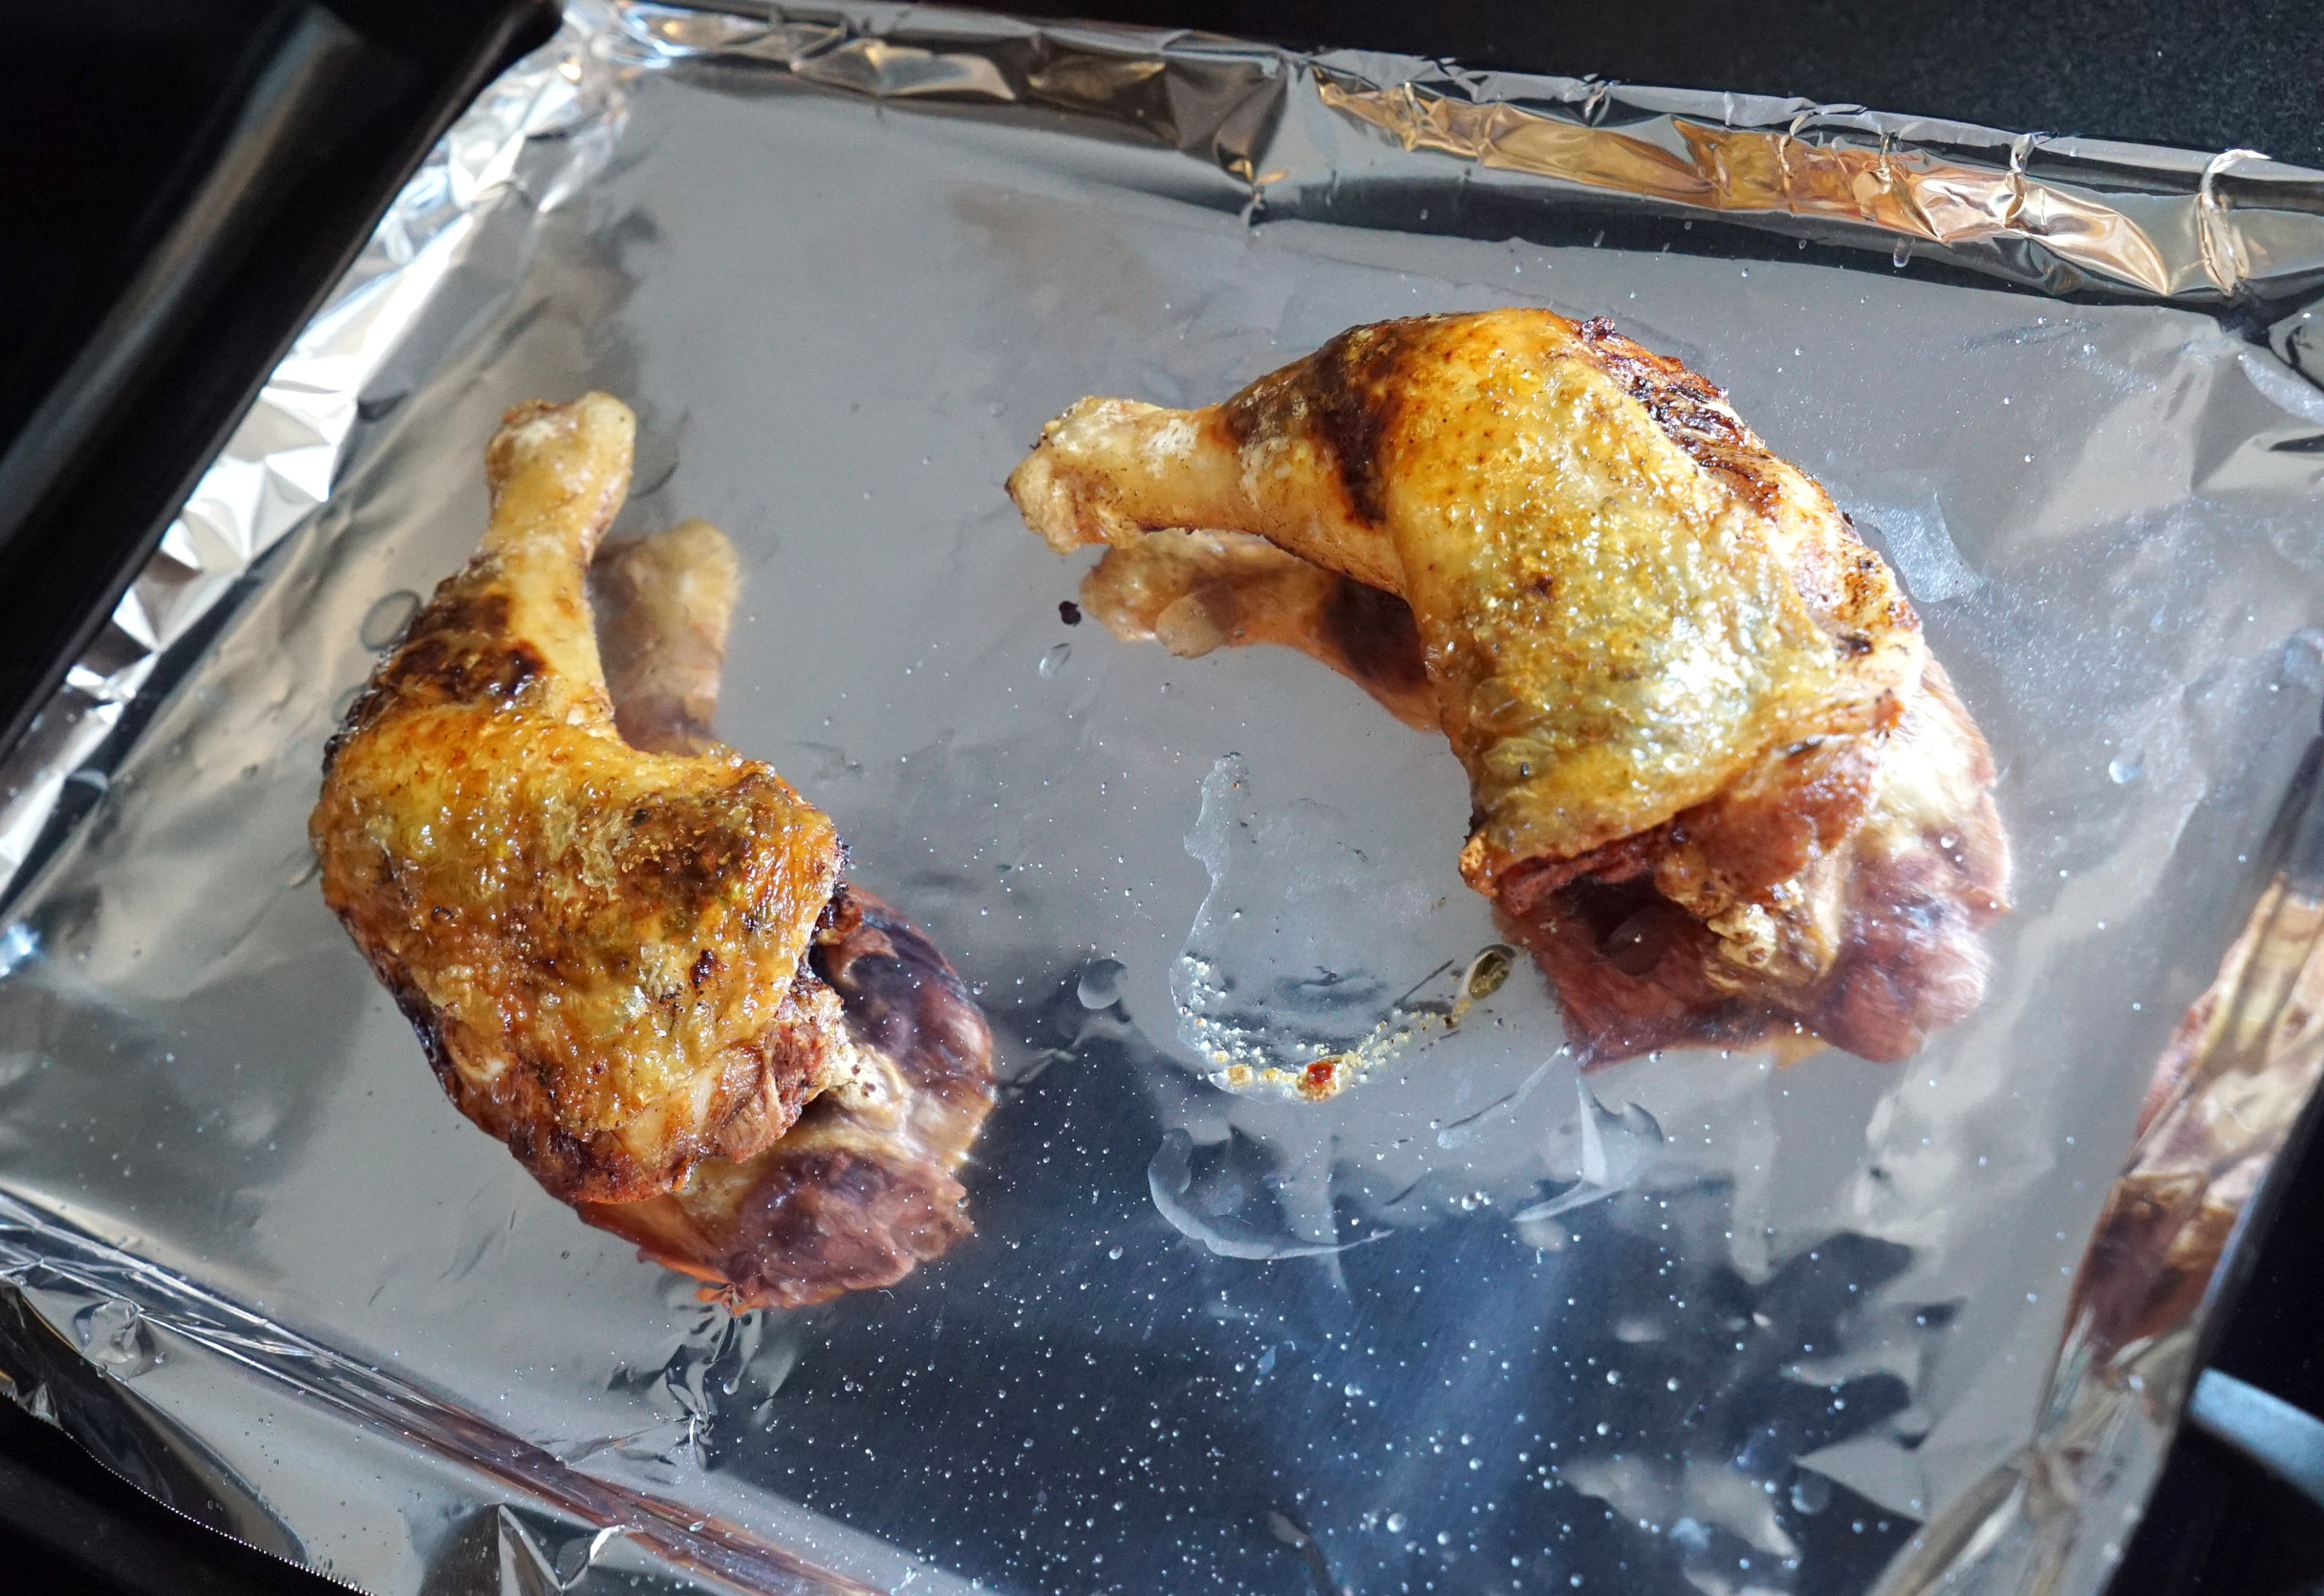
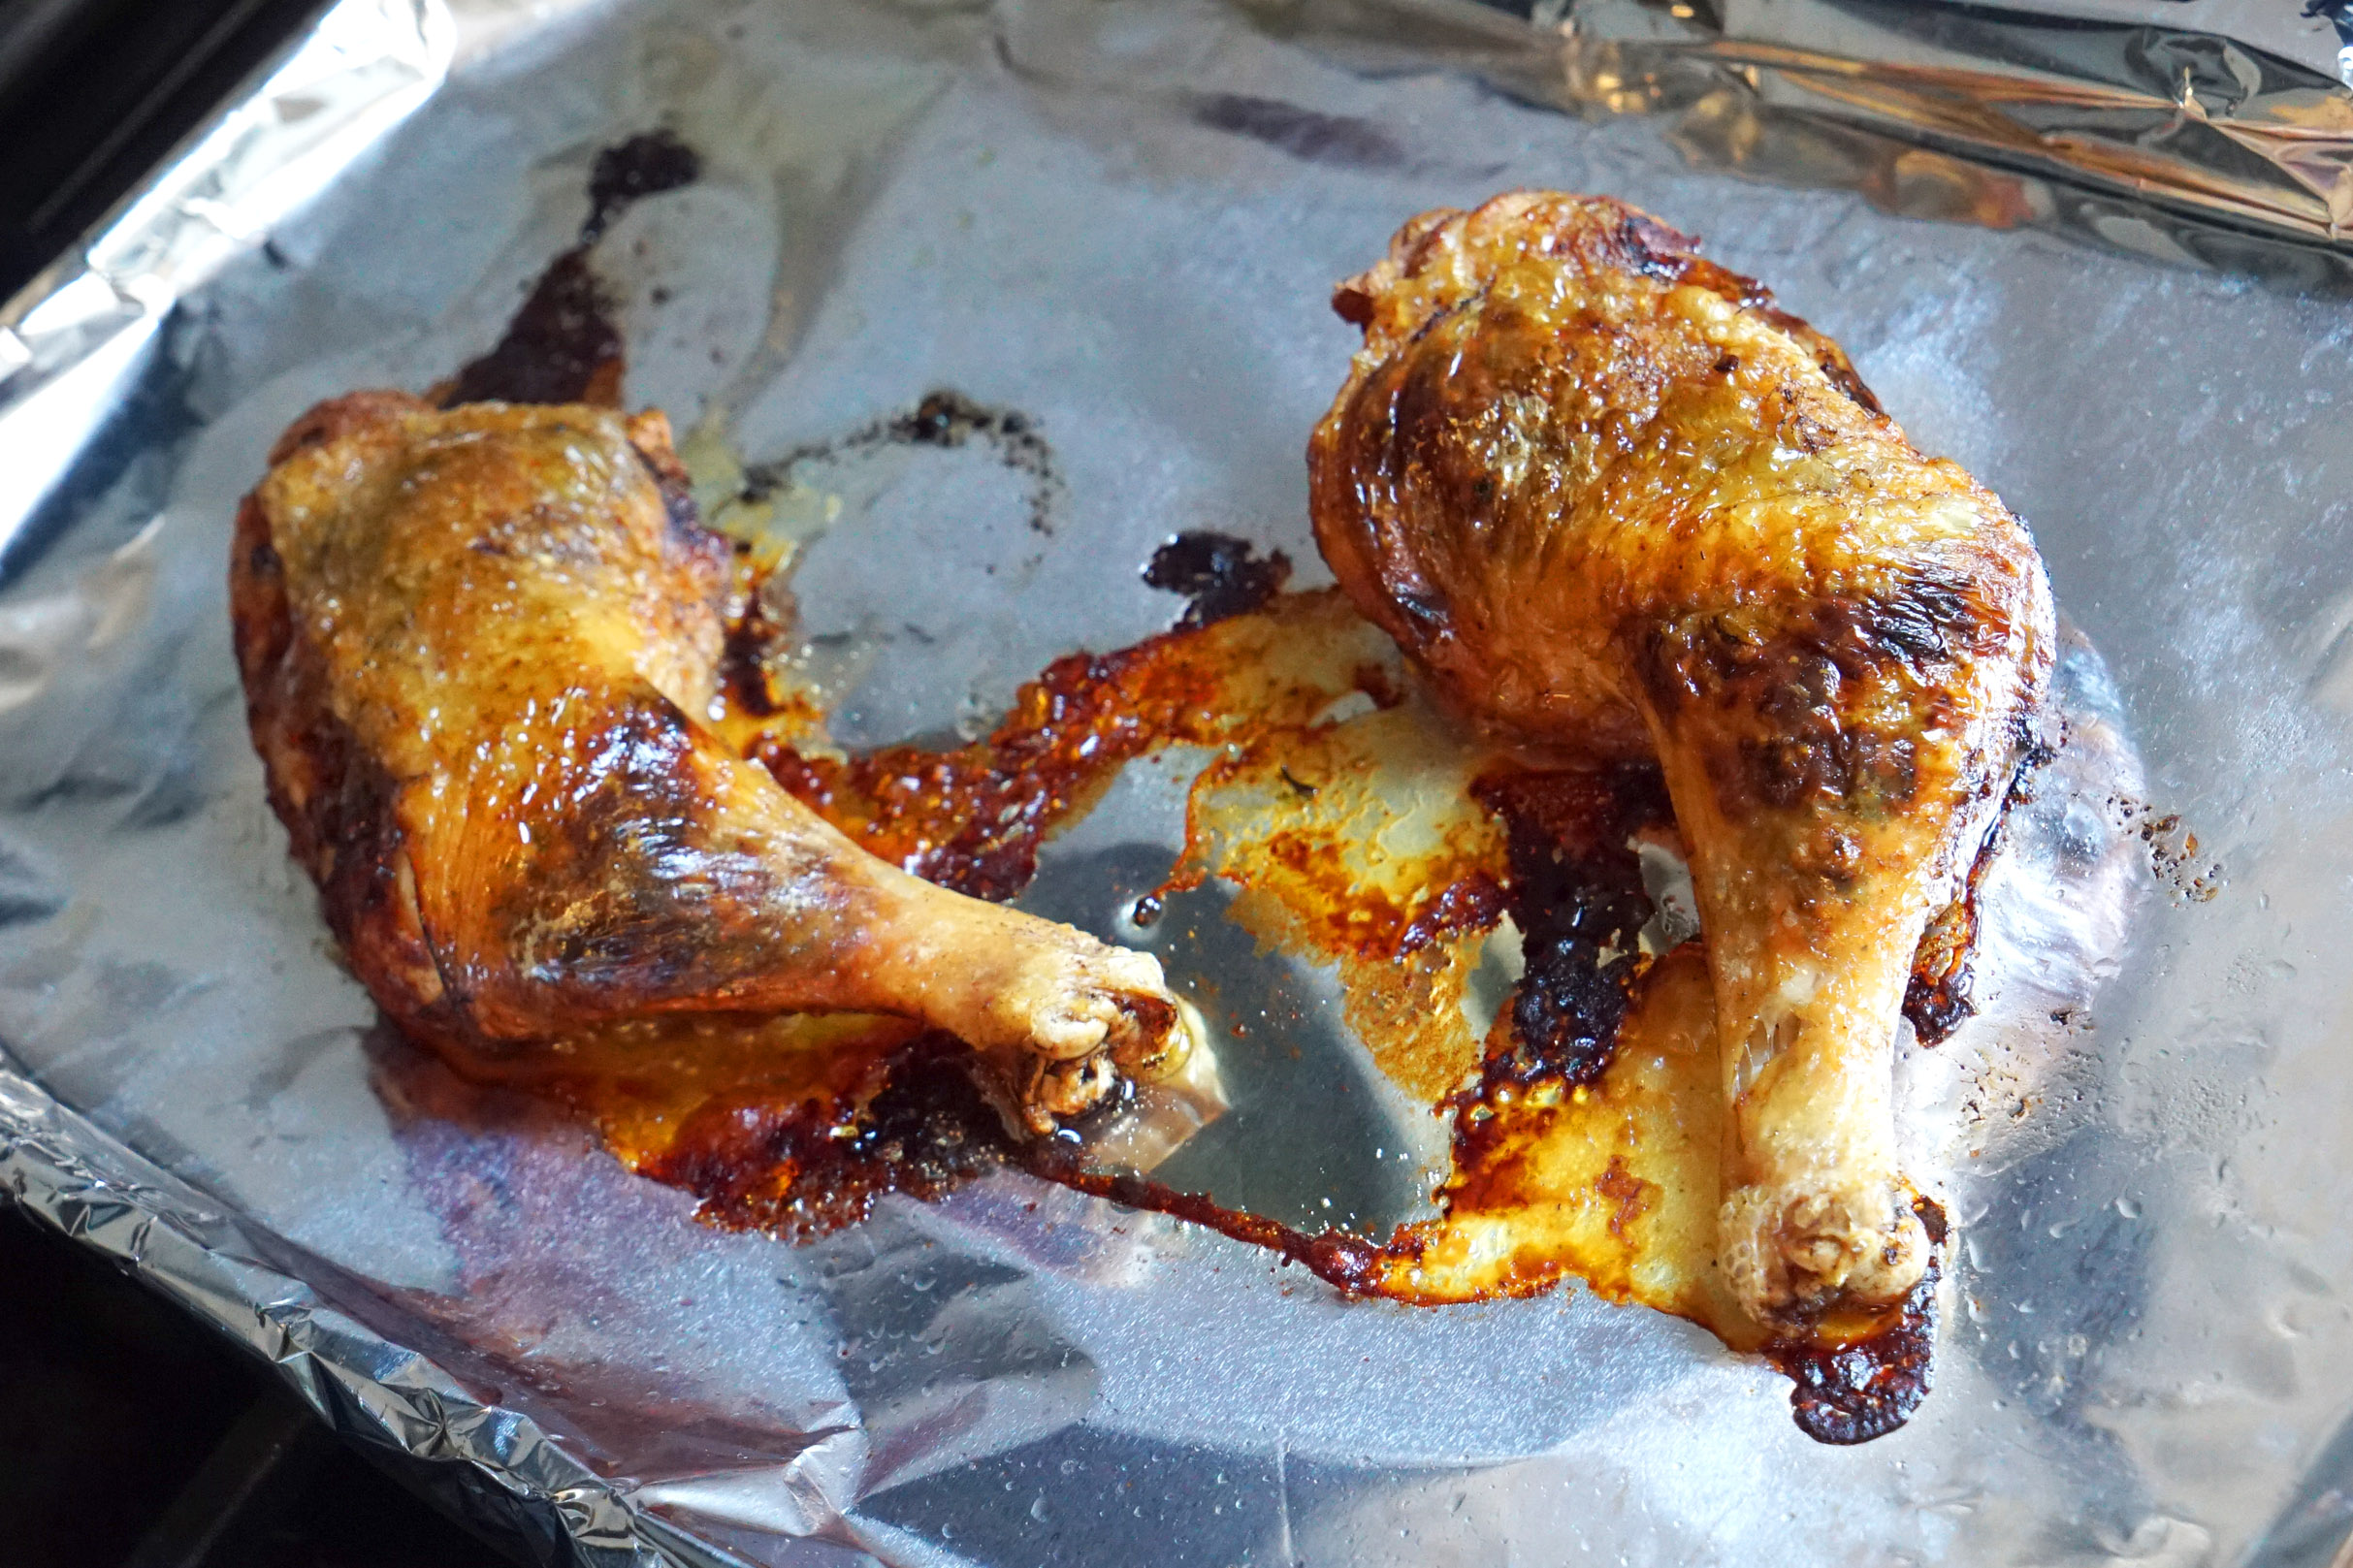
Remove the chicken from the frying pan once the other side gets nice and crispy brown, and place the legs onto a baking sheet. Pop that shit into the oven for another 20-30 minutes, top-side up.
STEP 6
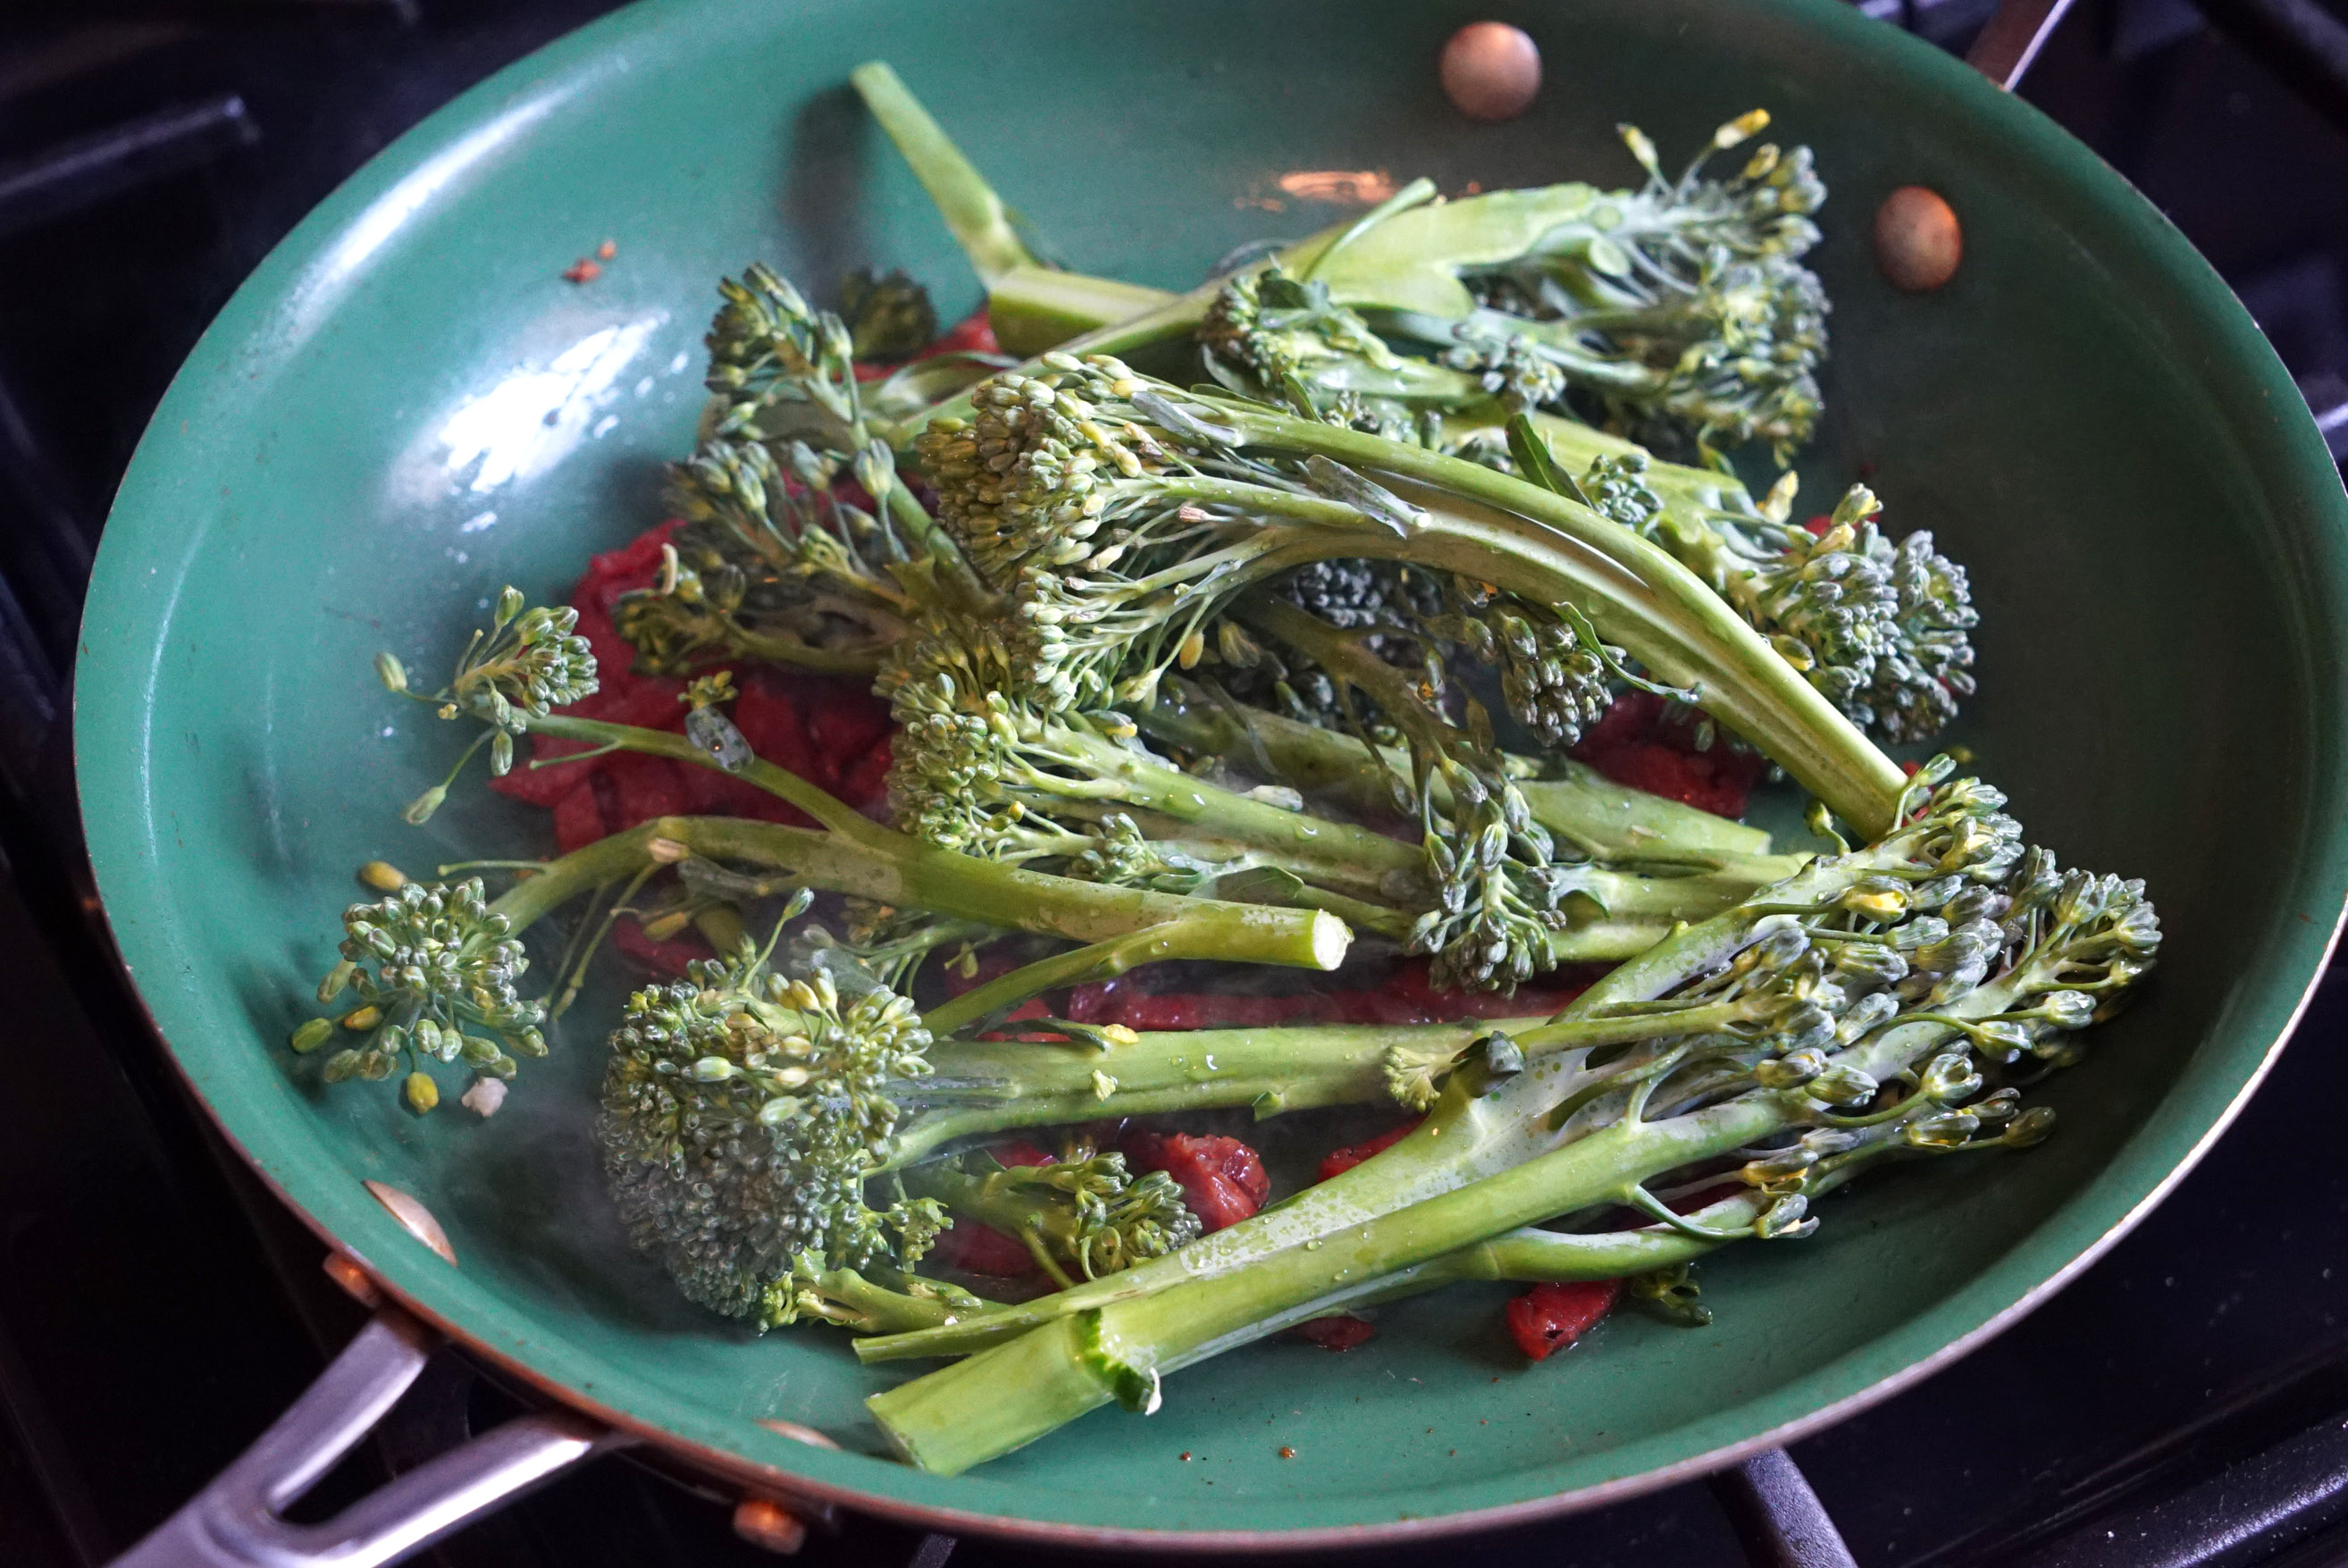
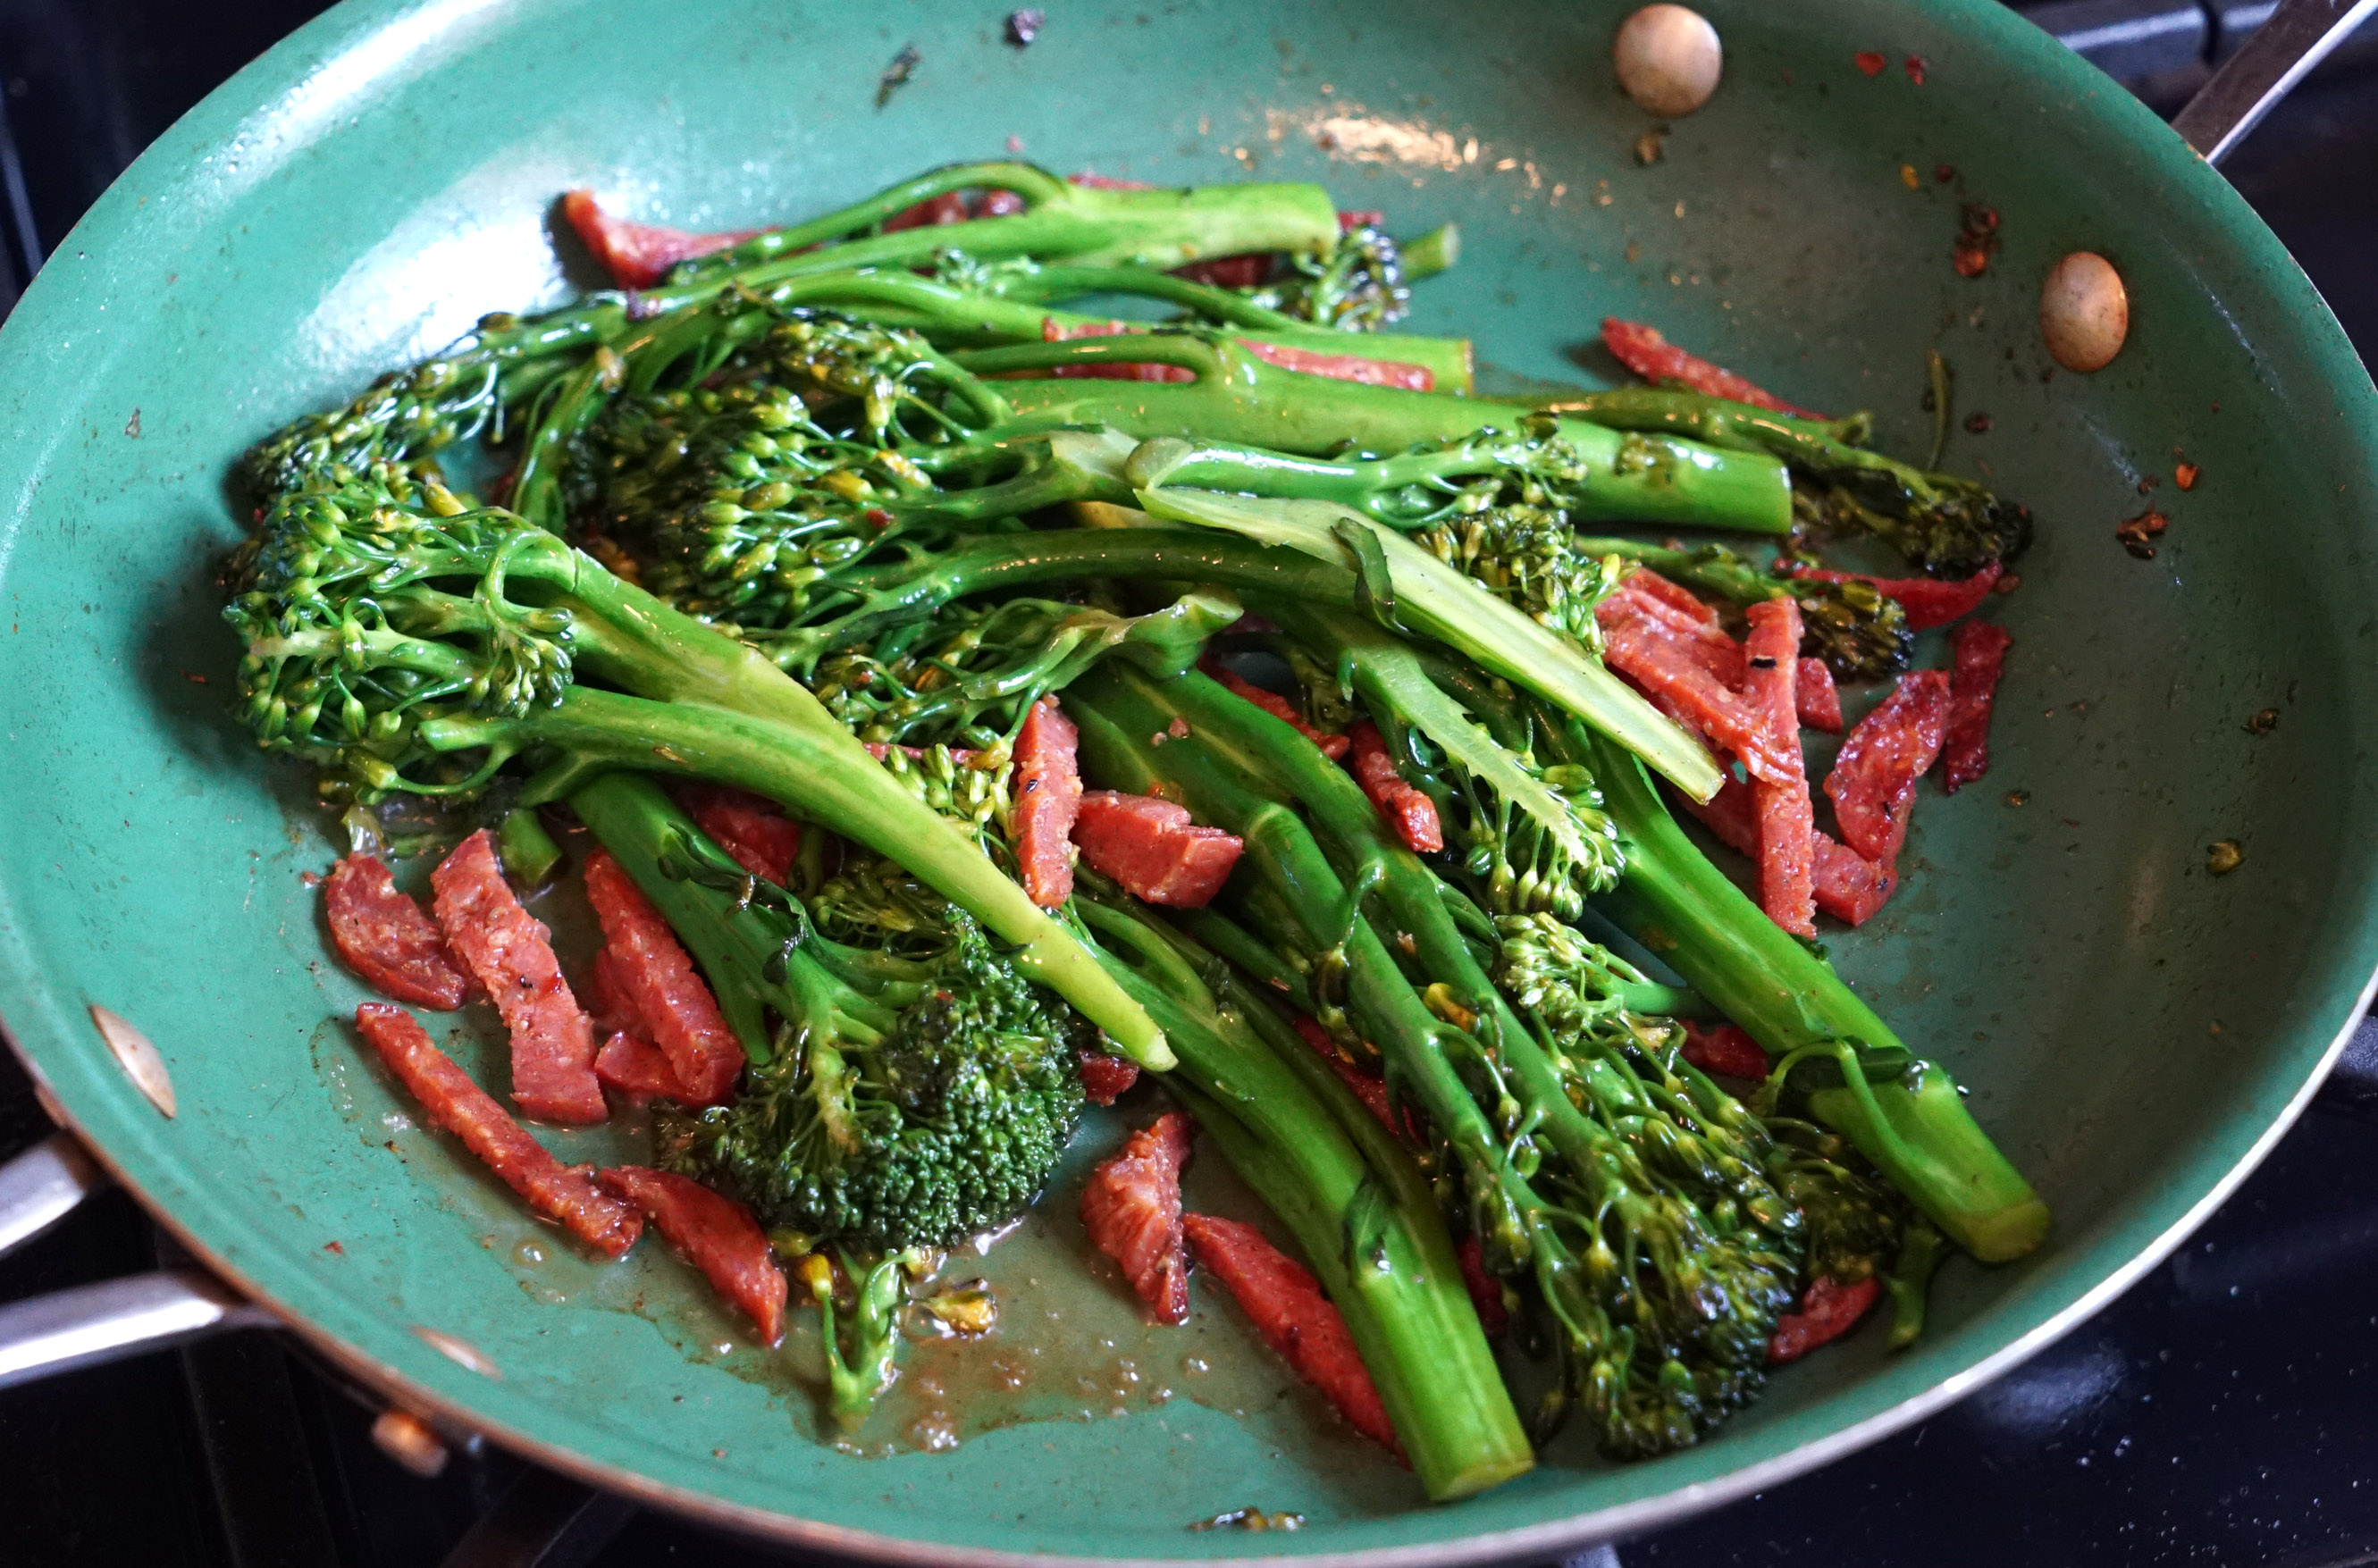
Clean your pan (or use a second one), and then begin to sautee your sausage/chorizo. When they start to release some grease, you can add your broccolini in there as well.
STEP 7
When the pan is nice and hot, and your broccolini is really cooking, I want you to hit the pan with a few ounces of water to deglaze the pan. Doing this releases all that nice brown sausagey goodness from the pan and puts that flavor directly into the broccolini.
Once the water is all evaporated from the pan again, your broccolini should be fully cooked and your chorizo should be slightly crisped and browned. Plate that shit.
STEP 8
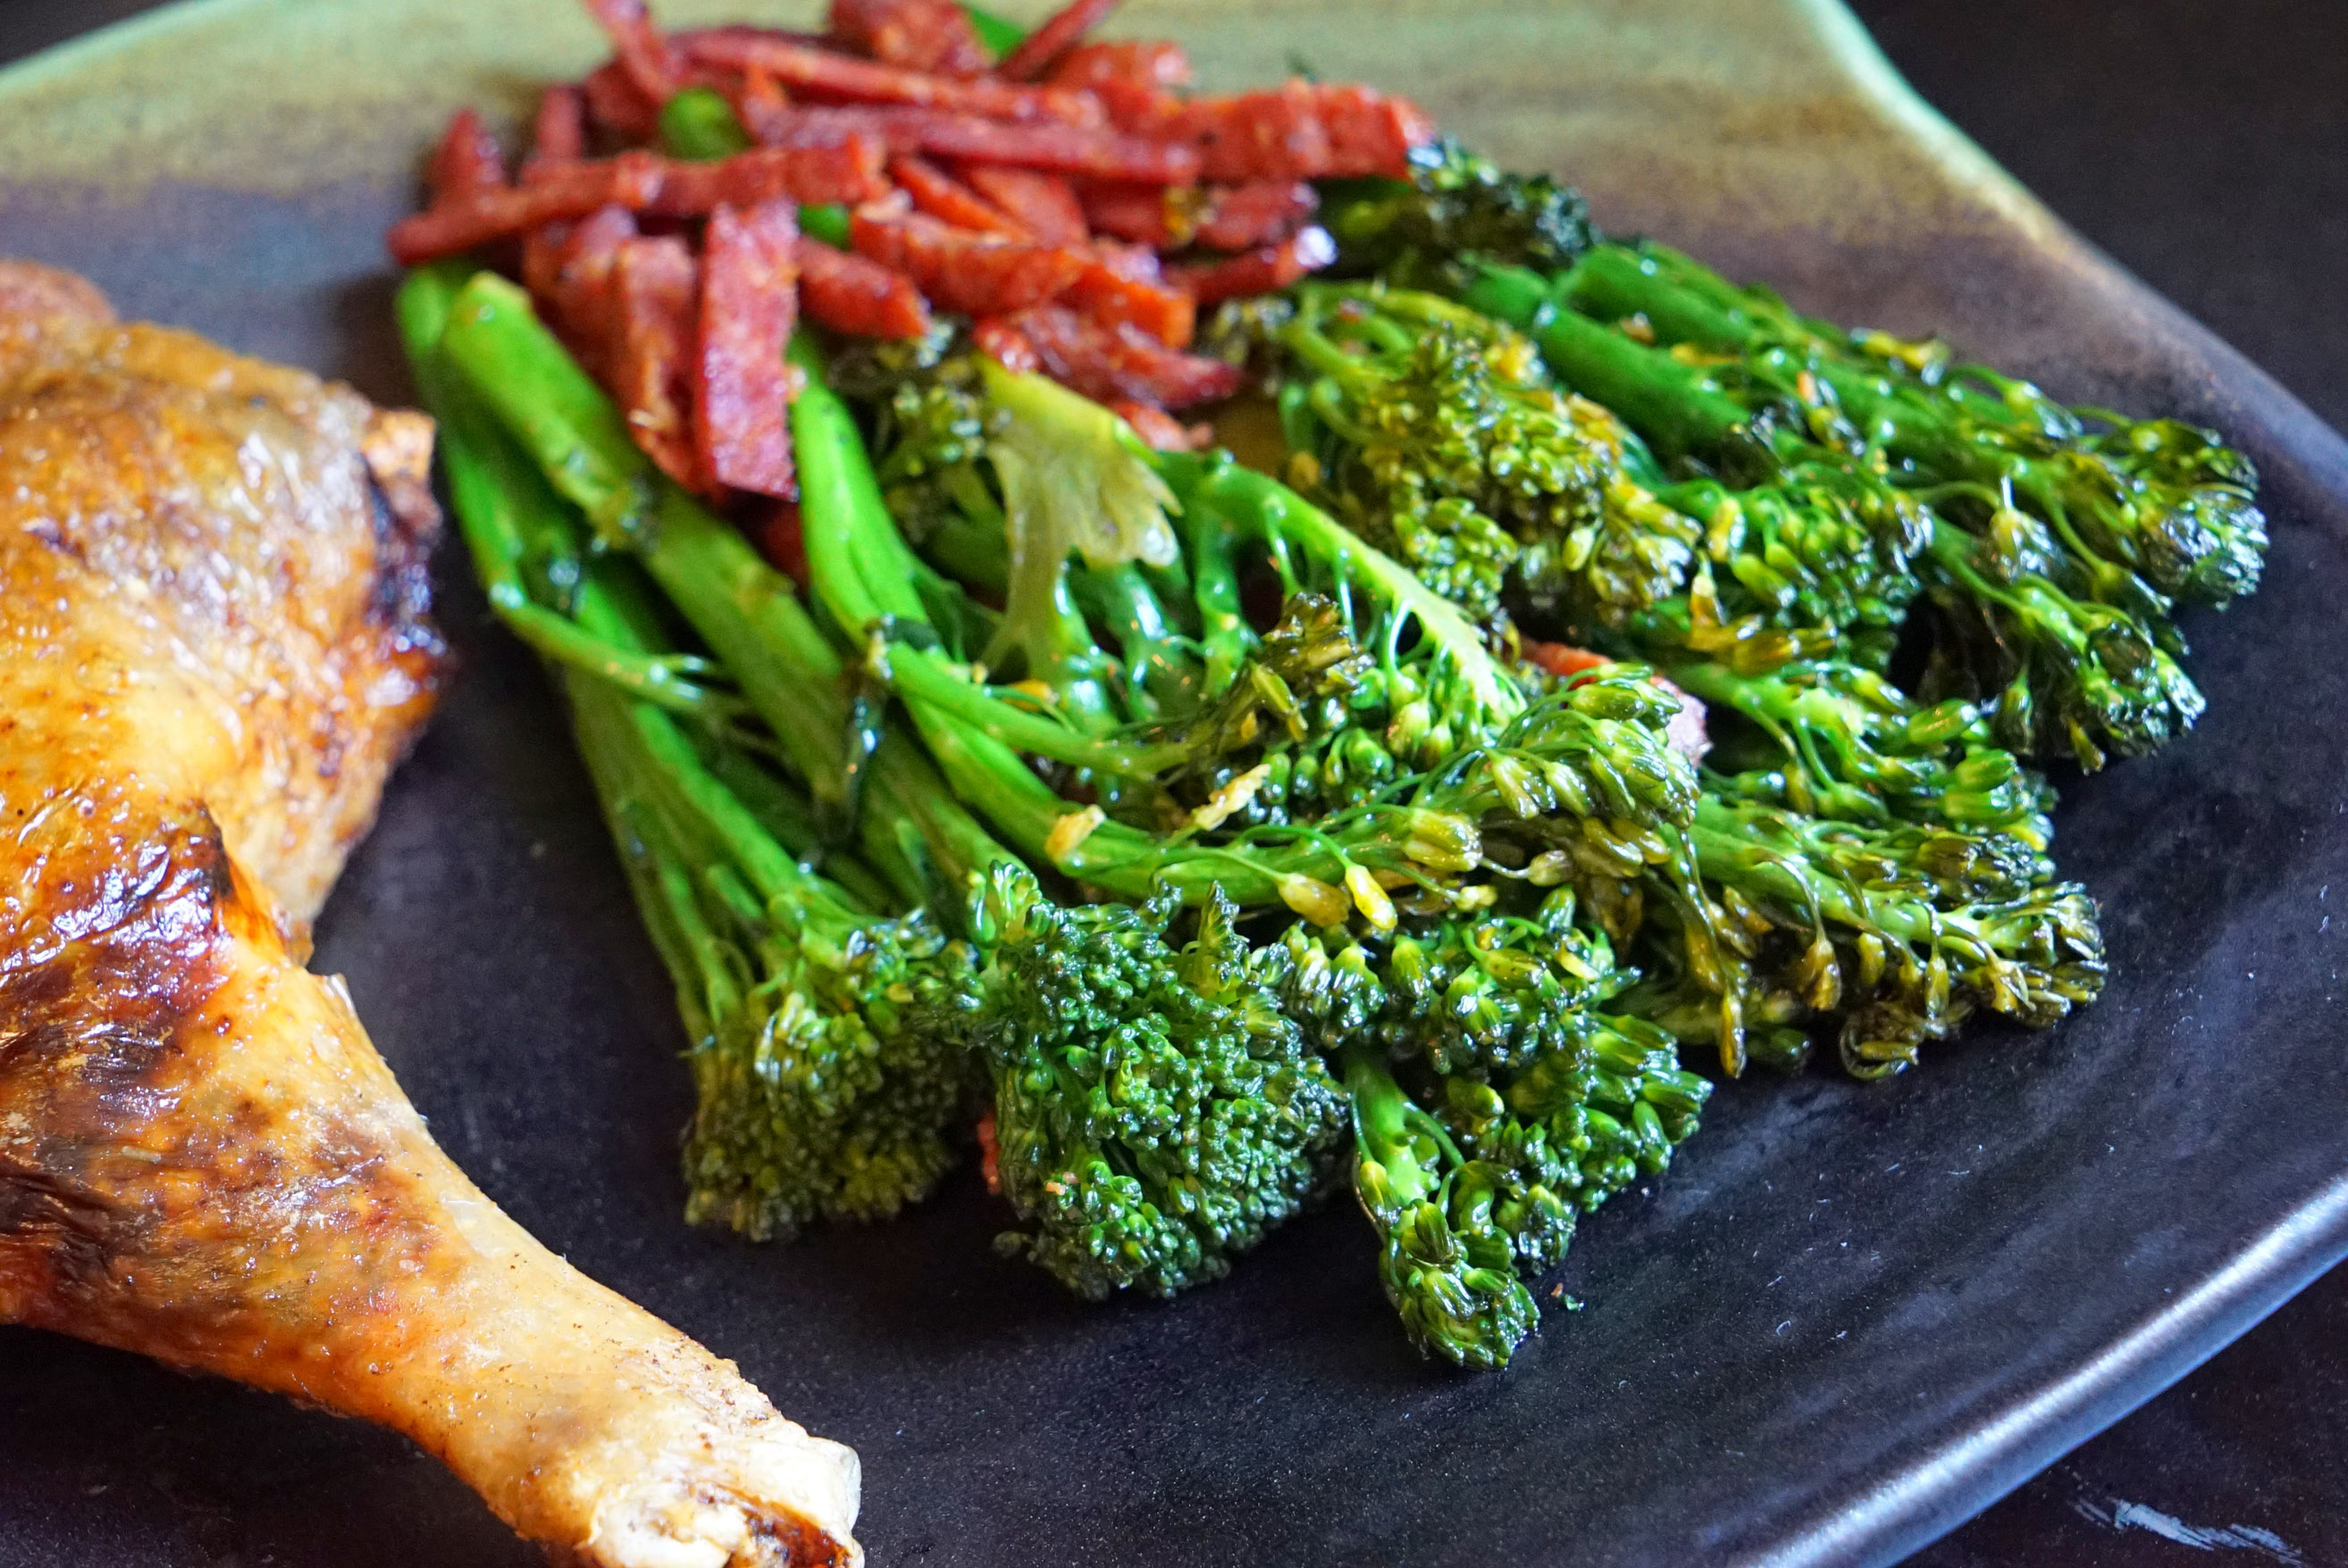
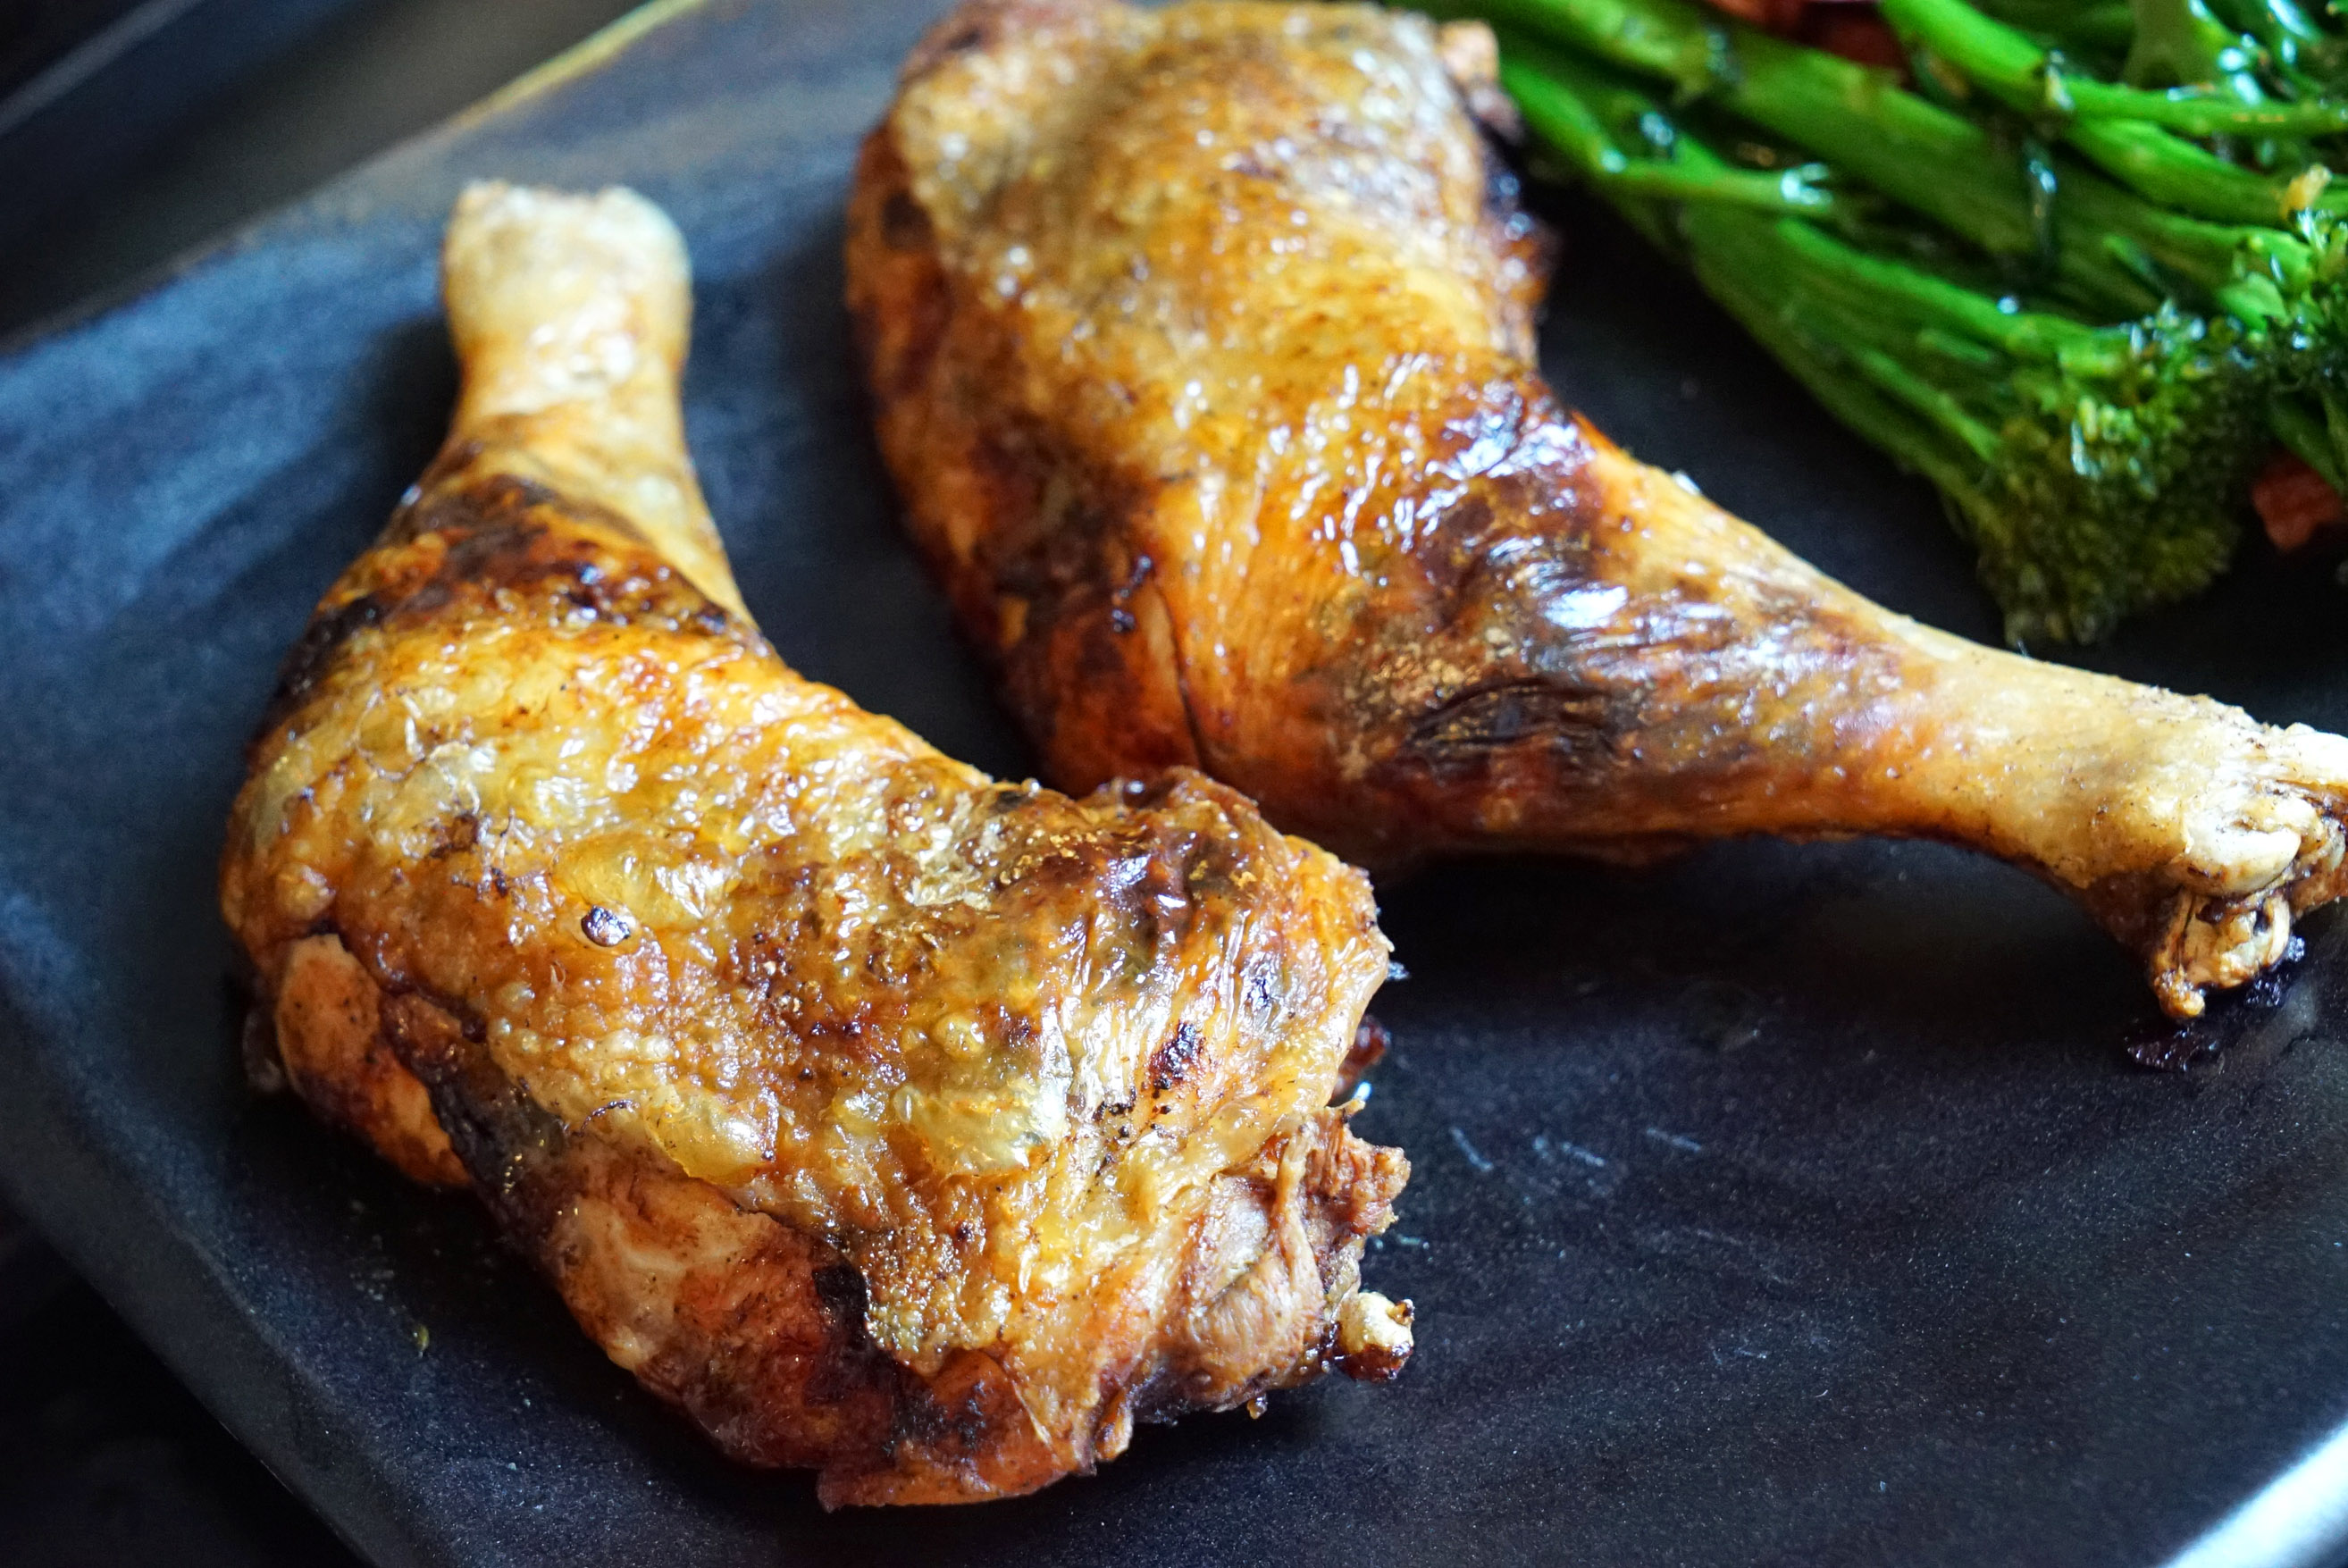
Remove your chicken from the oven and plate that shit alongside your broccolini.
That’s it. Super simple, and this will feed two people, unless you’re a fat fuck like me and can eat it all by yourself.
I also like to add sliced onion and fresh garlic into the broccolini sautee as well sometimes. When I did this recipe, I didn’t have that stuff handy, but here’s a shot of the finished plate from a previous night when I made the dish with onions and fresh garlic. As you can see, the skin actually came out a little nicer that time, due to better butter coverage and frying technique.
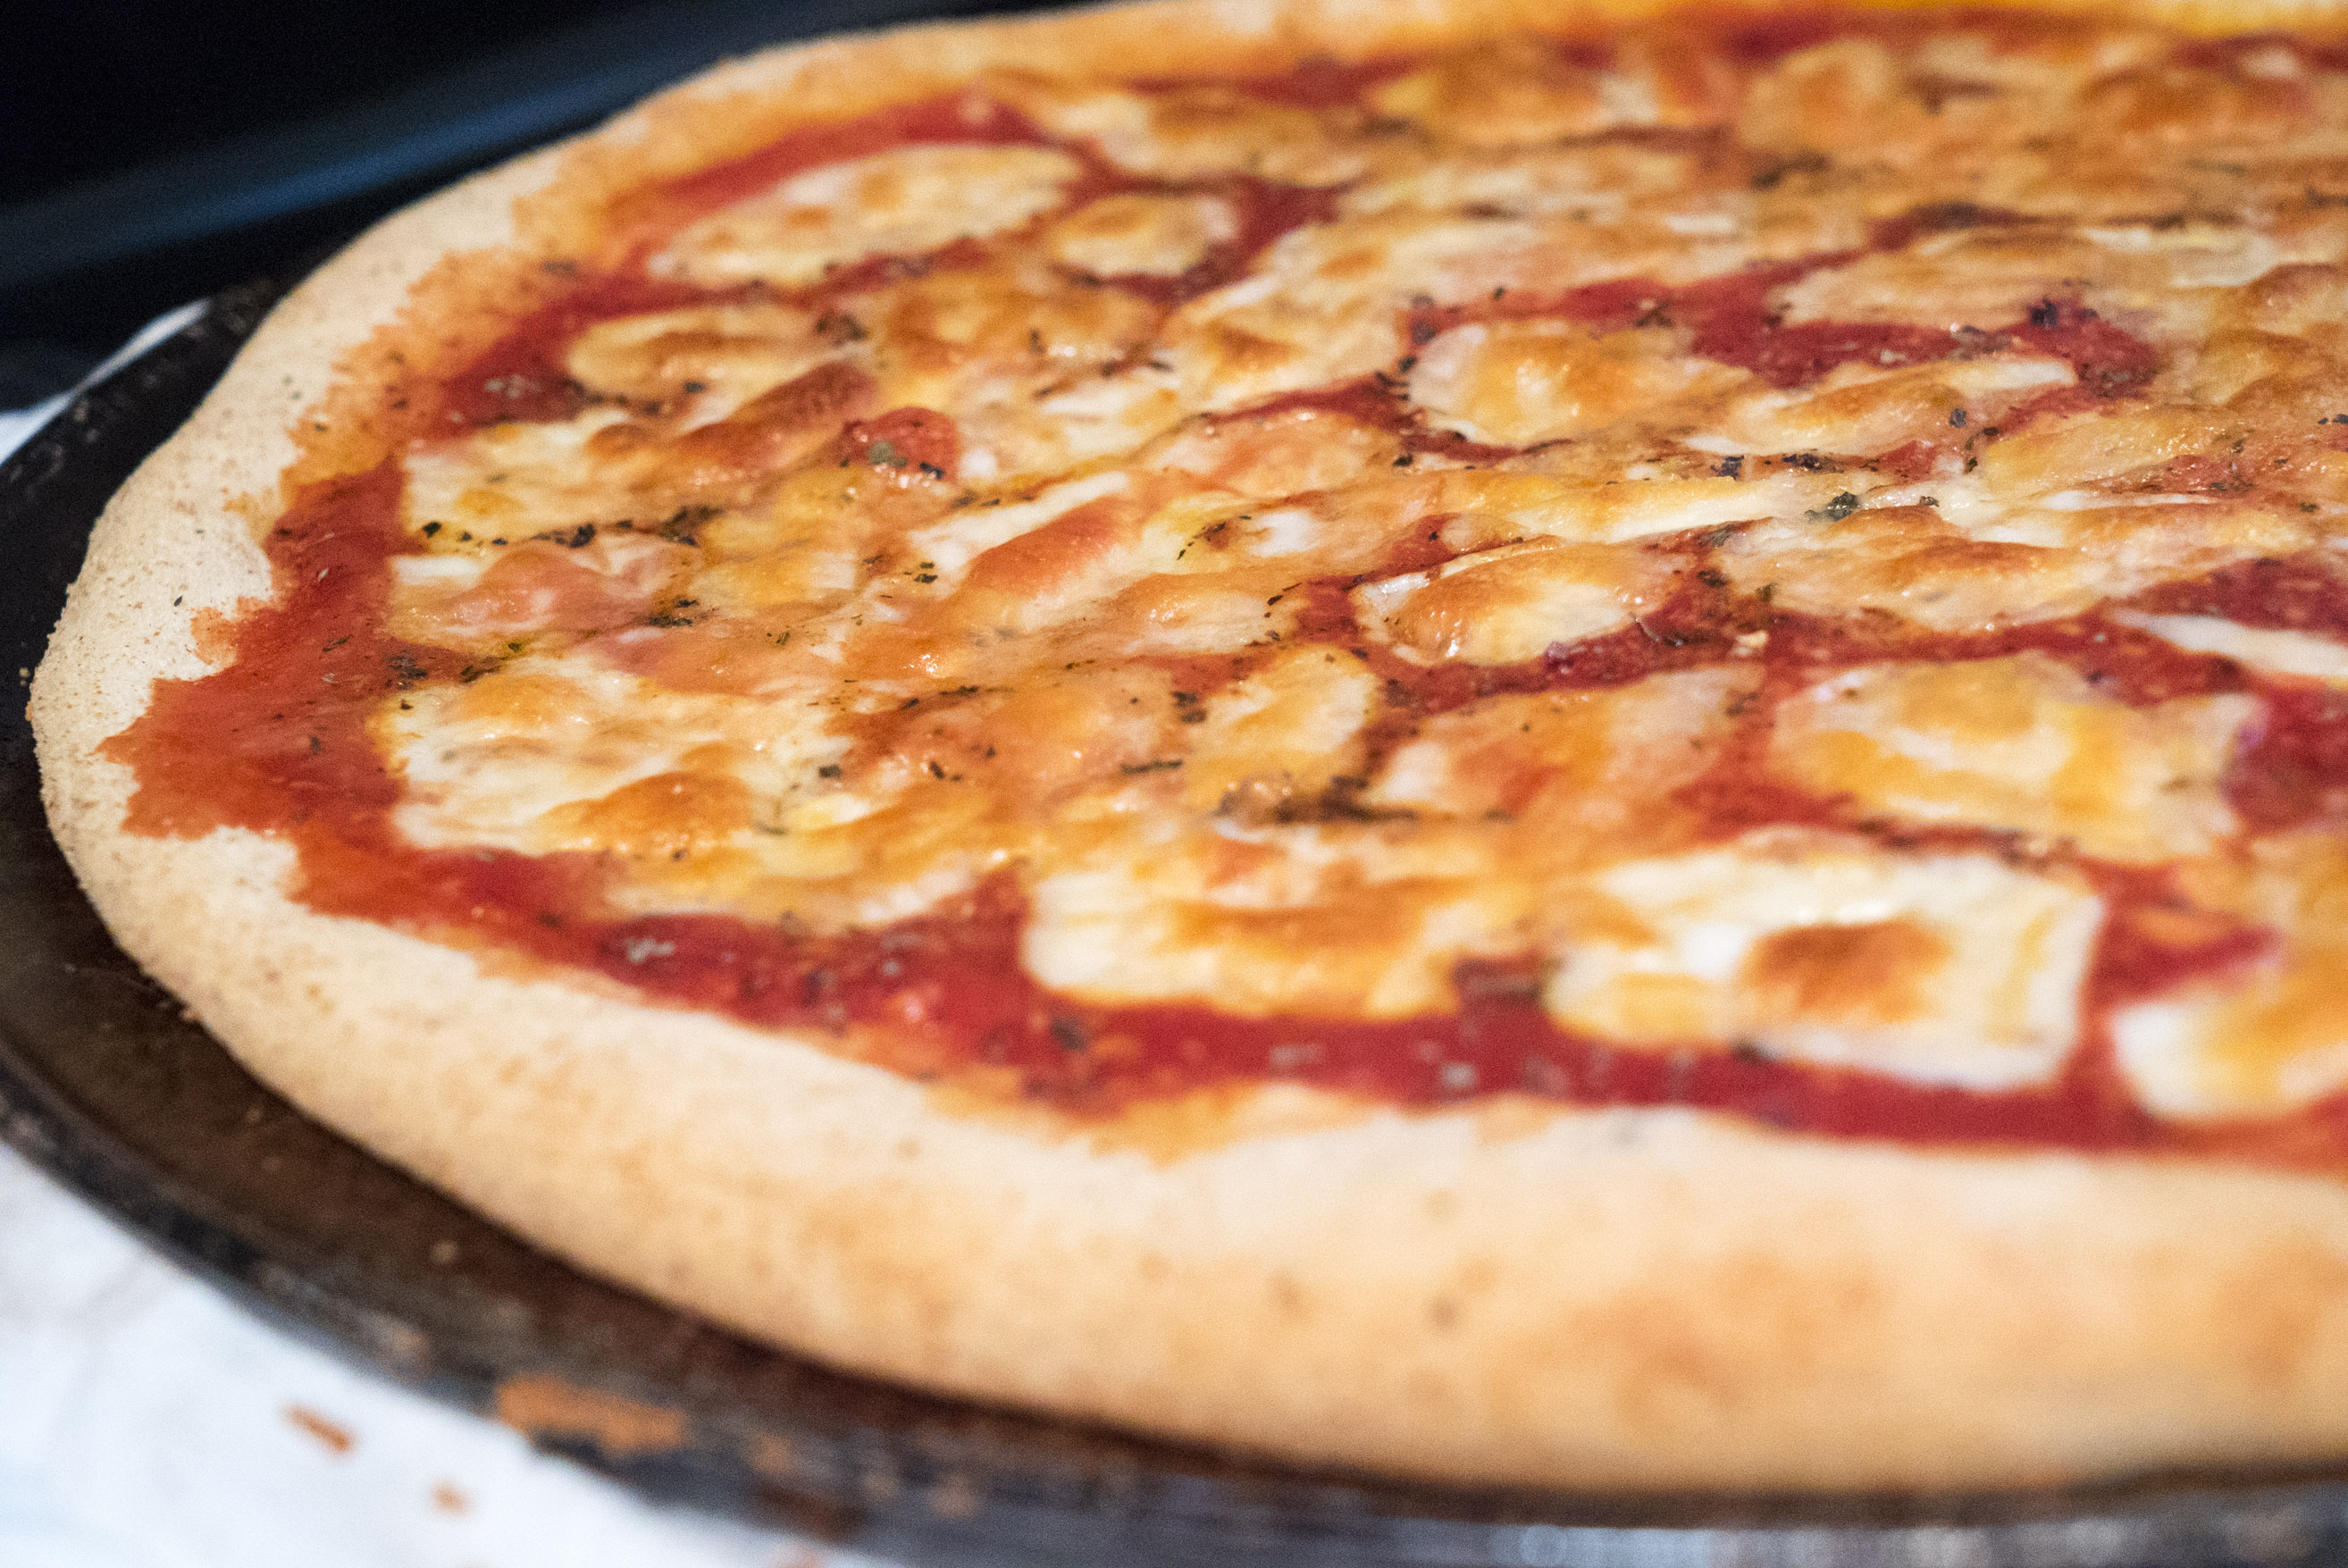
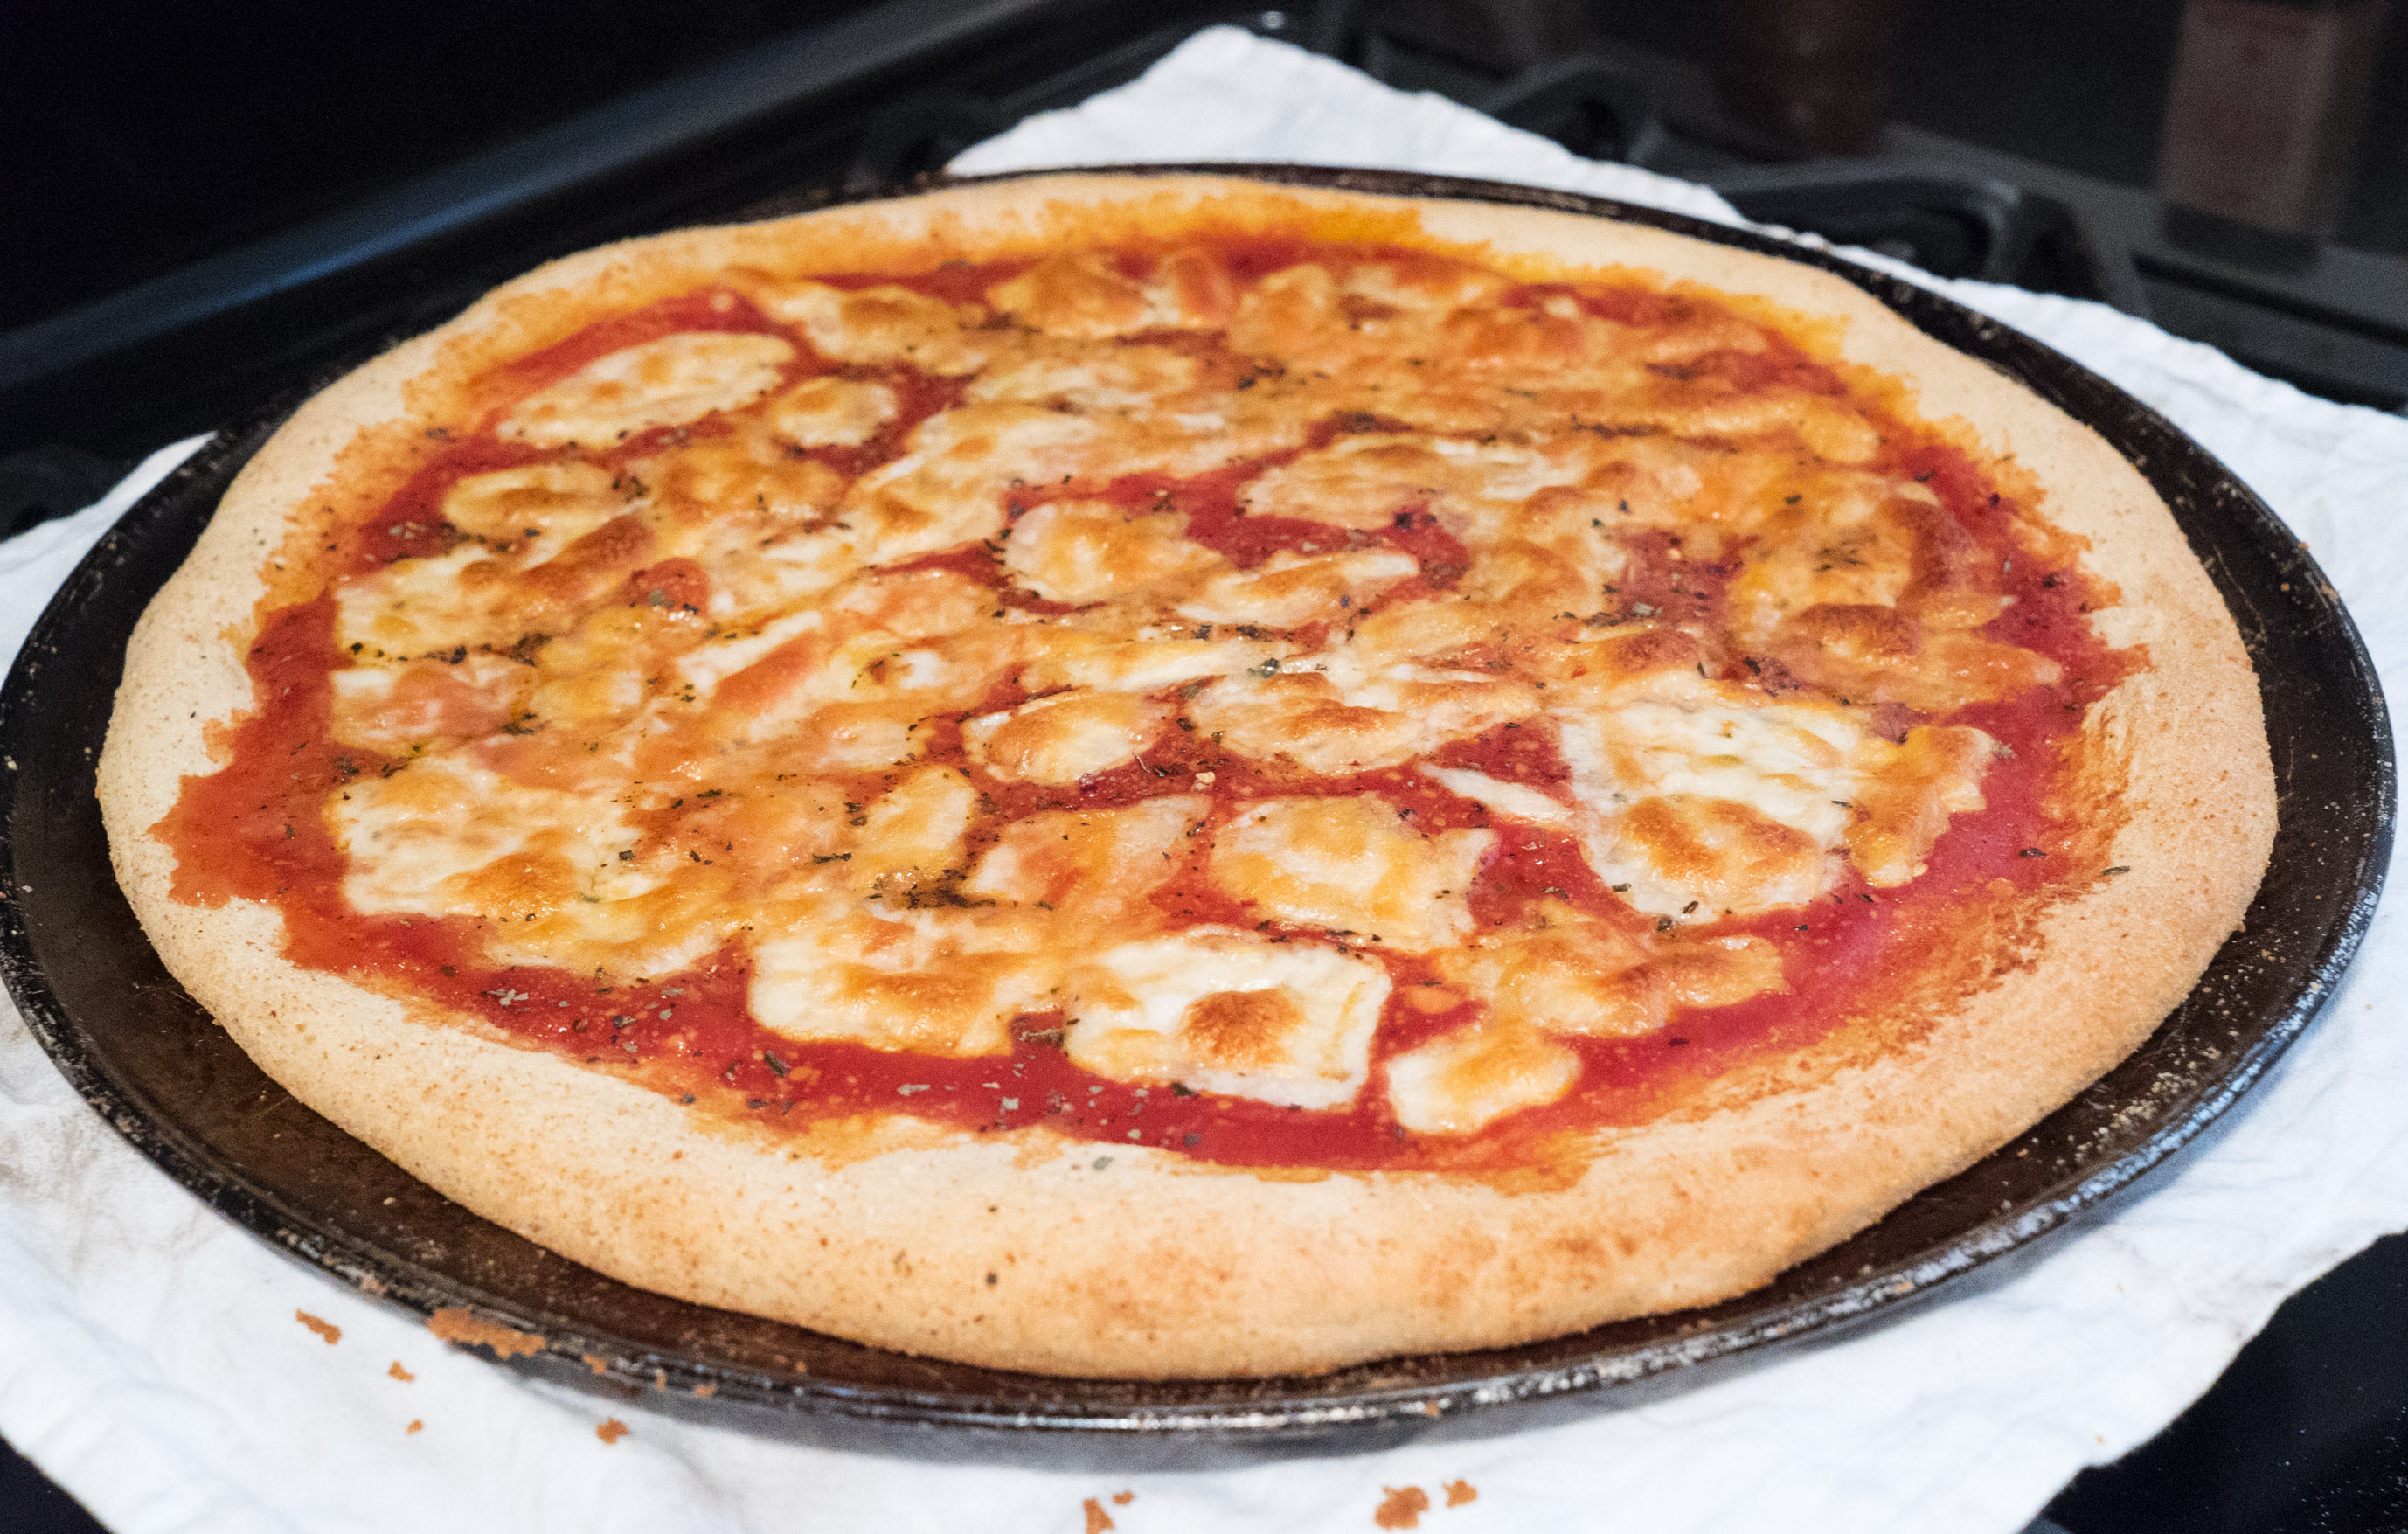
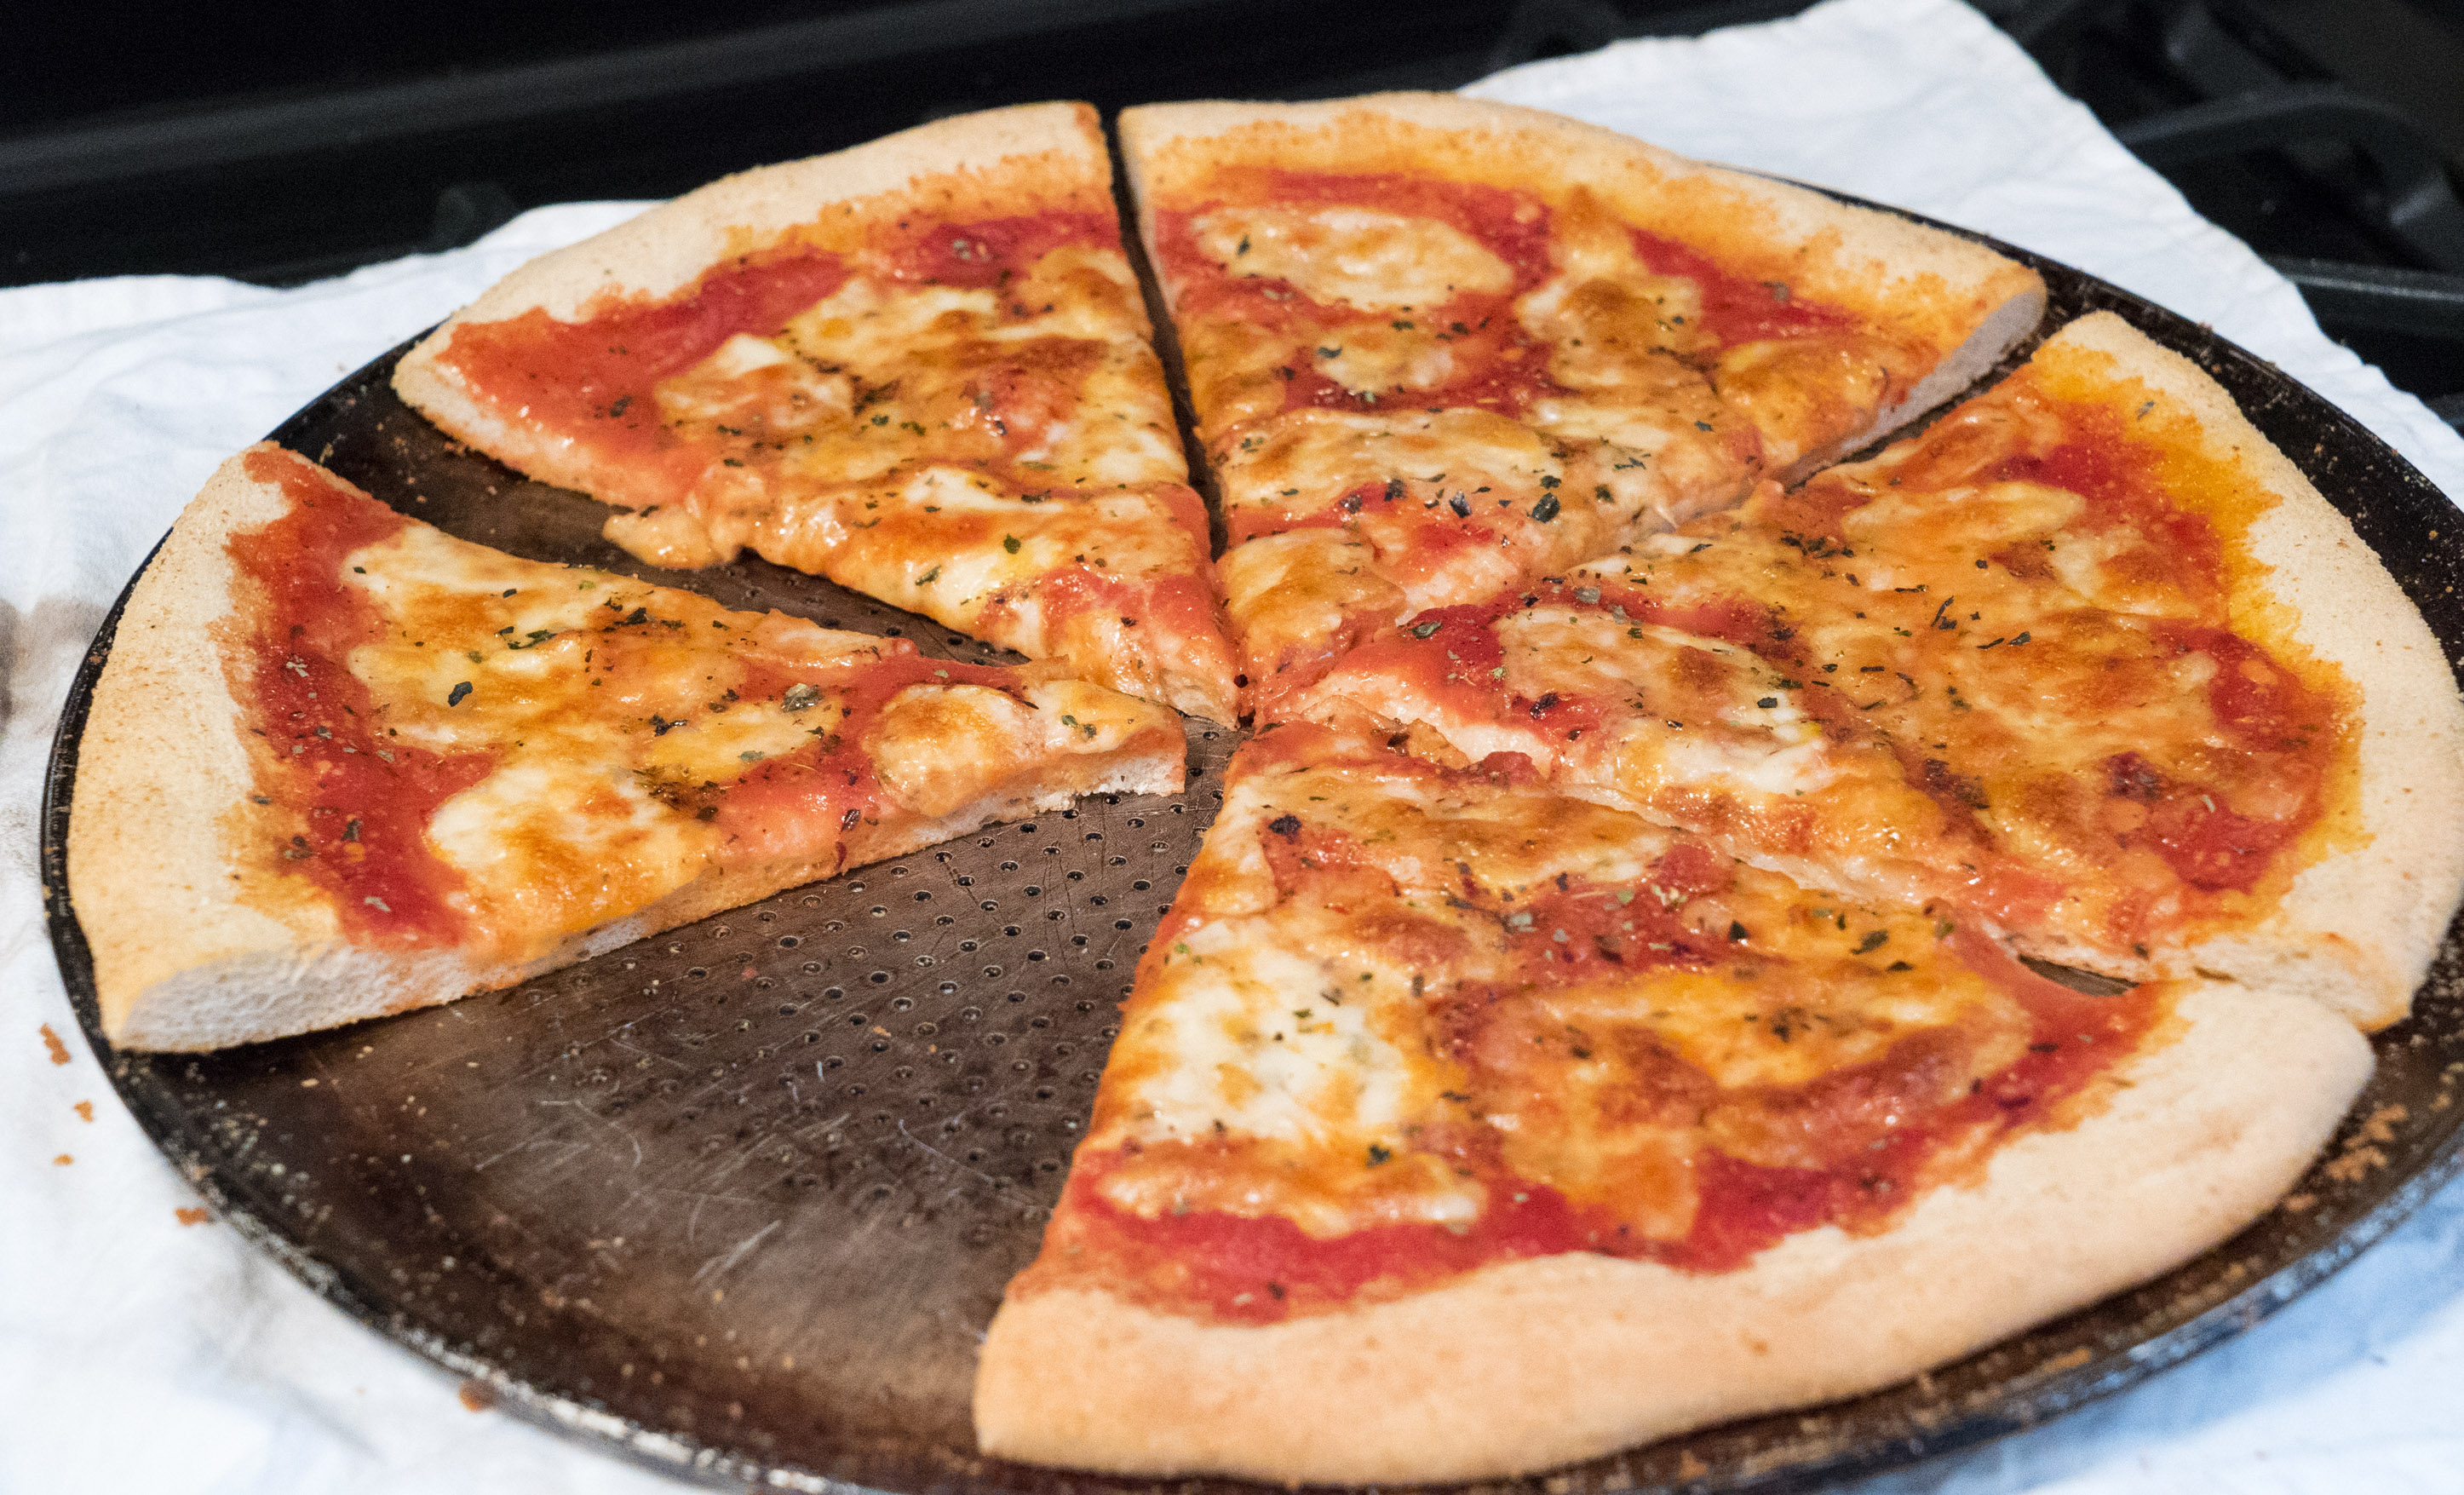
I put the word “homemade” in quotes because, well, nothing about this recipe is really homemade. It’s just a really incredible combination of store-purchased ingredients that comes together as one of the best pizzas you will ever eat in your fucking life.
I will 100% guarantee that this fucking pizza is better than where you get your delivery, and I don’t give a fuck if you regularly order from fucking Di Fara!
What Do You Need?
Small can of sauce (8oz)
Small package of mozzarella cheese (8oz block/ball is preferred)
Parmesan cheese (to taste)
Pre-made pizza dough (the fresh kind)
Olive oil (just a few ounces)
Bread crumbs or cornmeal (2 teaspoons)
Various spices (to taste)
Perforated metal pizza pan
Directions:
Pretty simple. Watch the time lapse video below, and if you can’t fucking figure it out from that, you can read on below…
Pre-heat your oven to 375 degrees. While waiting, coat your pizza pan with some olive oil. Shake a few teaspoons of bread crumbs or cornmeal across the pan. Stretch your pizza dough across the pan to get full coverage. Pour sauce evenly over the dough and add a few drizzles of olive oil. Add parmesan cheese and spices to taste. Cut up the block of mozzarella cheese and arrange slices evenly across the pizza dough. Bake 20-25mins or until cheese begins to bubble and turn brown. Remove from oven and allow pizza to cool down a bit before slicing.
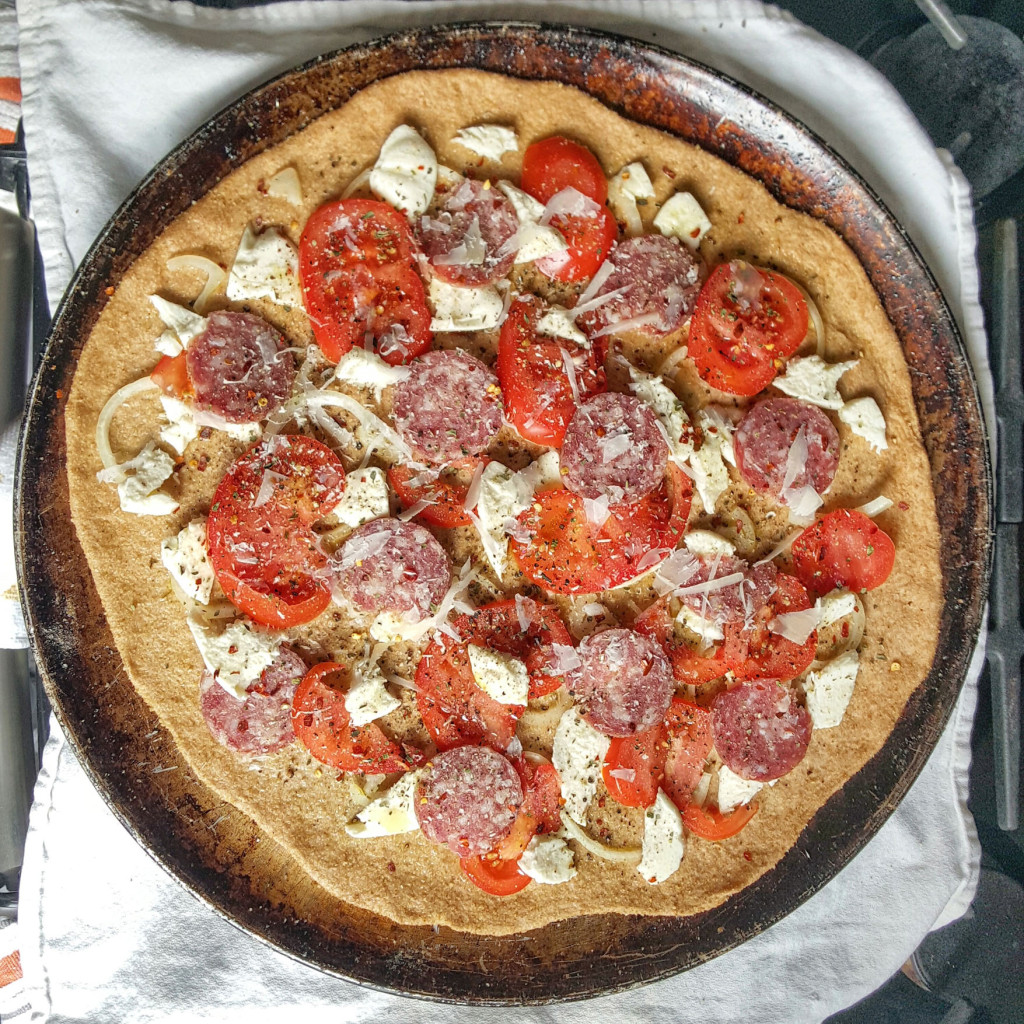
This shit also comes out really nice with fresh ingredients. I did the same type of thing with sliced tomatoes, fresh mozzarella, herbs and some sliced onion. Check it out:
Before the oven:
After the oven:
The tomatoes actually make each vote really juicy, so this was a much better pie than the ones I make with canned sauce.
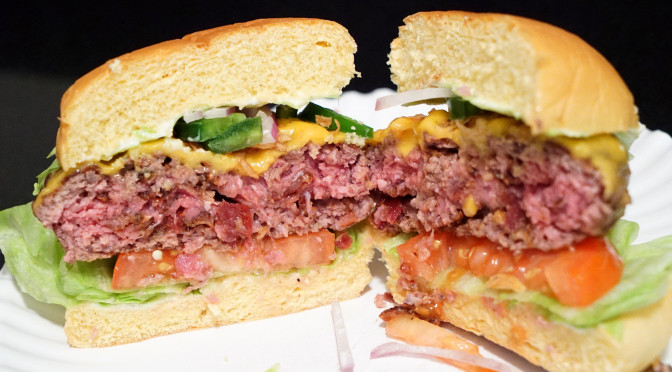
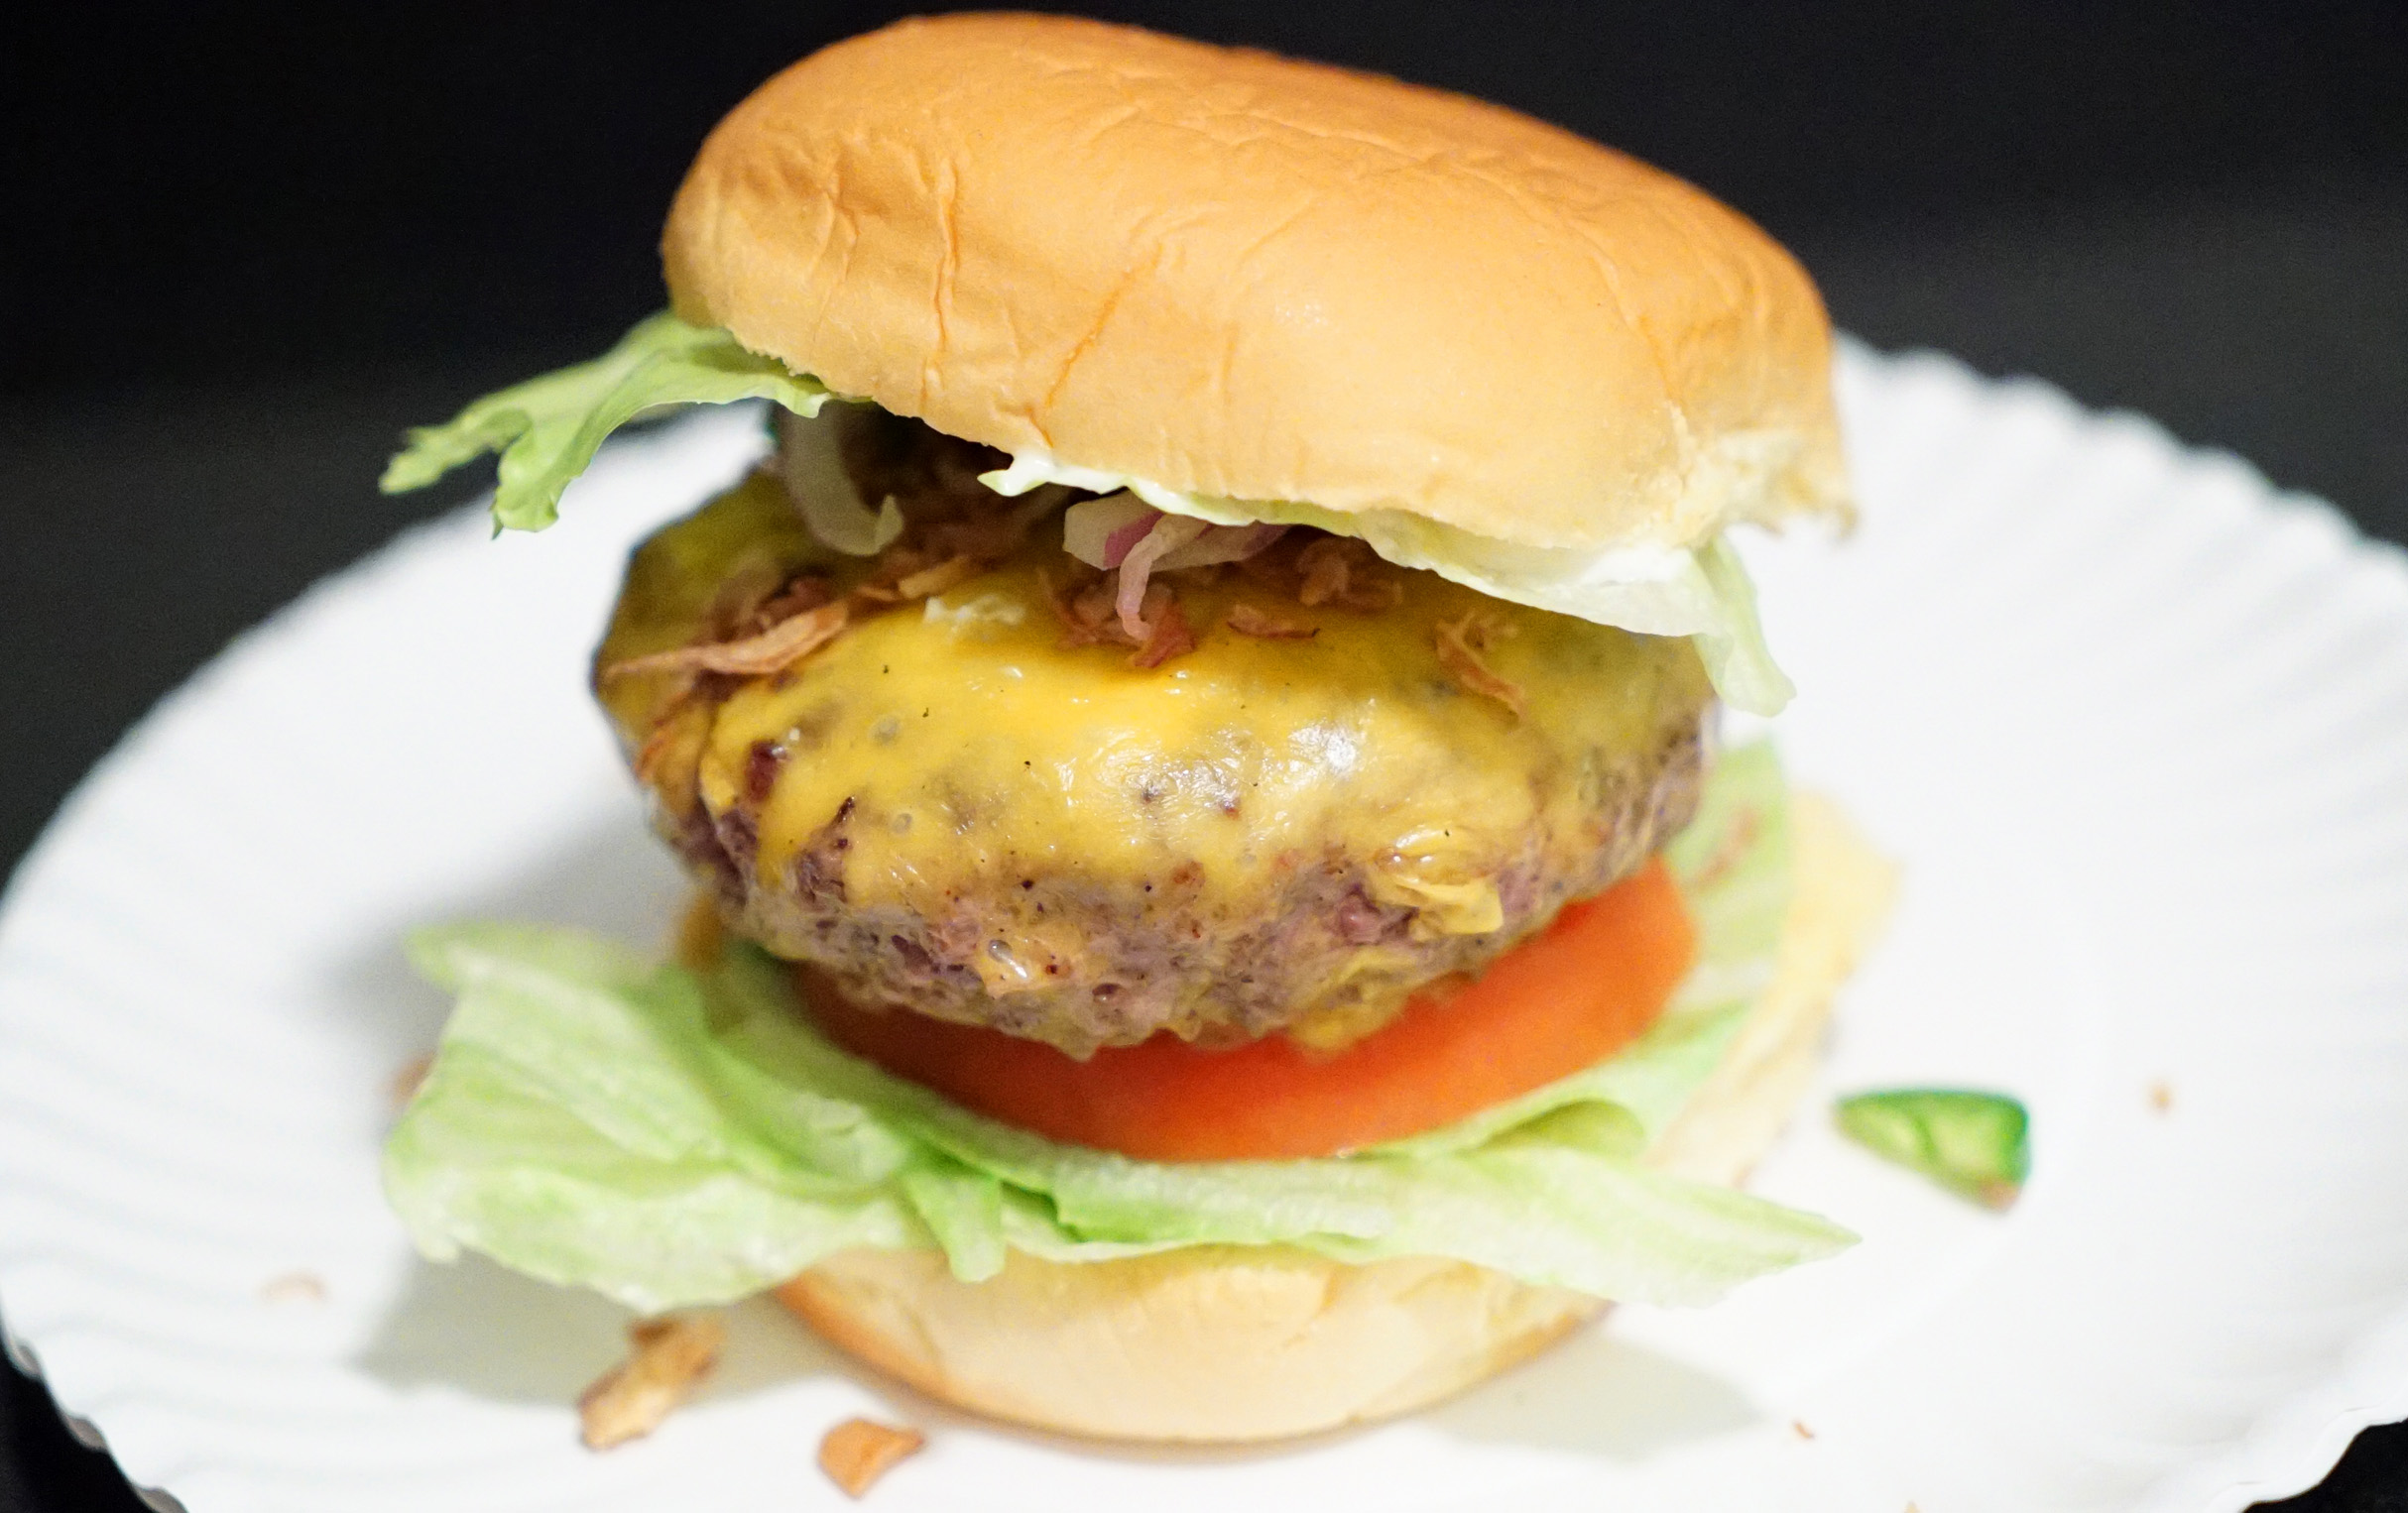
Let me start off my reiterating the fact that I am a burger purist. I like my burgers pretty much on the standard side. My ideal: a nicely seared beef patty (on a flat top – not grilled), sandwiched between a potato bun with mayo on both halves of the bun, and topped with melty American cheese, iceberg lettuce, one thin slice of tomato, some pickles and a few rings of raw onion (not a full slice). Occasionally I will throw some bacon on top, but I figured out a better way to get the bacon into the mix without adding yet another topping. Sometimes when the toppings get too numerous, you end up with a tall stack; that sucks.
I should also mention here that anyone can make a good burger at home. In fact some home burgers far surpass anything you can get at a burger joint. It’s one of the easiest things to cook at home, so a “recipe” for a burger is kinda nonsense, know what I mean? There’s nothing particularly special or innovative about this recipe other than the first three steps, and to even suggest innovation there is a stretch. It’s really just good sense, and I feel like more people need to know about it.
Here’s a quick time lapse video of me executing all the steps below:
1) Fry up some bacon in a cast iron pan – as much as you would normally include on top of your burger.
2) Remove the finished bacon from your cast iron pan, but leave the grease in the pan.
3) Once cooled, crumble up the bacon and mix it into your chopped meat. The crunchy bacon inside will add texture as well as flavor to your finished product. Don’t overwork or overpack the meat when mixing the bacon into the patty. I like about 6oz of chopped meat for a burger. That means it’s not too ridiculously thick, and not too thin to the point where you need to eat two burgers just to feel something in your stomach.
Note: Some burger recipes tell you to add diced bacon into the chopped meat BEFORE cooking the bacon. BIG MISTAKE. If you’re like me, and you like your burger medium or medium rare, then some of that bacon won’t cook properly in the amount of time is takes to get the beef up to temperature. There’s nothing worse than rubbery, undercooked bacon. It blows. The key is to fry that shit off beforehand, as I noted in step one above, and then mix the fully cooked bacon into the raw beef burger patty.
4) Cook your burger in the bacon grease, in the same cast iron pan. This will follow through on your bacon flavor, and it’ll give the patty a good crust to boot.
5) When you flip the burger (you’re only flipping it once, by the way), add your American cheese (go with two slices) and cover the pan, so that the cheese gets nice and melty.
Note: Some people add a bit of water into the pan at this point, before covering the pan (like maybe 2-3oz). Why? The water instantly sublimates to steam, which is a higher temperature than the air in the pan. When sealed up and covered, this helps to melt the cheese faster. This is especially helpful if you like a rare or medium rare burger, because you don’t have to wait as long for the cheese to melt, which in turn means you are less likely to overcook your burger while waiting for the cheese to finish melting.
6) Remove your patty from the pan when the cheese is melted, and set it aside for a moment. You can use a cooling rack or a plate.
7) Prep your bun for assembly. This entails a few sub-steps:
a) Apply mayo to both sides of the potato bun.
b) Add one leaf of iceberg lettuce to each side.
c) On the bottom side, set down your thin slice of tomato on top of the lettuce. Ideally you want a good sized tomato so that your slice covers the majority of the bun from end to end.
d) On the top side, place your rings of raw onion and pickles on top of the lettuce.
e) I’ve also opted to add some fried crispy shallots to the burger for extra texture, as well as some sliced jalapeños for heat, mainly because I almost always have these things in my fridge.
f) Put your burger in there, and close her up.
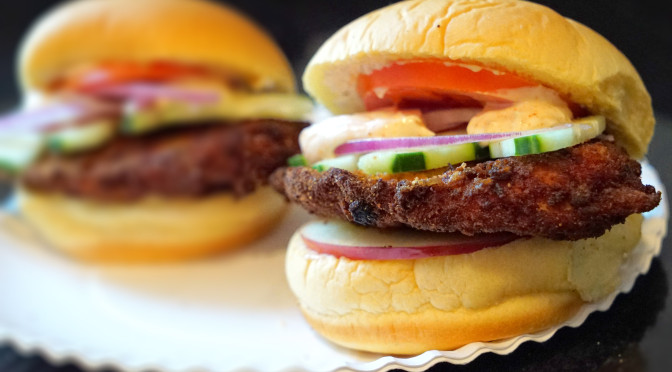
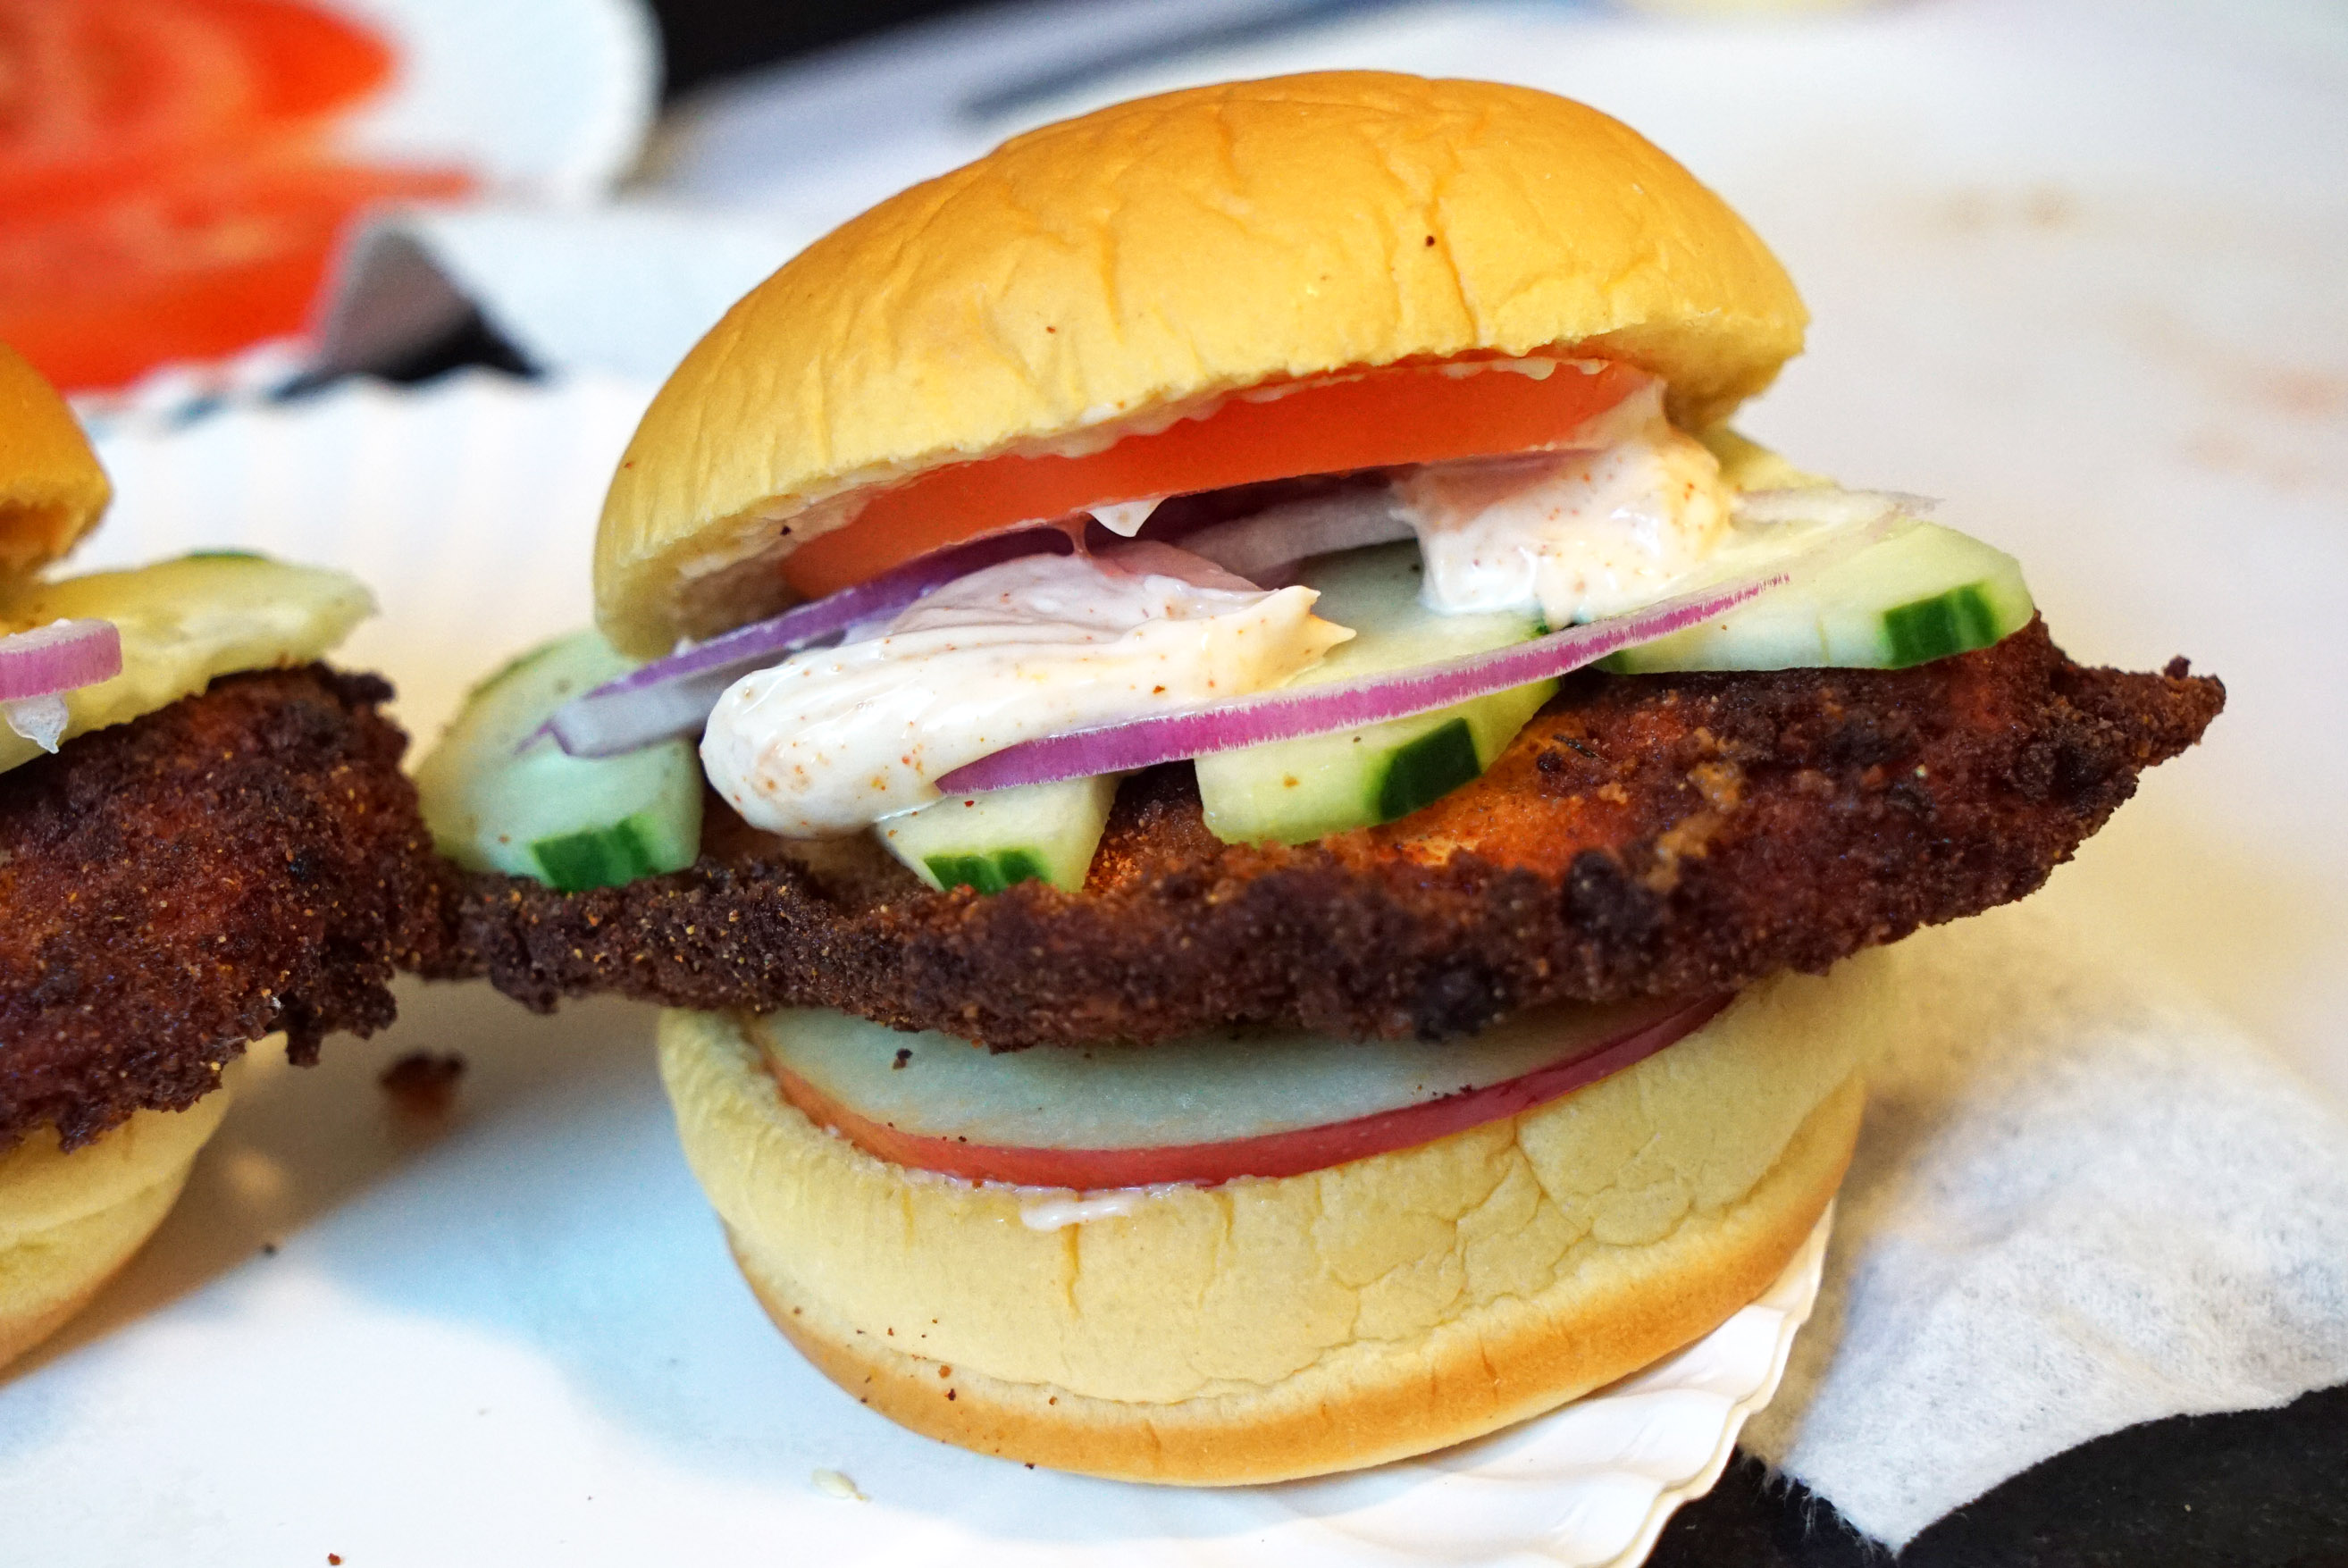
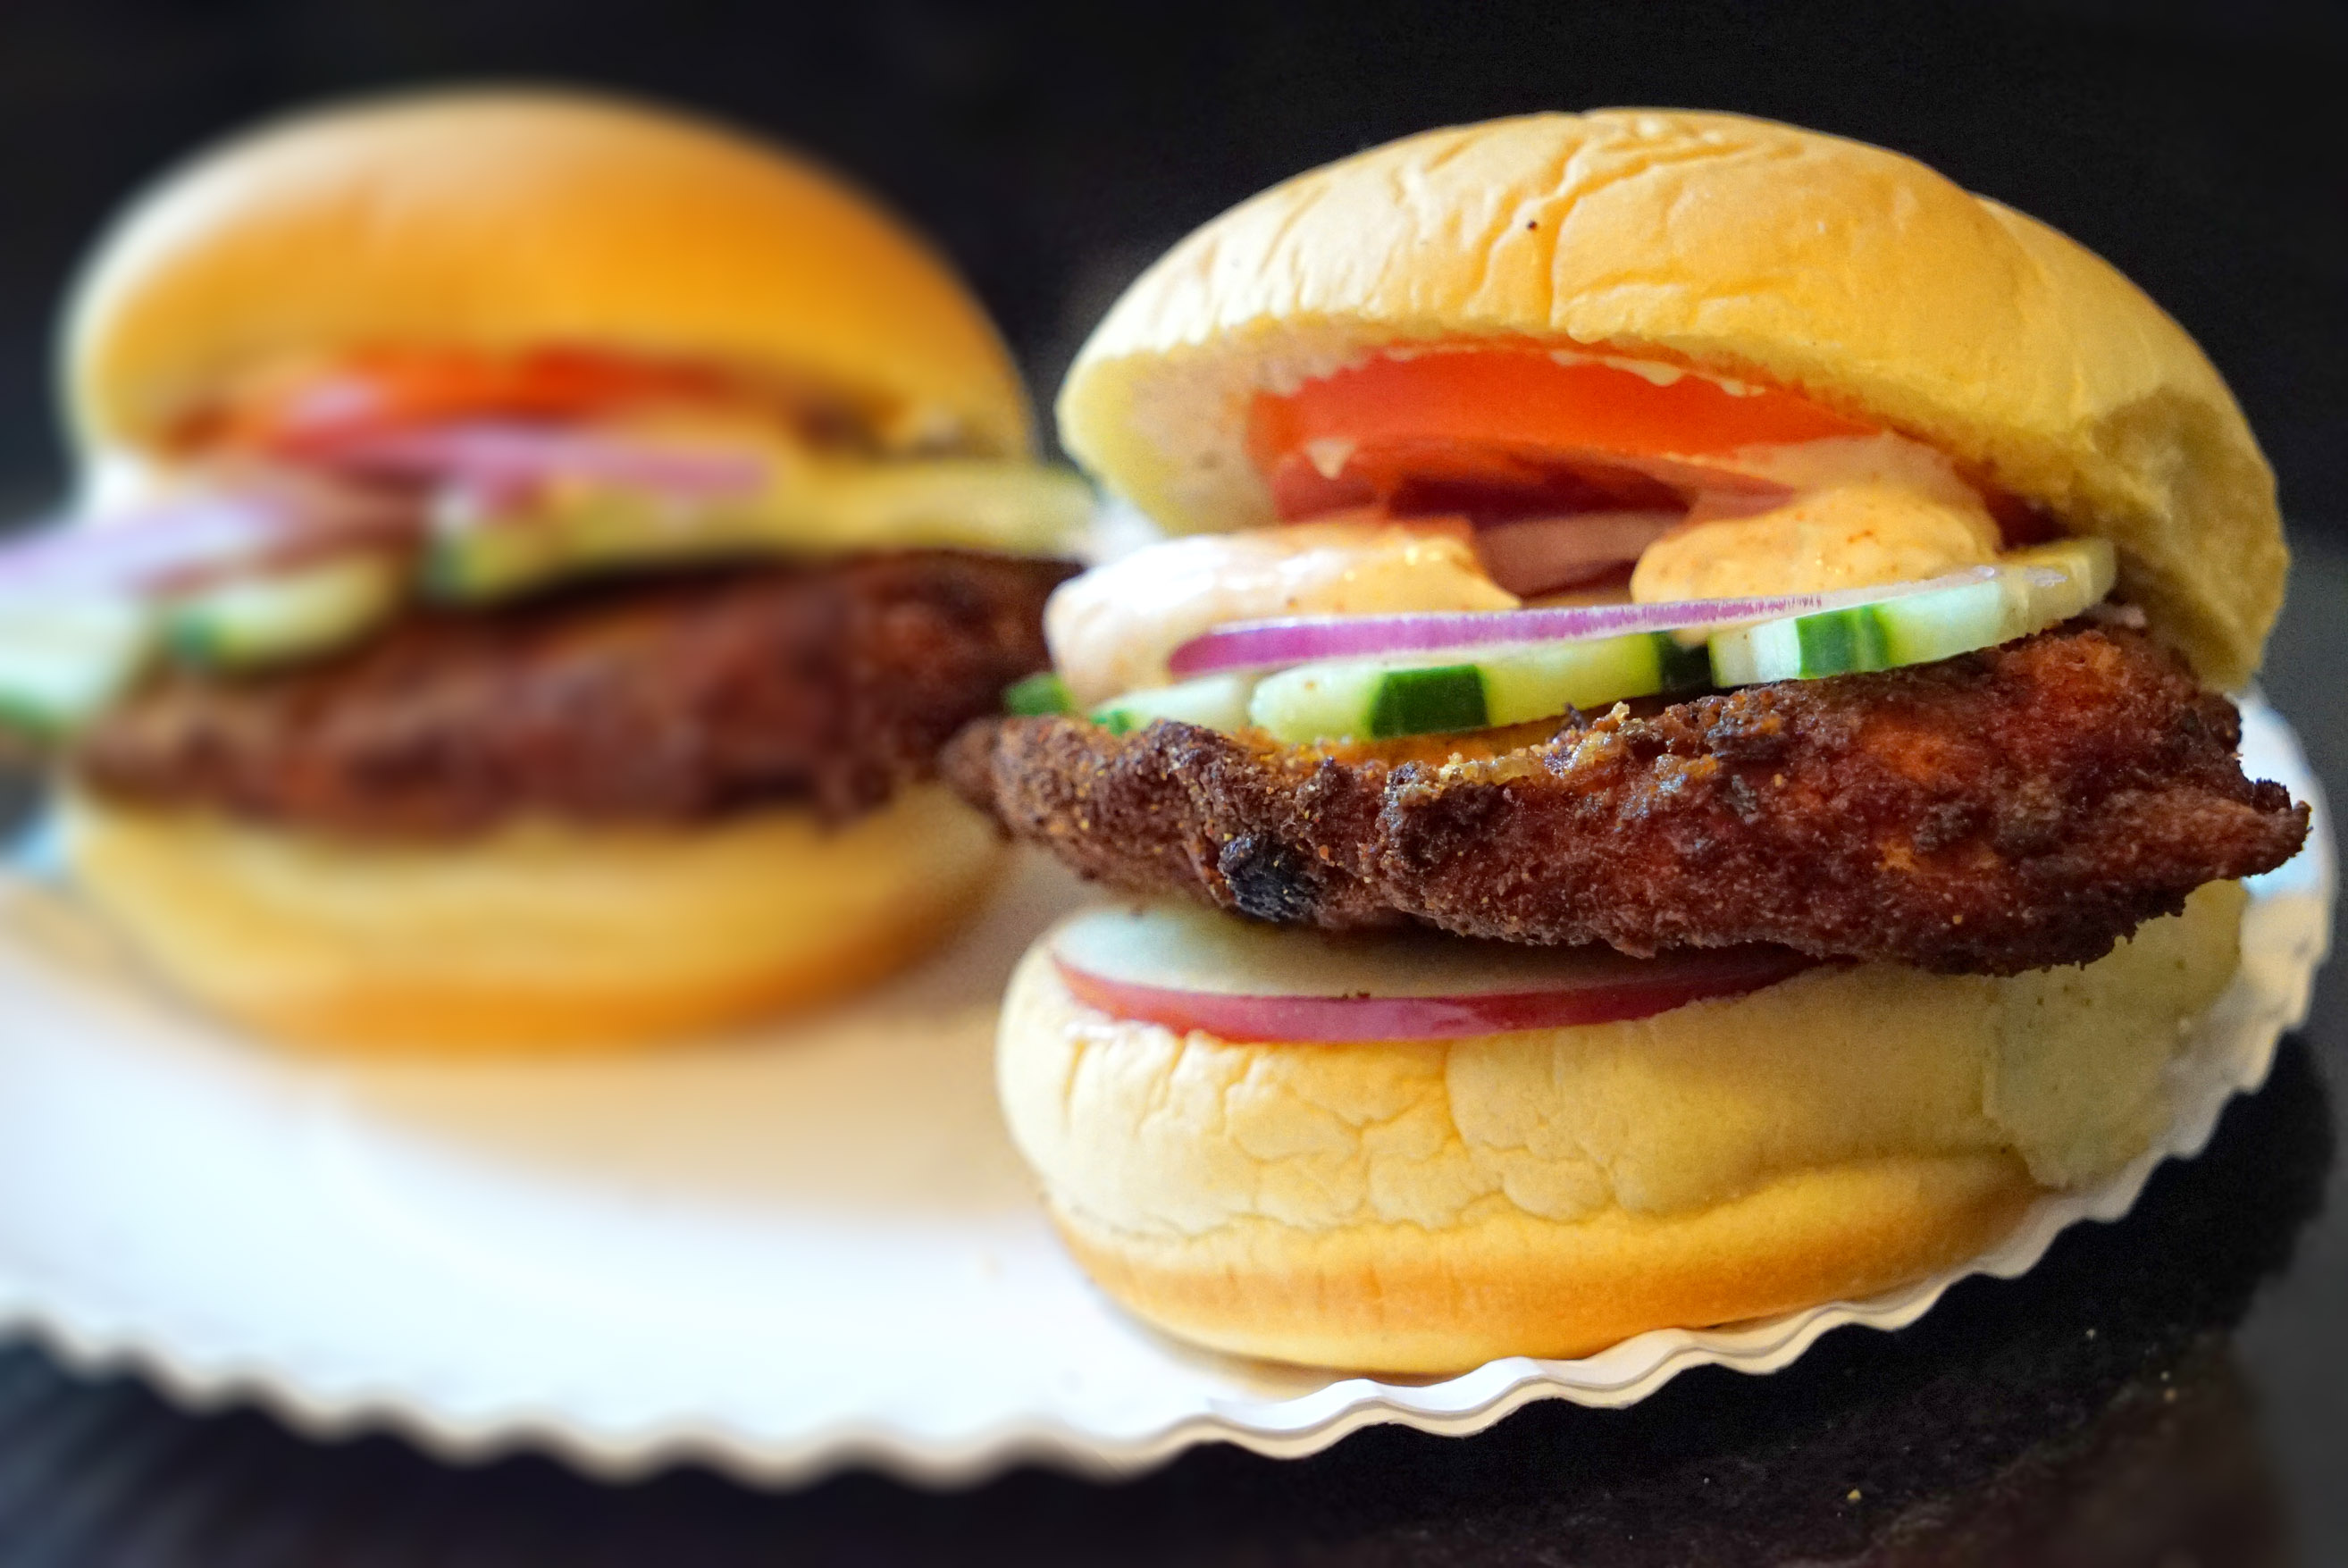
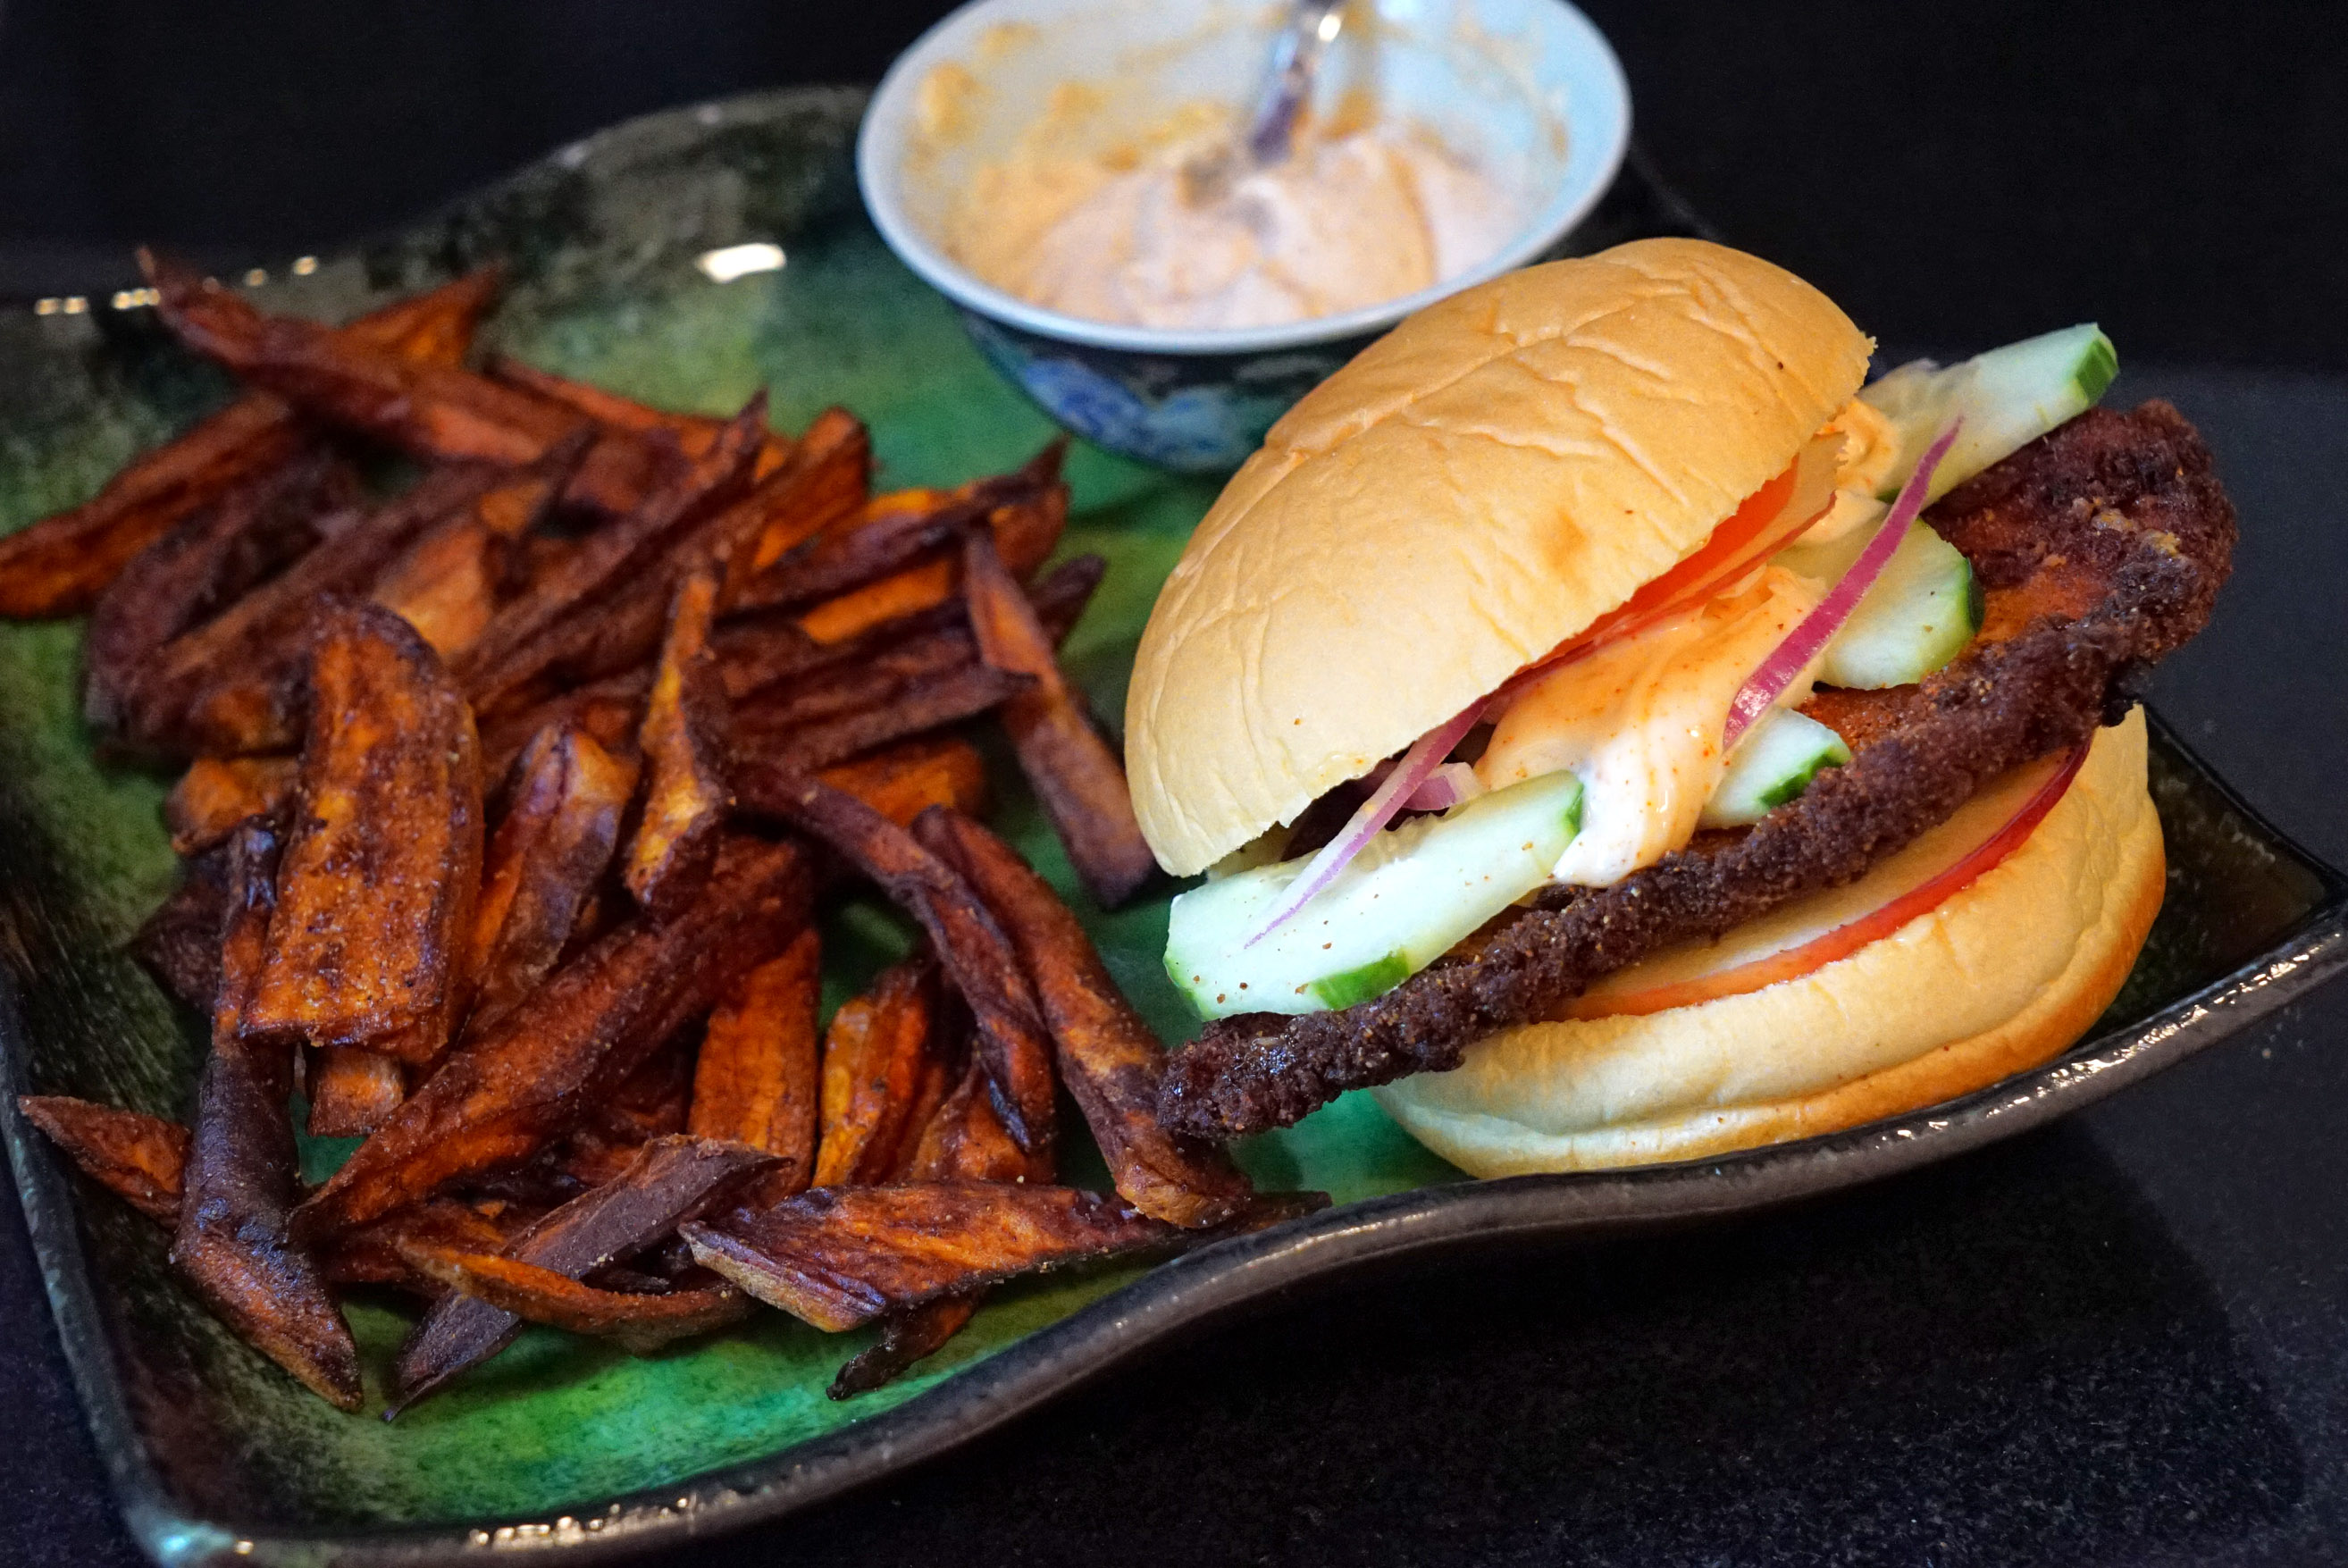
Satan’s Fried Chicken Sandwich is a recipe I concocted for usage of Saint Lucifer Spice during my review of their product. If you can’t get your hands on their delicious shit, then substitute for some other pepper like cayenne powder. But I highly recommend their habanero garlic blend. It just works better.
What do you need, and how do you do it?
1) Grab a pack of thinly sliced chicken breast from the grocery store.
2) Crack a few eggs into a bowl and mix/scramble.
3) Create a breading mixture using a combination of Italian breadcrumbs, panko and a teaspoon of Saint Lucifer Spice.
4) Drag your chicken filets through the egg dredge and batter them with the spicy breadcrumbs.
5) Fry your chicken to golden brown in hot oil.
6) Hit your still-hot chicken with some more Saint Lucifer spice to lock in the seasoning after they come out of the fryer/hot oil.
7) As the chicken cools, quickly prep some lettuce, tomato, onion and sliced apple. Maybe some cooling cucumber as well, if you feel like it. As an alternative, you can do this step before you start cooking, but then the apples may bruise up and oxidize – unless you know to hit them with some lime juice to prevent that brown bullshit from happening.
Note: This step is for adding additional crunch and a little sweet juiciness to cut the spice. If you happen to have coleslaw laying around, you could simply use that. And if buying an apple is too much work for your lazy fucking ass, you can also use the pickles that have been sitting in your fridge, floating around in murky water like a shit that never got flushed.
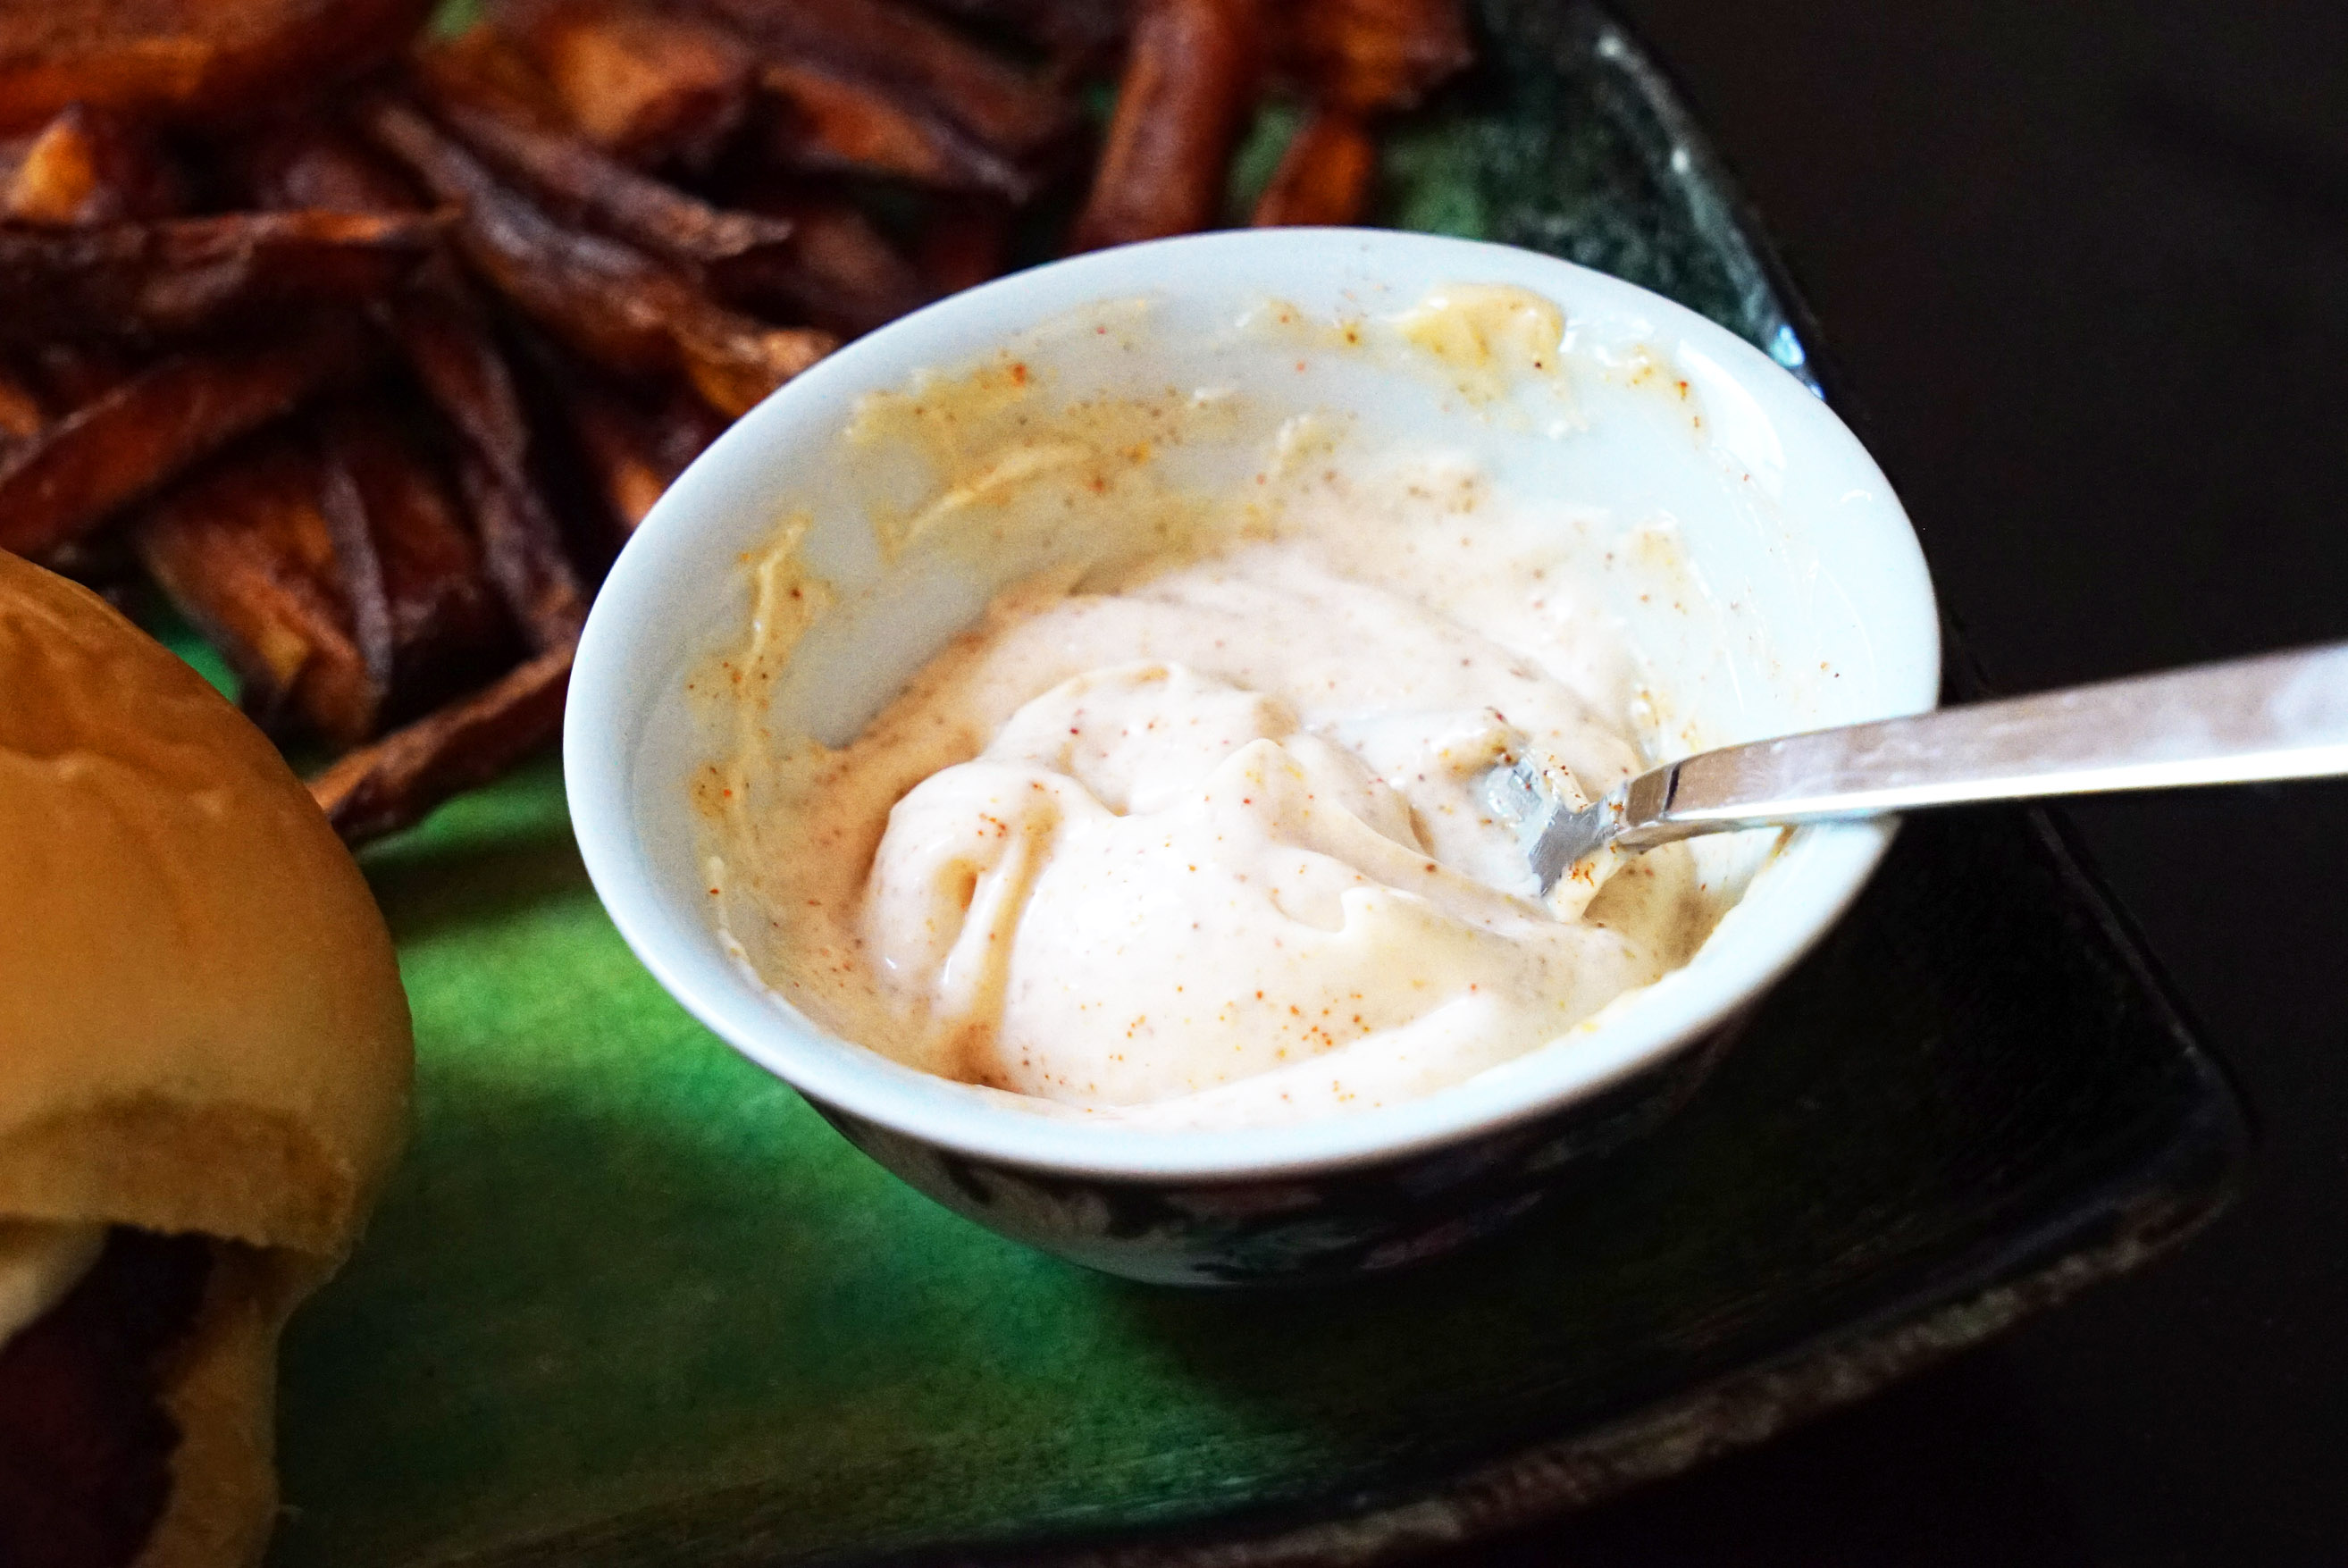
8) Mix a few shakes of Saint Lucifer spice into some mayonnaise.
9) Apply some of that spiced mayonnaise onto each half of a potato bun. A soft, sweet bun is key, like Martin’s or King’s Hawaiian.
10) Assemble sandwich and eat.
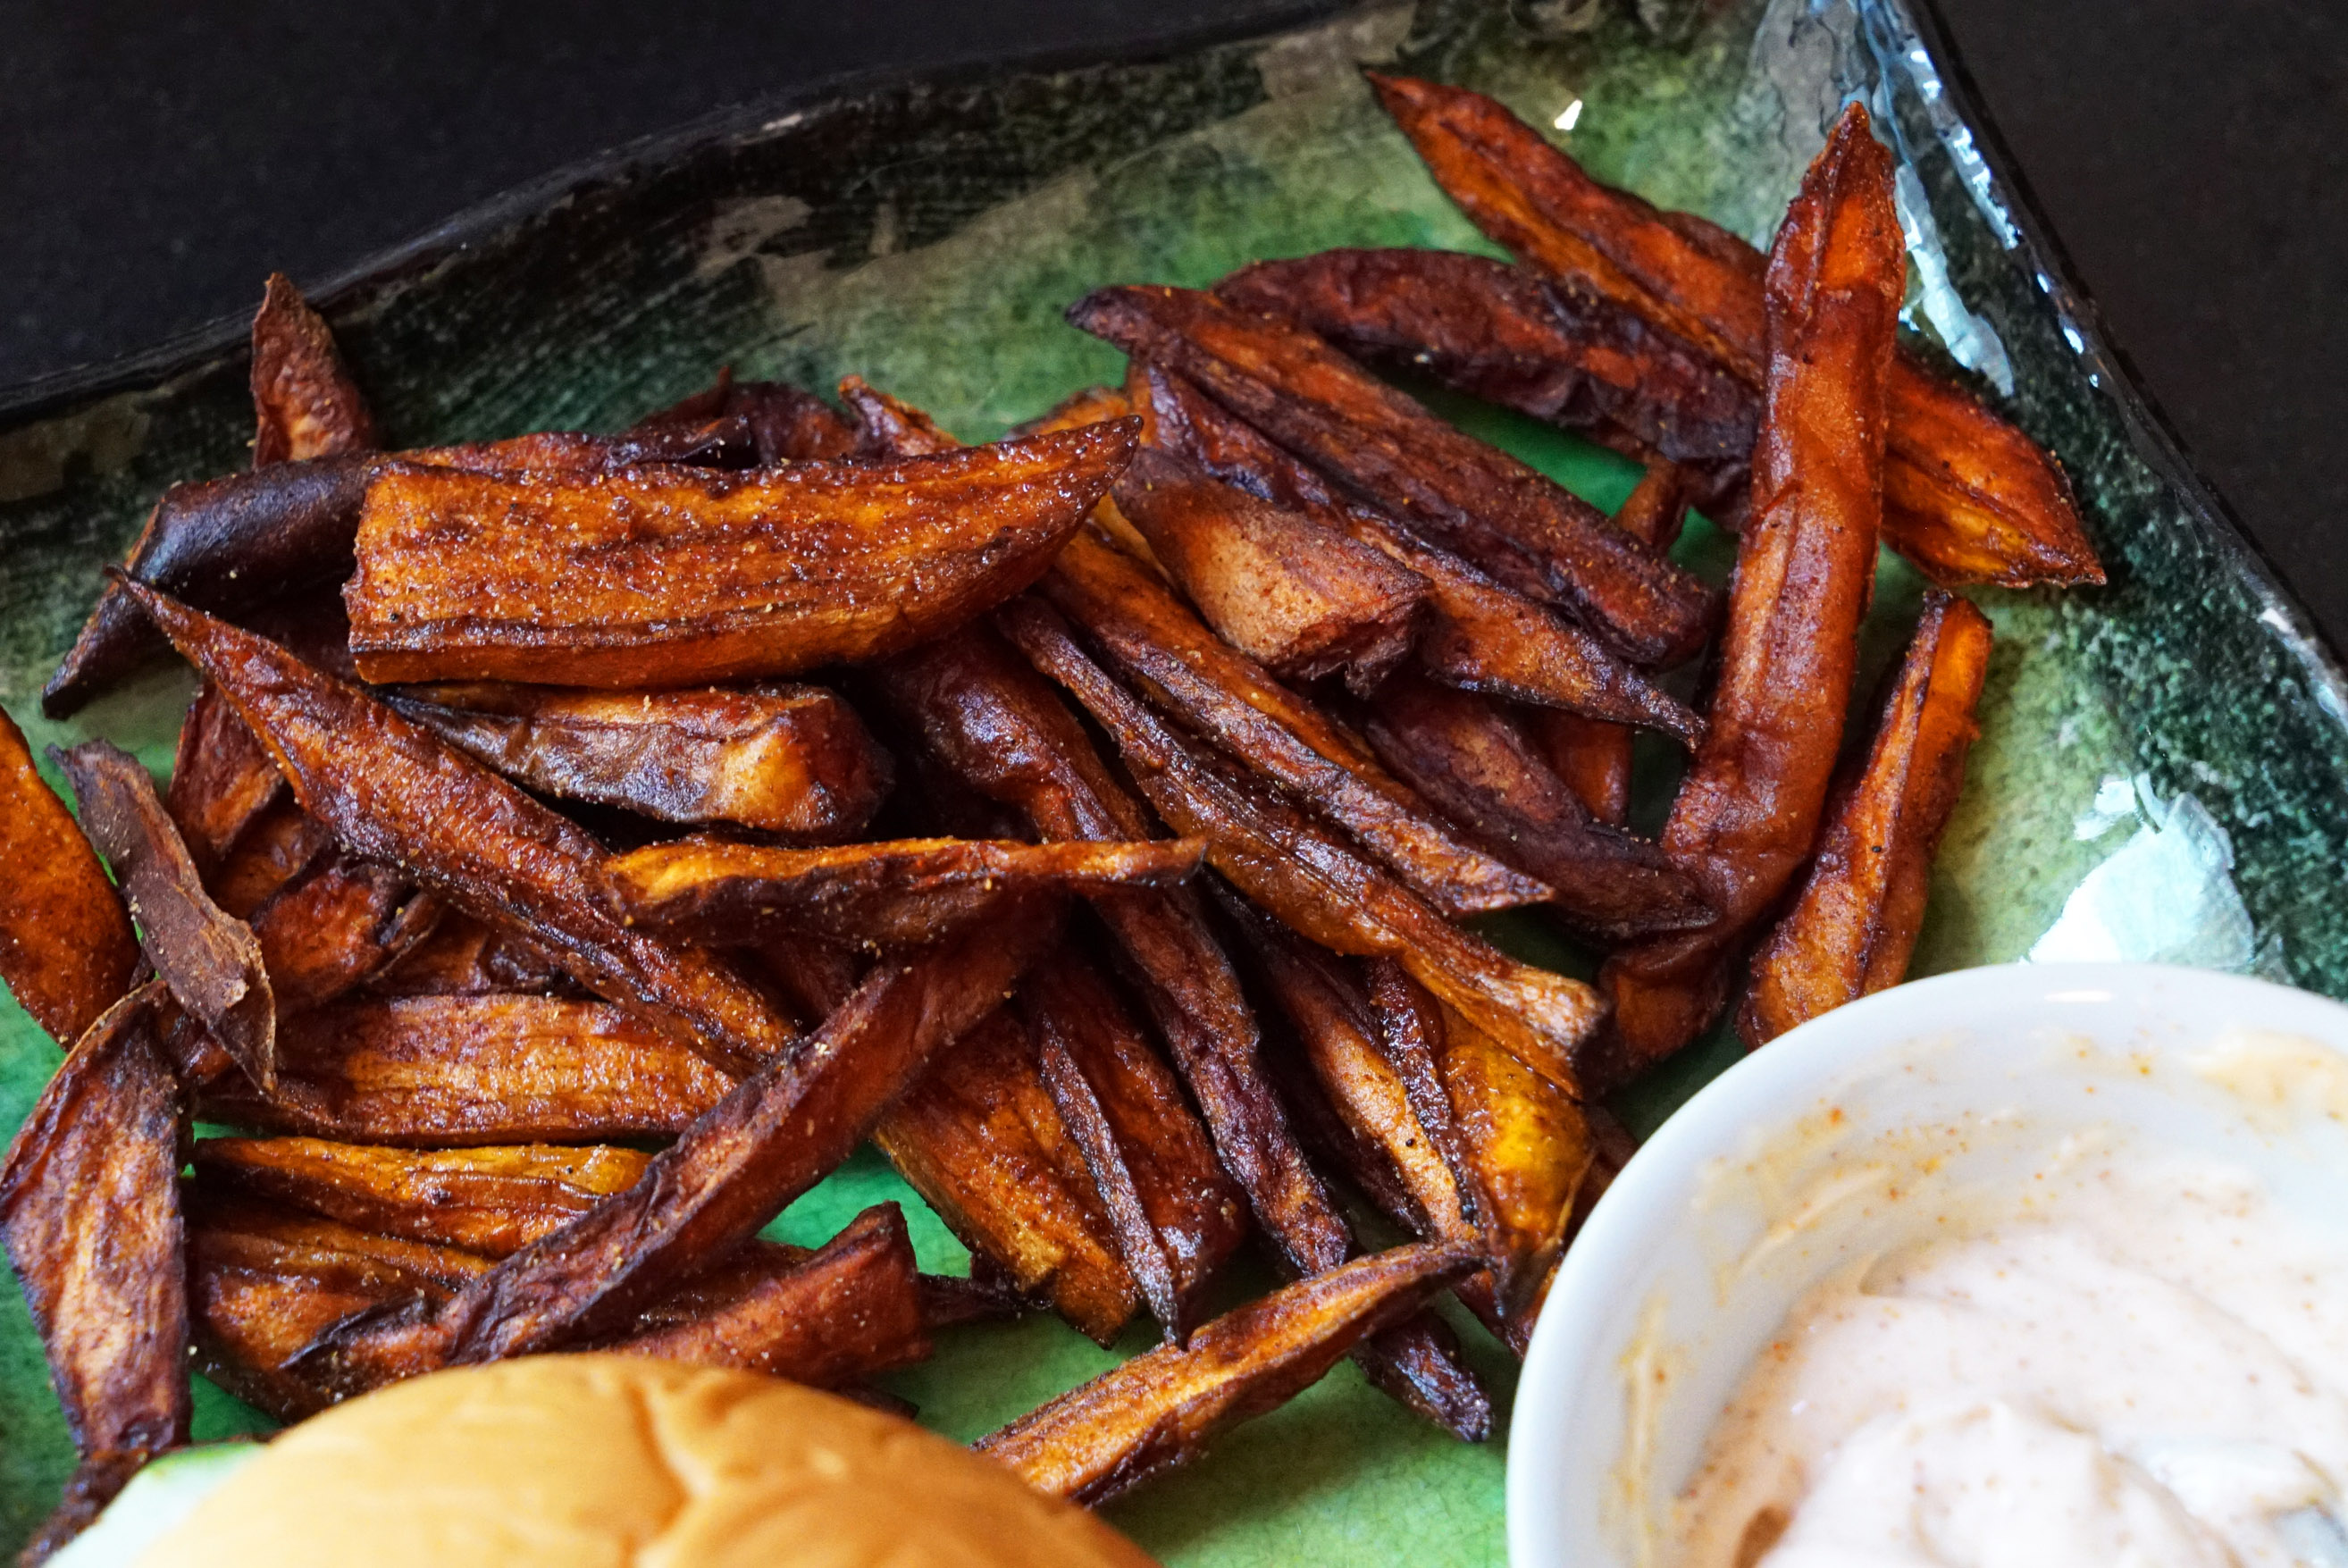
If you’re ambitions, you can make some “conundrum fries” to go with this sandwich on the side: sweet potato french fries spiced with a few shakes of Saint Lucifer, once they come out of the oil. Do it, and then eat them with the remainder of your spicy mayo mixture from above. Why? Because fuck ketchup, that’s why.
My brother in-law inadvertently invented one of the greatest drinks ever described to me. One night he made himself a margarita or two. After drinking, there were still some tasty, salty, boozy ice cubes left in his glass that he didn’t want to go to waste. So he decided to throw a shot of tequila into that bitch. Then he cracked open a beer and poured that into the glass (perhaps it was a Corona?), and followed it up with some agave syrup. Why toss out those delicious margarita ice cubes when you can have one last drink with them? We were mulling over a name for this genius cocktail at Easter dinner when it hit me like a bolt of lightning…
This is a really fucking simple drink recipe that packs a lot of flavor. I call it “The Smoky Mountain Beehive” for a few reasons. It is “smoky” from the peaty scotch. It is “Smoky Mountain” because of the Tennessee whiskey aspect. And bee-cause of the honey flavor, I went with beehive. See below:
1 part Laphroaig (or any other equally peaty scotch)
1 part Jack Daniels Tennessee Honey whiskey (or you can double the Laphroaig and add some straight honey into the mix)
1 part orange liqueur
1 part orange juice
1 part seltzer
Pour contents over ice into a shaker. Shake the fuck out of it. Pour contents of shaker into a lowball and drink up. I like this with rocks, and it can be garnished with an orange peel or some other bullshit.
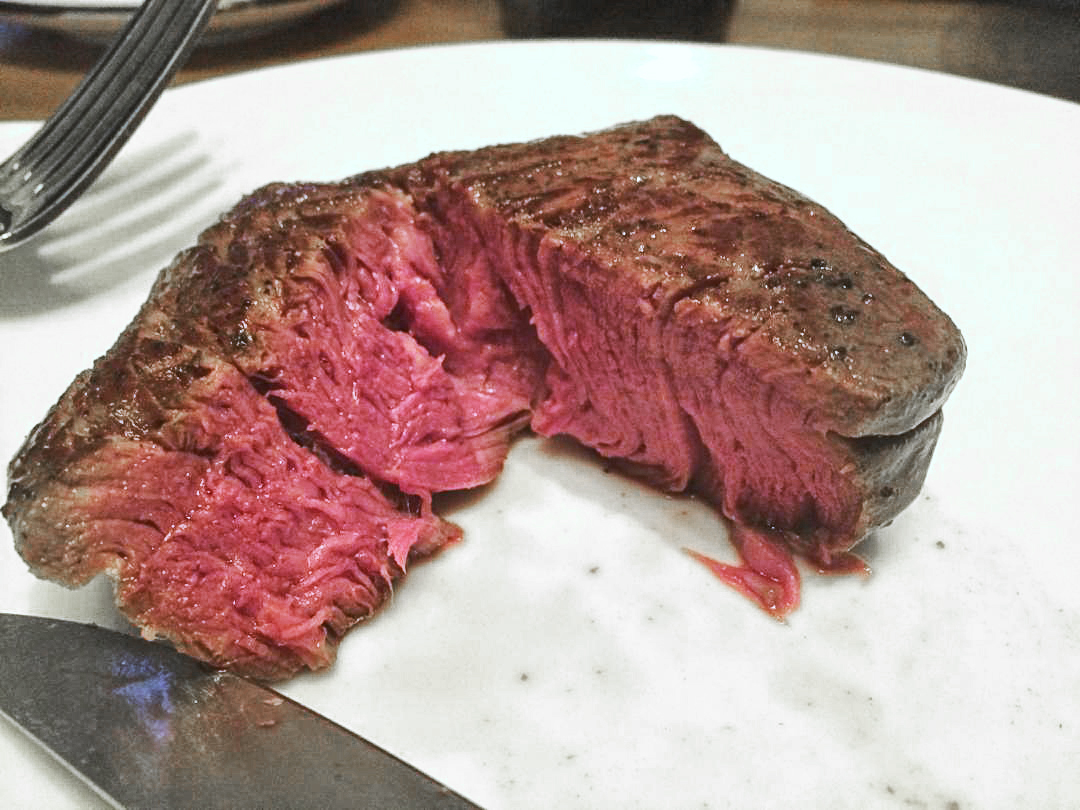
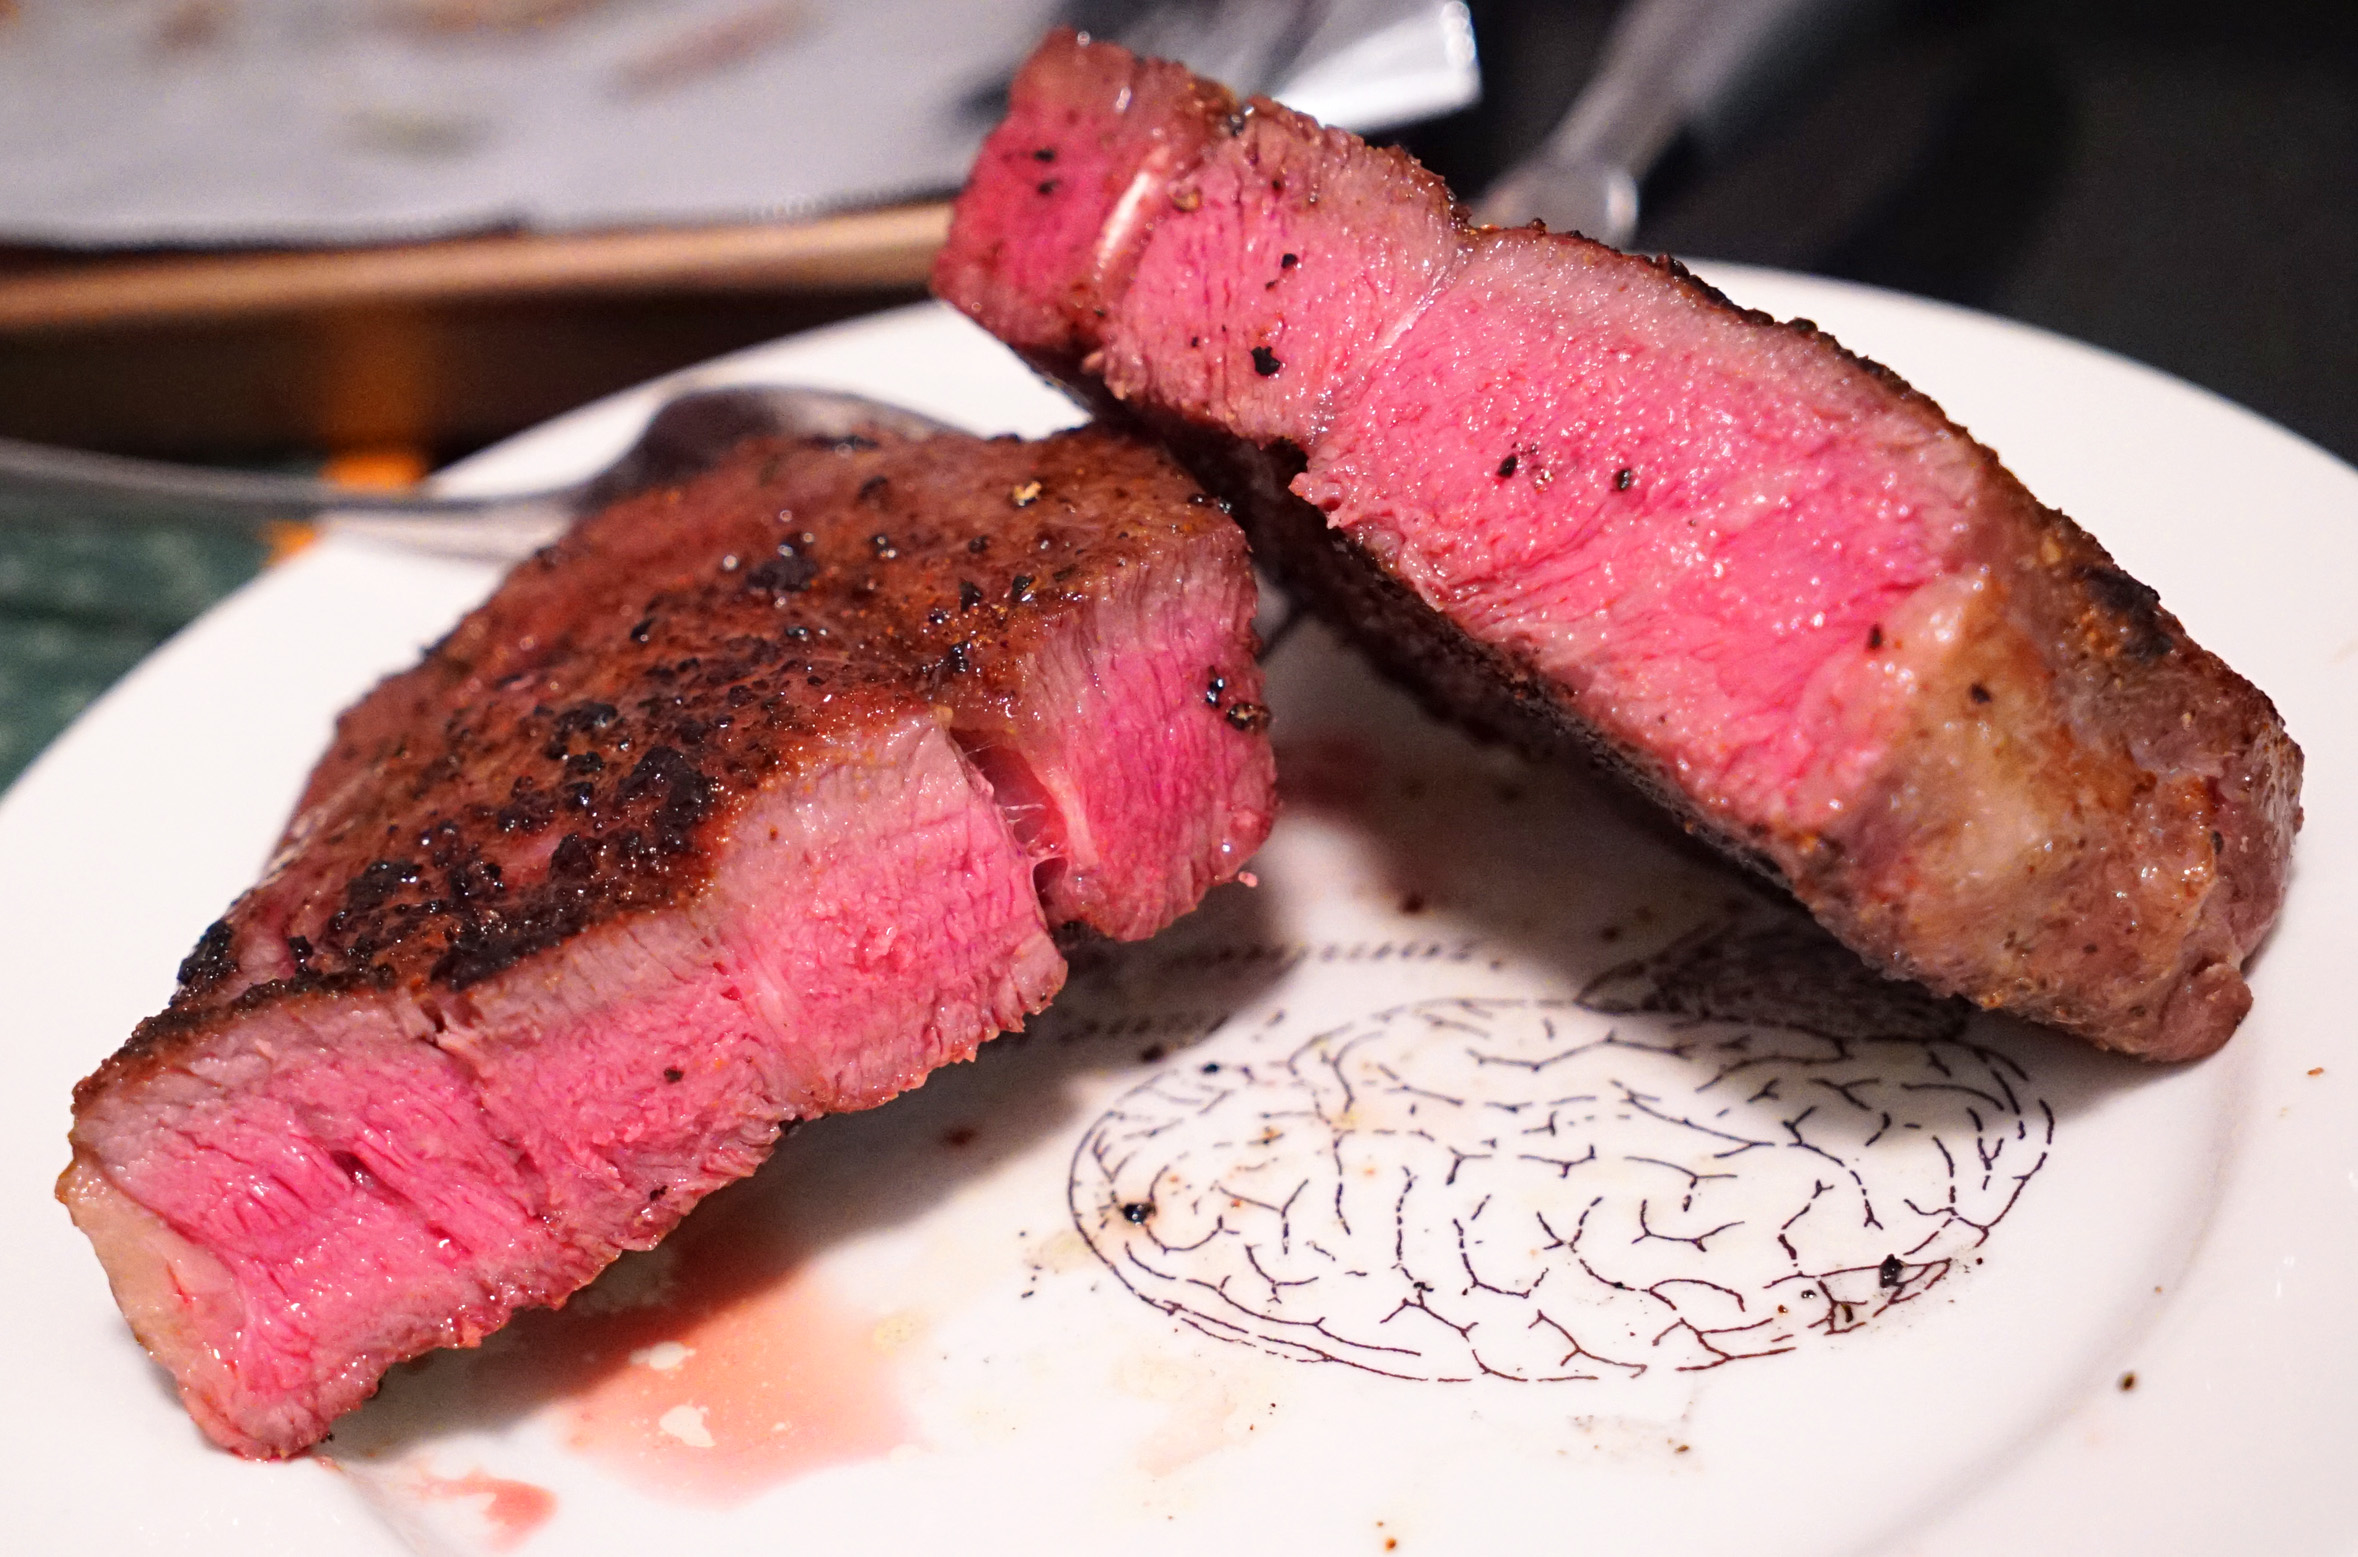
This is one of the simplest things to make, now that I have a sous vide machine at home. I honestly don’t think I will ever order a filet mignon out at a restaurant ever again, because this shit comes out so fucking perfect at home.
The only catch here: you need a sous vide machine (the vacuum sealer and Searzall are optional). They can be pricey, but if you have the balls, you can make one yourself like a real man (or have your cousin make you one, like I did) for a quarter of the cost of a store-bought machine.
Step 1: Buy filets
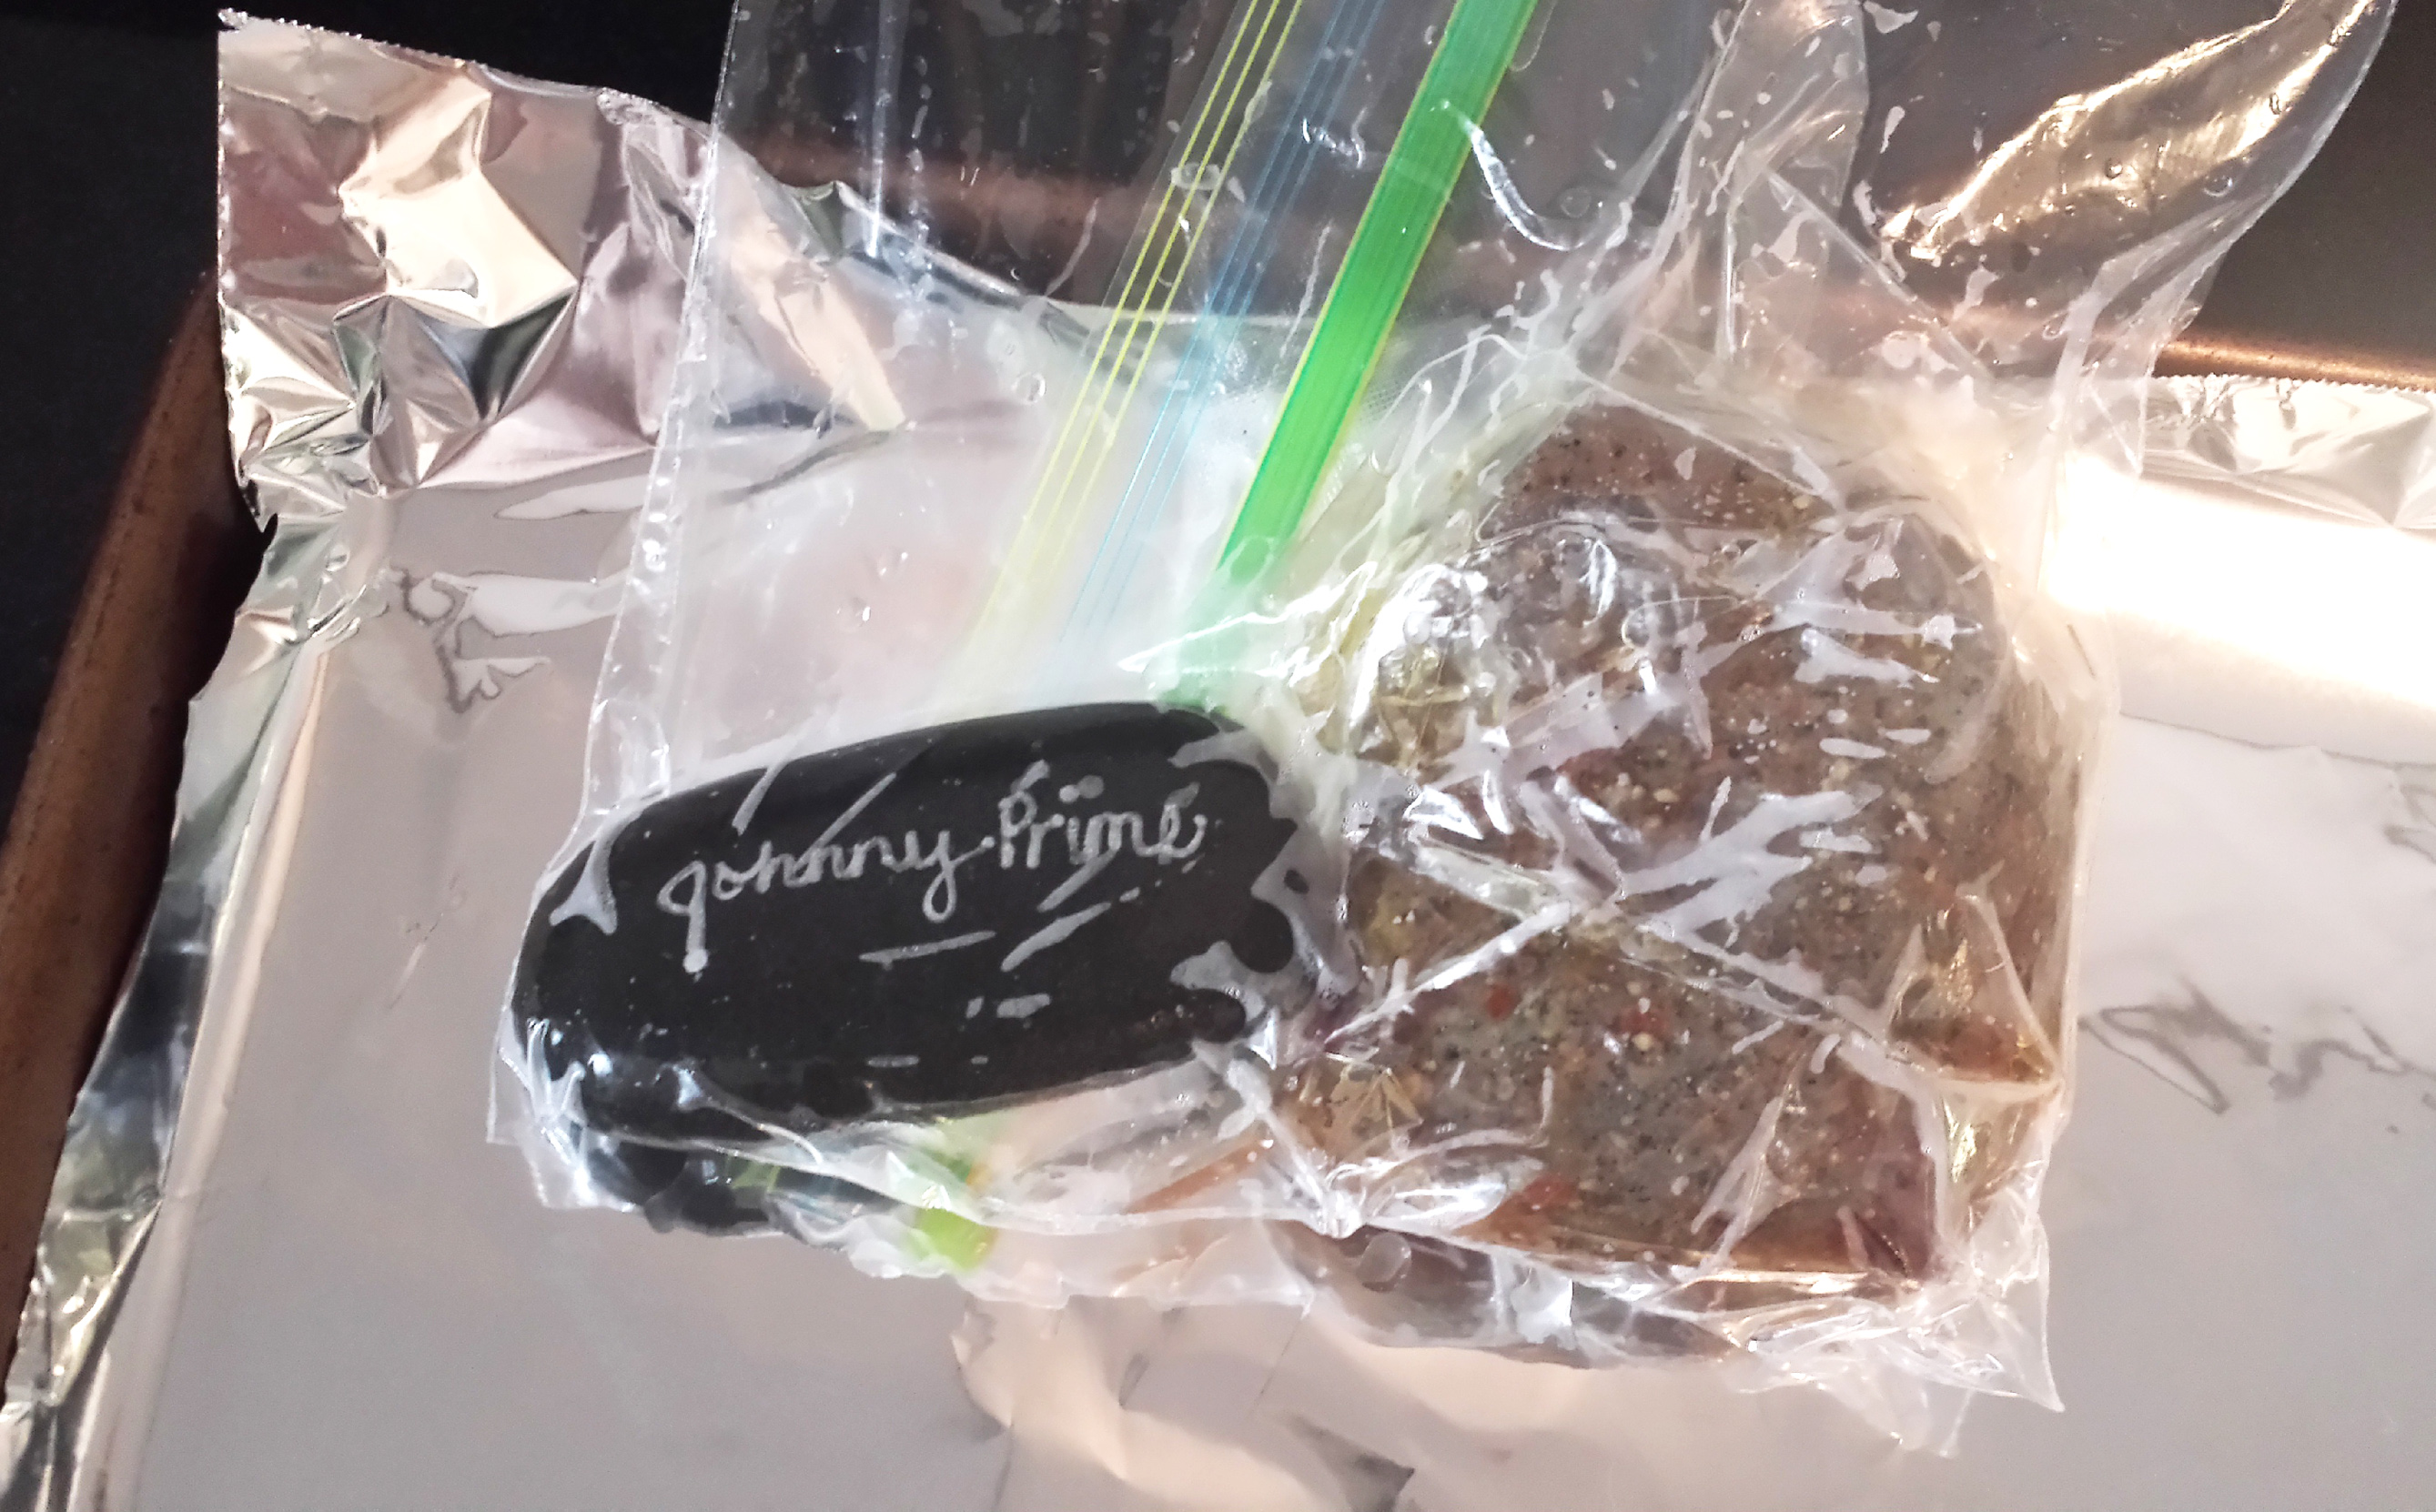
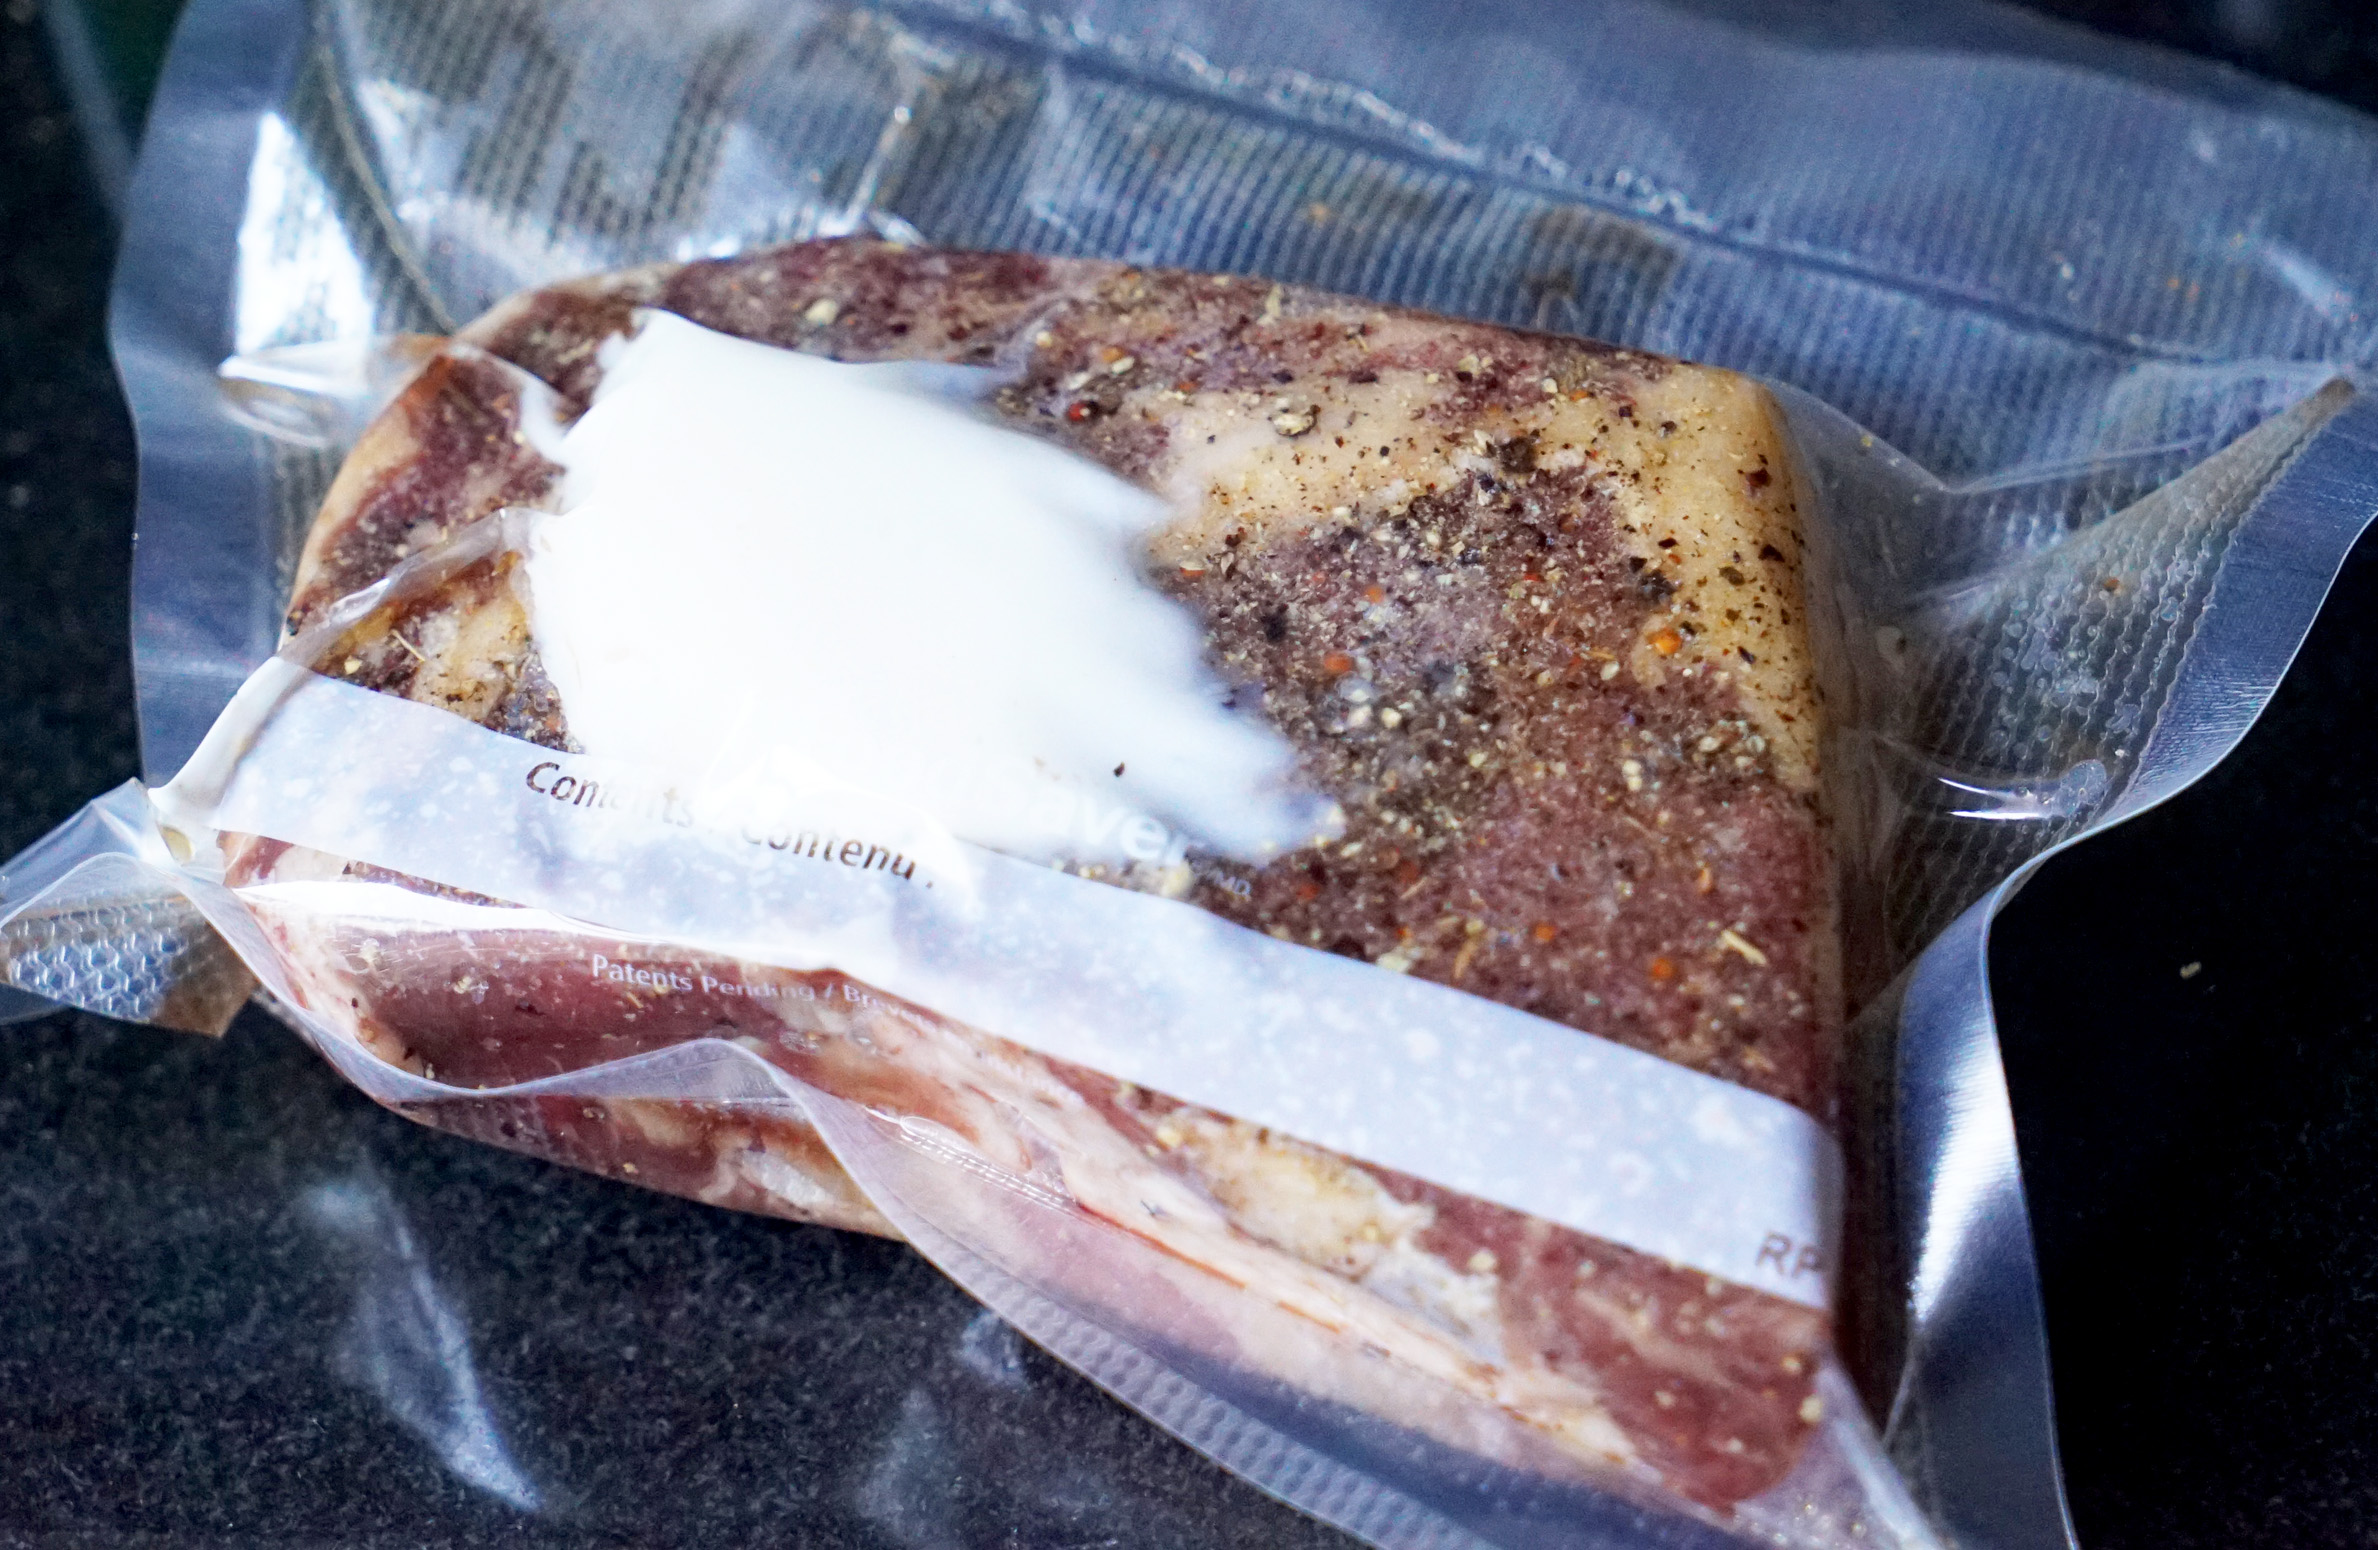
Step 2: Season filets however the fuck you want. I used salt, pepper, garlic powder, garlic oil and crushed red pepper.
Step 3: Place filets into vacuum seal bag and seal it the fuck up, with some butter and herbs inside (thyme and rosemary are always nice).
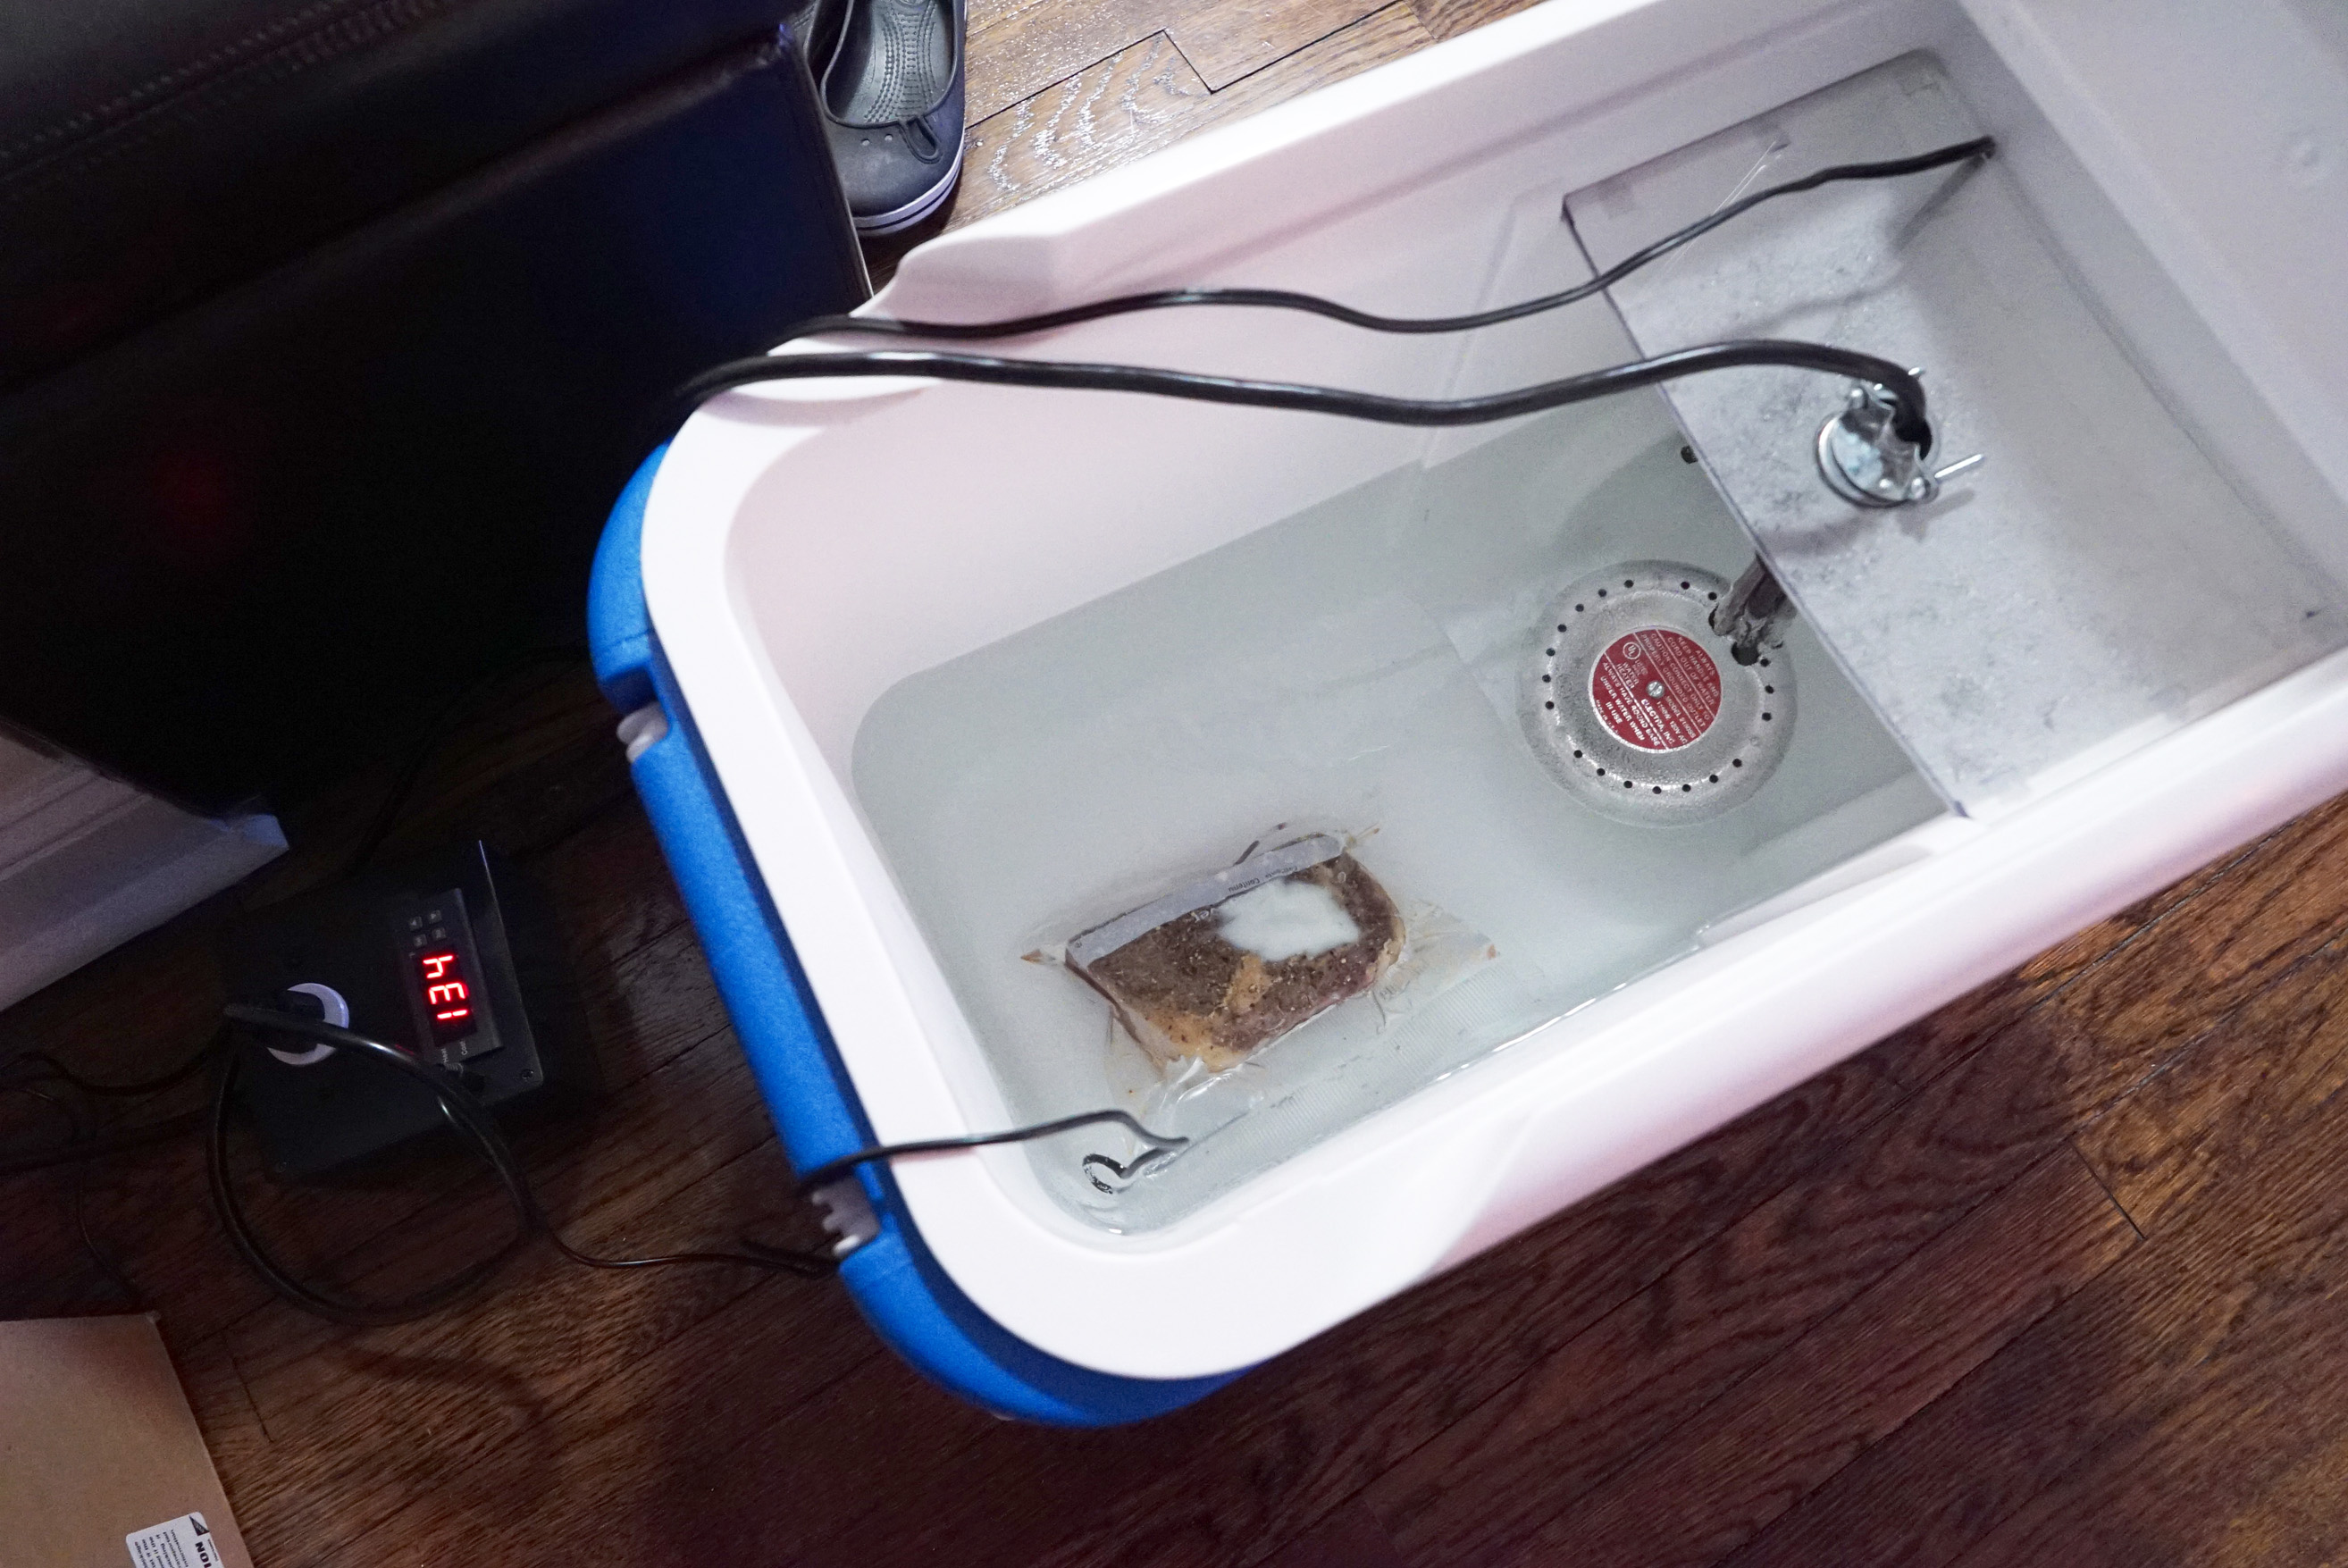
If you’re a poor bastard and can’t afford a vacuum sealer, you can use ziplock bags. Place your meat into the bag and begin to submerge the bag into the water bath. Once you are all the way close to the zipper, zip it shut. The water surrounding the outside of the bag will push out all the air from inside – poor man’s vacuum sealer. If you do this, you may want to put a smooth, clean rock in there too, just for good measure, to keep the meat from floating.
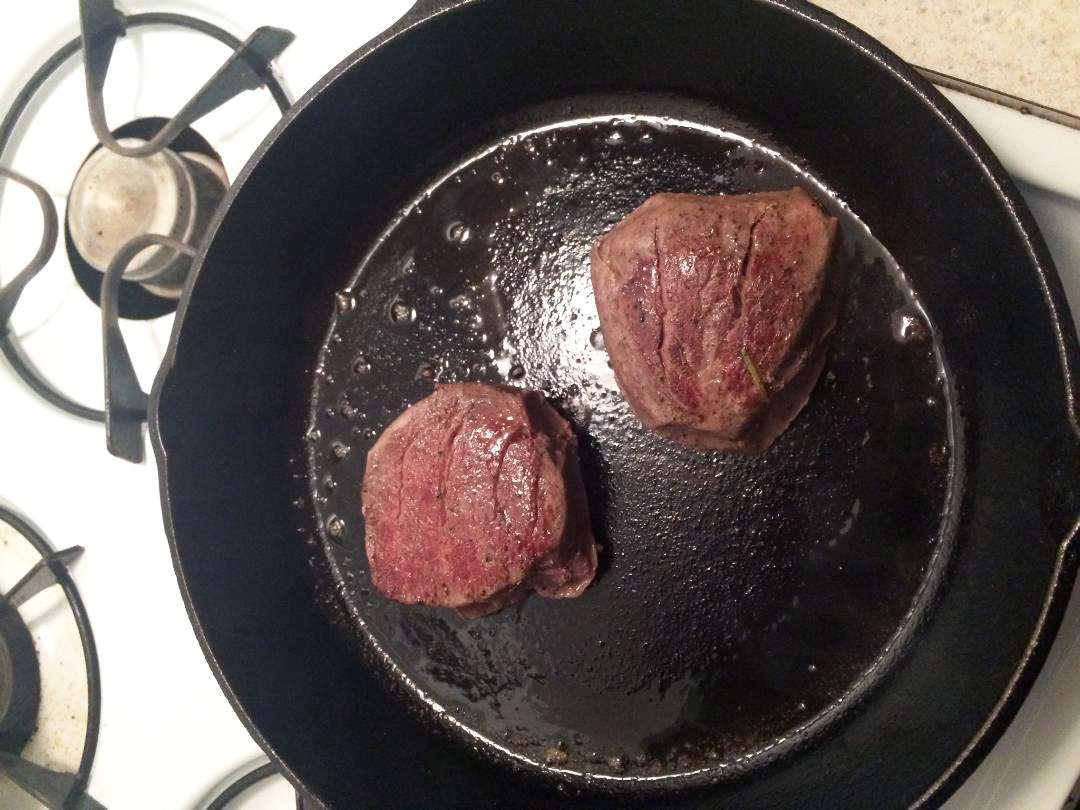
Step 4: Set your temperature to however the fuck you like your steak cooked. I put mine at 138º F for a nice medium rare / medium. I’m dealing with grocery store meat here, people. Don’t give me any bullshit about that being too well done.
Step 5: Wait. About an hour or two. Don’t panic, assholes! You can’t overcook your steak in a sous vide bath. That’s the whole point of it!
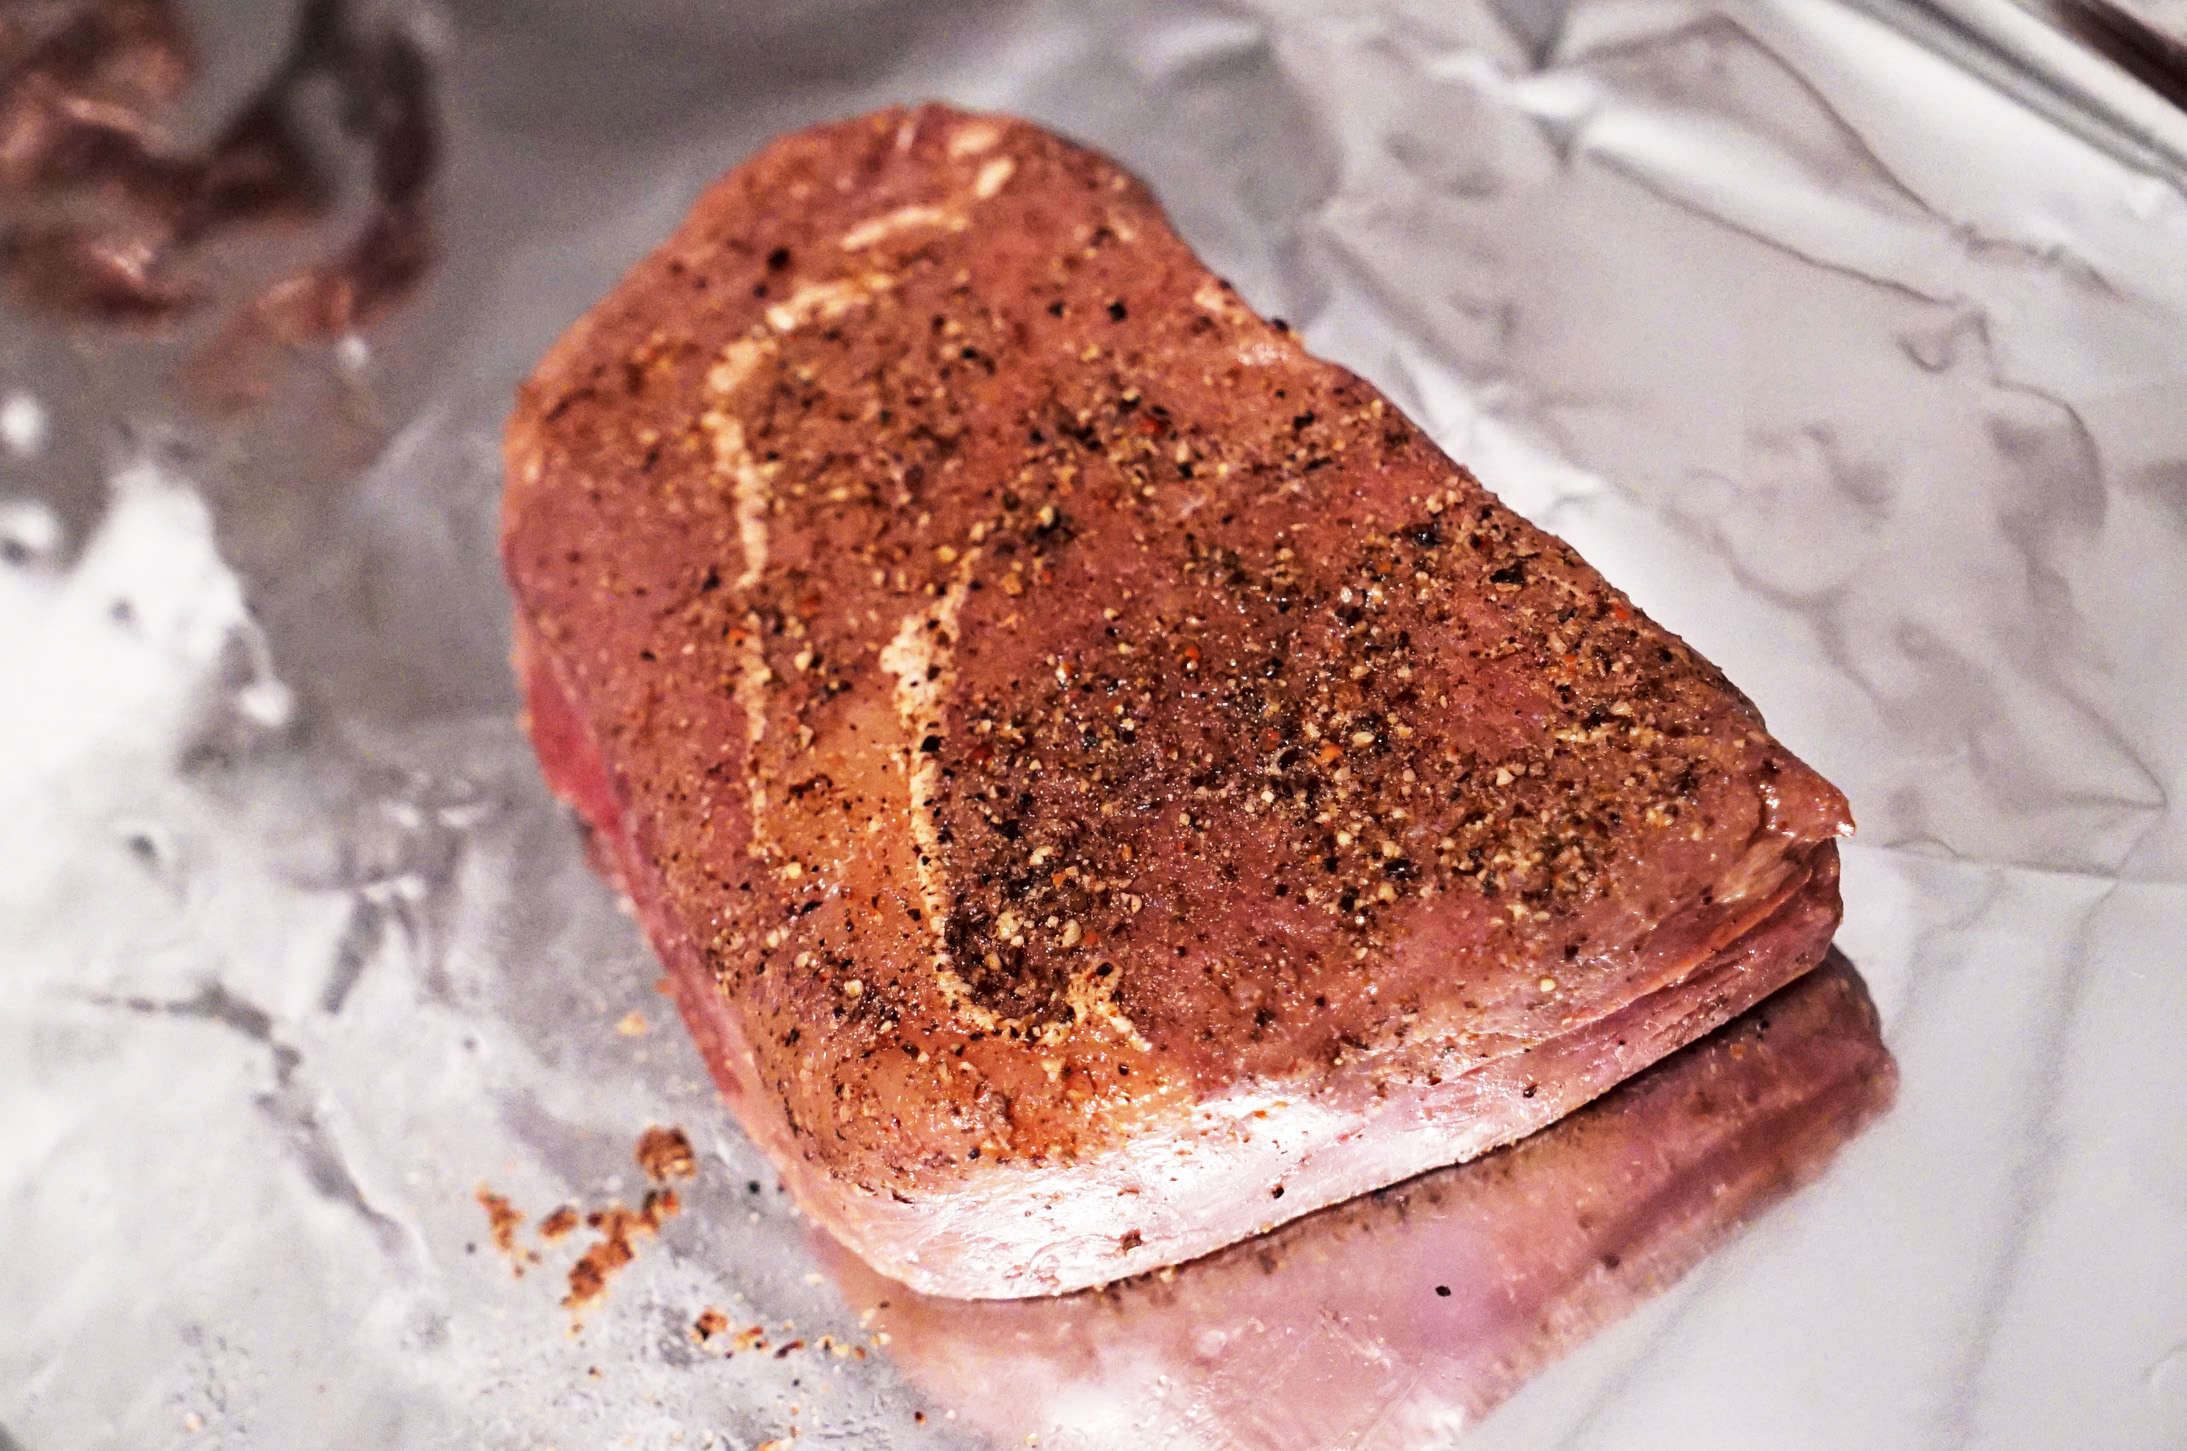
Step 6: Remove your steak from the water bath and re-season it a bit, if so desired.
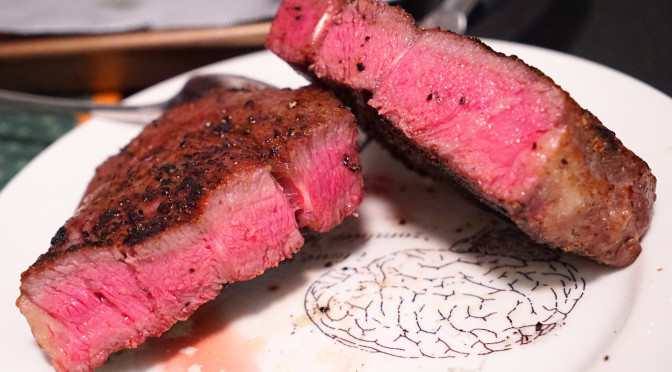
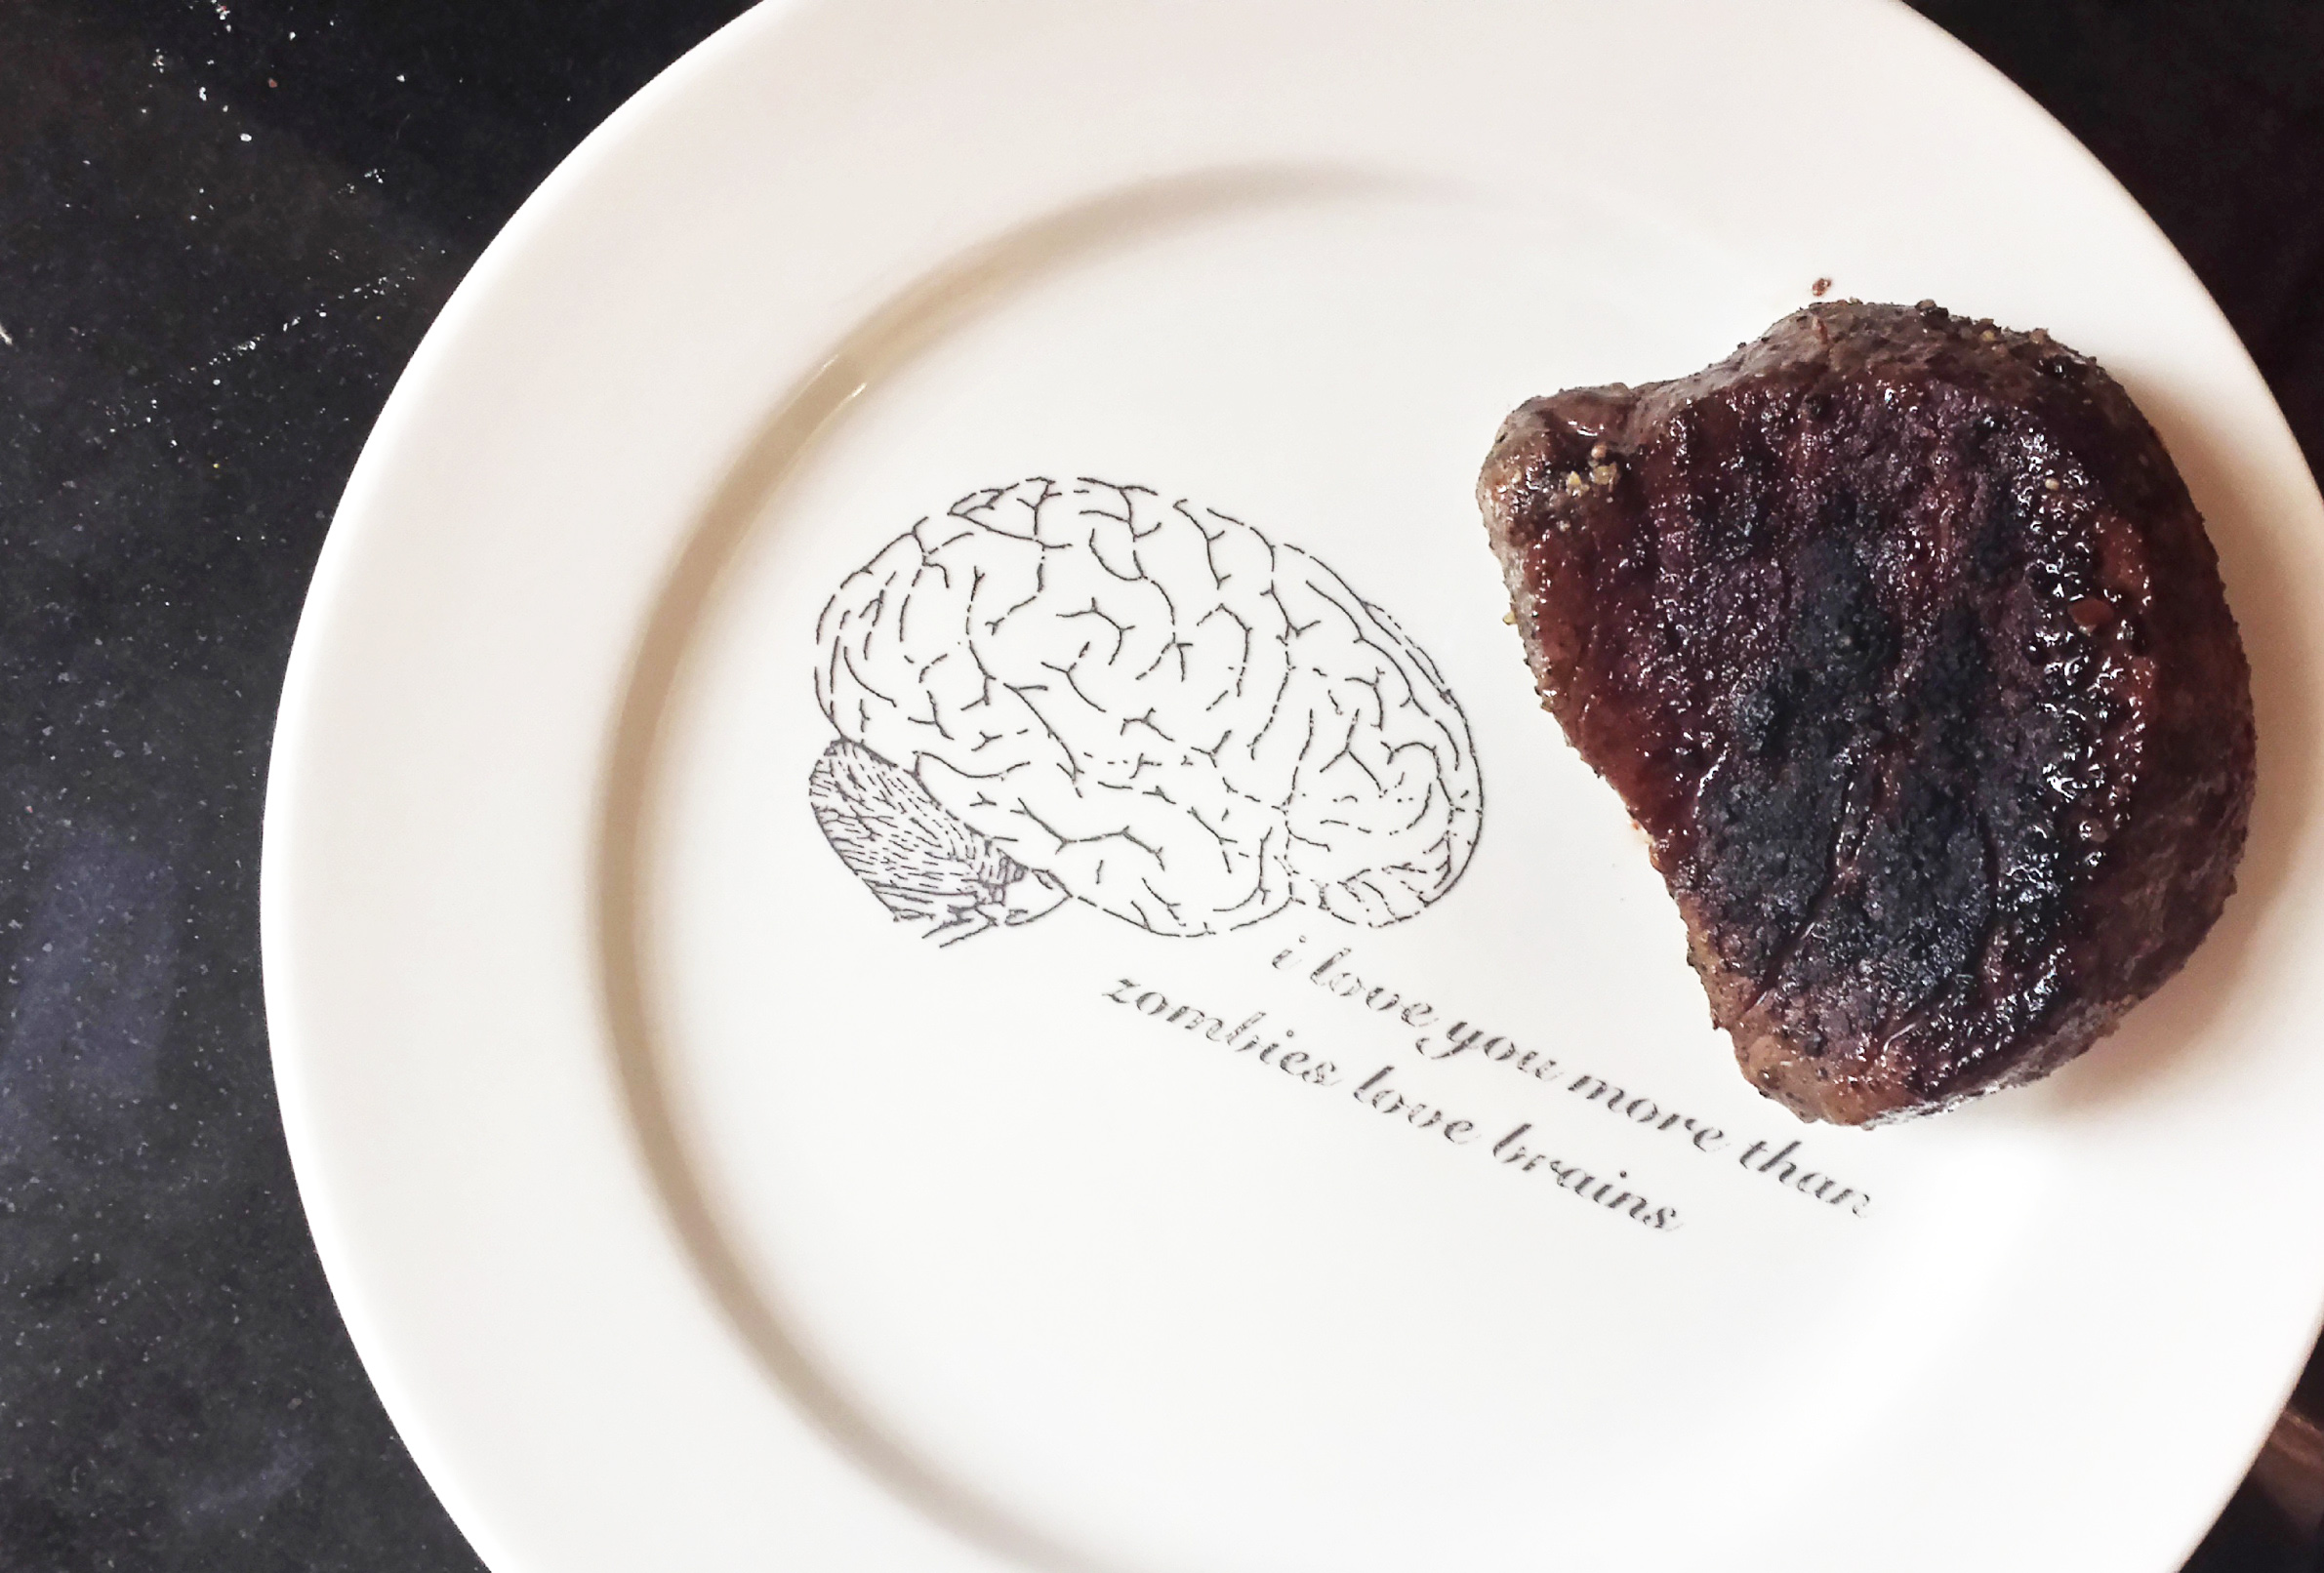
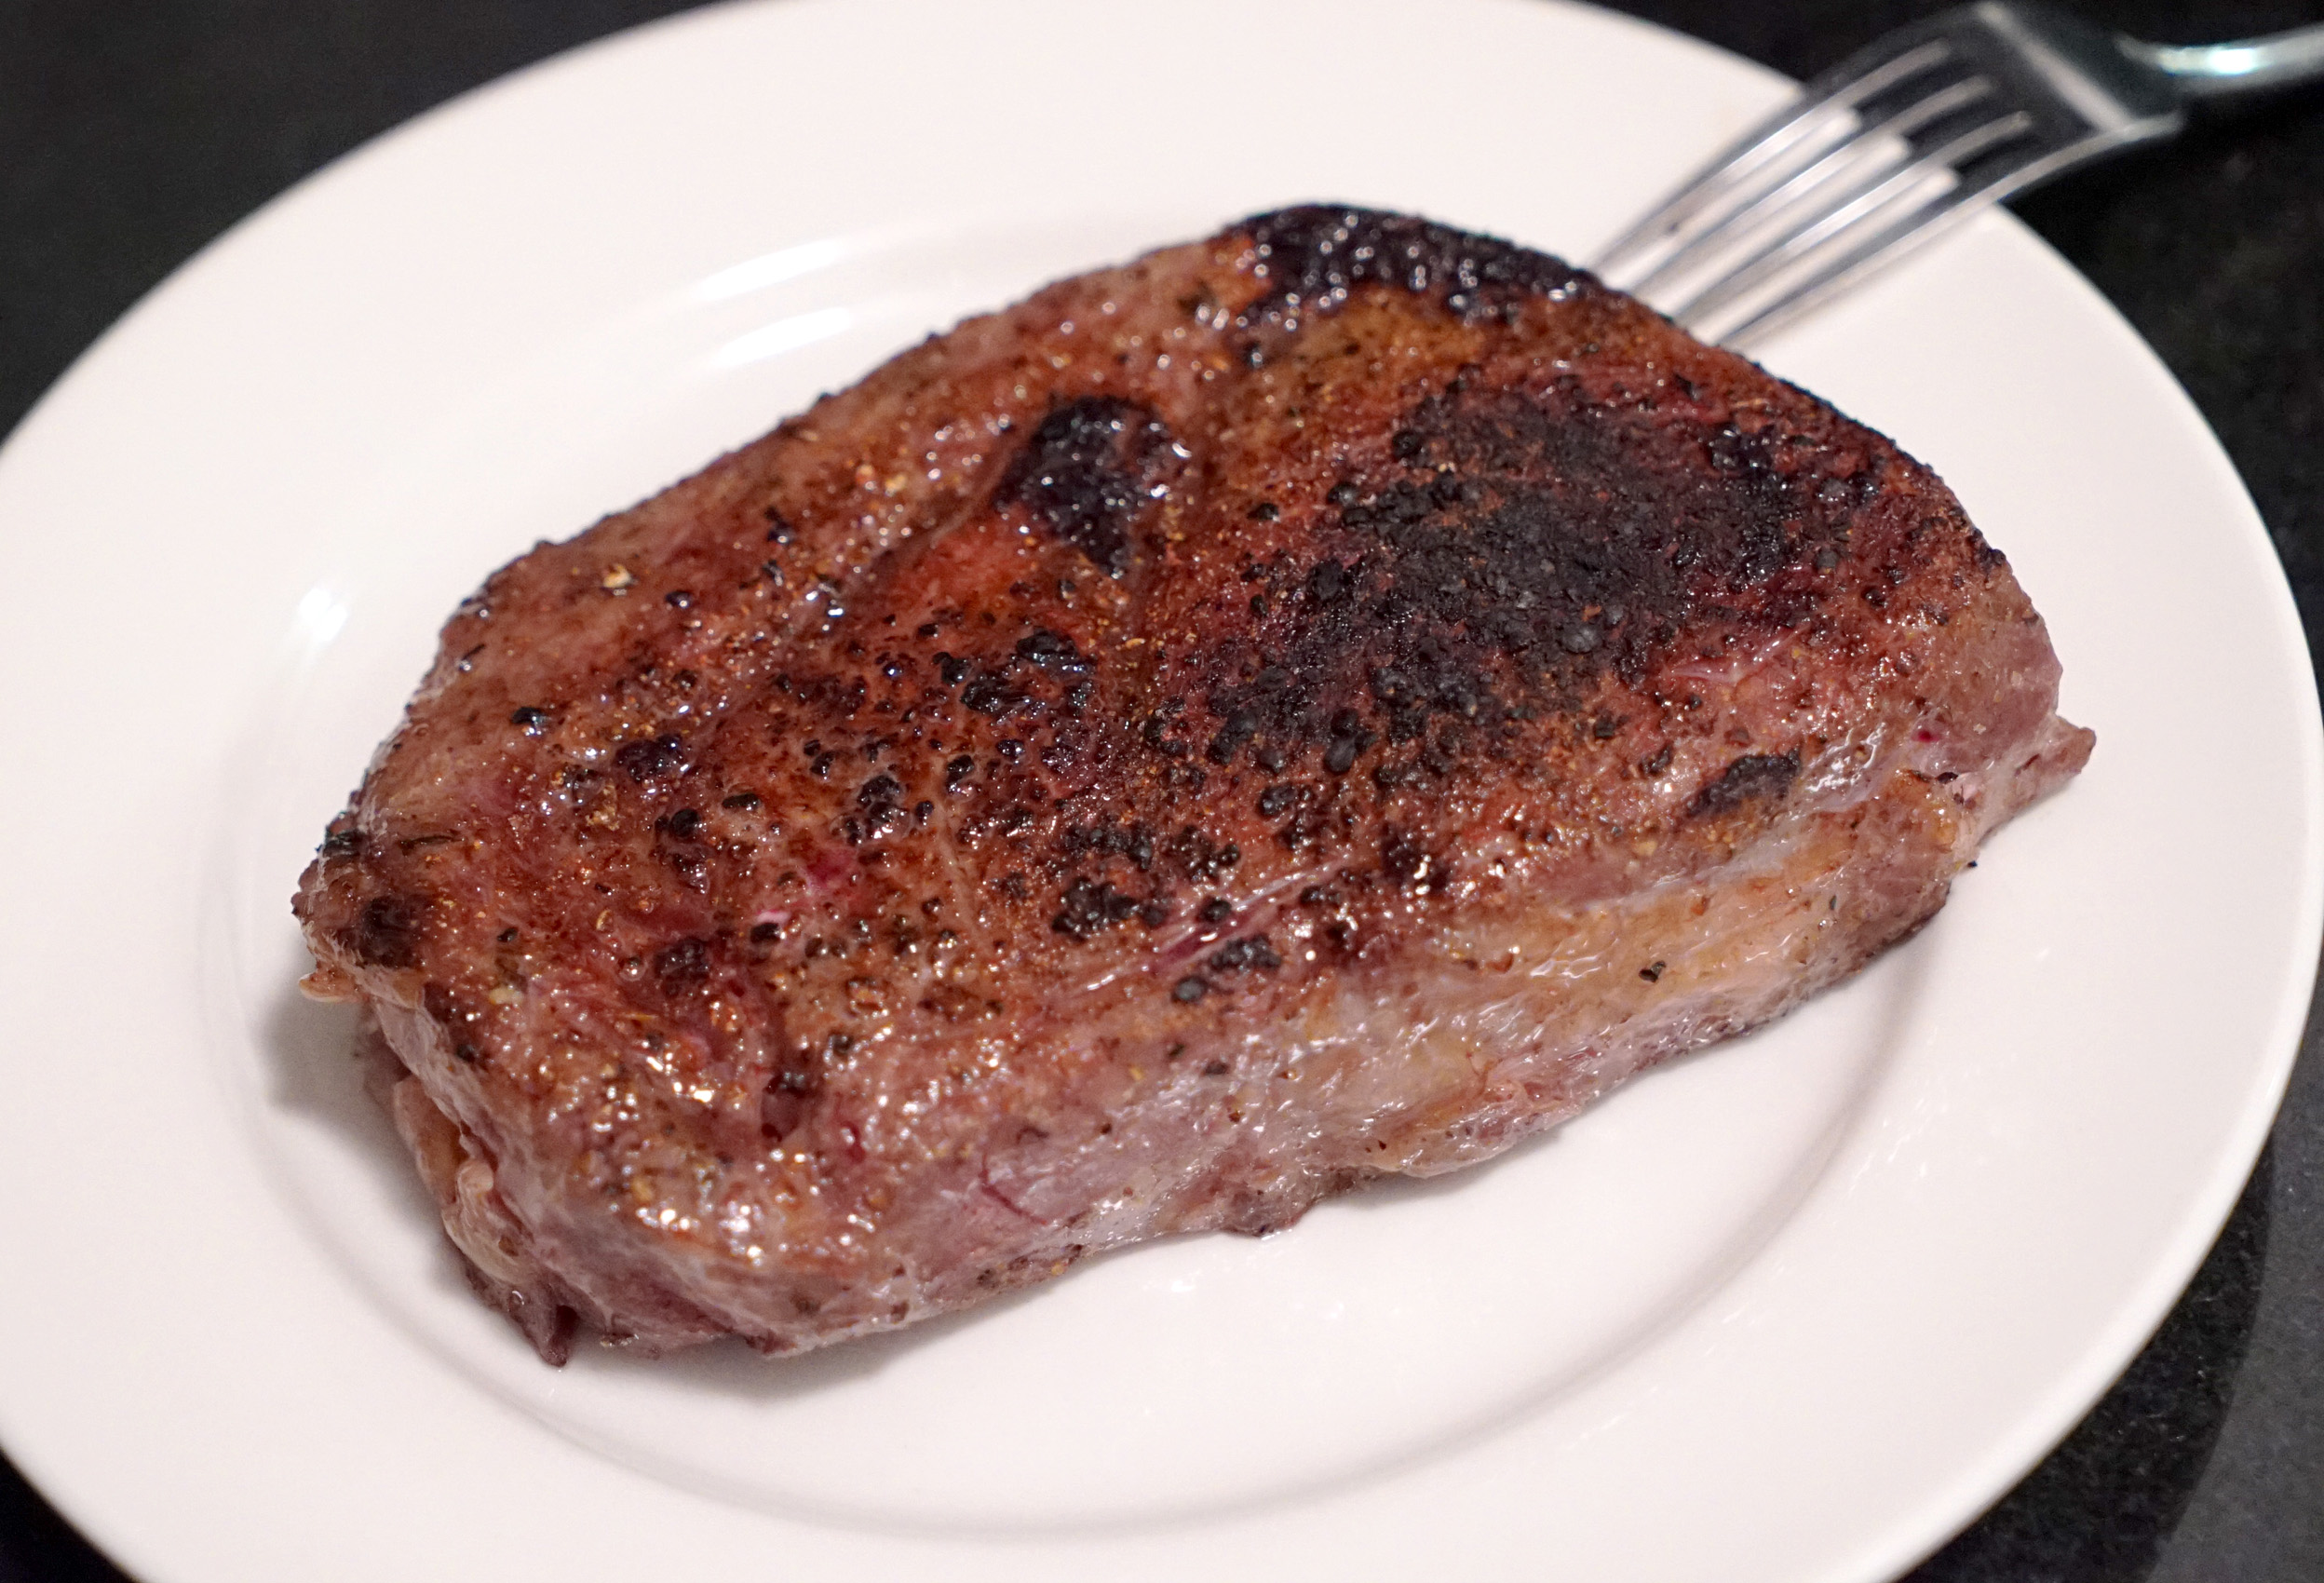
Step 7: SEAR THE FUCK OUT OF IT. I used a Searzall, because I am a fucking badass with a massive bag dangling in the area between my asshole and my dick shaft. Listen to that fucking sizzle just before I flip it over:
But you can easily just toss this baby into a real hot cast iron pan with some more butter and herbs to get that brown and crispy coating. That’s how my cousin does it – see his results below:
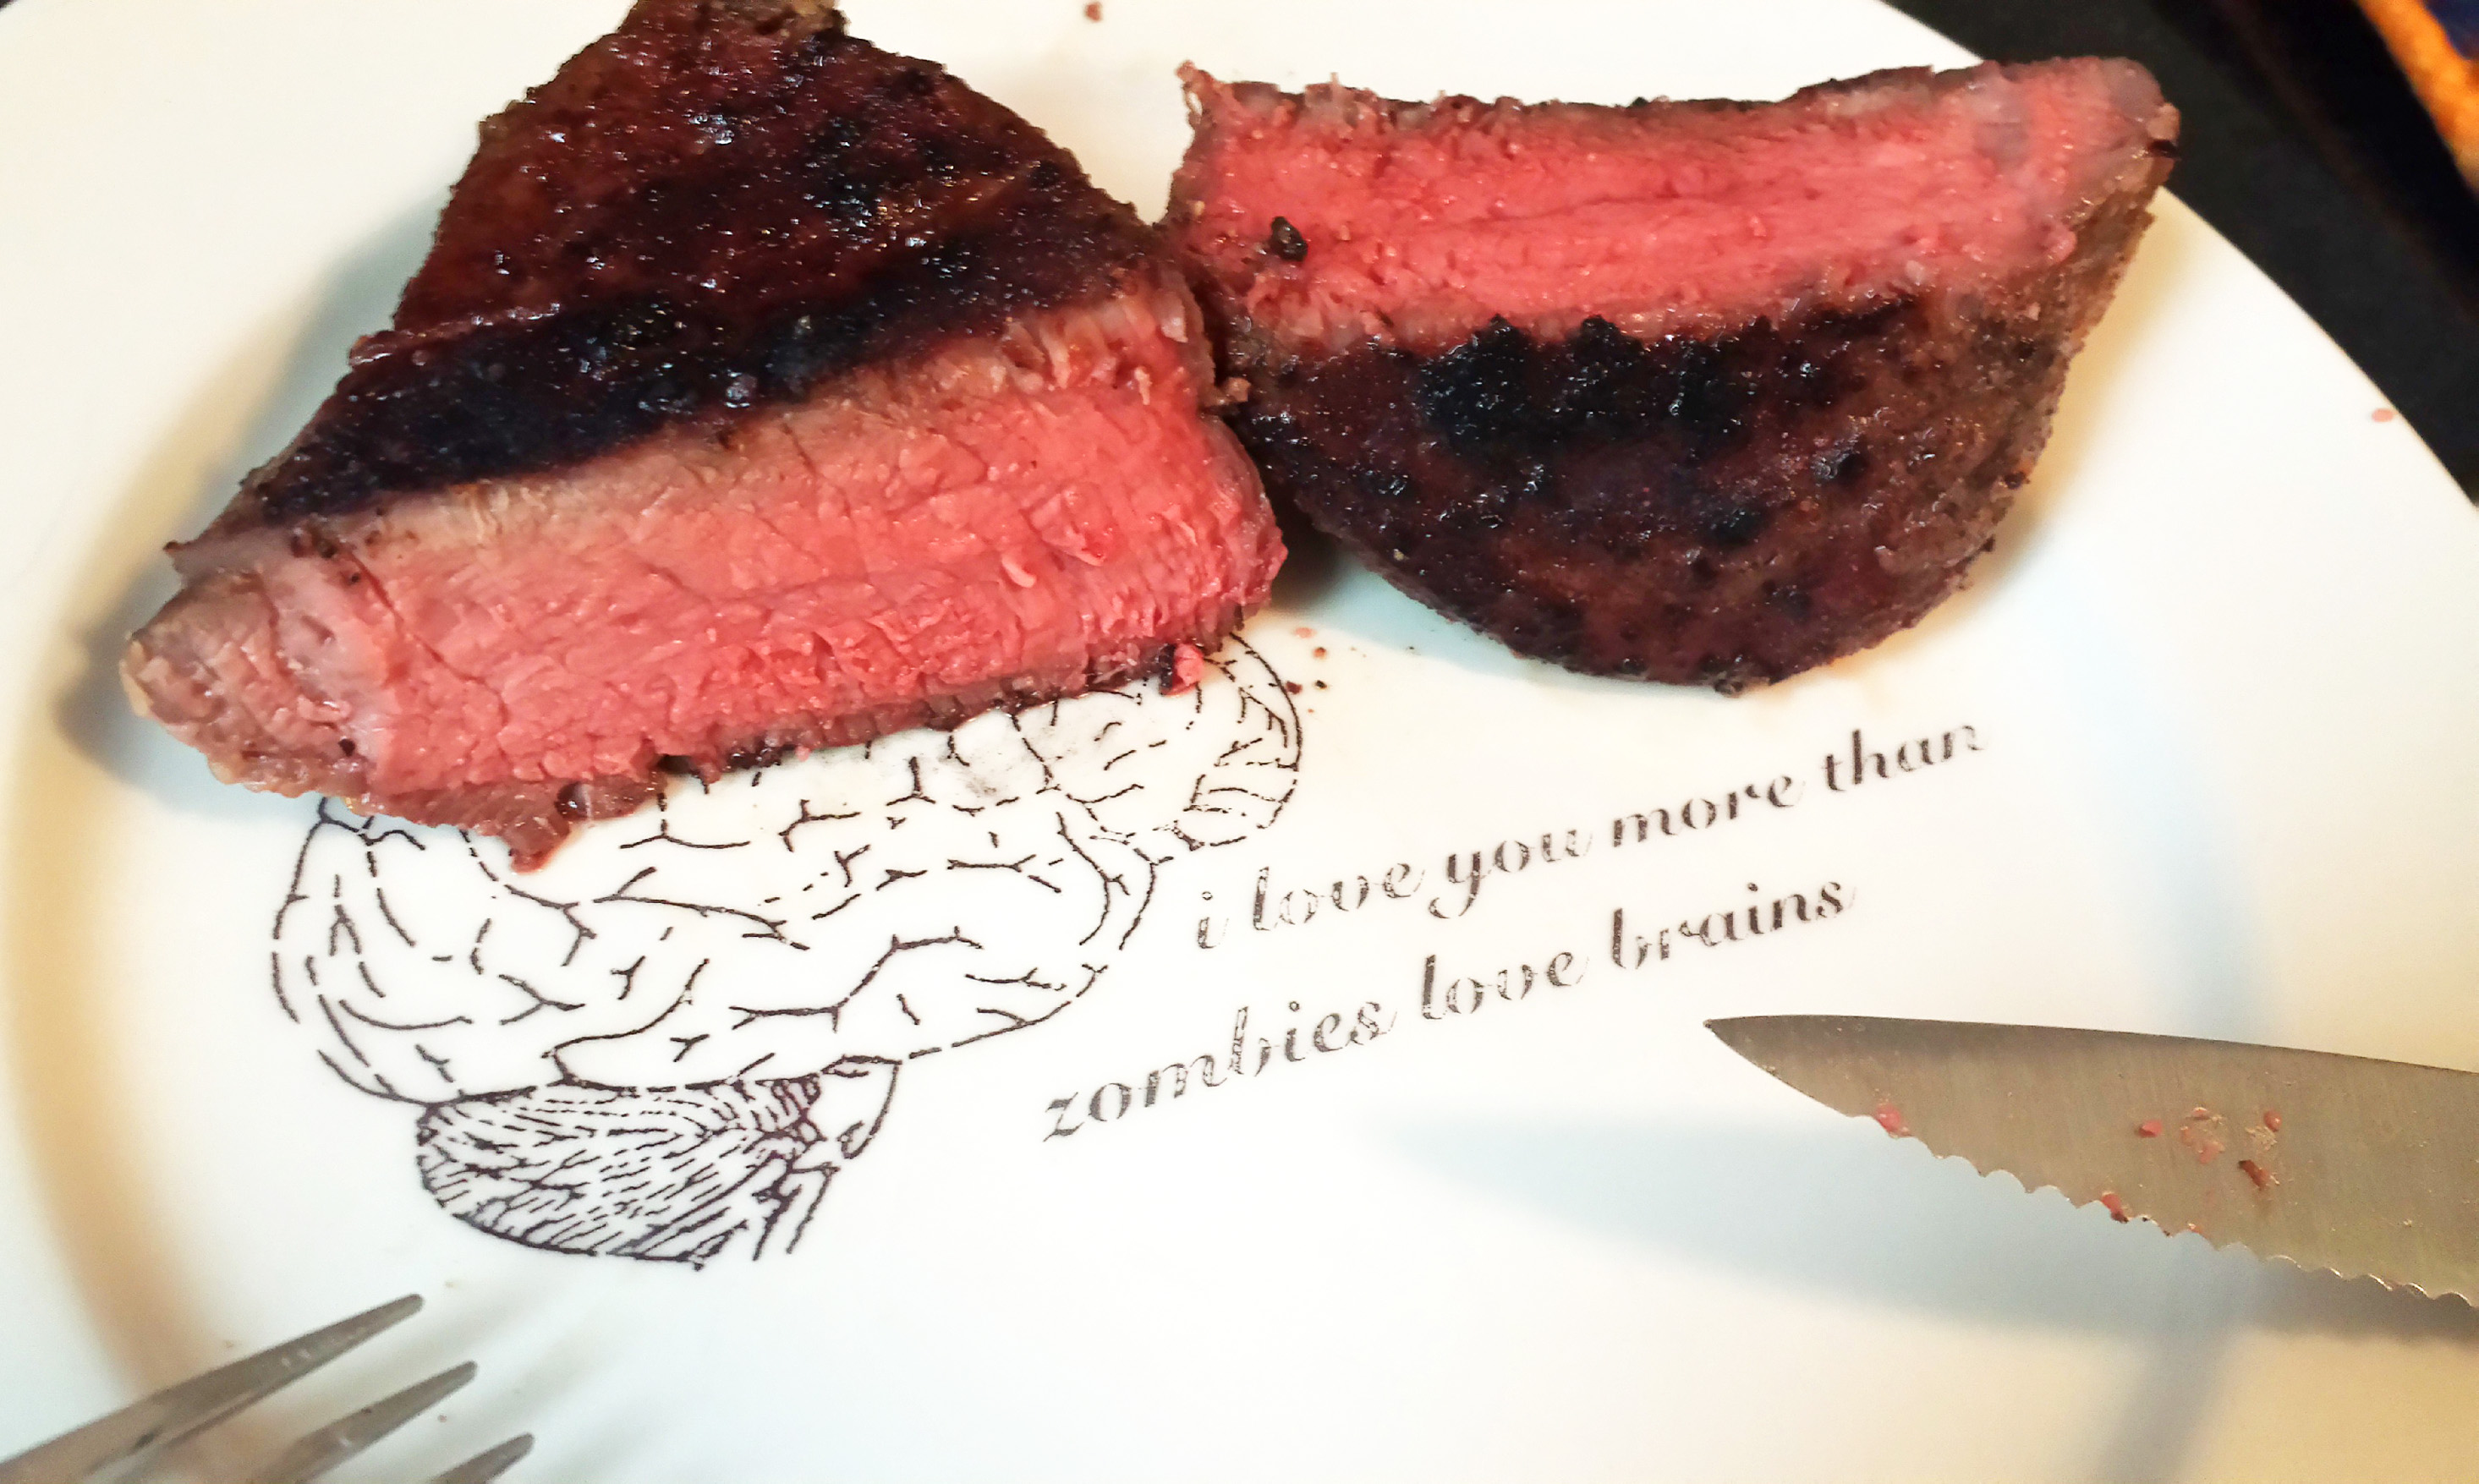
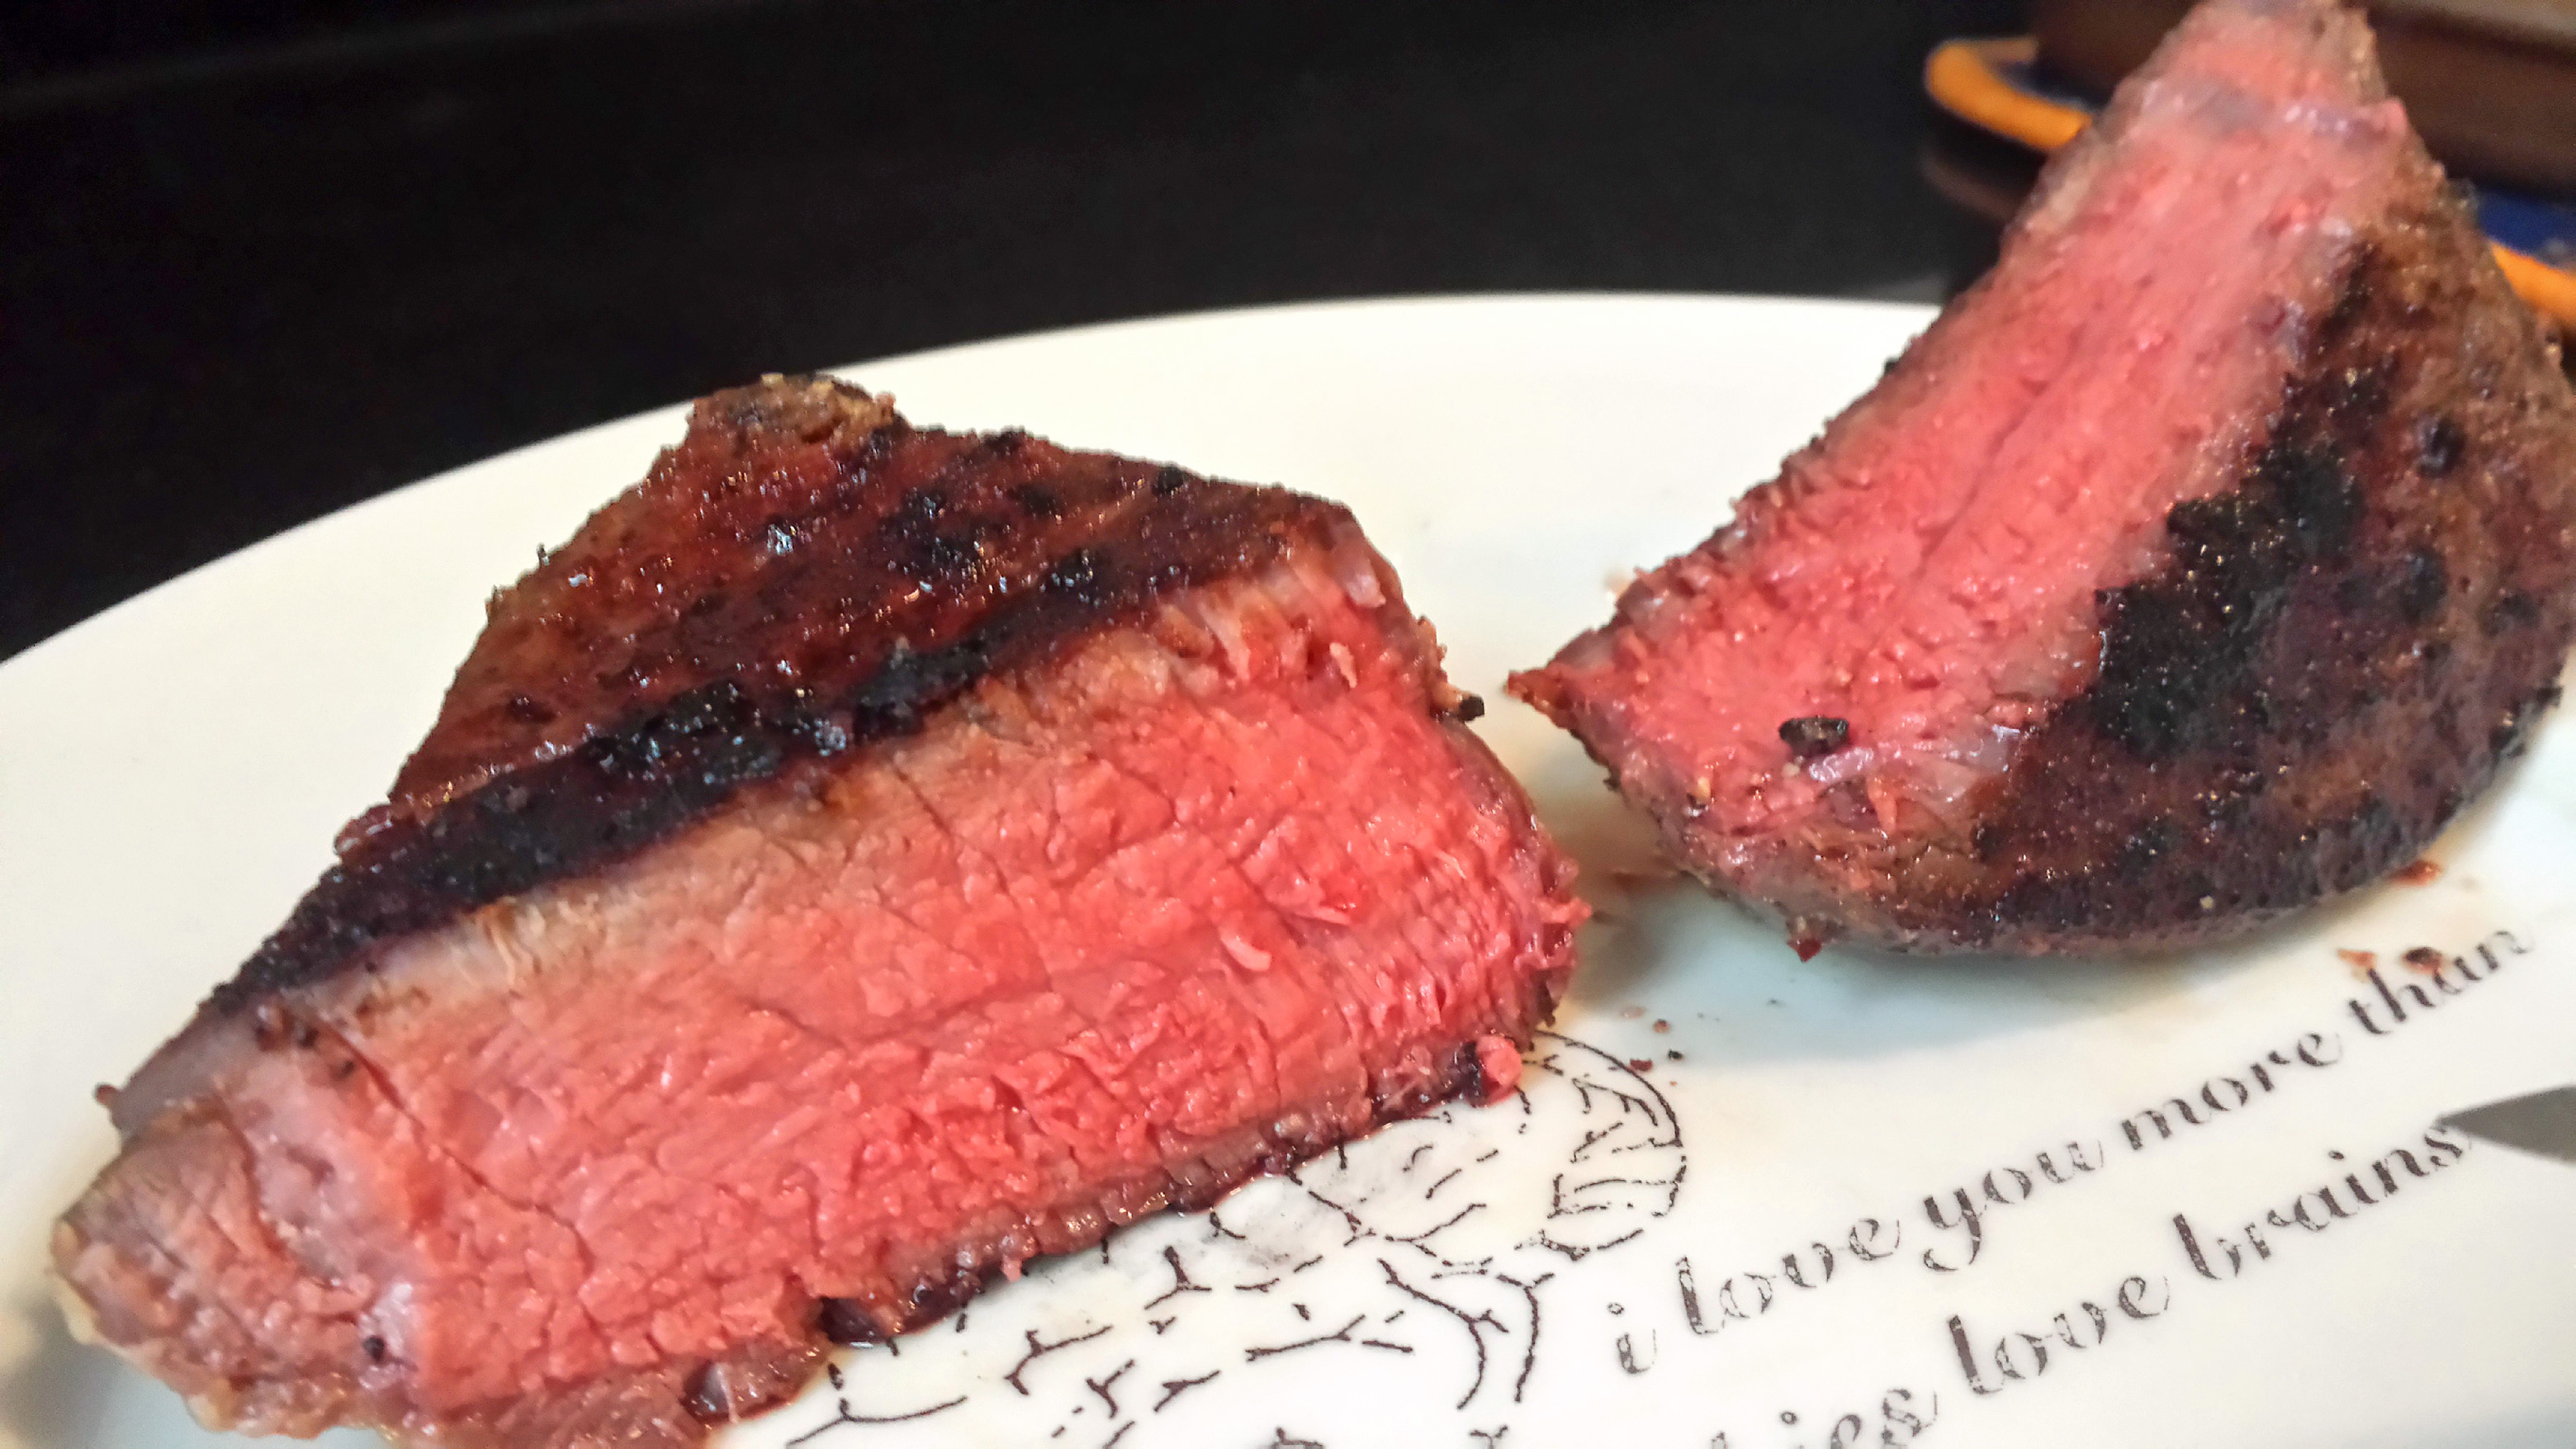
As for mine? Check it out below… Seared to a fucking crisp on the outside, and pink as a snatch inside:
Step 8: Pour yourself a hefty glass of Scotch whisky.
The ice sphere is so much cooler than the ice cube. The ice cube is such a square.
Step 9: Drink it, then refill it, and then EAT while you drink that second glass of Scotch. Here: watch me devour one of the filets in under two minutes and then lick the damn plate.
Step 10: Jerk the fuck off and brag about how awesome you are, which I clearly did in the video above, shit the booze out of your system, and then fall asleep drunk and naked in the bathroom.
Feel free to use any cut that you want for this. I recently did the same thing with some Mosner grass-fed rib eyes, with some added duck fat to round them out. See below for the setup and results:
Happy St. Pat’s Day! This is a dish I first saw at a local Irish bar on Long Island, and it was actually the inspiration behind my Hillbilly Nachos dish. I was blown away by this shit, so I had to share it here. It’s really simple. Use this shit:
Create your layers and add each ingredient to taste. Be cautious with your cheese, sour cream and Russian dressing ratios; you don’t want to overdo it. I like just a drizzle of Russian dressing across the top, not gobs of it.
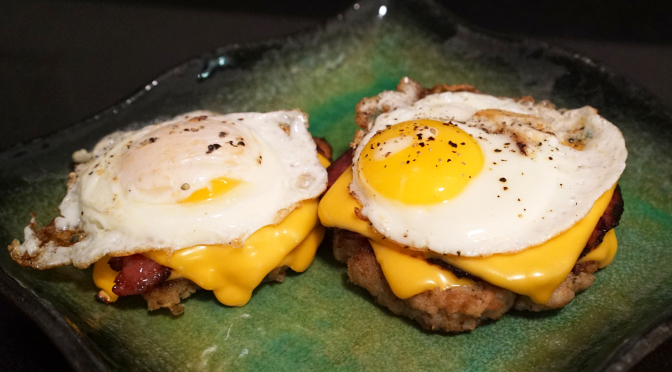
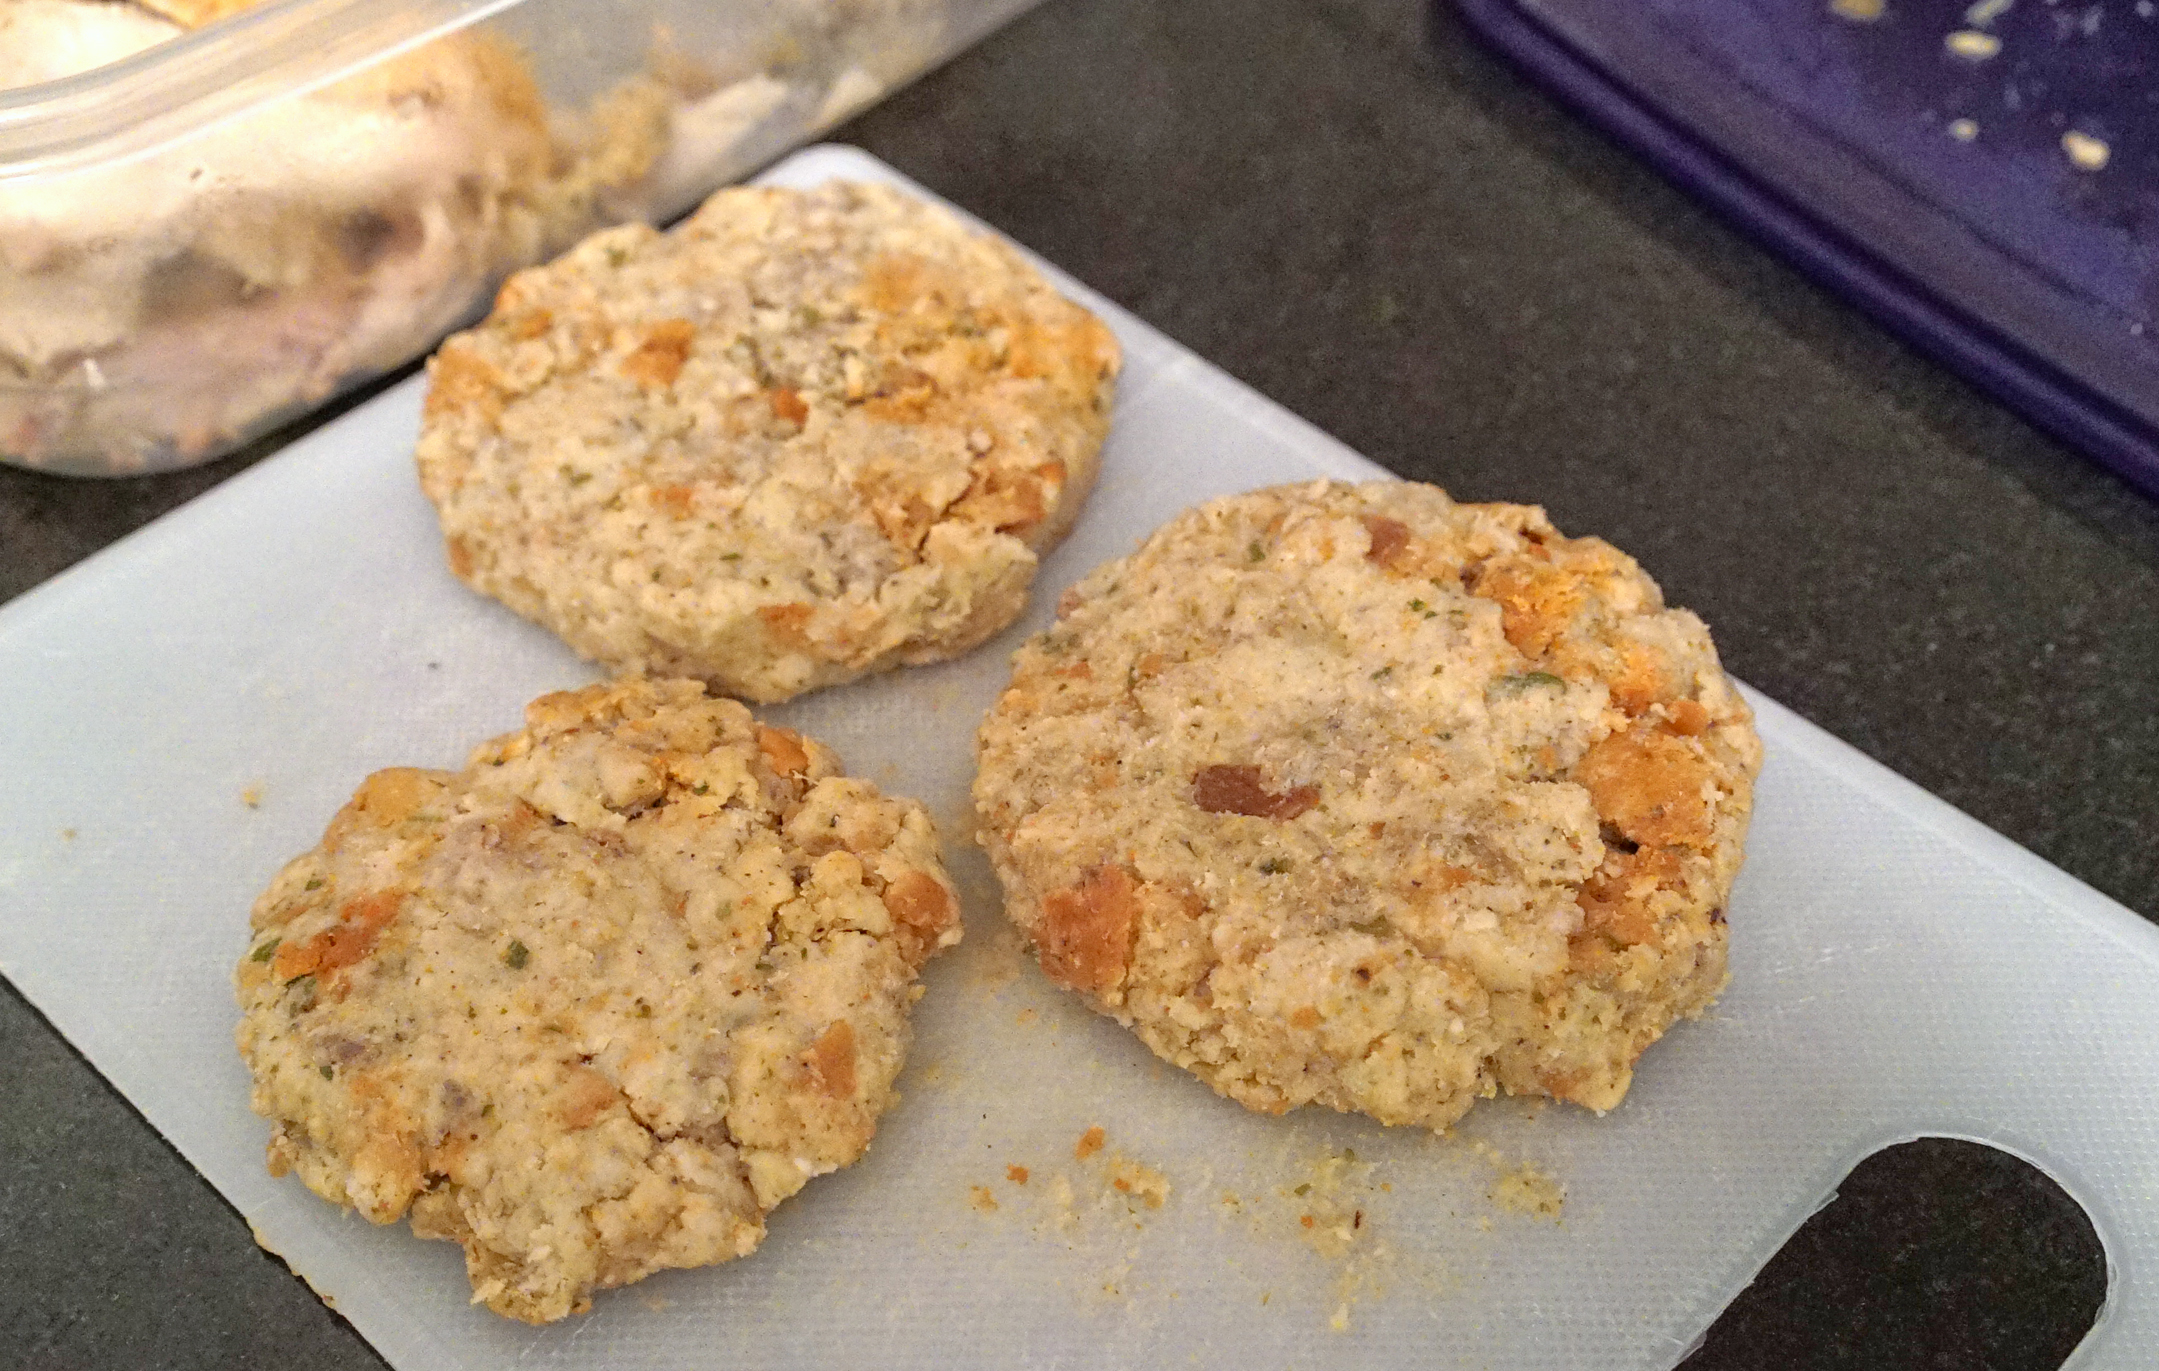
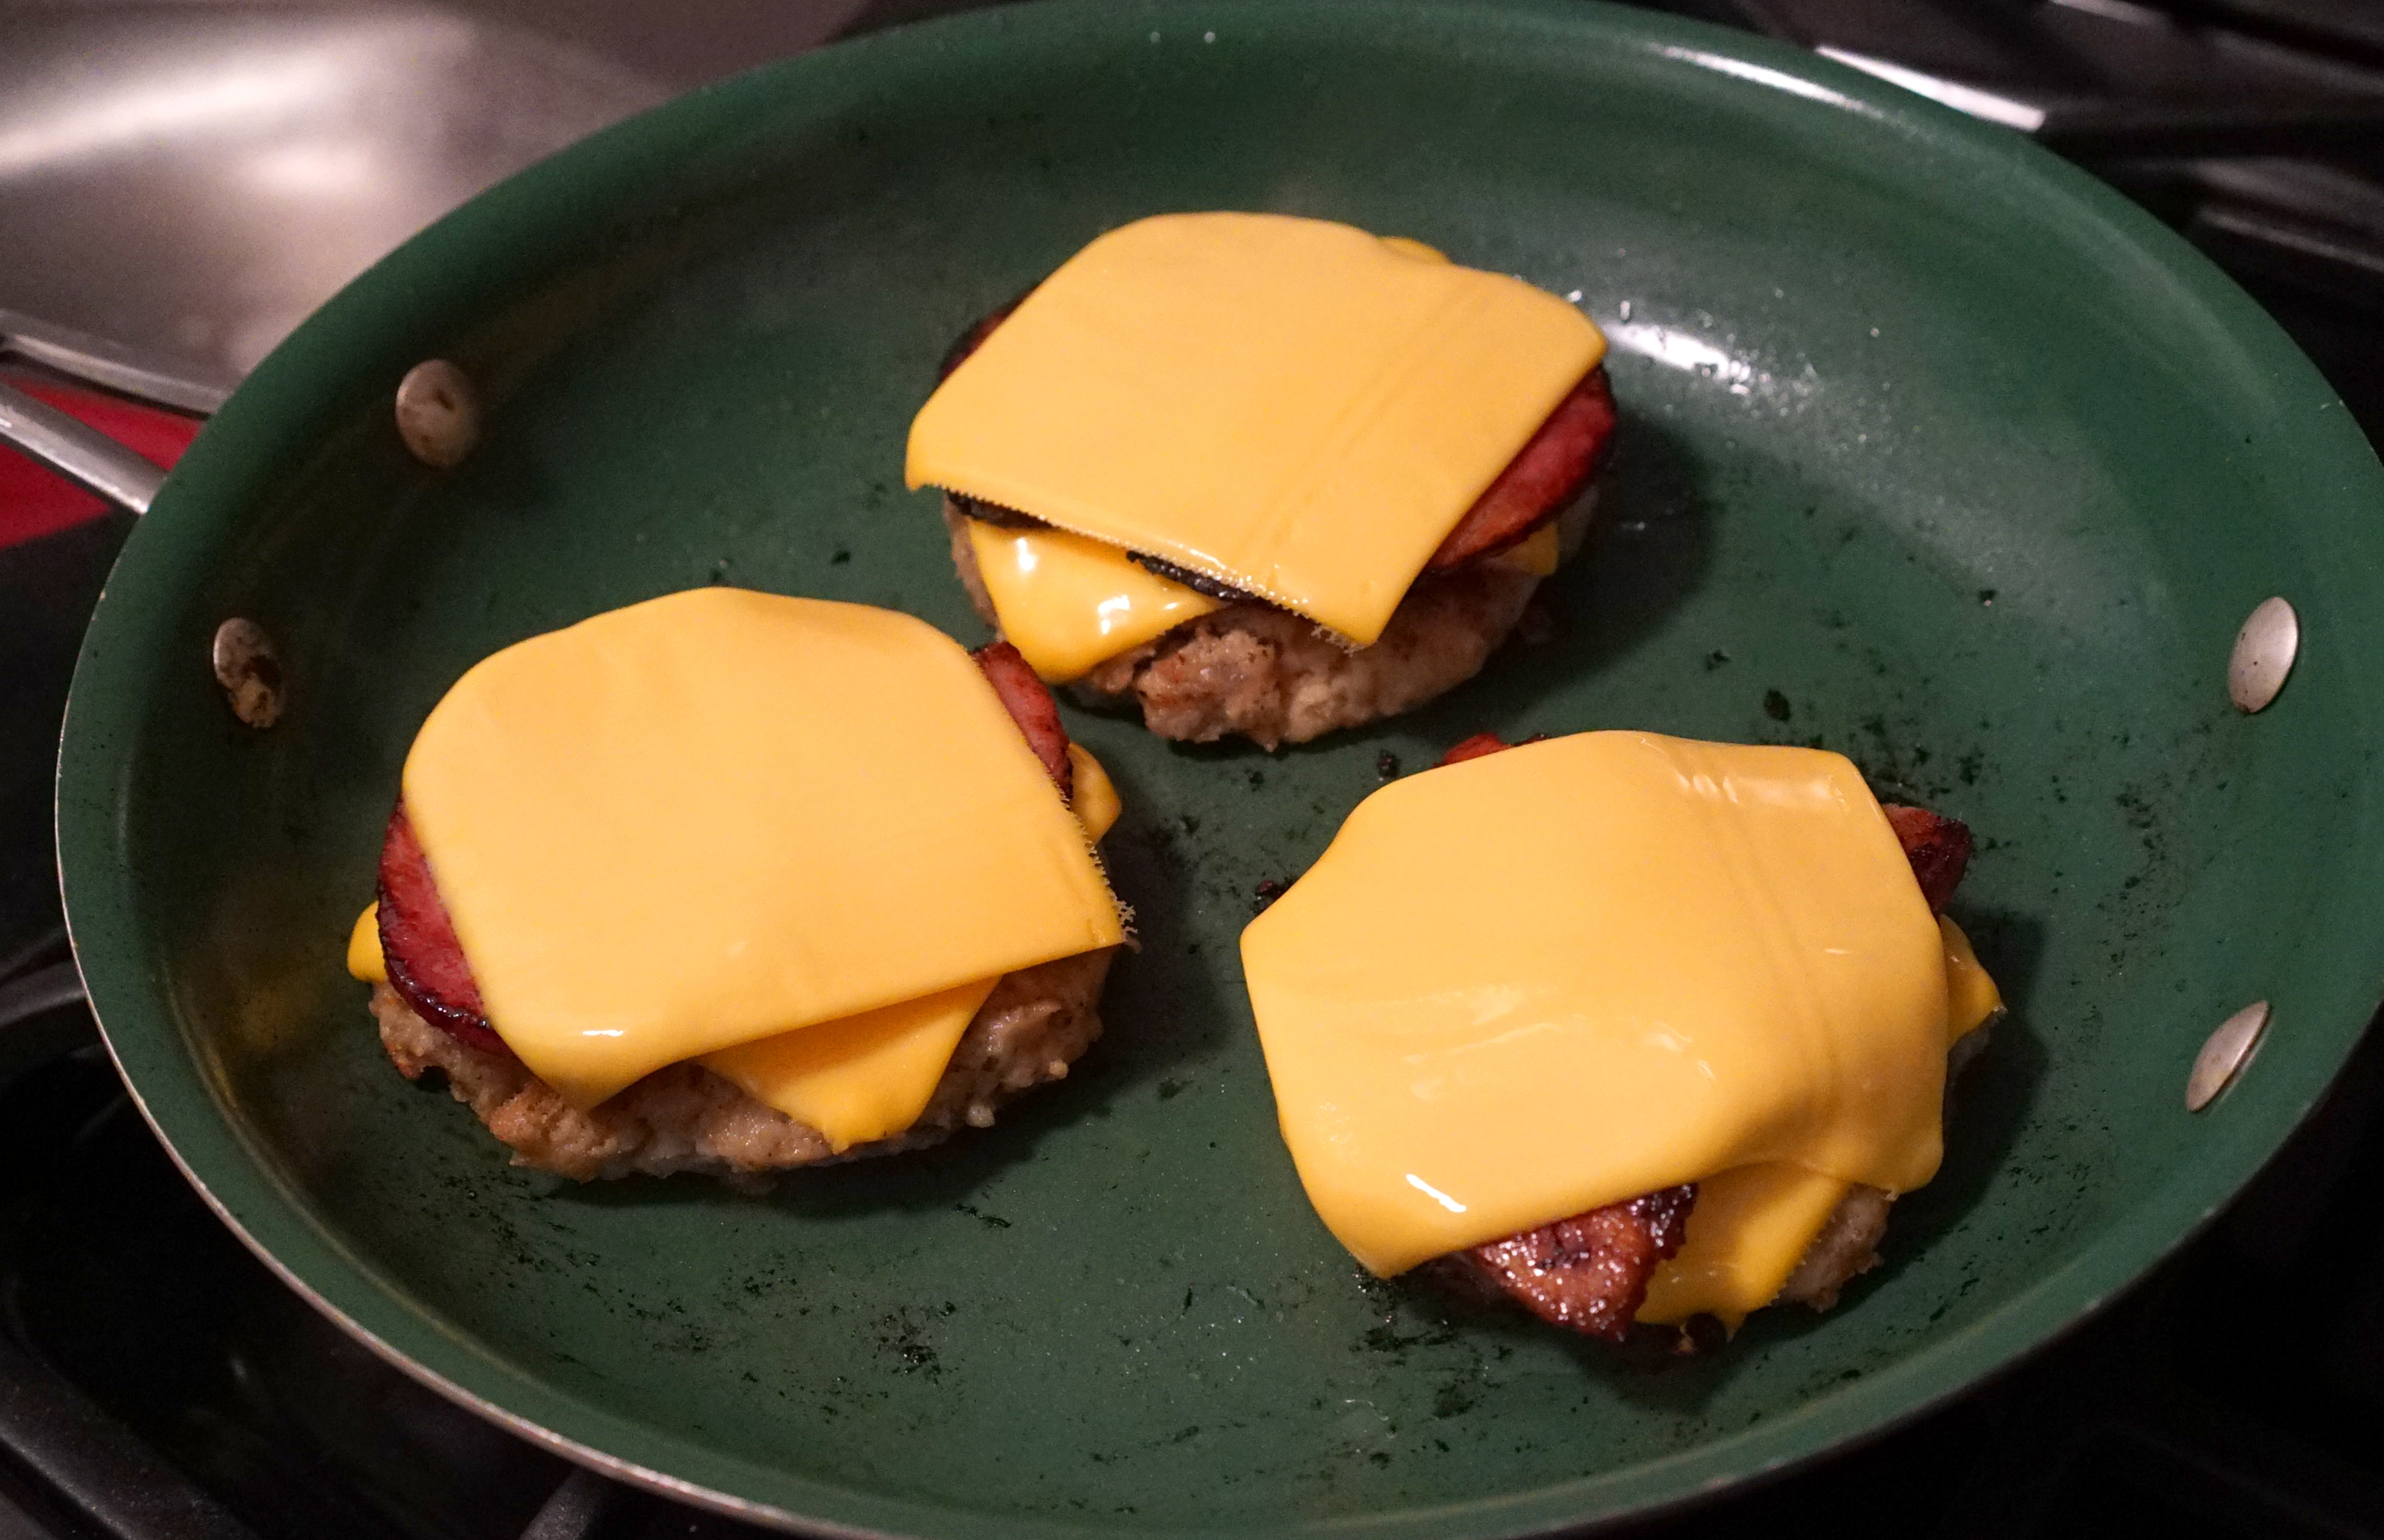
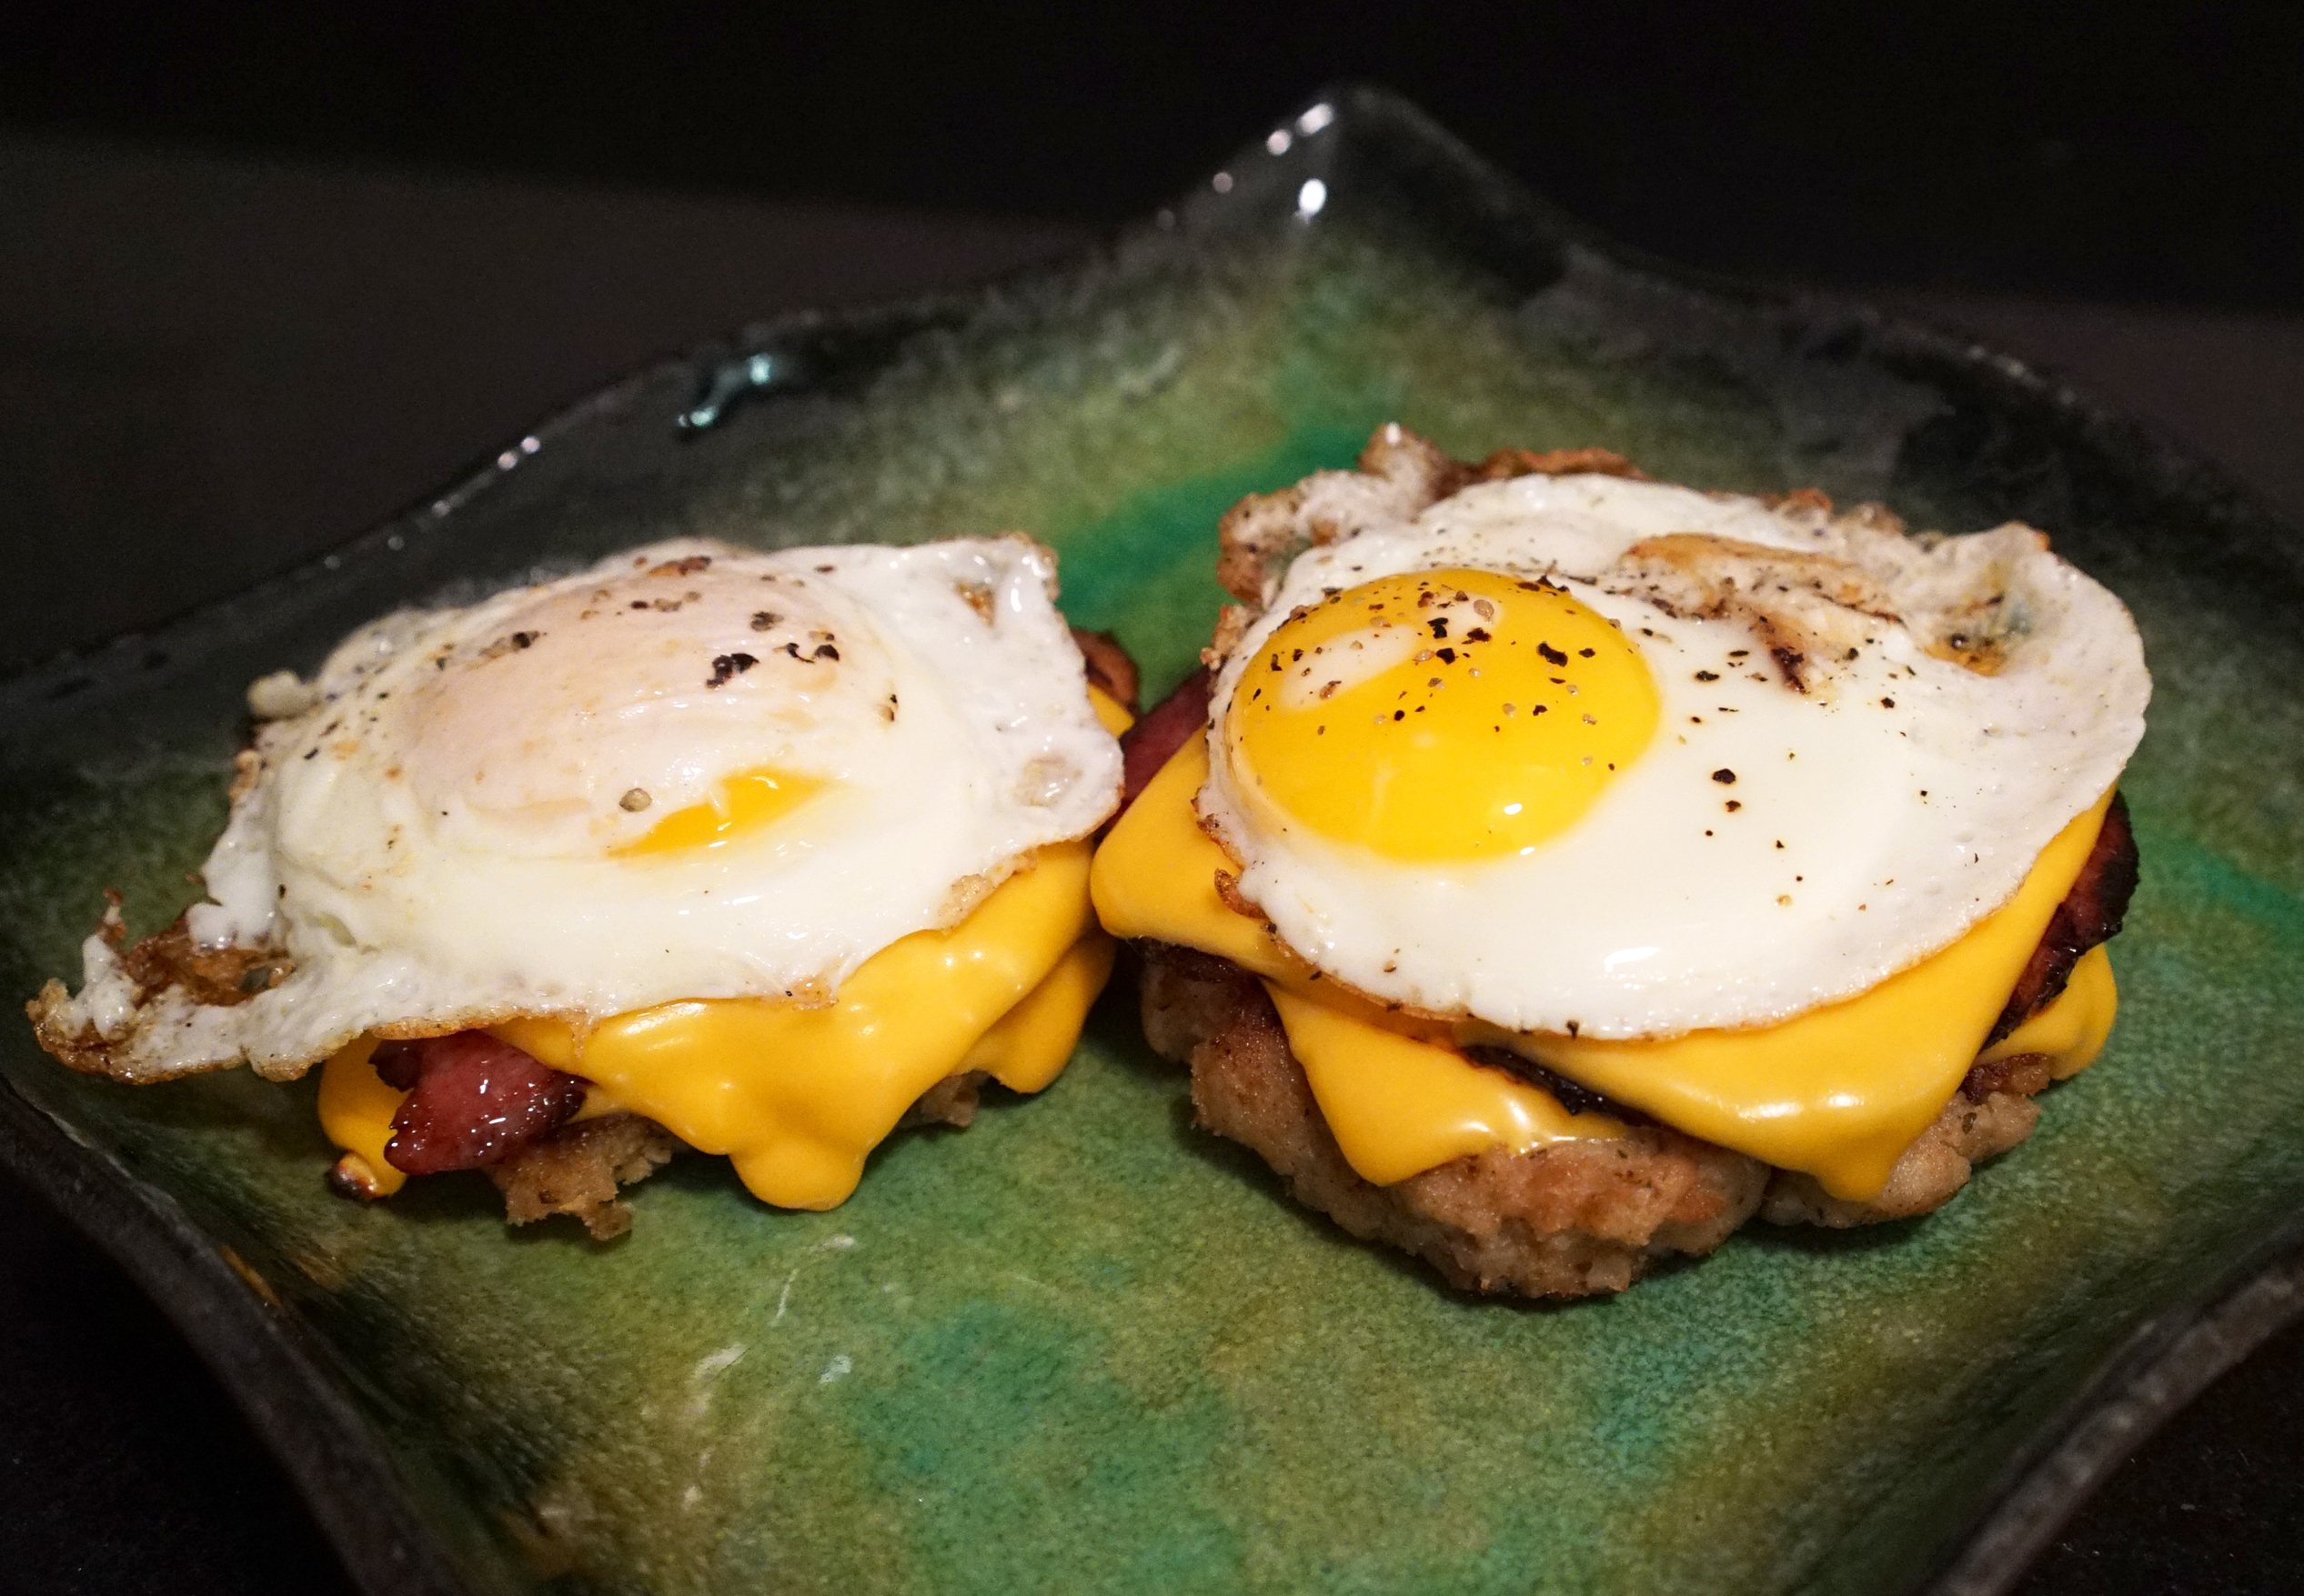
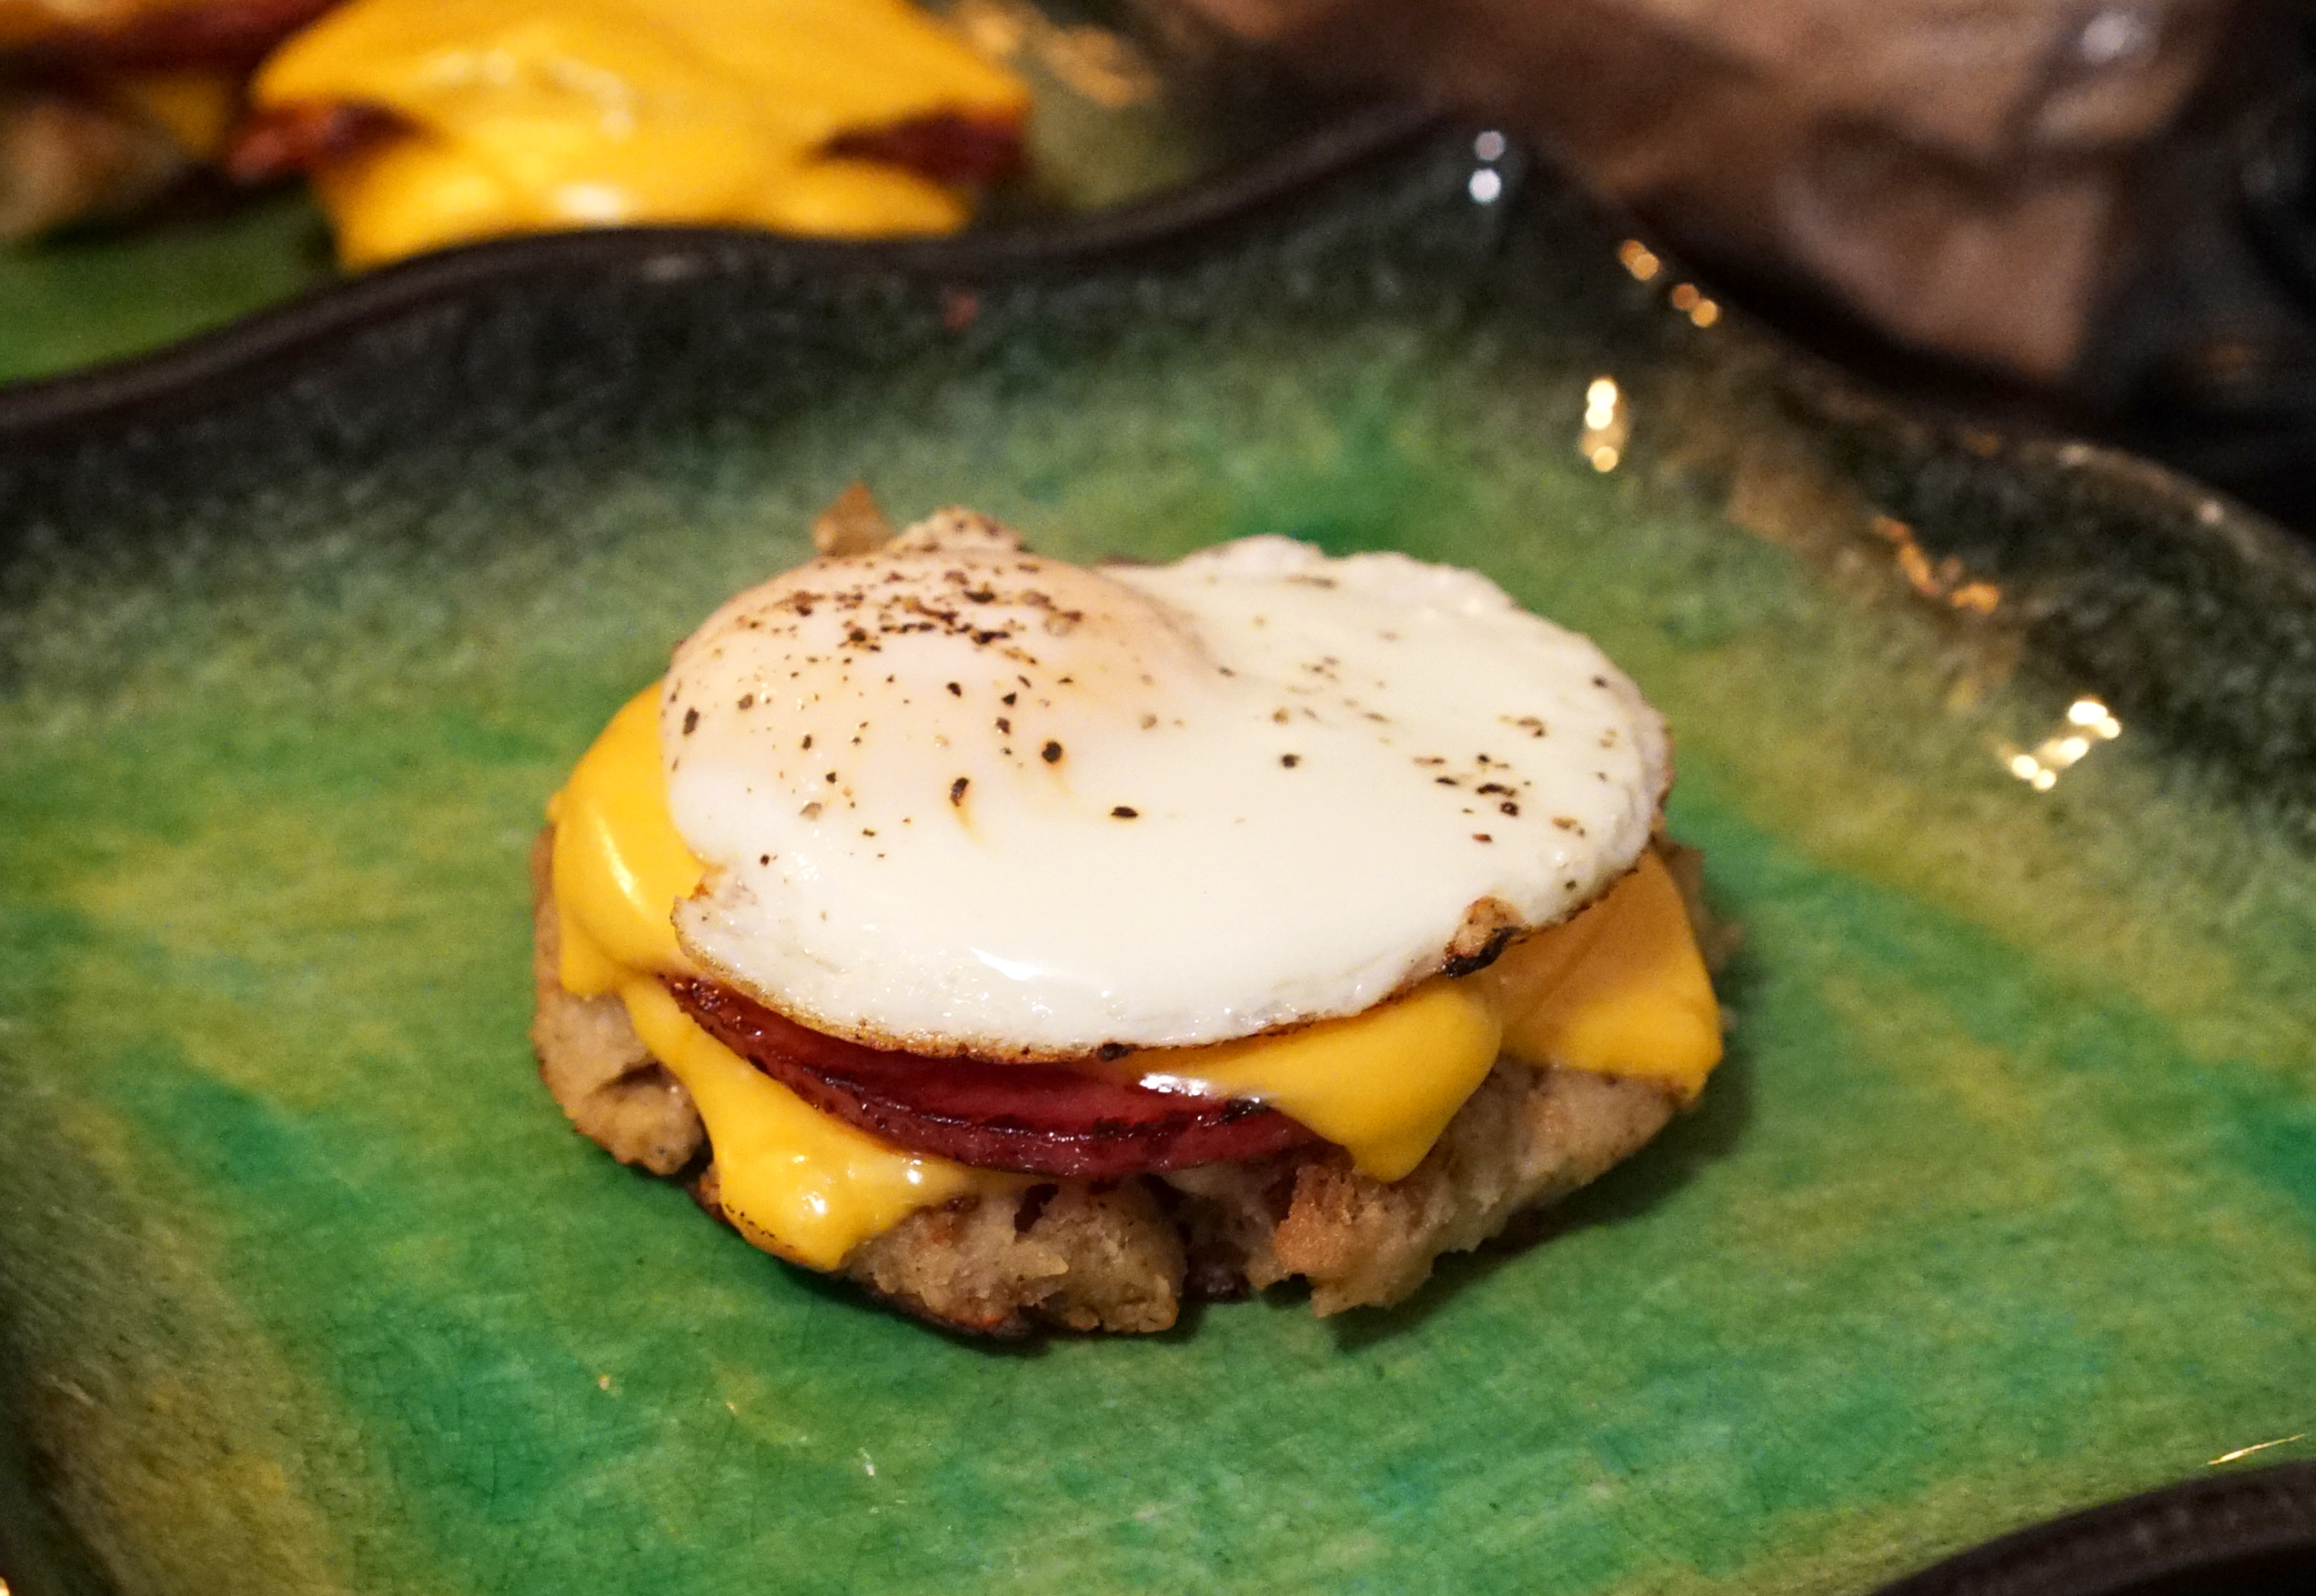
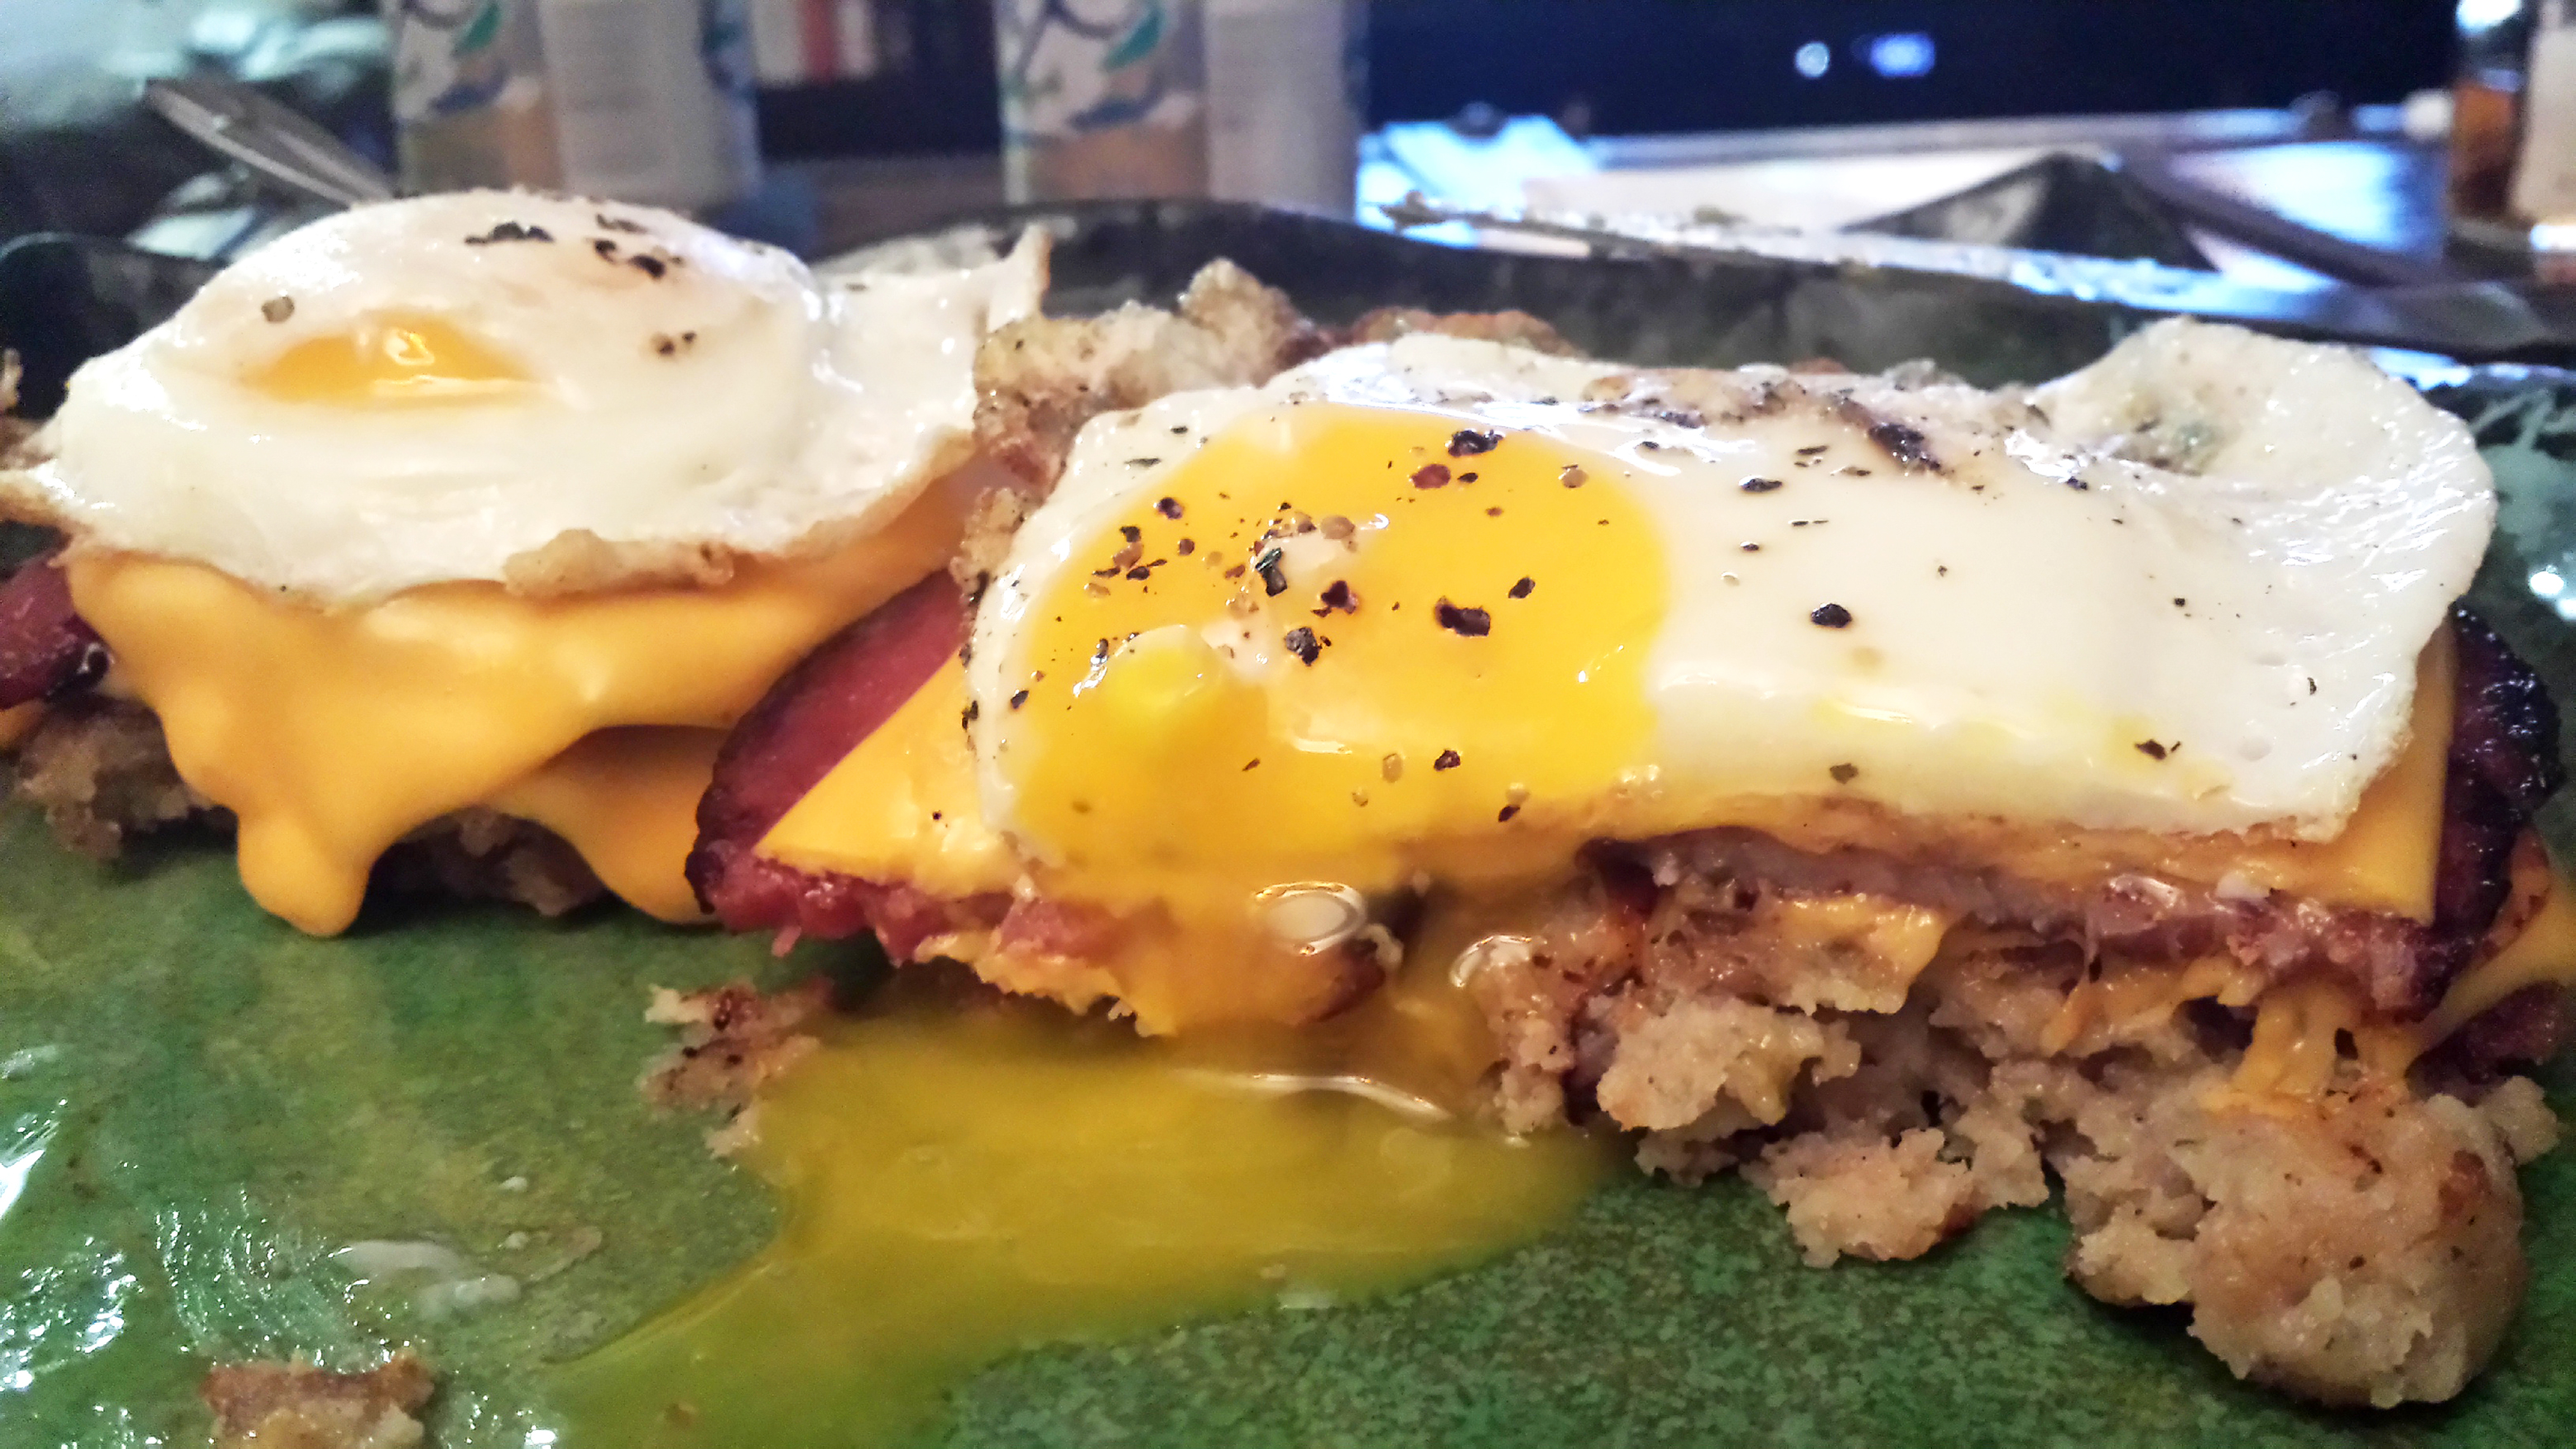
A number of variations on this gem can be concocted depending on what’s left in your fridge after the annual gorge-fest known as Thanksgiving. I had an abundance of leftover stuffing and ham, so that’s the route I went this time. Check it out, assholes.
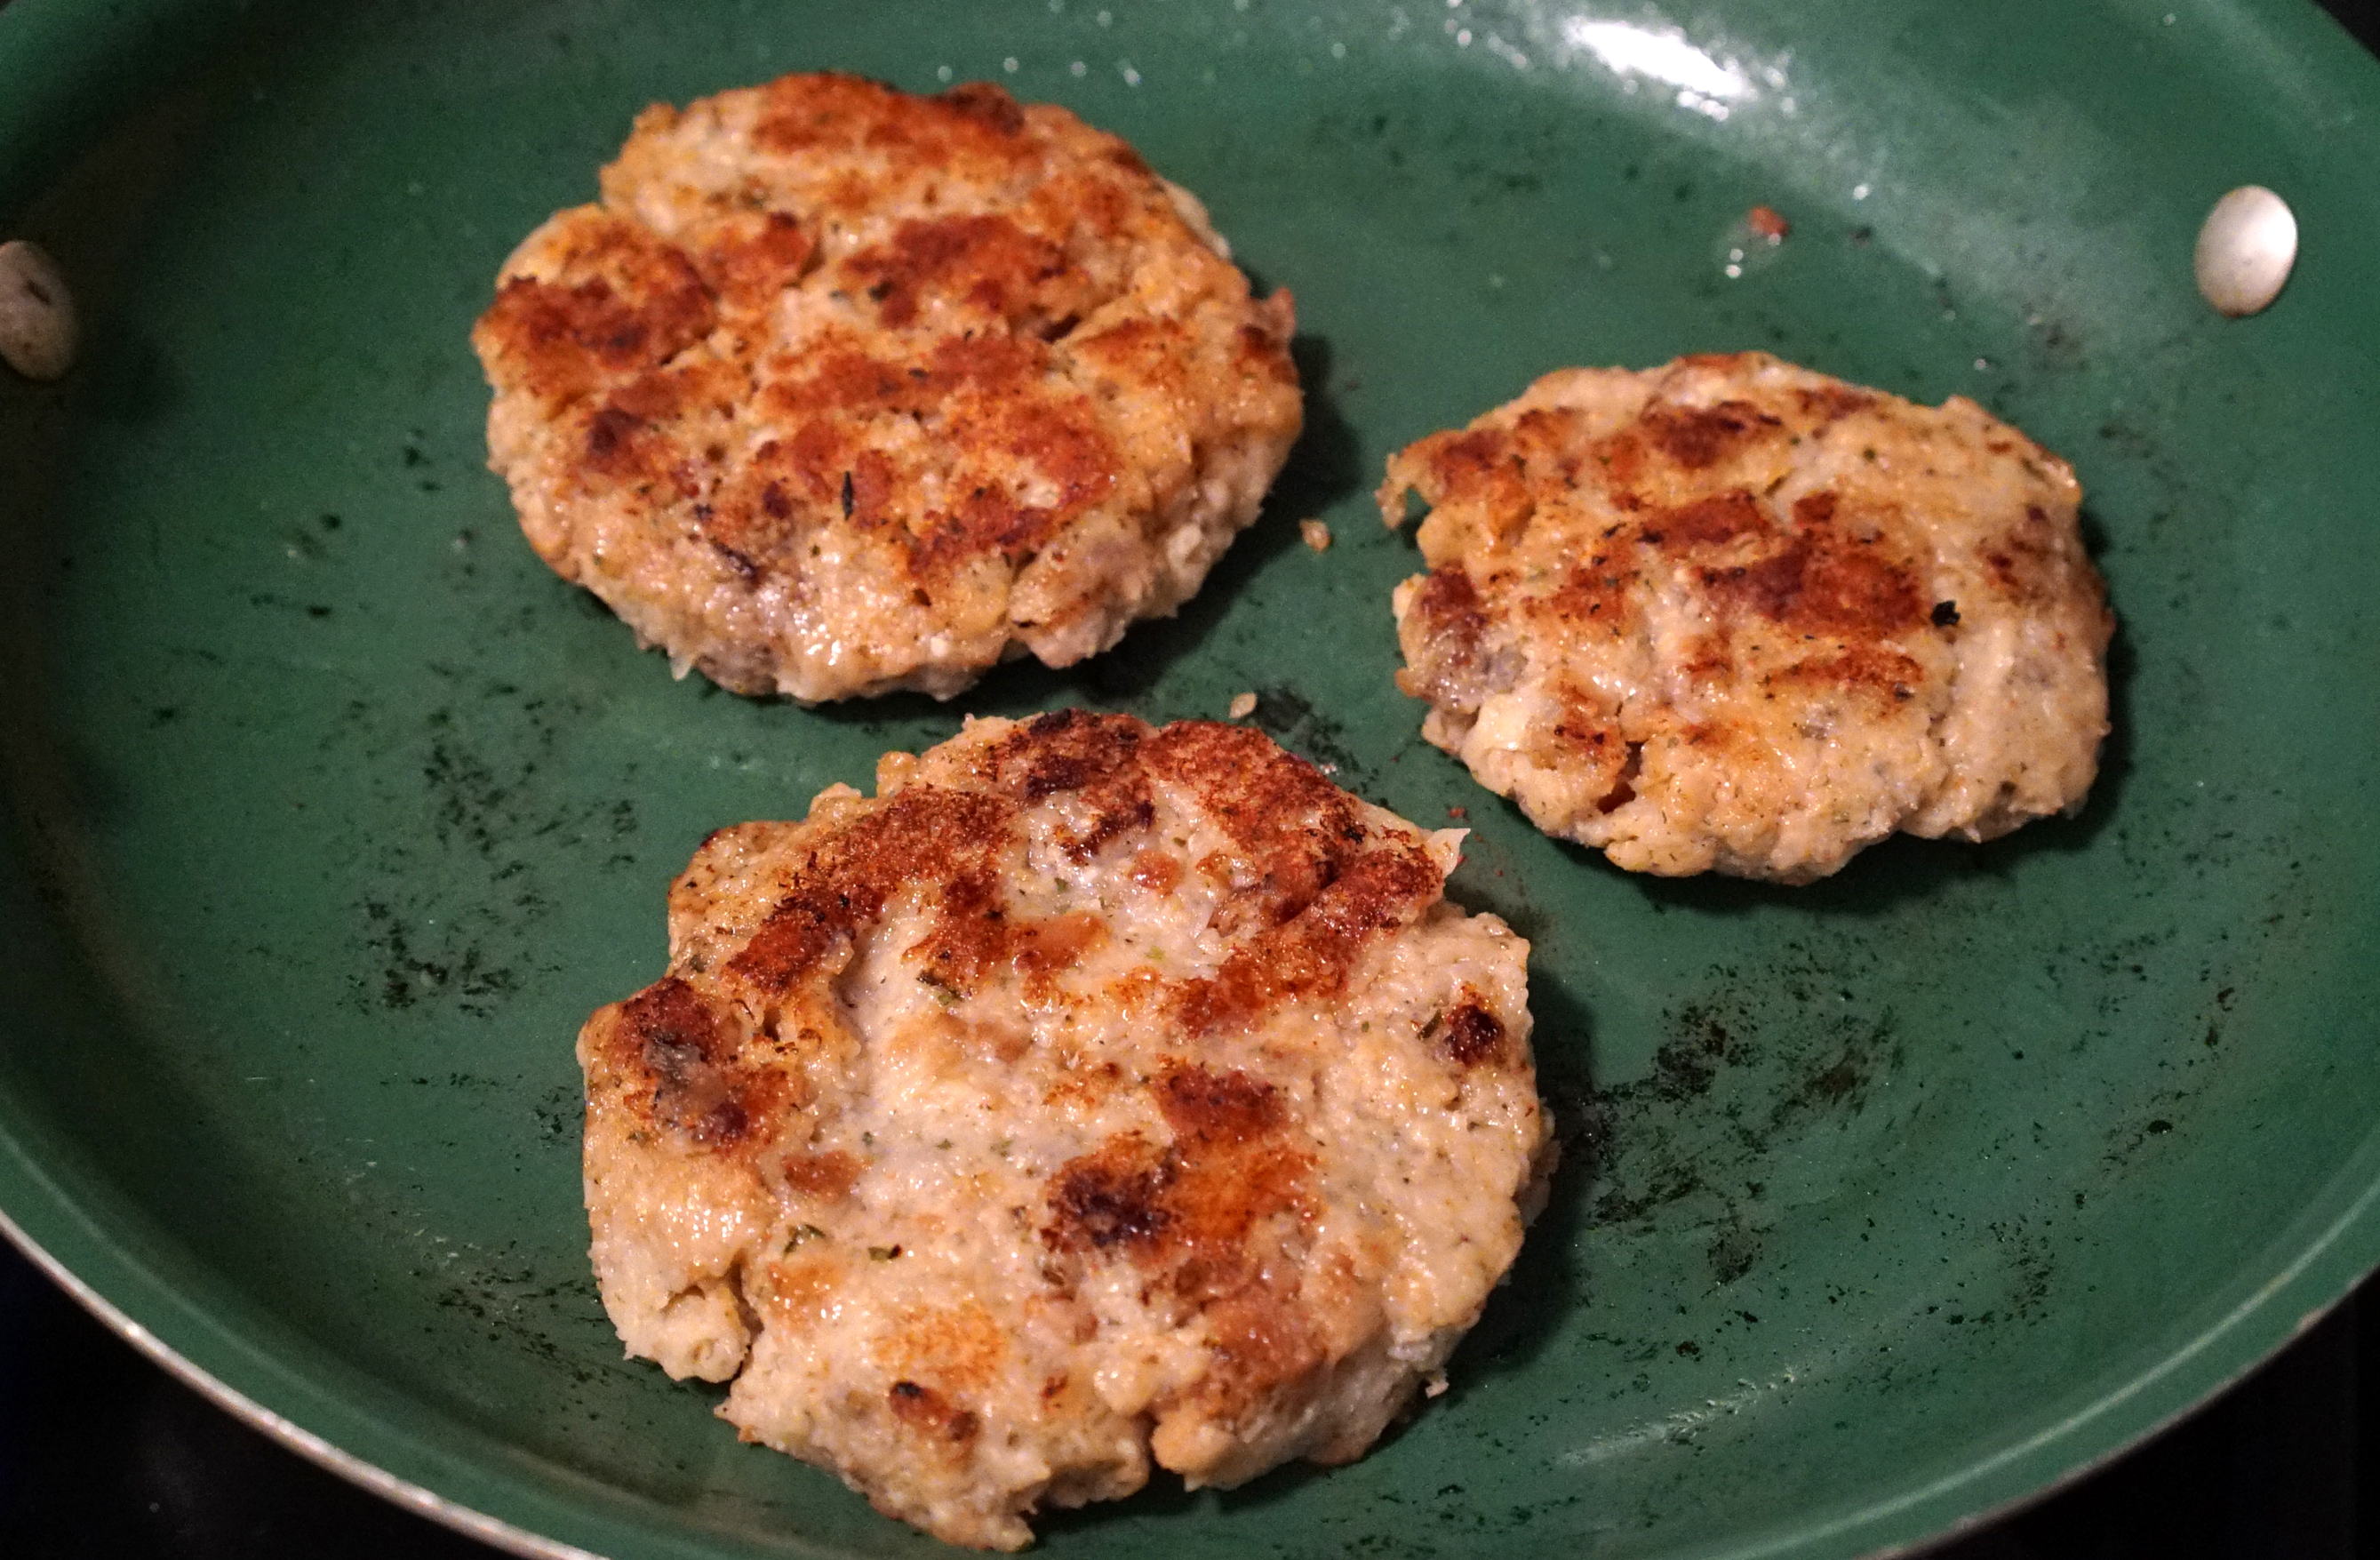
STEP 1: Sculpt your stuffing into burger sized patties. My patties were pretty sweet since my stuffing also had sausage meat already incorporated into it (Momma’s recipe is amazing).
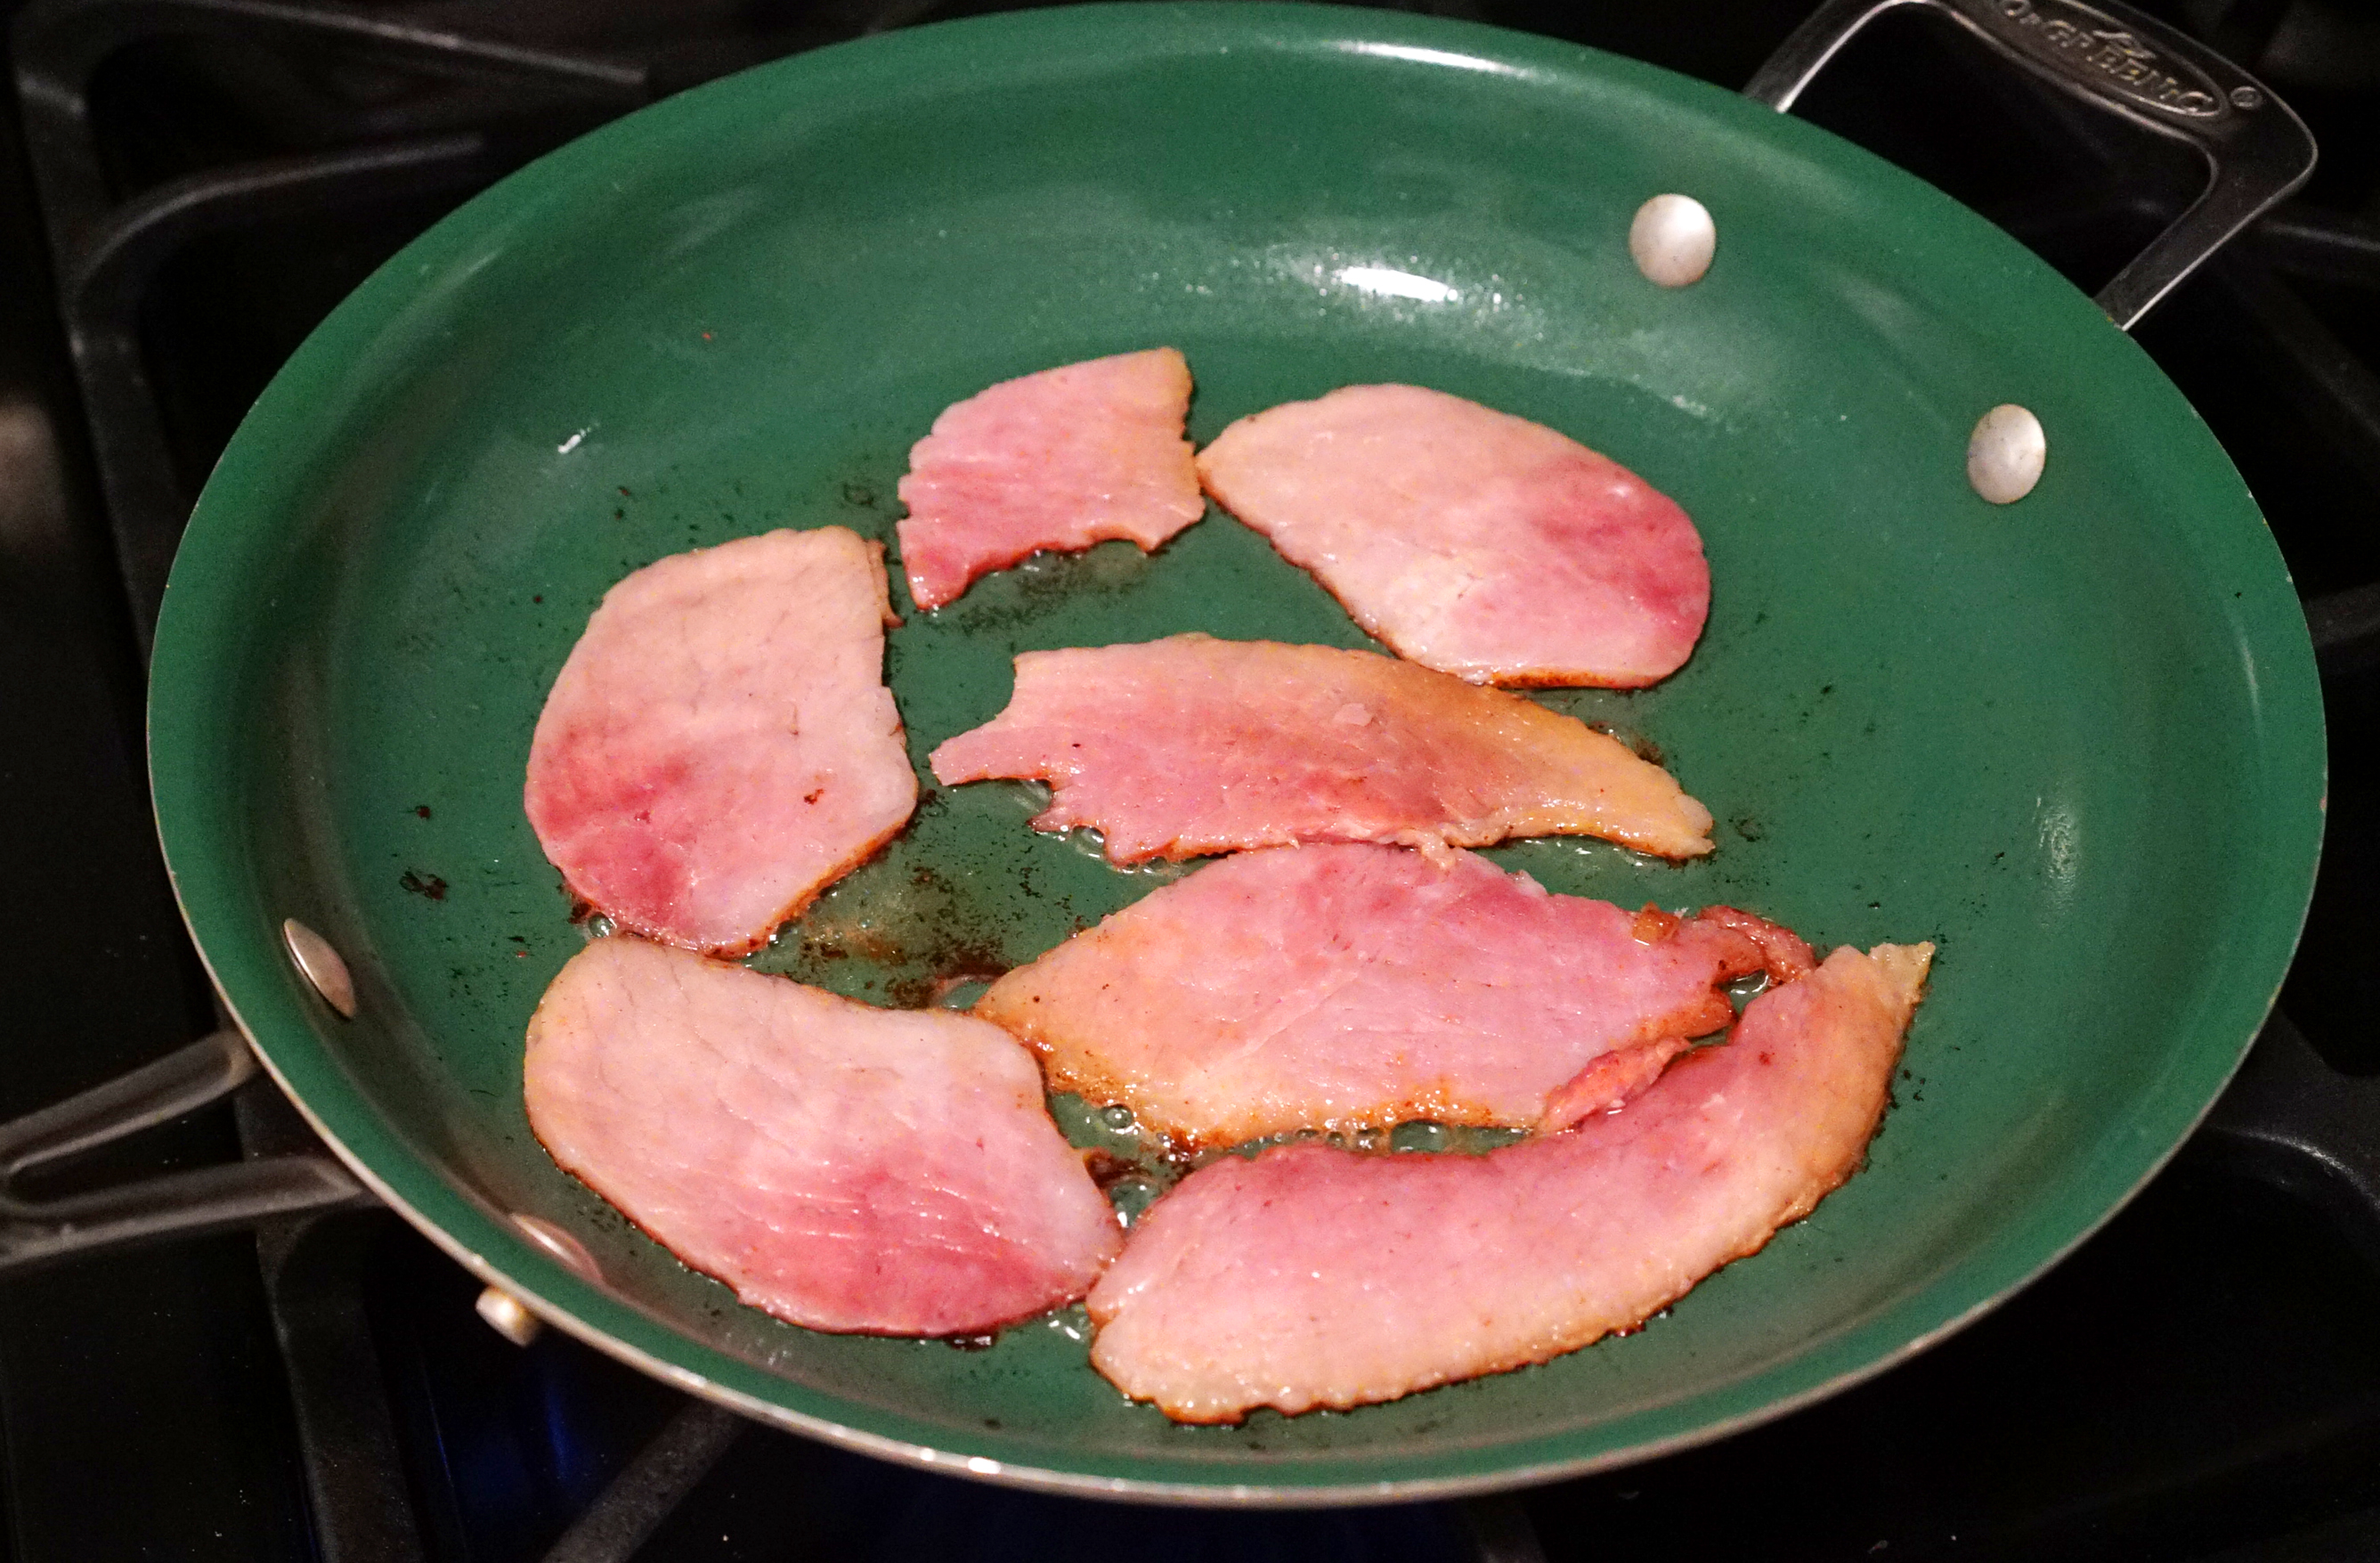
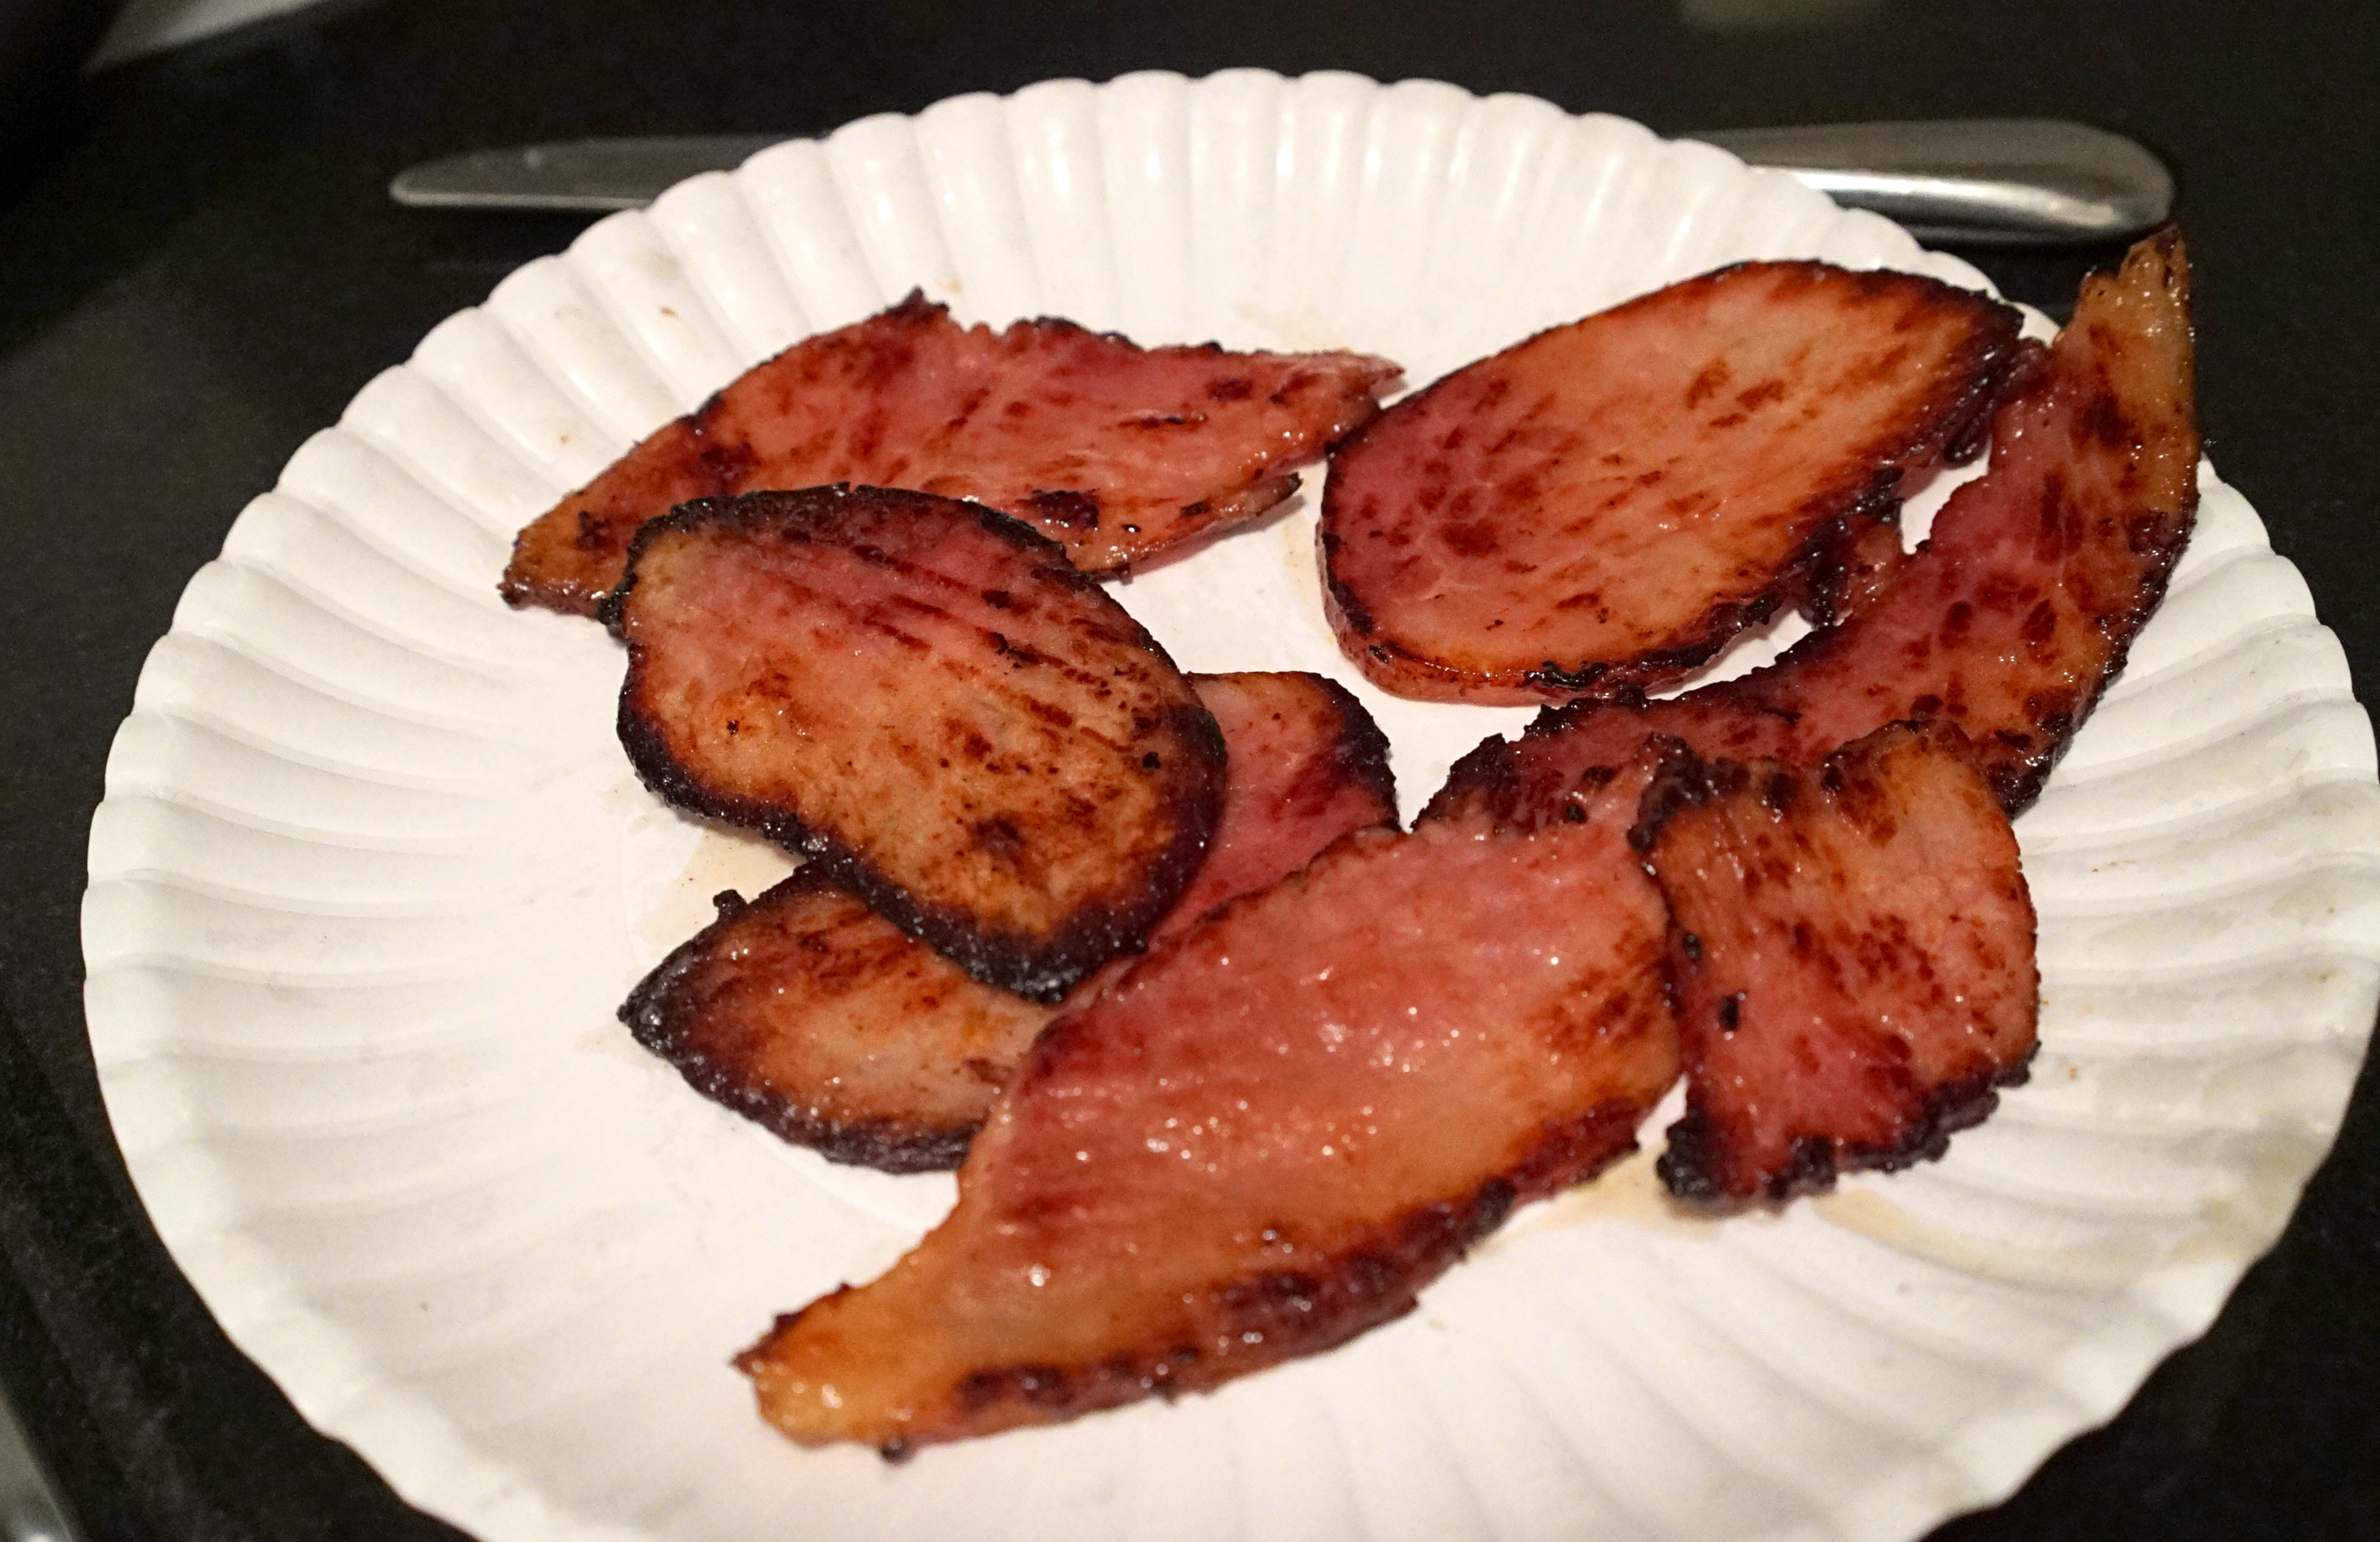
STEP 2: Fry off some ham. Get it nice and brown/crisp on the edges.
STEP 3: You should have some hammy oil in the pan now. LEAVE IT! Put your patties in and let them sizzle up like a regular burger.
STEP 4: Flip once, when they are browned.
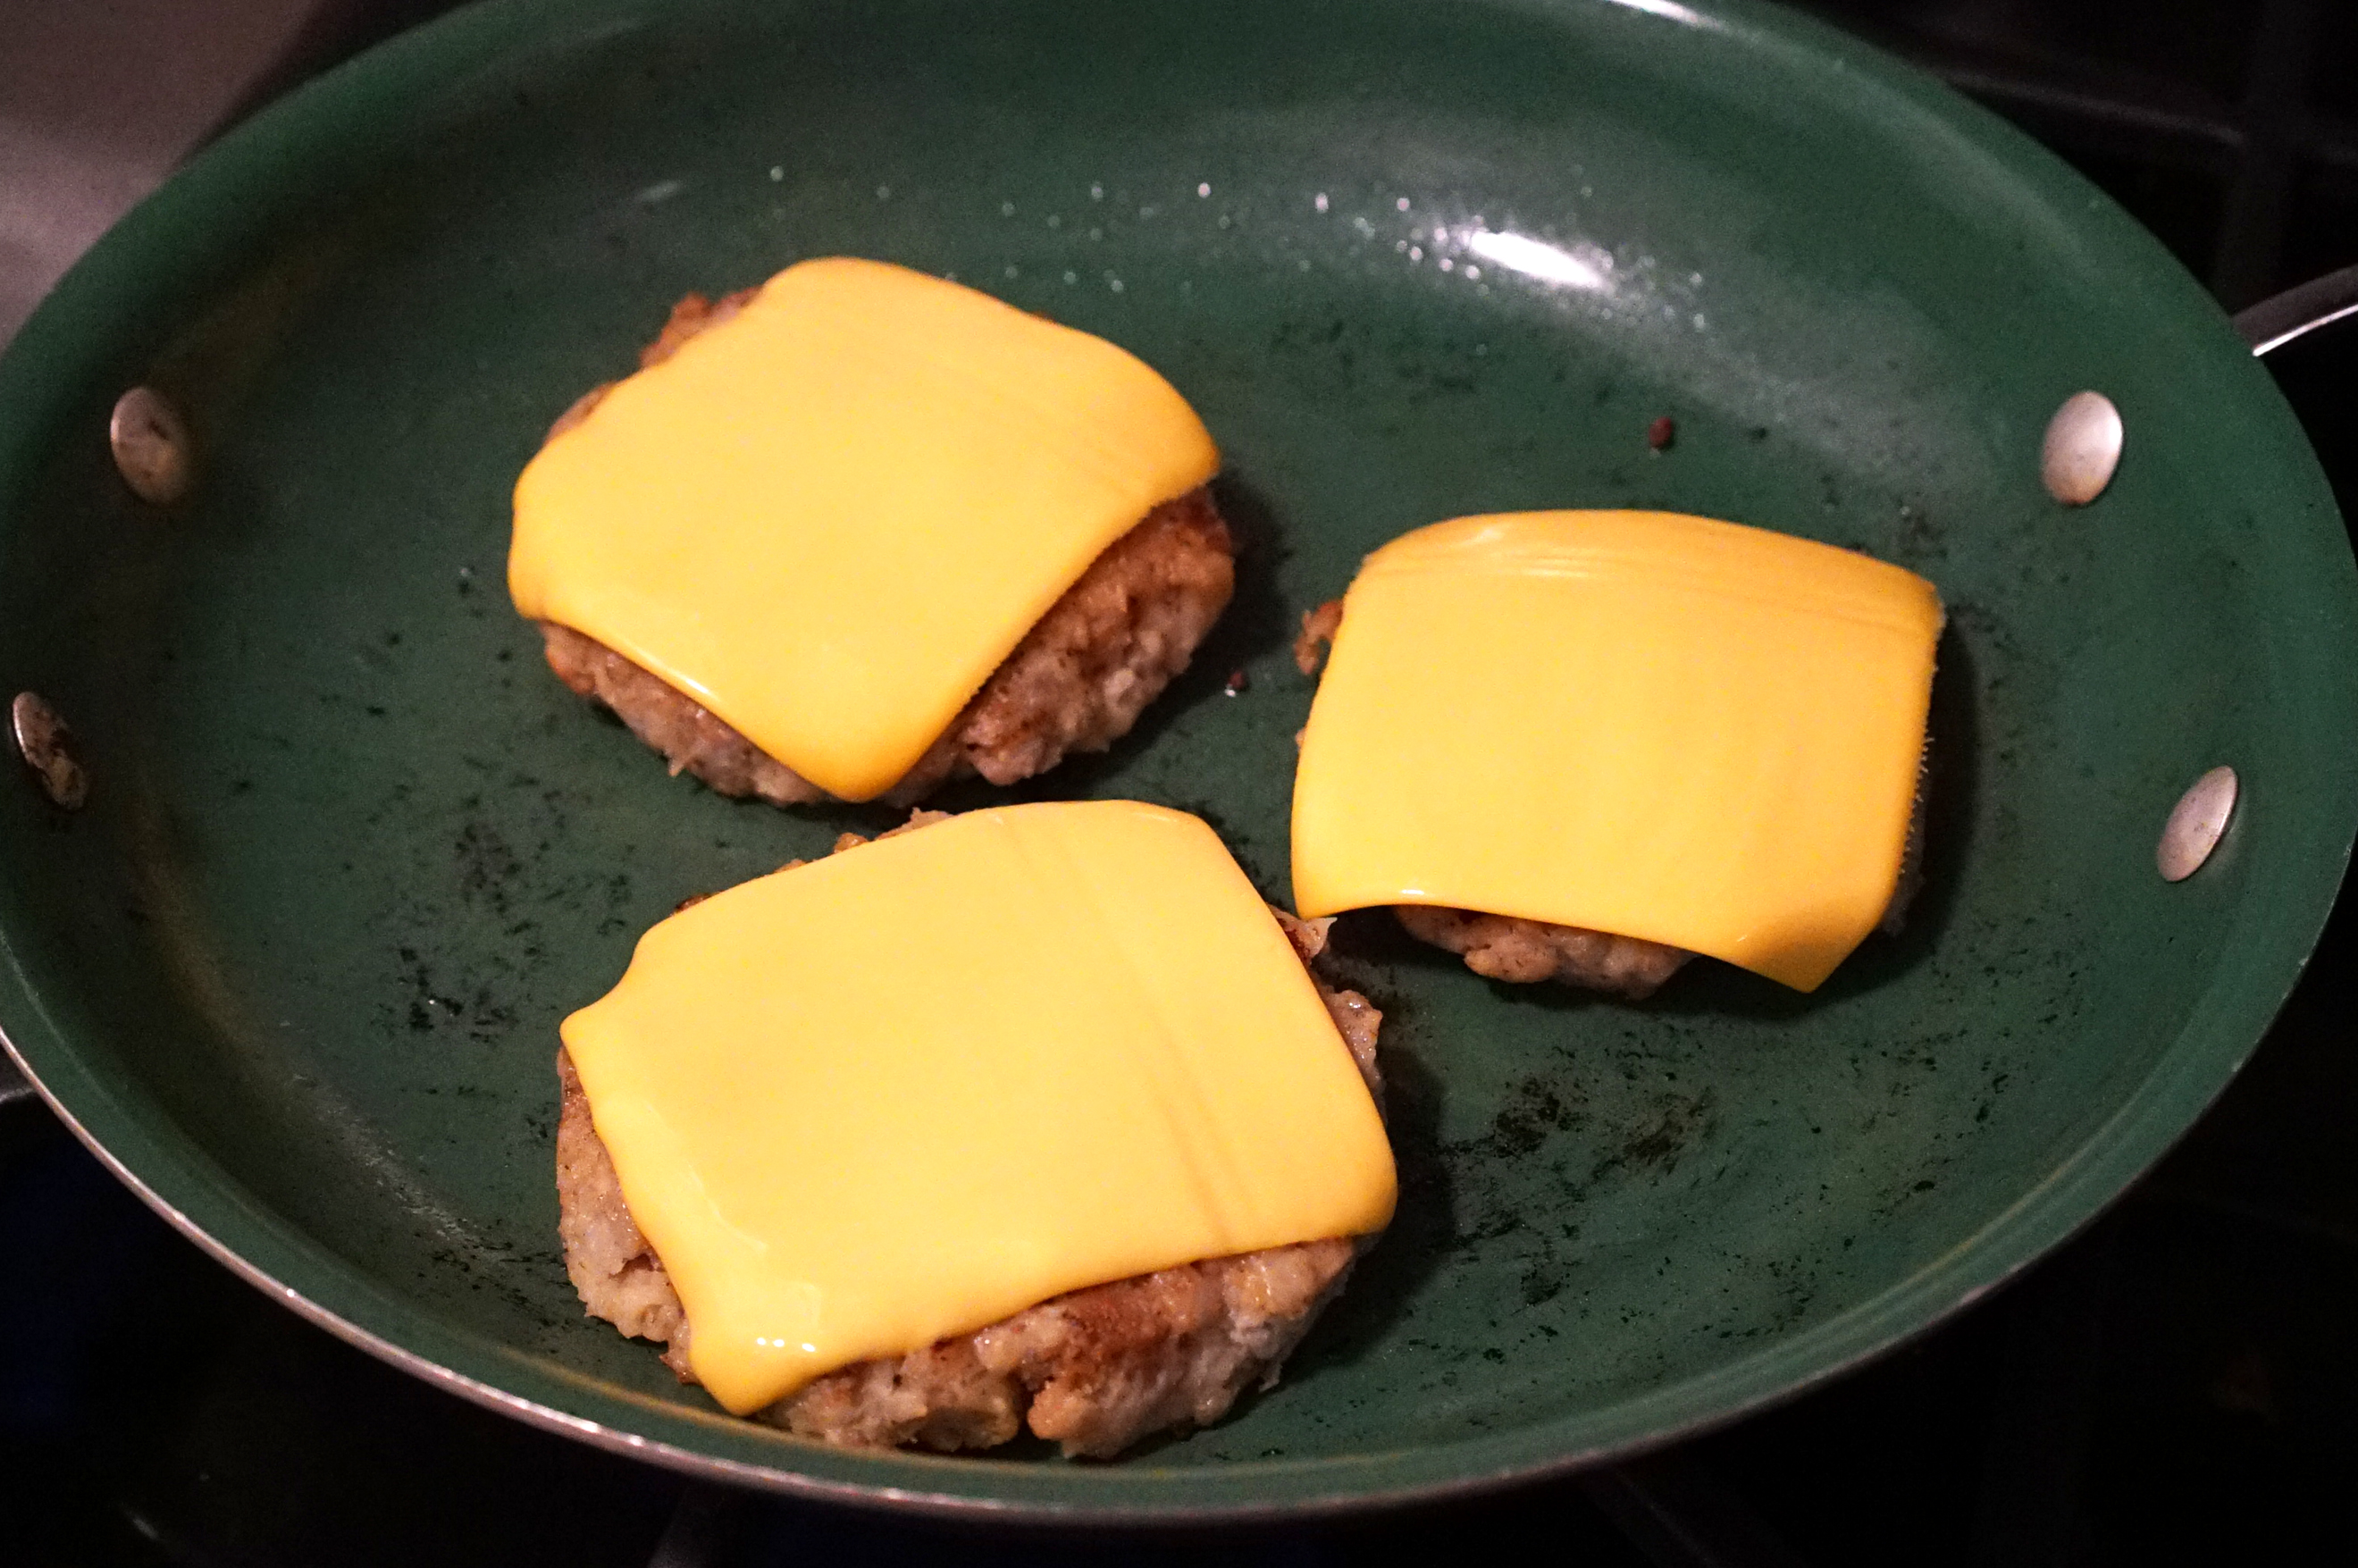
STEP 5: Add first layer of cheese. If possible, cover the pan so the cheese begins to melt from the steam that builds up.
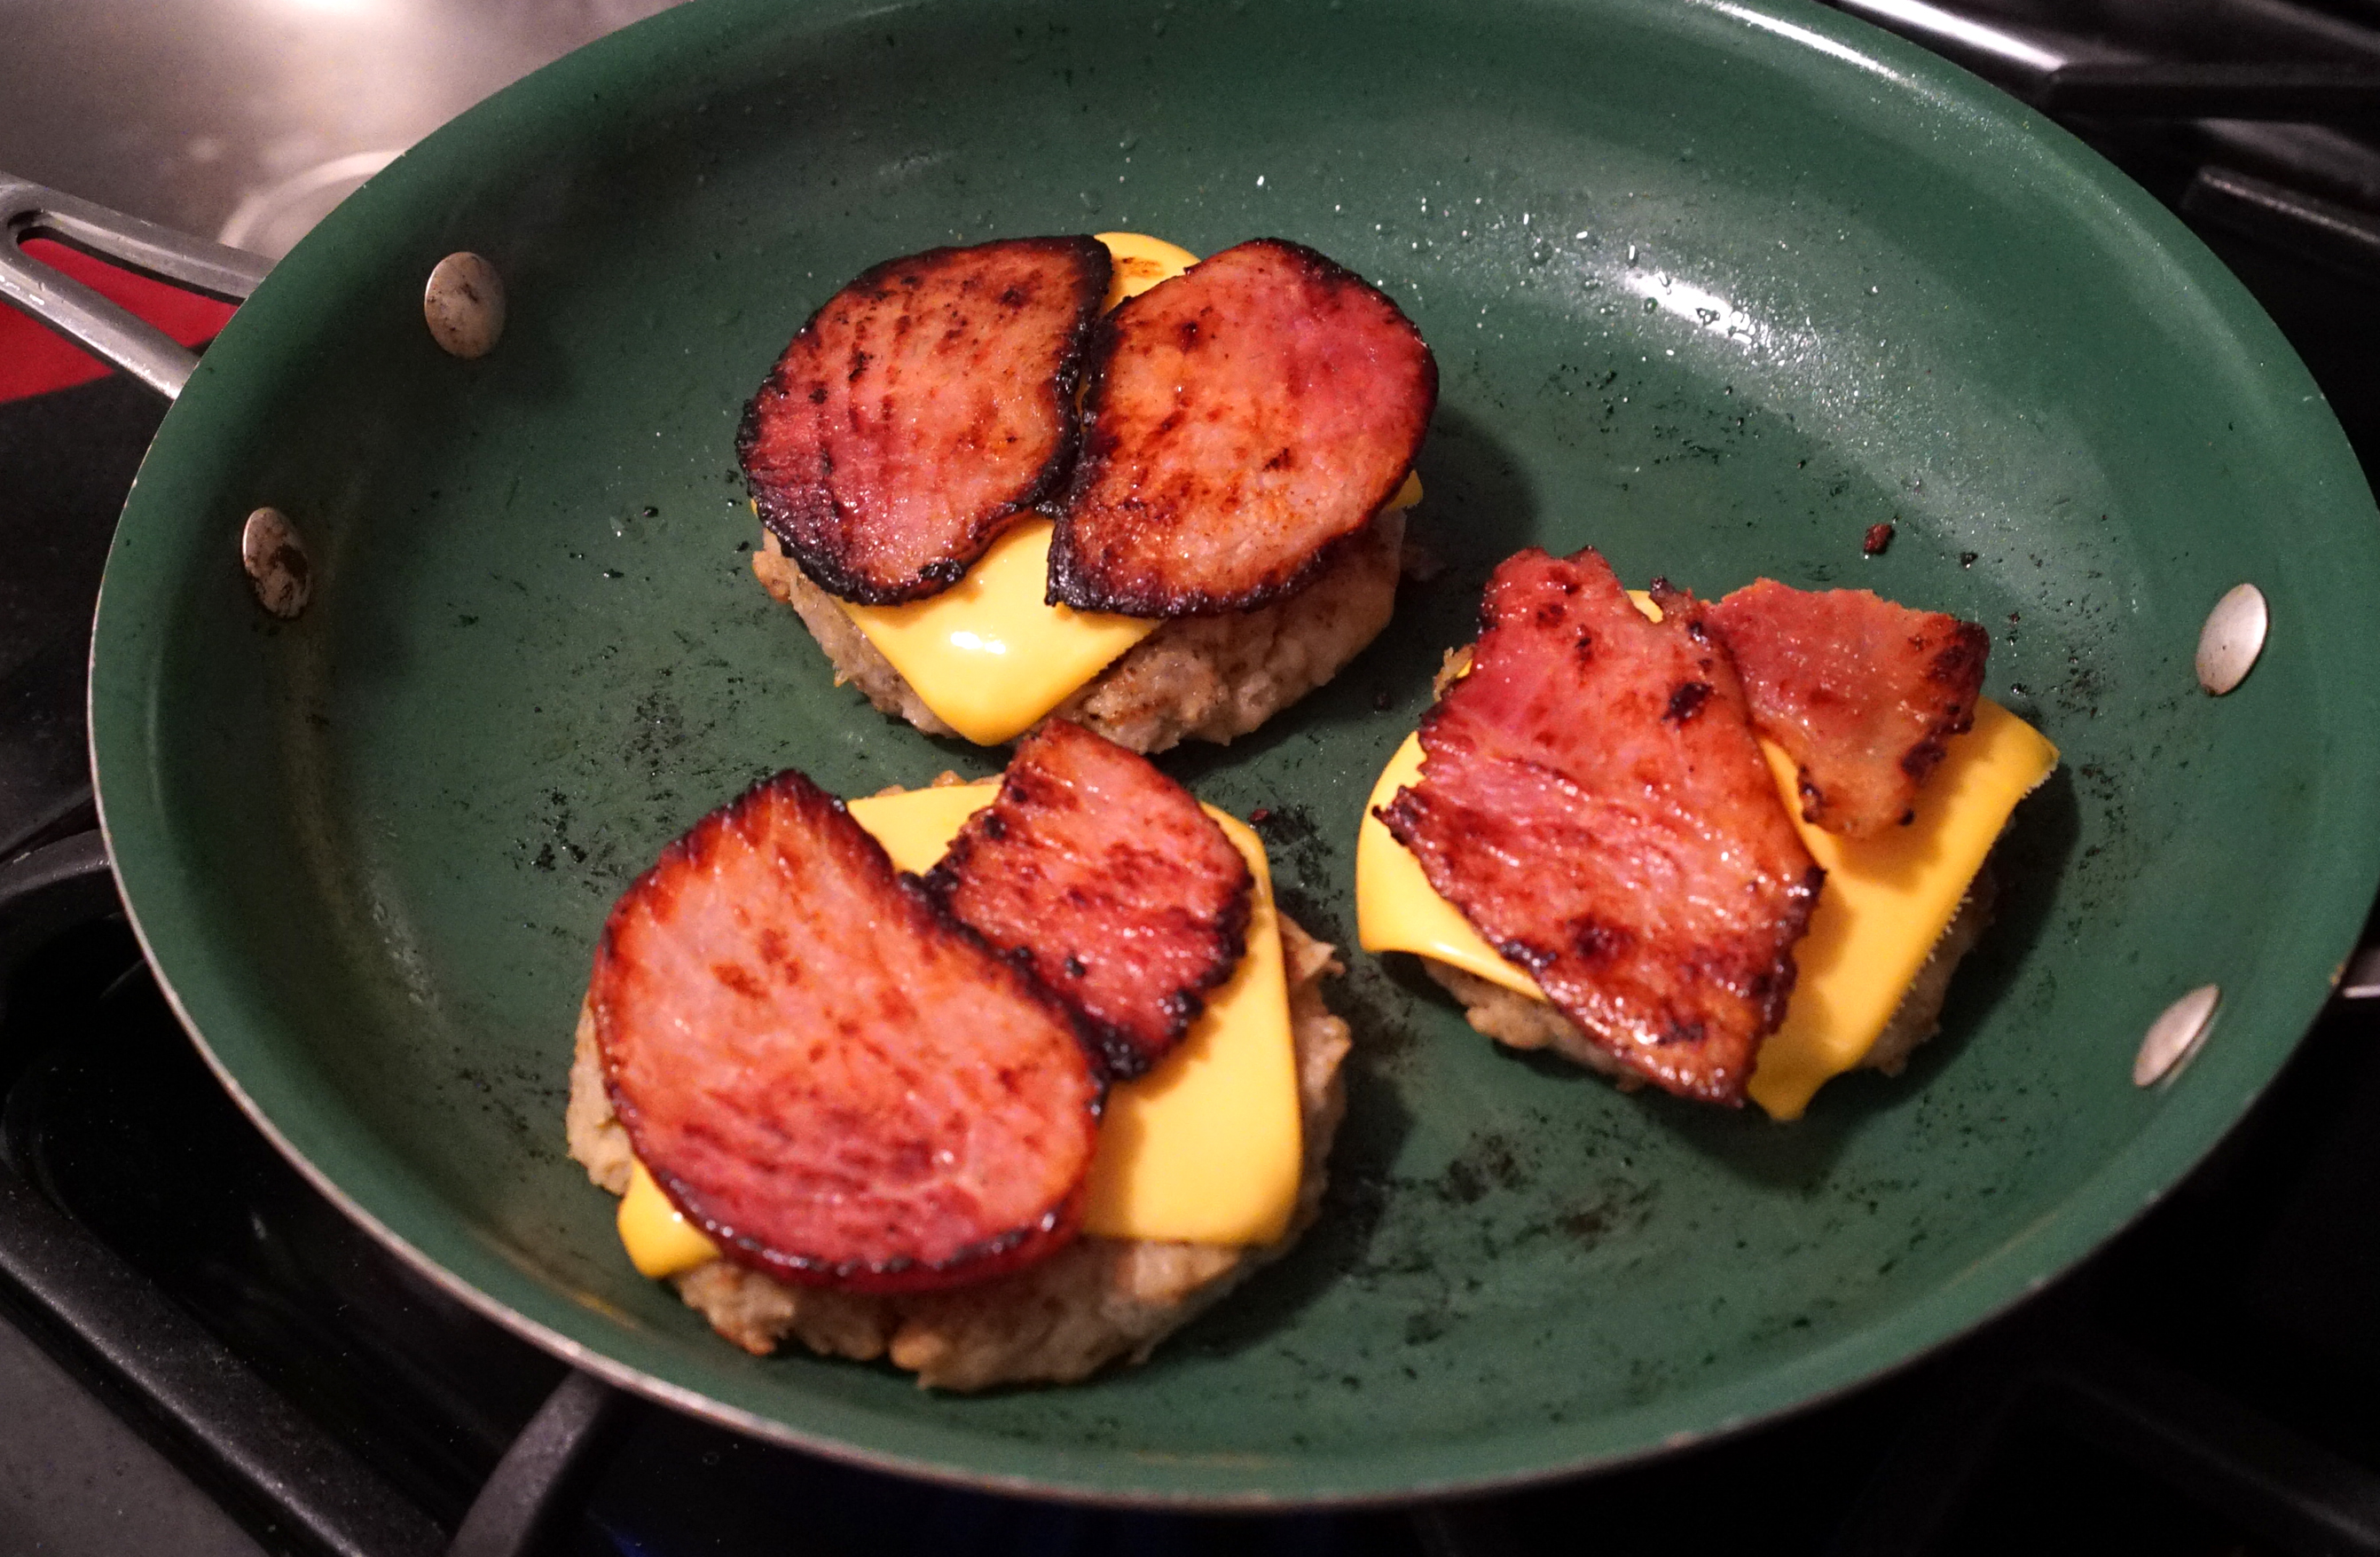
STEP 6: Pop some ham on that bitch.
STEP 7: Add second layer of cheese (and cover if possible).
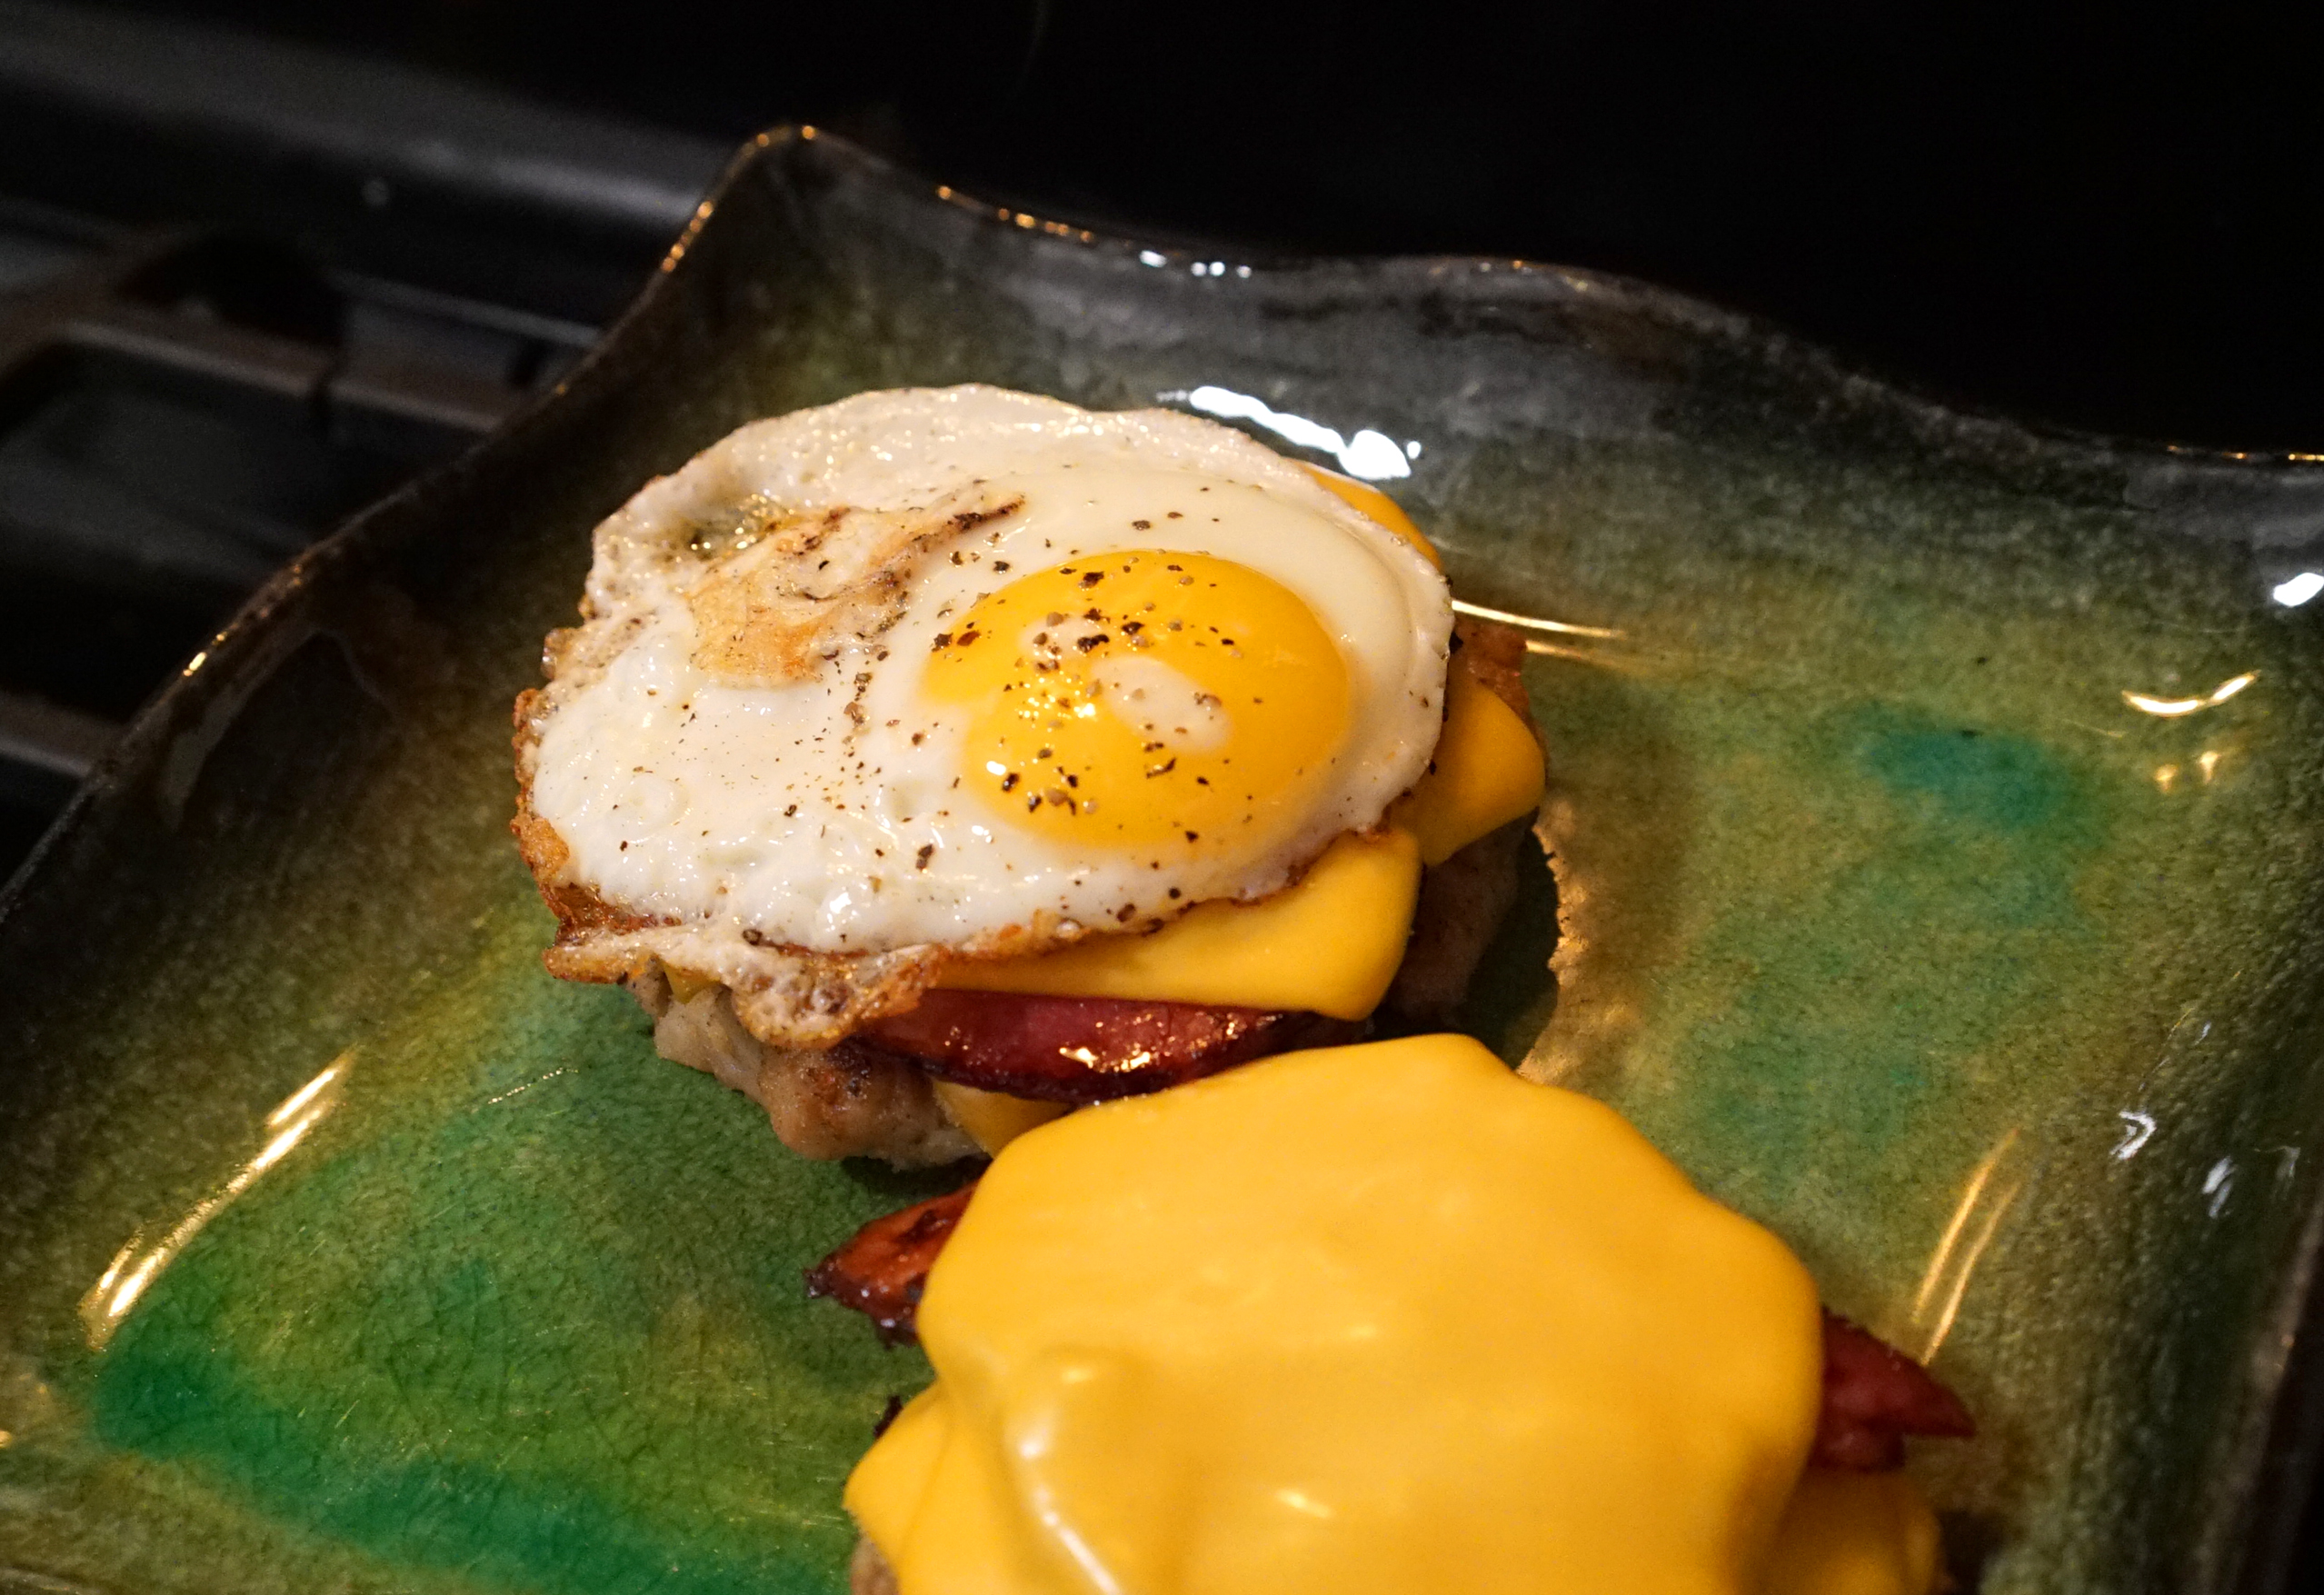
STEP 8: Take the burgers off the pan with a spatula and fry up some eggs for the top.
STEP 9: Top off your burgers with an egg or two.
STEP 10: EAT.
I had no buns in the apartment, but since the burger is primarily made from bread, there’s really no need for a bun anyway. Just fork and knife it.