Category Archives: Education

Meat 201

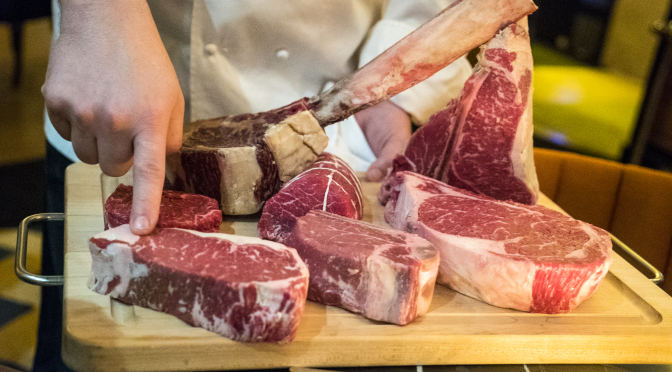
Meat 201 is an advanced examination of the four major cuts of beef that you’re likely to see at a steakhouse. The four major cuts are Filet Mignon, Strip Steak, Porterhouse and Rib Eye. For more general information about these cuts, and for information about other cuts of beef, please see my MEAT 101 and MEAT 102 posts.

1. Porterhouse

Etymology: There is some difference of opinion on the origin of the word “Porterhouse,” with several restaurants and cities claiming to have created the name. For example, Martin Morrison served large T-bones in his Pearl Street (Manhattan) “Porter House” around 1814. This history was popular in the late 1800’s, but some say a Cambridge, Massachusetts proprietor by the name of Zachariah B. Porter added his name to the steak. Still, others argue that the Porterhouse name stems from various 19th Century U.S. hotels or restaurants called Porter House, such as the Porter House Hotel in Flowery Branch, Georgia.

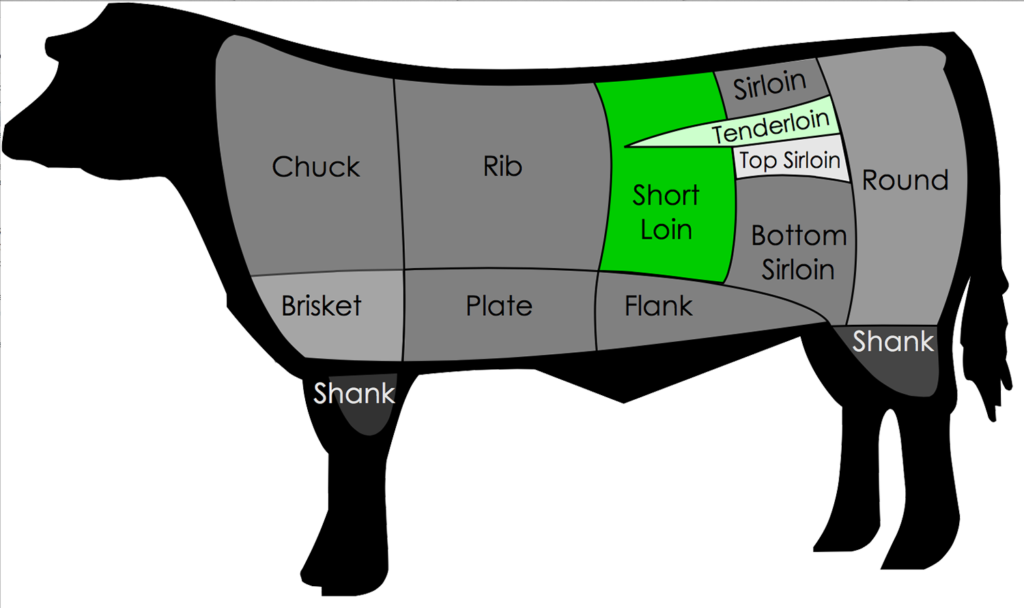
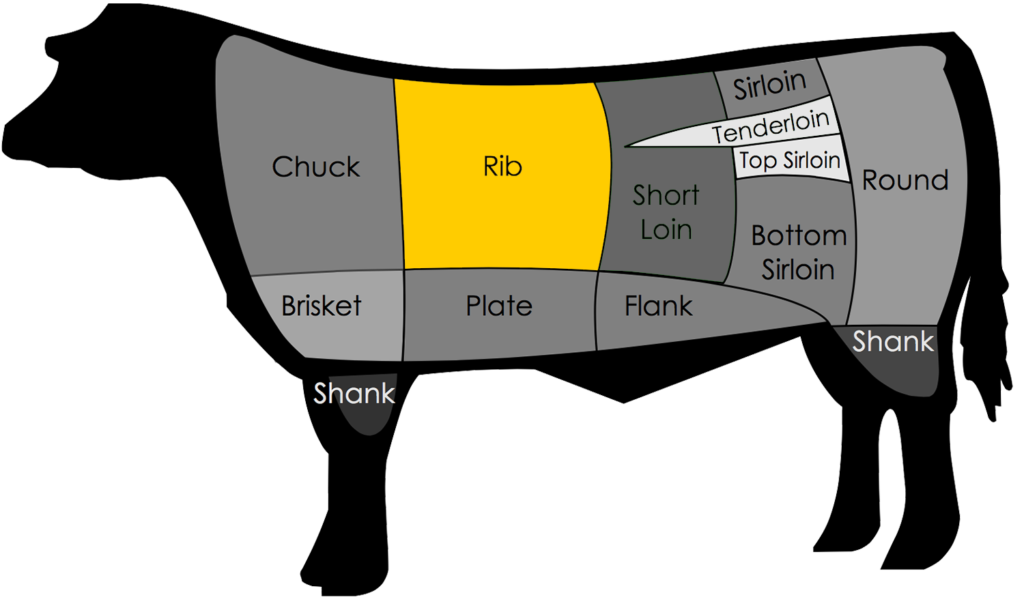
Anatomy: The Porterhouse is a cut of steak from the short loin portion of the animal that contains both strip loin and tenderloin meats. See the highlighted portion in the diagram below:

It is cut from a lumbar vertebra that is sawed in half through the vertebral column.

The downward prong of the “T” is a transverse process of the vertebra, and the flesh that surrounds it (spinal muscles) makes up the meat of the Porterhouse.

DSC02003 illustrated watermark

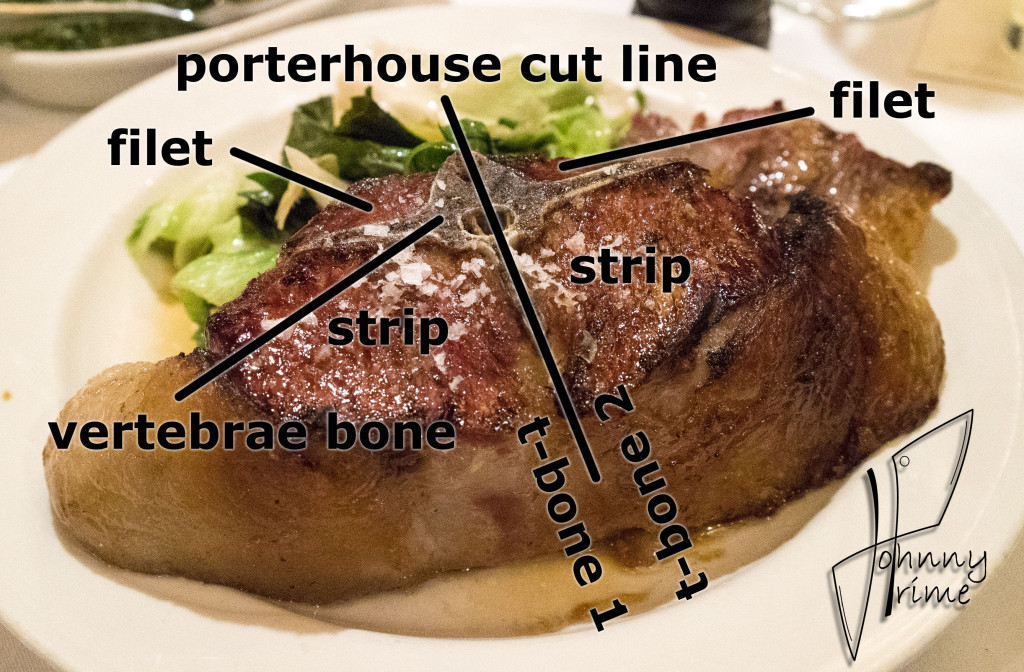
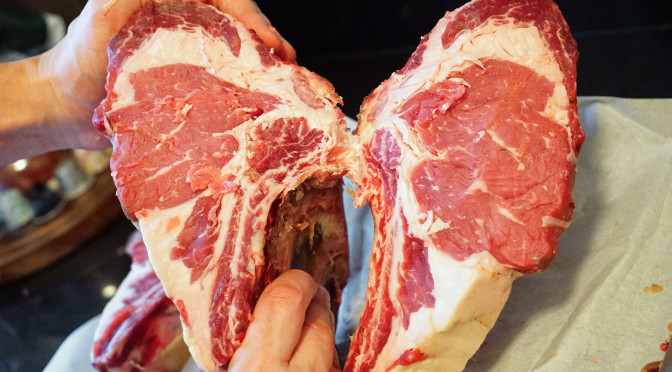
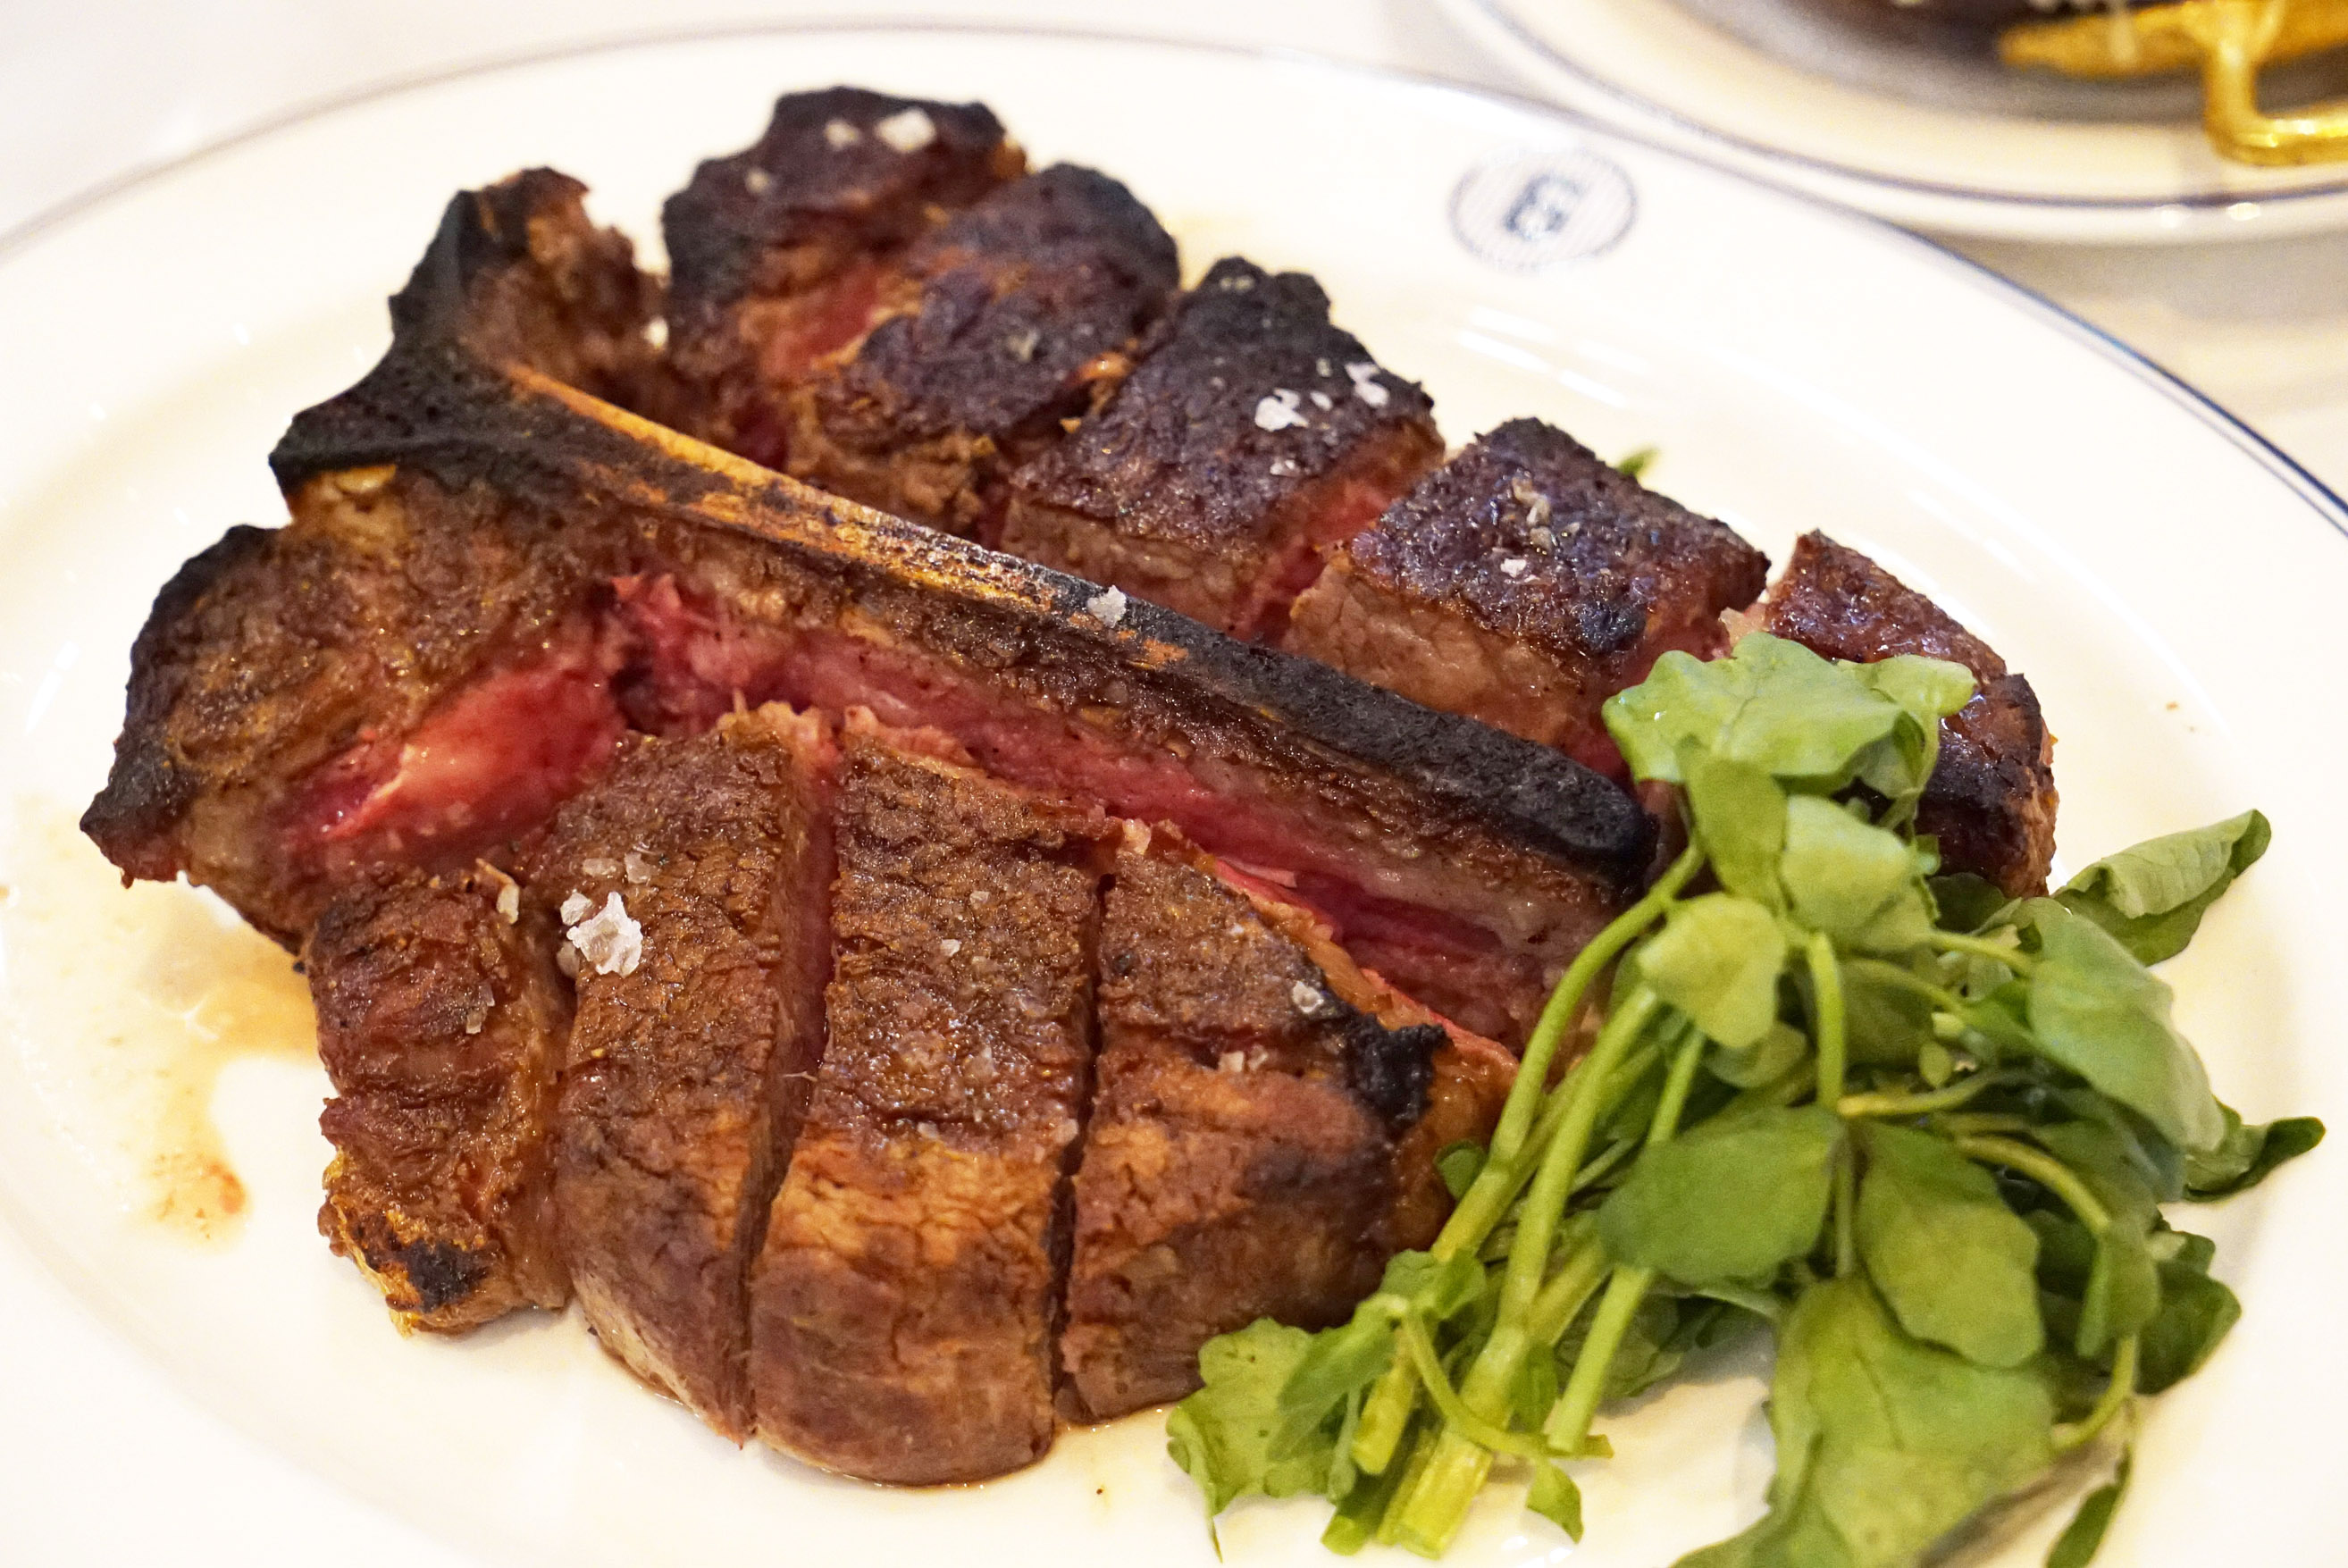
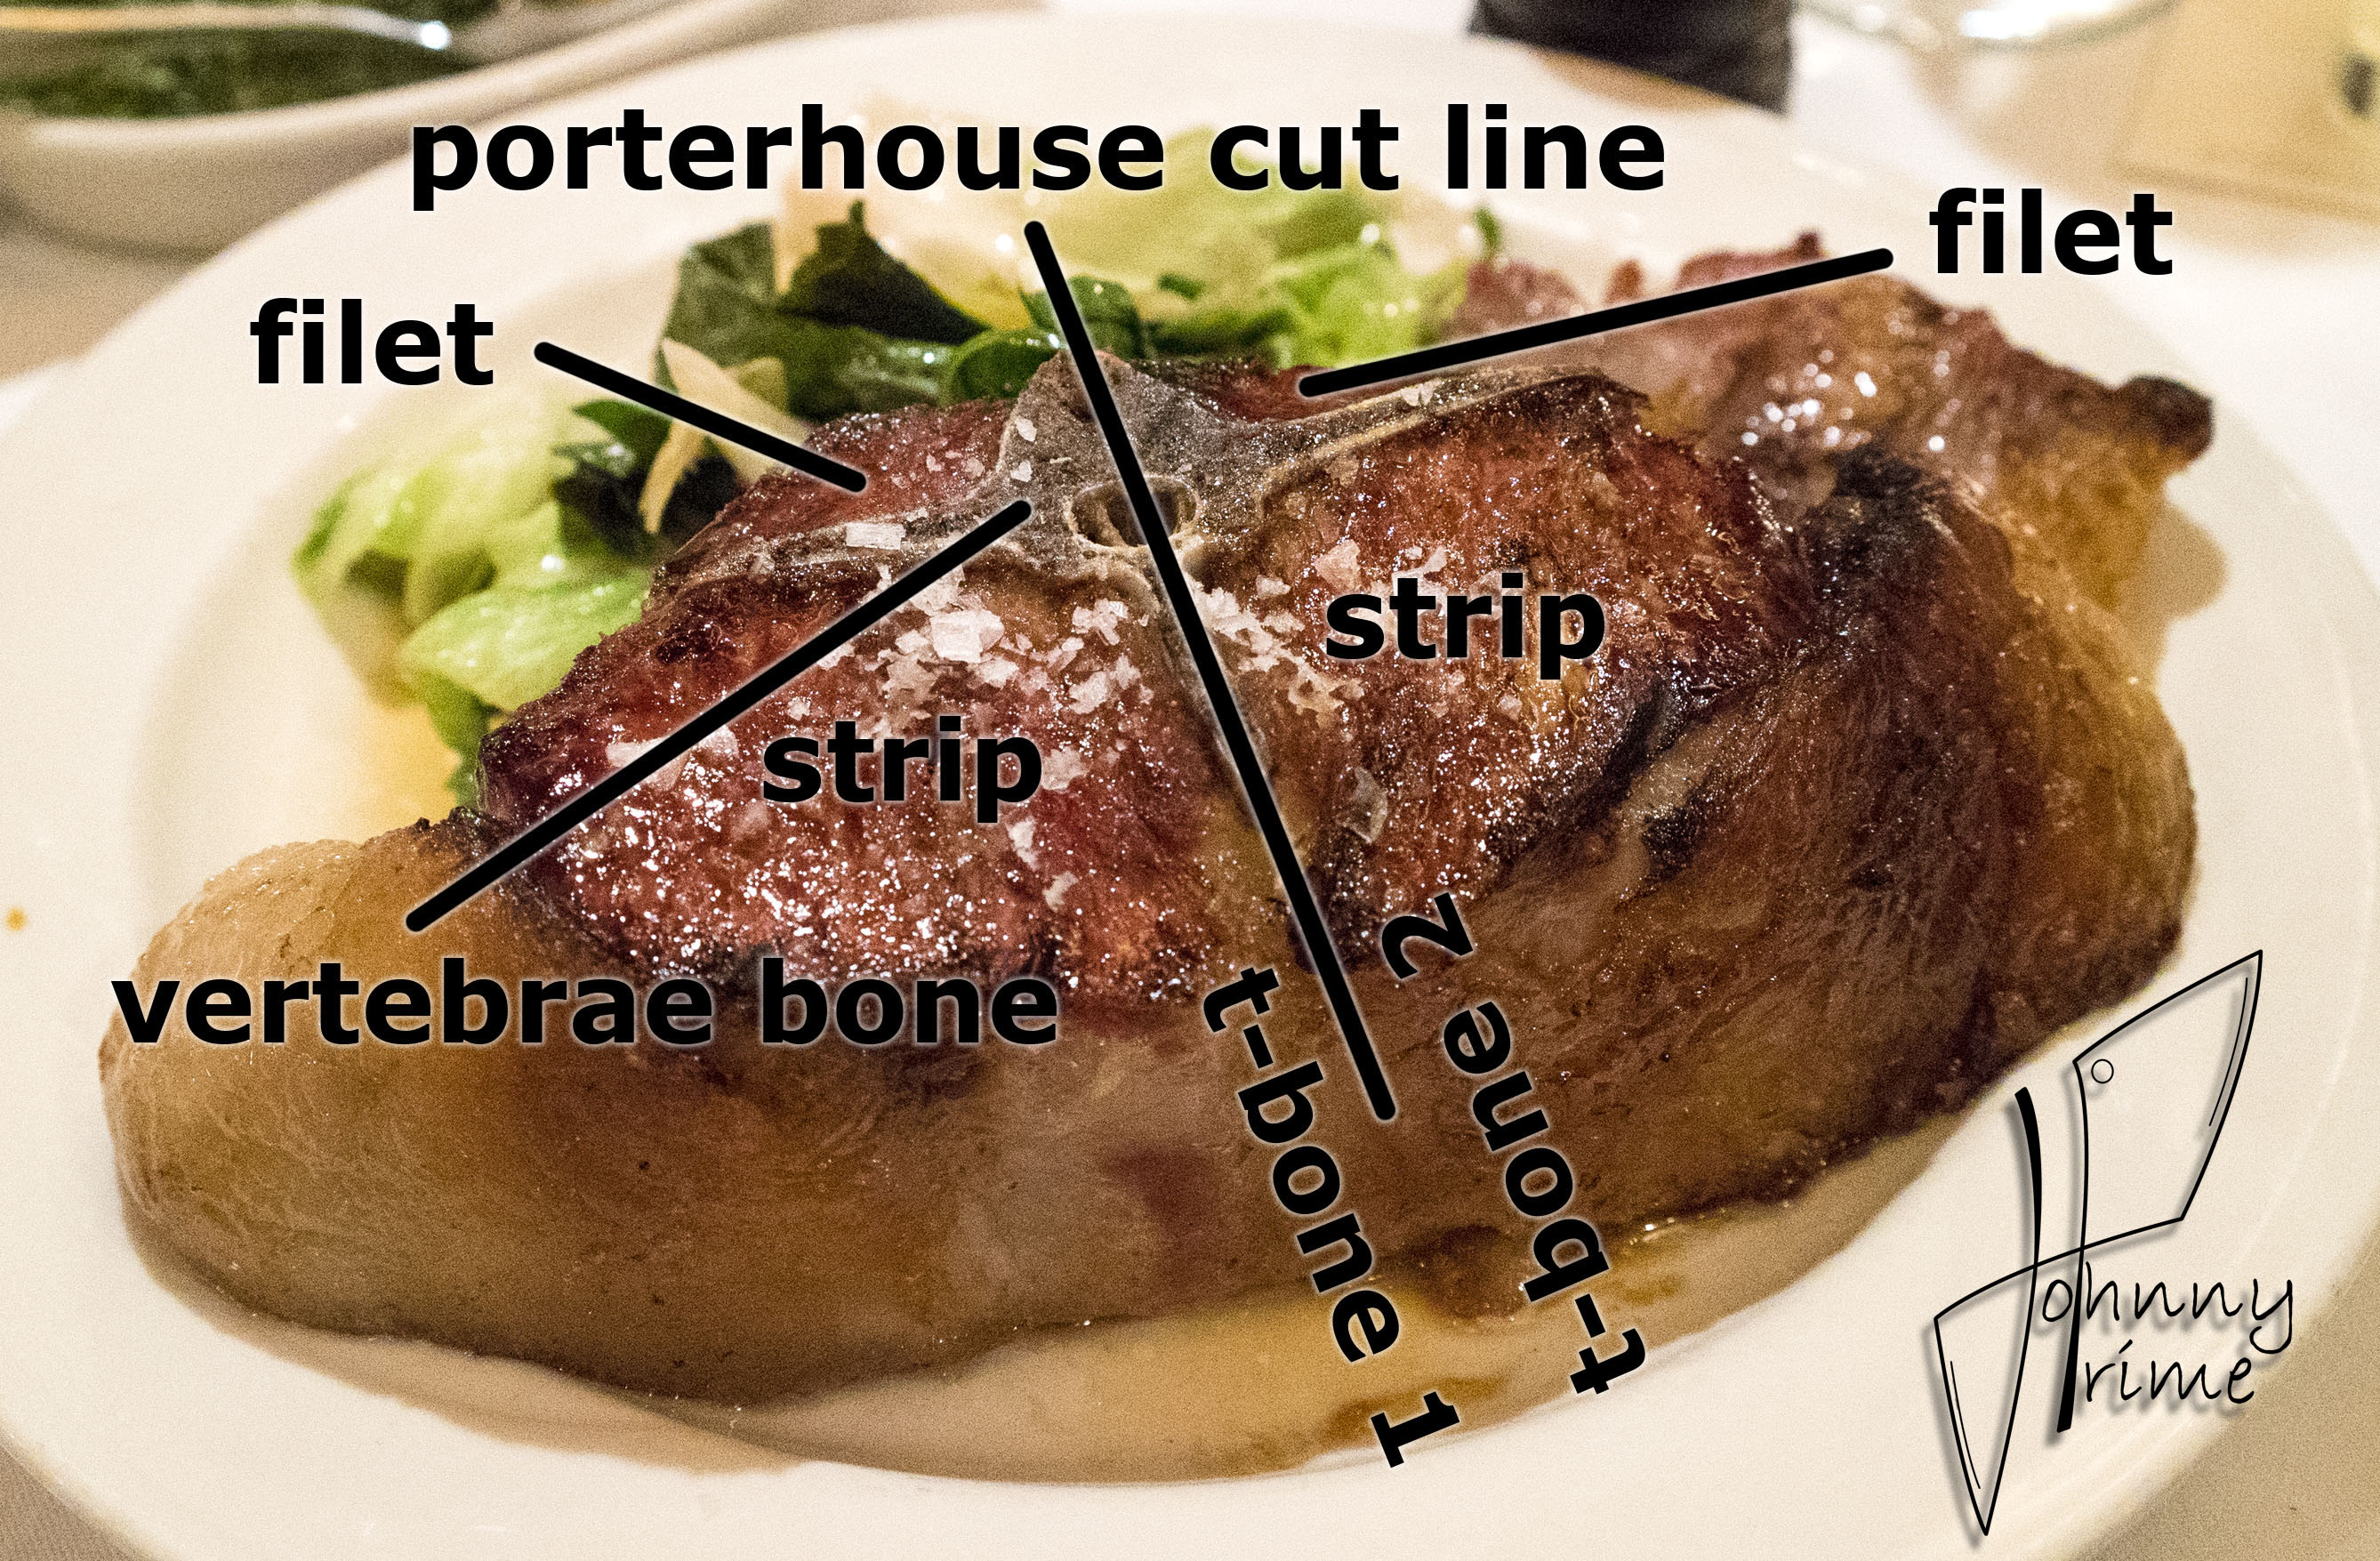
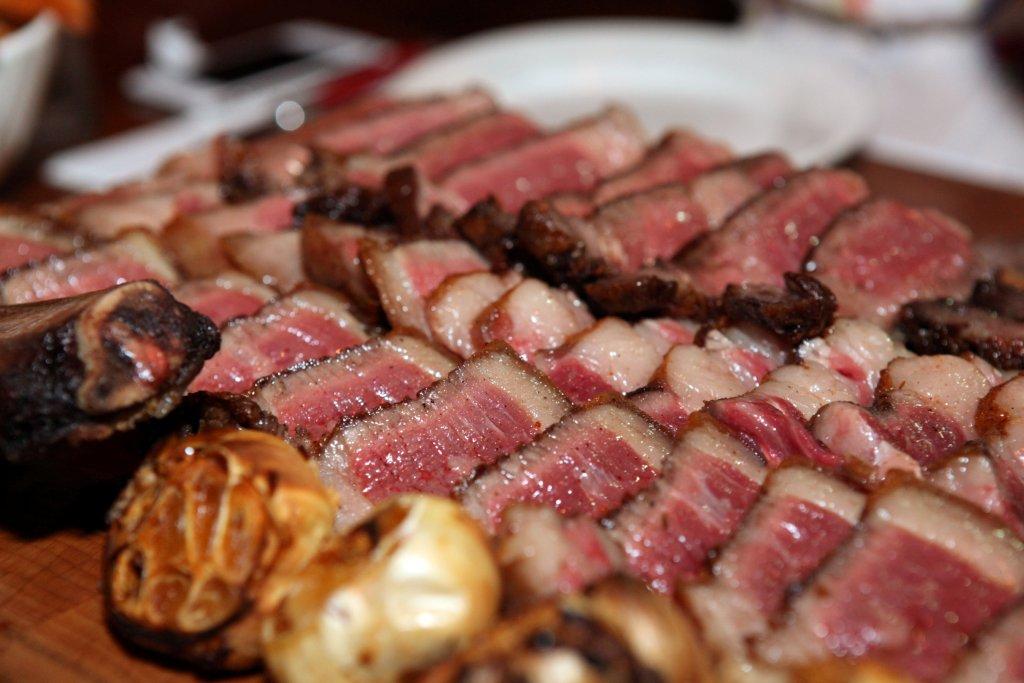
Essentially, it is a large T-bone steak from the rear of the animal that has two different types of meat (tenderloin and strip loin), one on either side of the “T.” In the picture below, the strip loin or Strip Steak is on the right, and the tenderloin or Filet Mignon is on the left.

DSC03188

The small semicircle at the top of the ‘T’ is half of the vertebral foramen, which is the name of the hole that passes through each vertebra for housing and protecting the spinal cord. They run the whole way up the back, all the way up to the brain of the animal.

The anatomy of a Porterhouse differs from that of a T-bone only in that the Porterhouse contains a larger portion of tenderloin than its T-bone counterpart.

This is primarily due to the fact that Porterhouse steaks are cut from further in the rear of the animal, from lumbar vertebrae, where the tenderloin is much thicker. Experts differ, however, on how large the tenderloin must be to differentiate a Porterhouse from a T-bone. The U.S. Department of Agriculture’s Institutional Meat Purchase Specifications state that the tenderloin of a Porterhouse must be at least 1.25 inches thick at its widest, while that of a T-bone must be at least 0.5 inches.

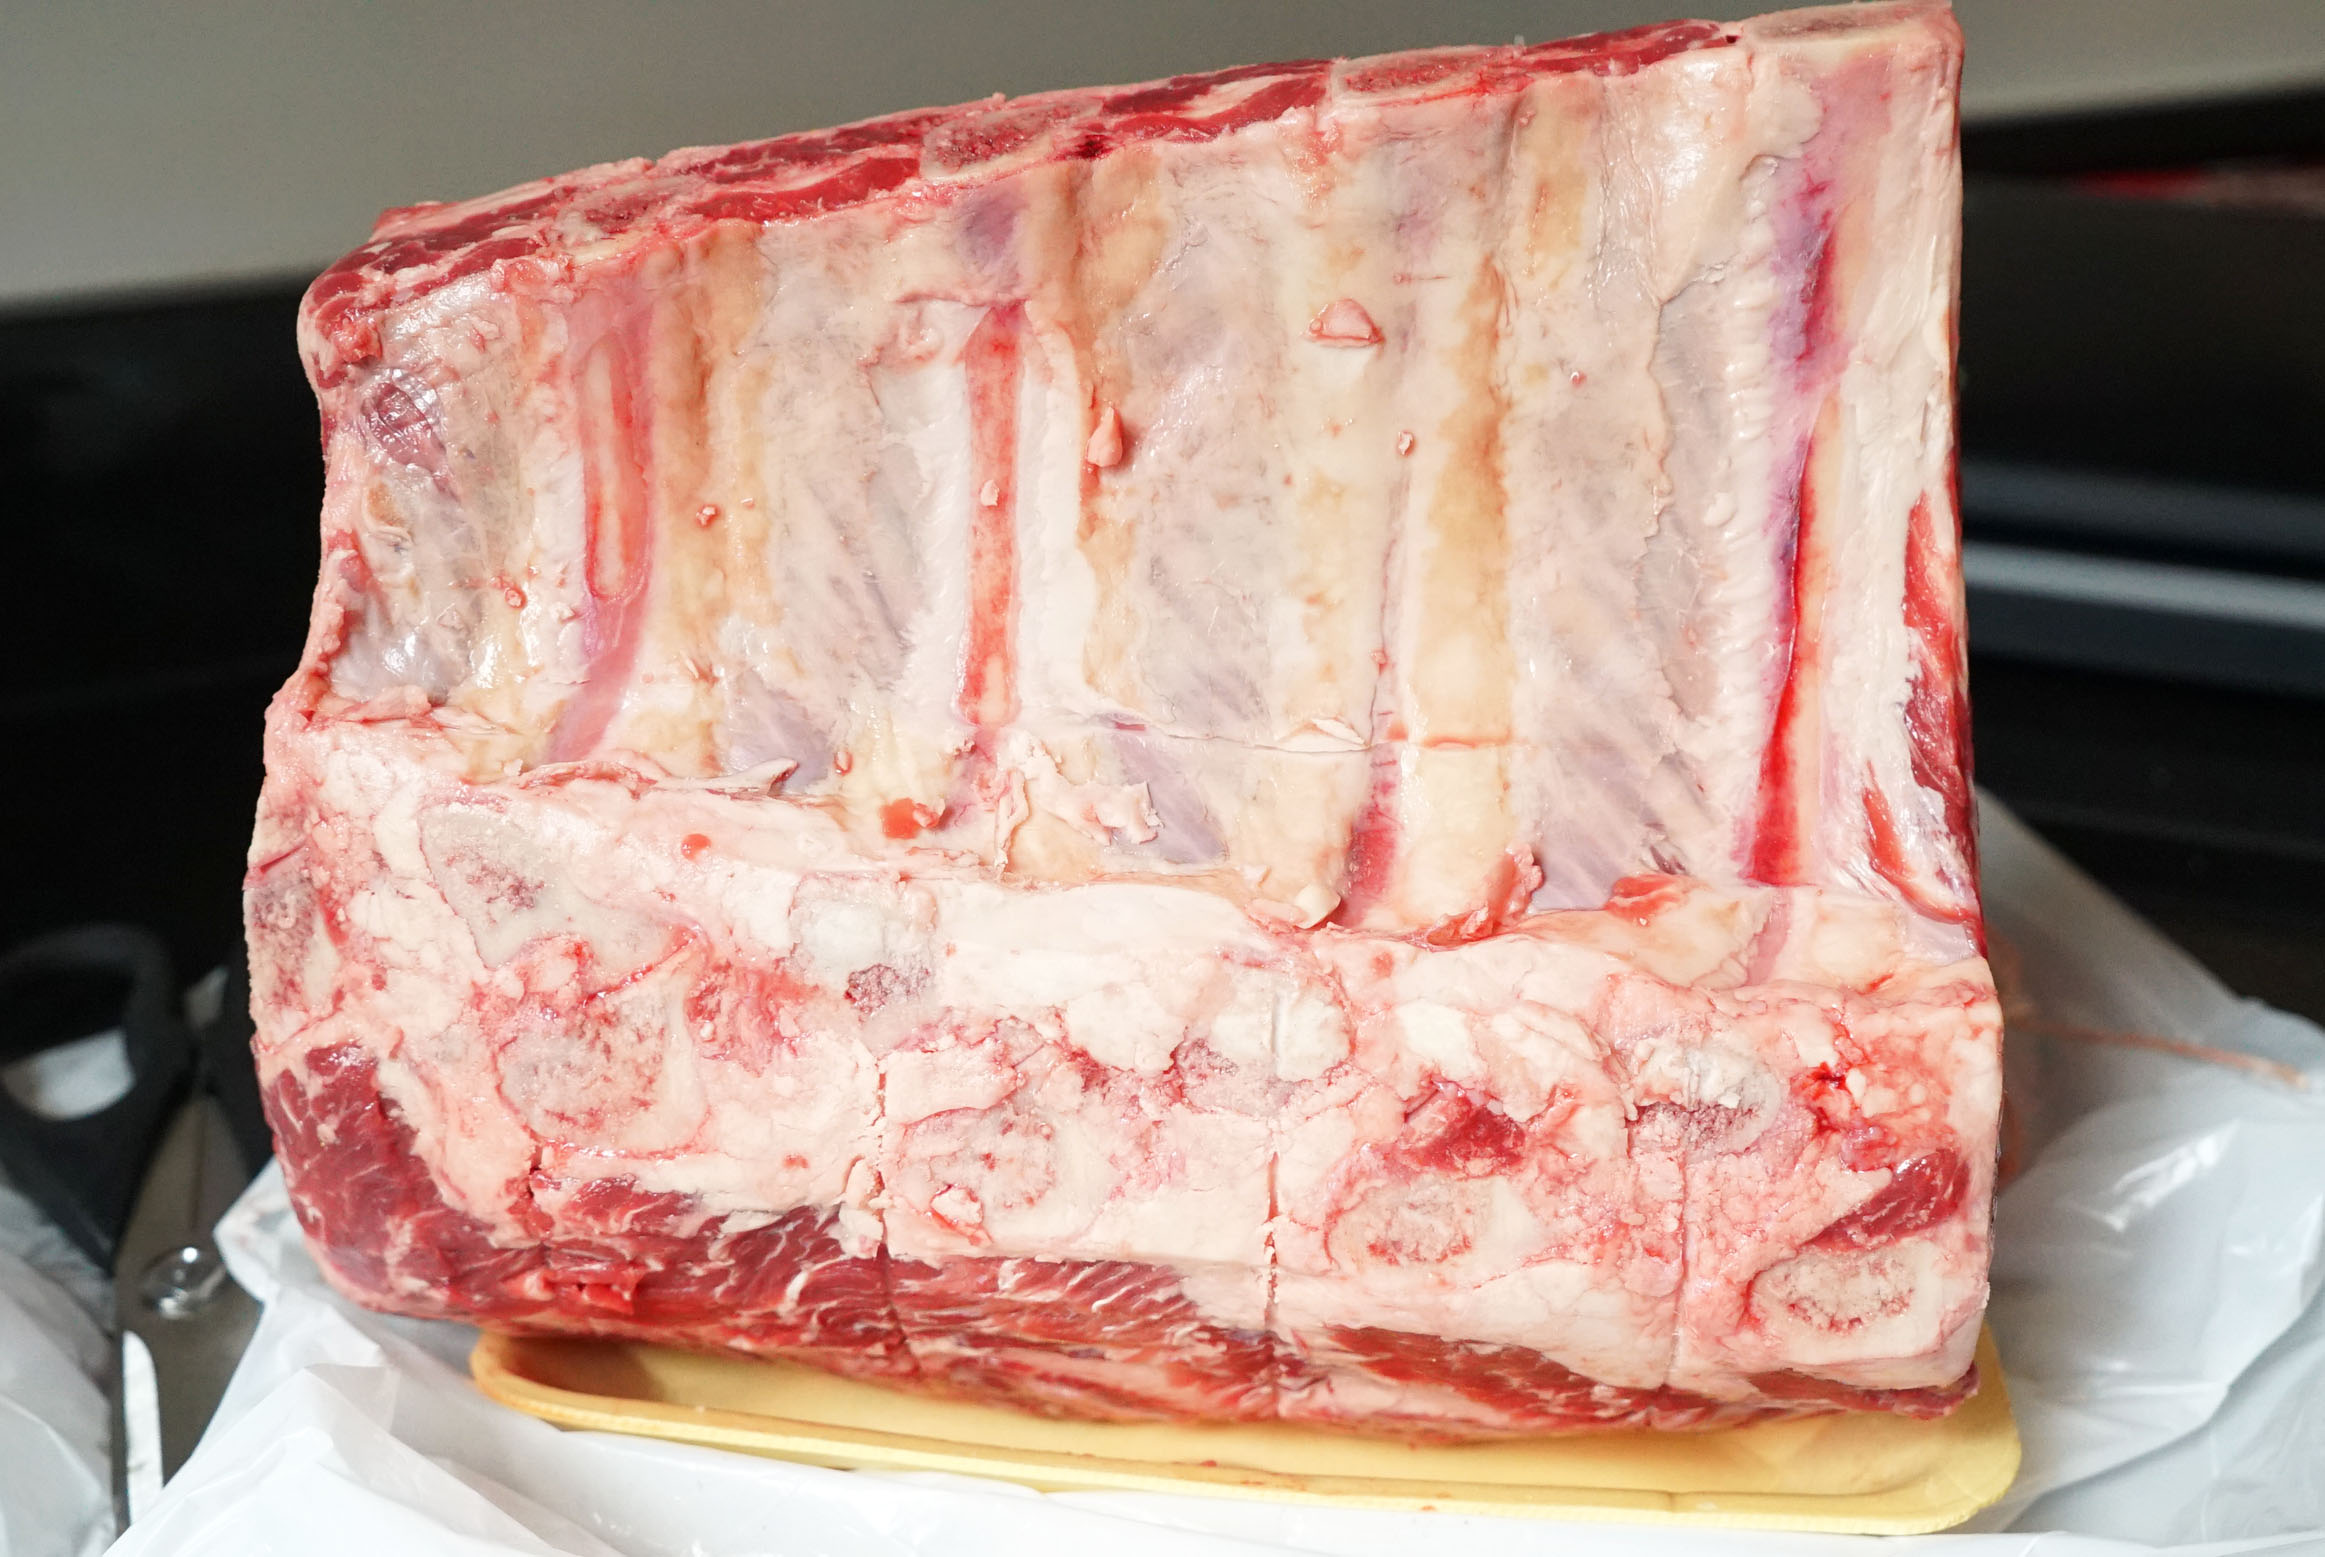
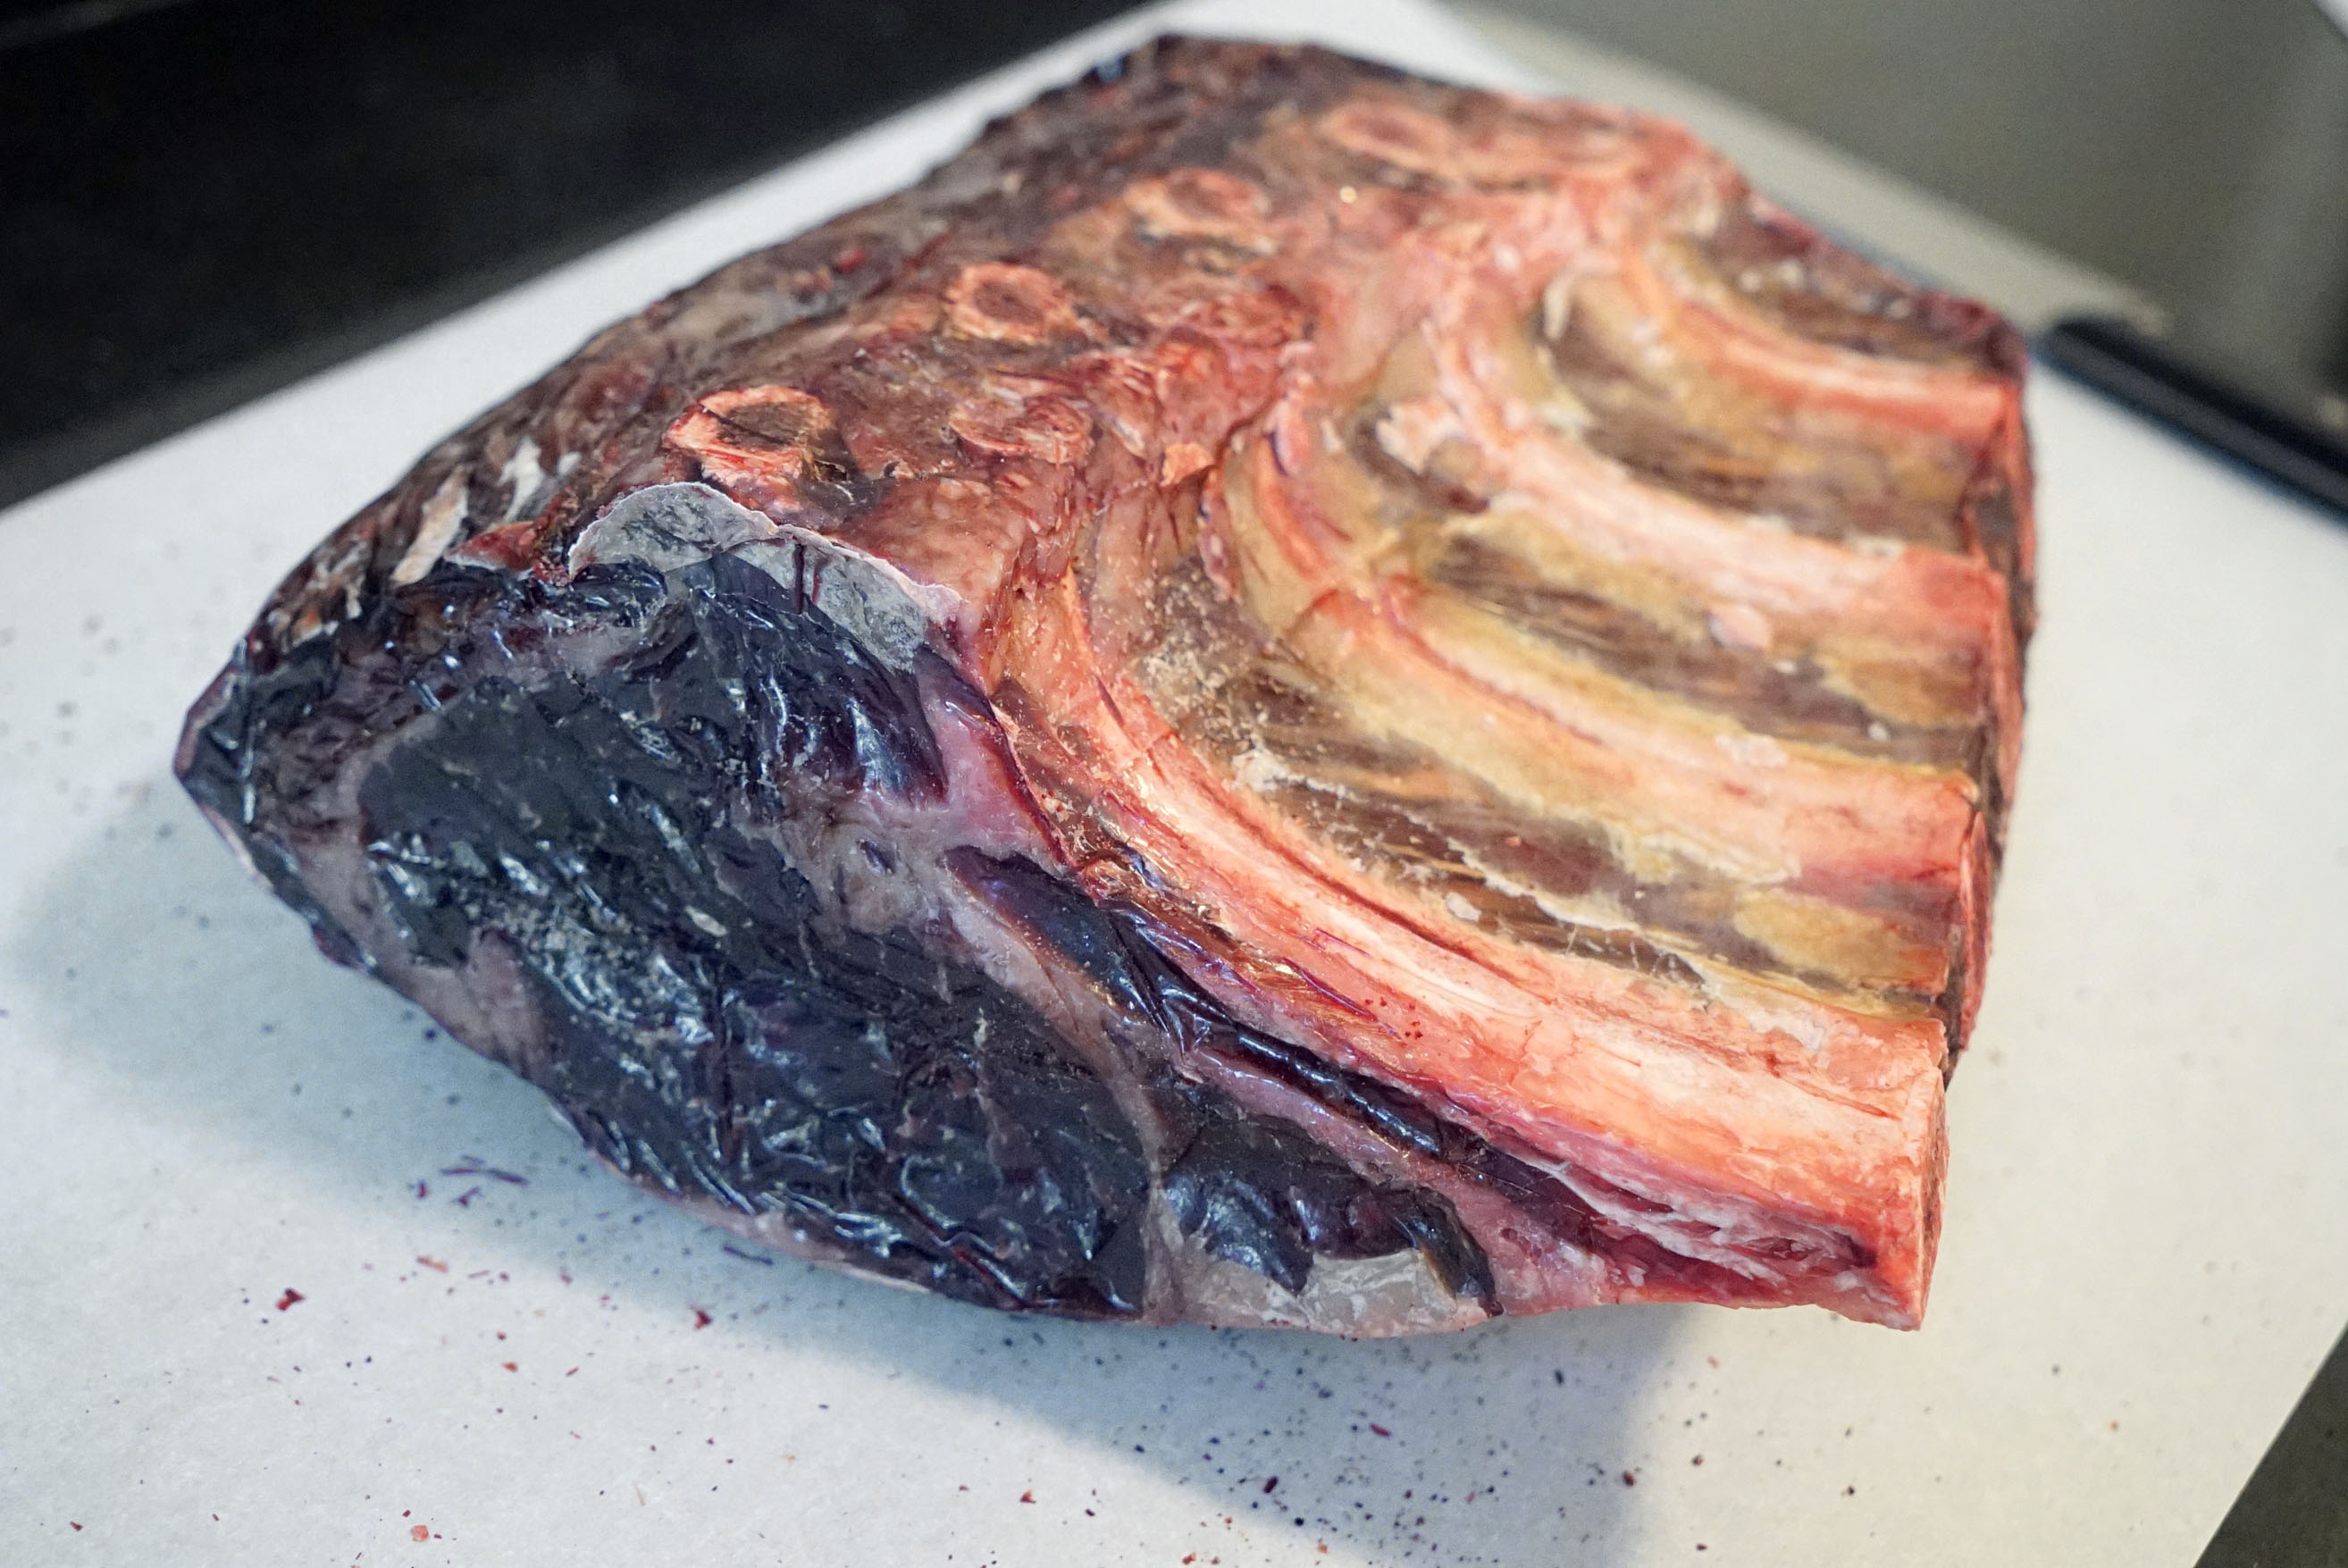
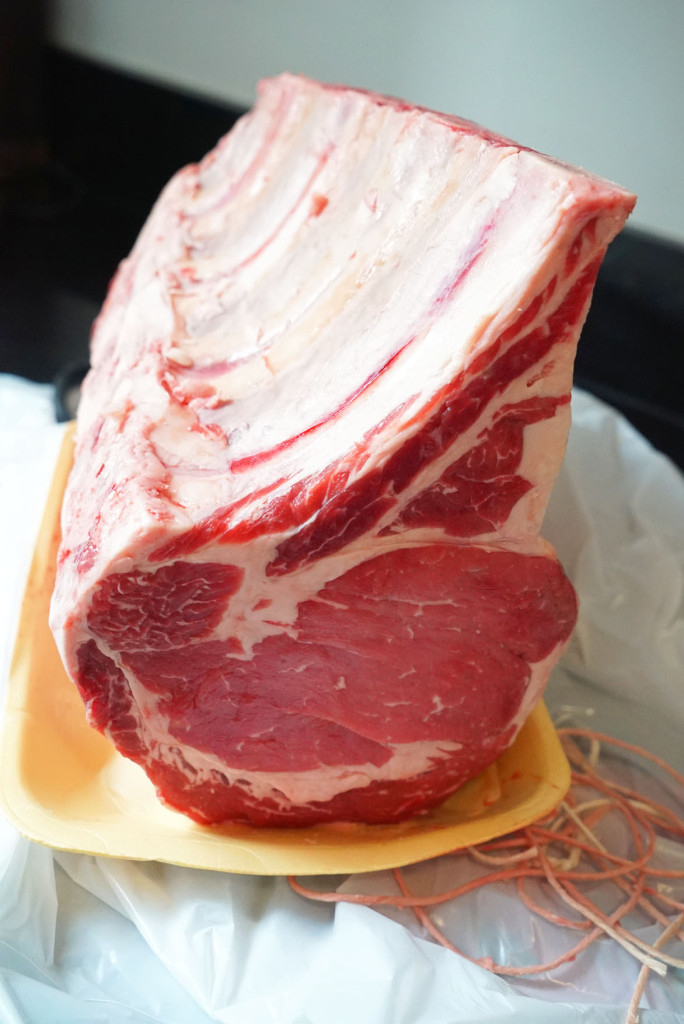
Here is a shot of a short loin with multiple vertebrae still intact and not portioned out into individual Porterhouses and T-bones.

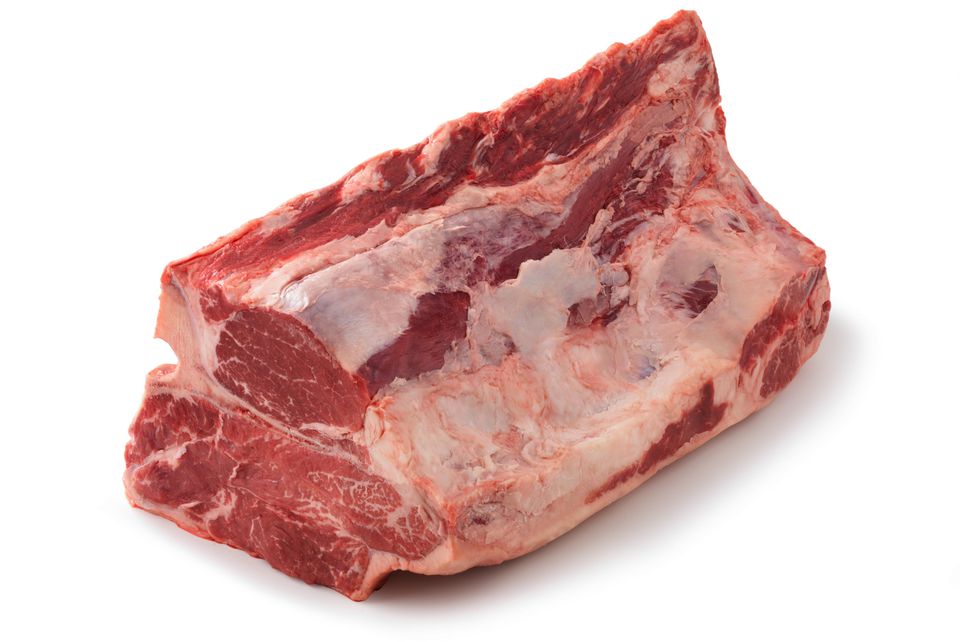
You can see on the left there is a good sized, thick portion of tenderloin. That thins down as you move the the right, and seems to disappear by time your eyes reach the far end of the cut.

Just to drive home the anatomy a little more, here is a great excerpt and image from Russ Cooks:

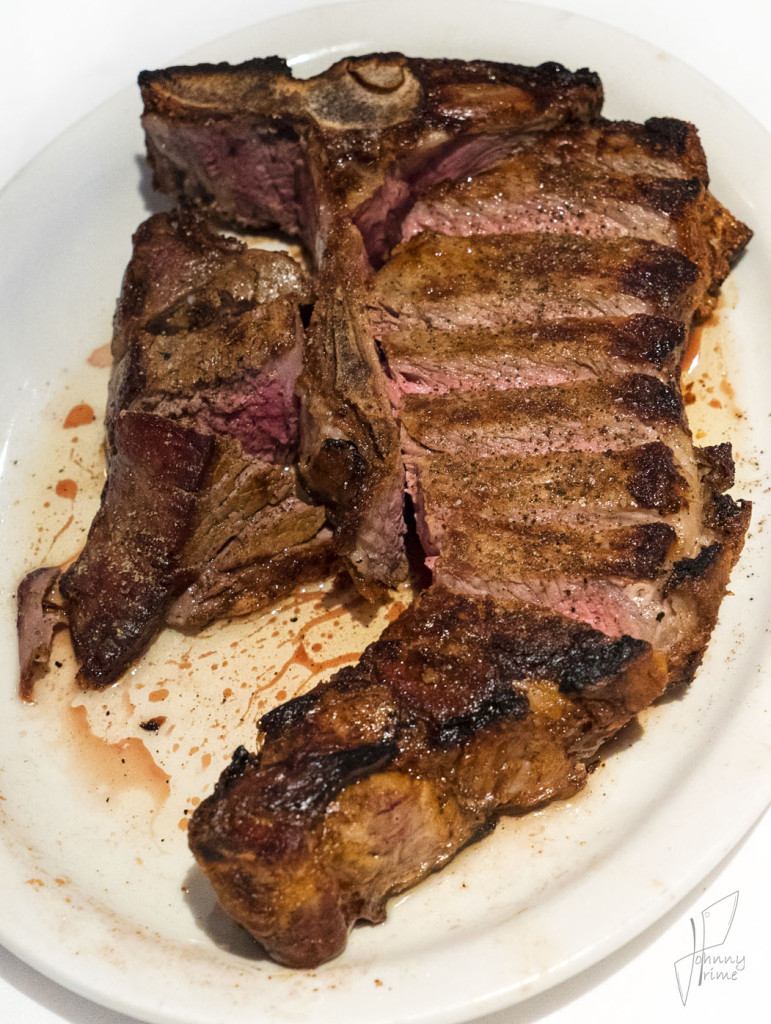
“Up close and personal, this is where the T-bone fits.

t-bone-illustration
photo credit: http://www.russcooks.com/images/t-bone-illustration.png

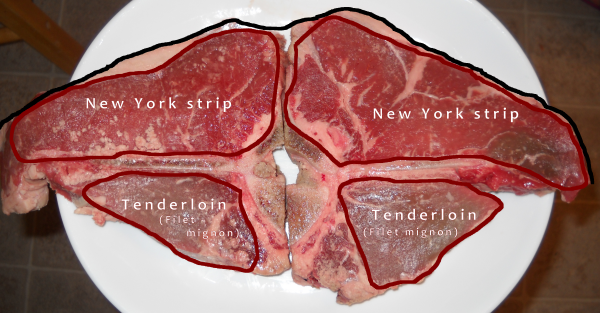
The black line across the top of the two T-bones pictured here is the outside (top of the back) of the steer. You can see the T-bone in the schematic illustration higher up on this page as the topmost part labelled Rib. Above the ribs, what you touch if you pat the steer’s back, is the New York strip. Beneath the ribs is the tenderloin from which a filet mignon is often cut. T-bone steaks cut closer to the shoulder are known as Porterhouse while those cut closer to the loin are just T-bones.”

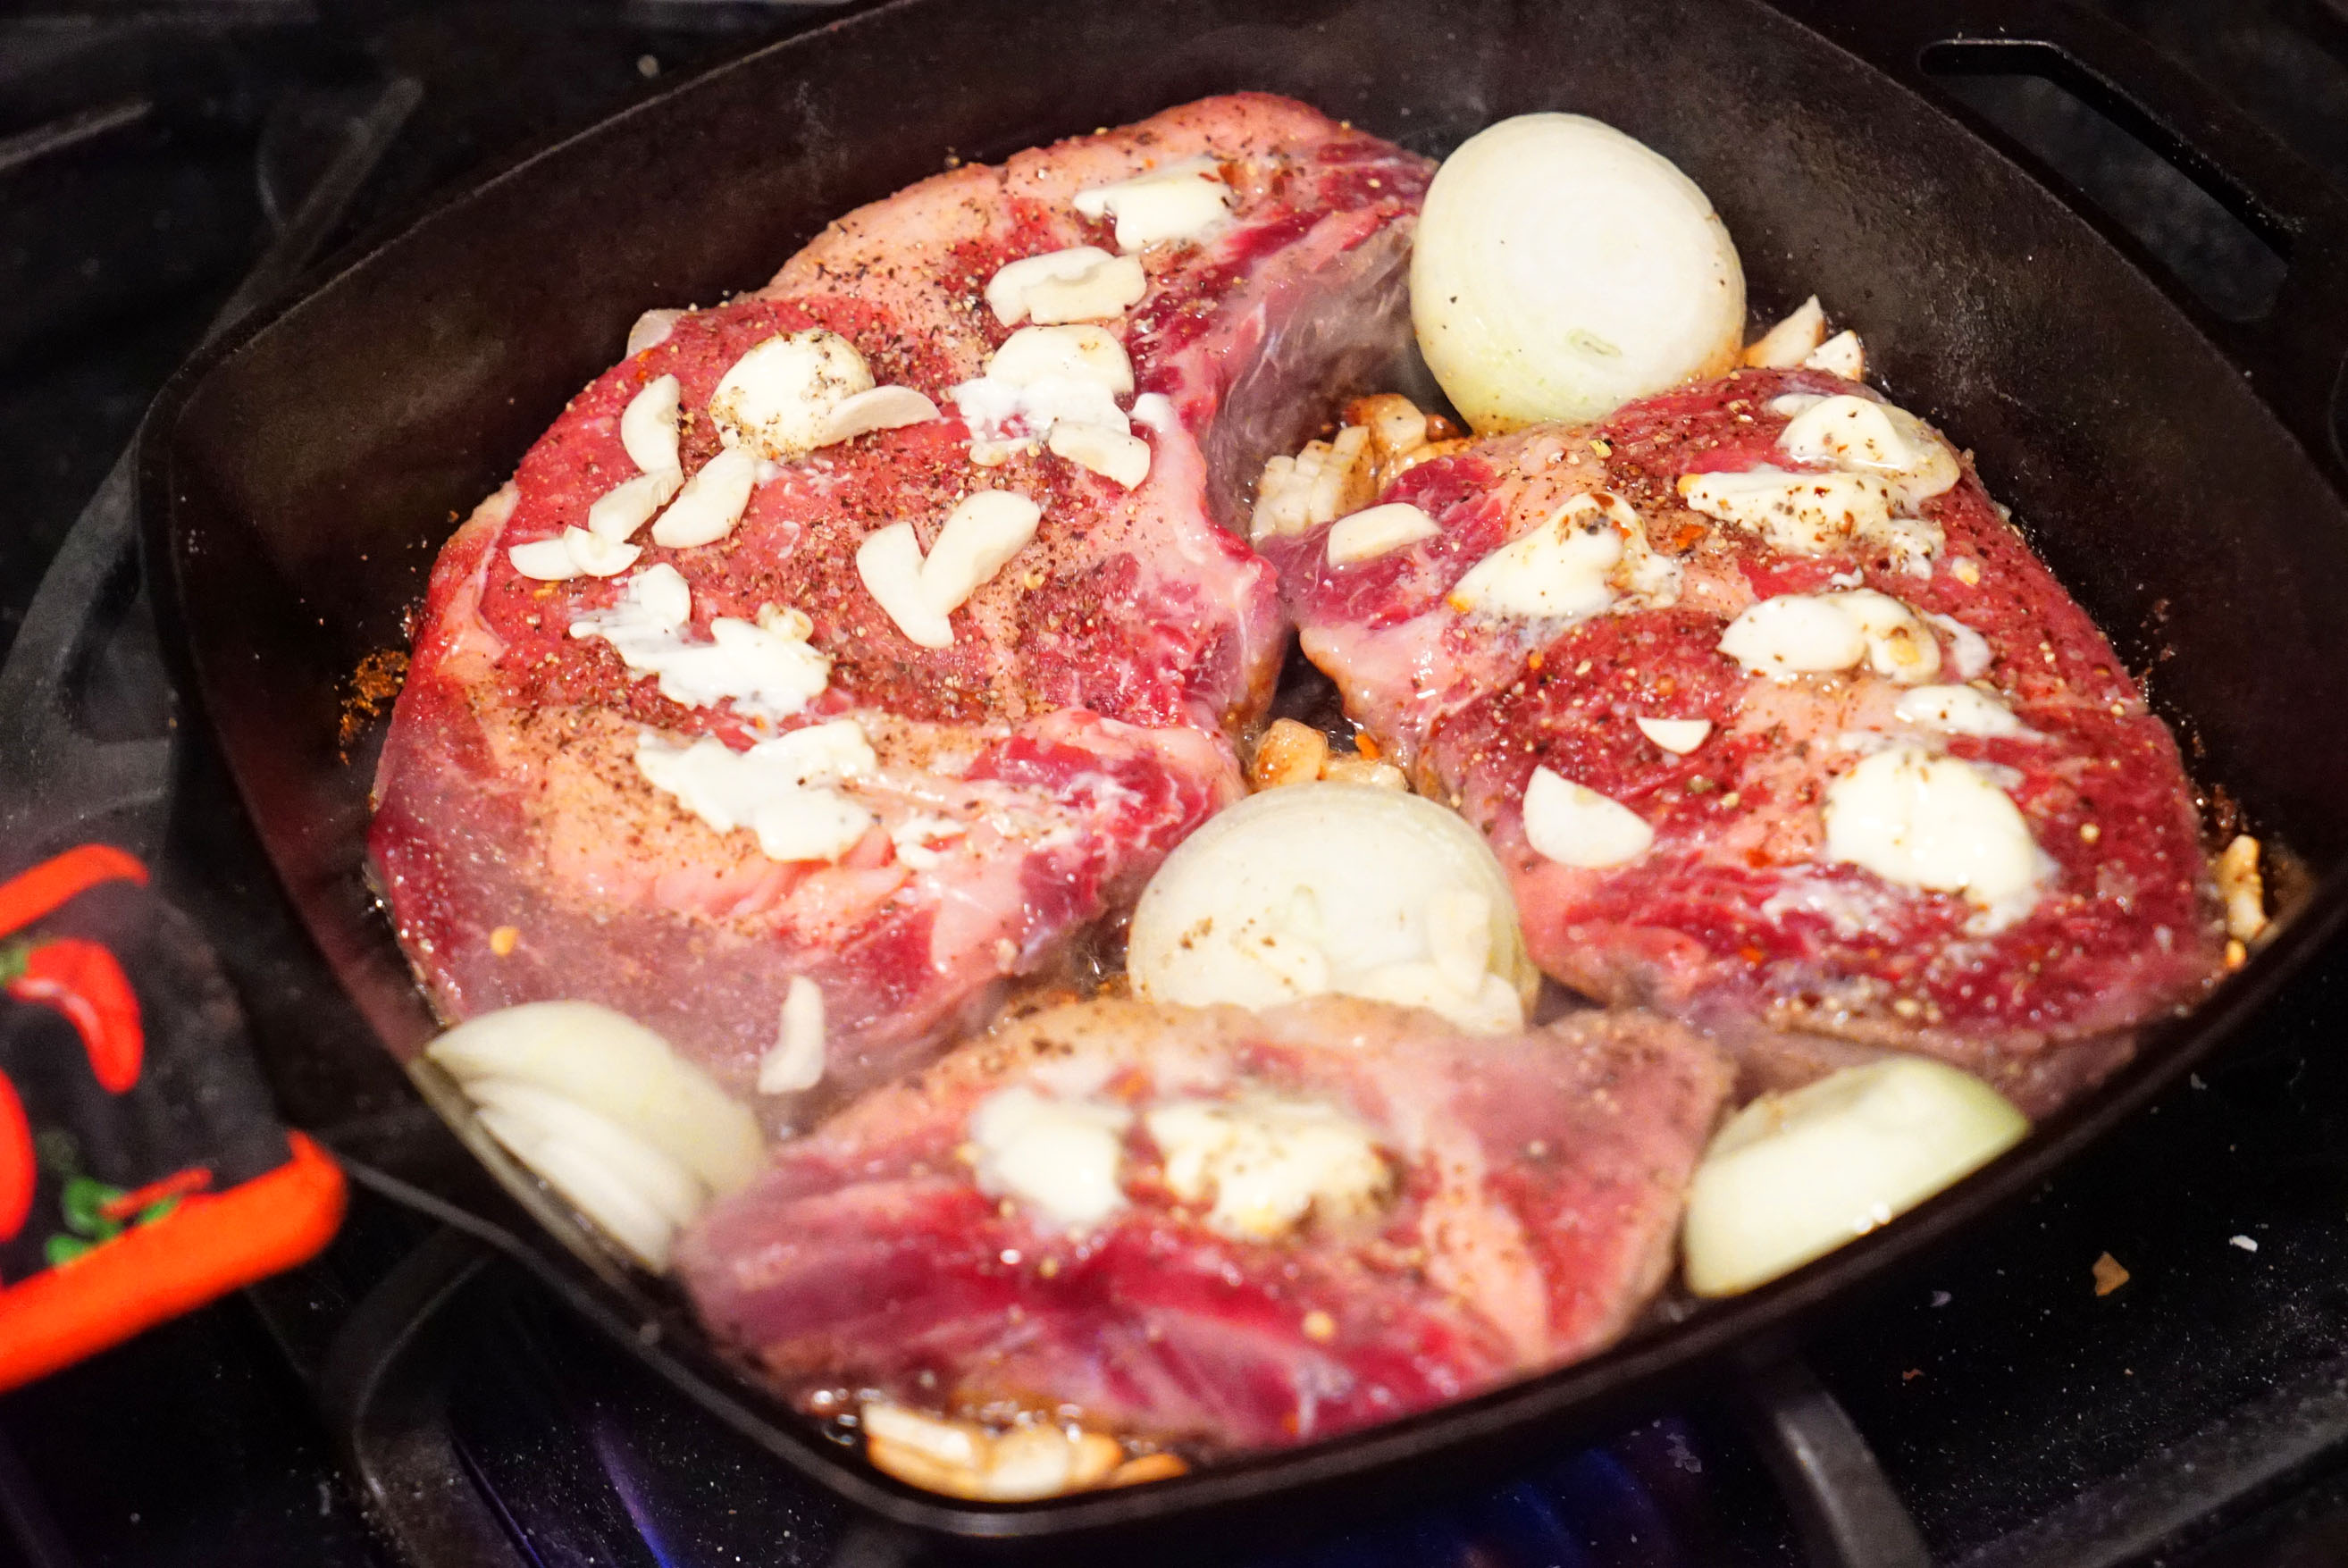
Preparation: Most times, T-bones and Porterhouses are either grilled, seared in a pan, broiled or blasted with high heat in specialty steak ovens made for charring the outside of the meat without over-cooking the inside. Butter is essential, and heavy seasoning is important as well. Herbs and garlic help boost the flavor too.

DSC07247

Flavor: Since this cut contains both the Filet Mignon and the Strip Steak, I refer you to the flavor sections for those cuts below, with a notation that the bone being left in often adds a more robust flavor while helping to retain tenderness and juiciness. These are very popular items at steakhouses because they can be cut large enough to feed anywhere from two to four people. Additionally, with two different types of meat in one steak, one can vary the flavors that one experiences with each bite.

2. Filet Mignon

Etymology: Filet, in culinary terminology, means boneless. Mignon, in French, means dainty or small. As such, this is a steak ideally suited for chicks: small/dainty, and with no bone.

DSC05717

Occasionally on a steakhouse menu you will see a “bone-in filet.” Given what I just mentioned above, that phraseology is completely self-defeating and confusing, as it simultaneously means both “bone-in” and “boneless.” However, it seems this sort of language is becoming commonplace. If it were up to me, I would prefer “bone-in tenderloin” to be listed on menus instead. There is no wording conflict with that phrasing, and it is an accurate description of what is being presented. In other words: all Filet Mignon is tenderloin, but not all tenderloin is Filet Mignon.

Anatomy: Traditionally, a Filet Mignon was cut from the anterior end of the tenderloin. In the beef chart image below, you can see a portion of the tenderloin section highlighted in red.

diagram-filet-cut-1500

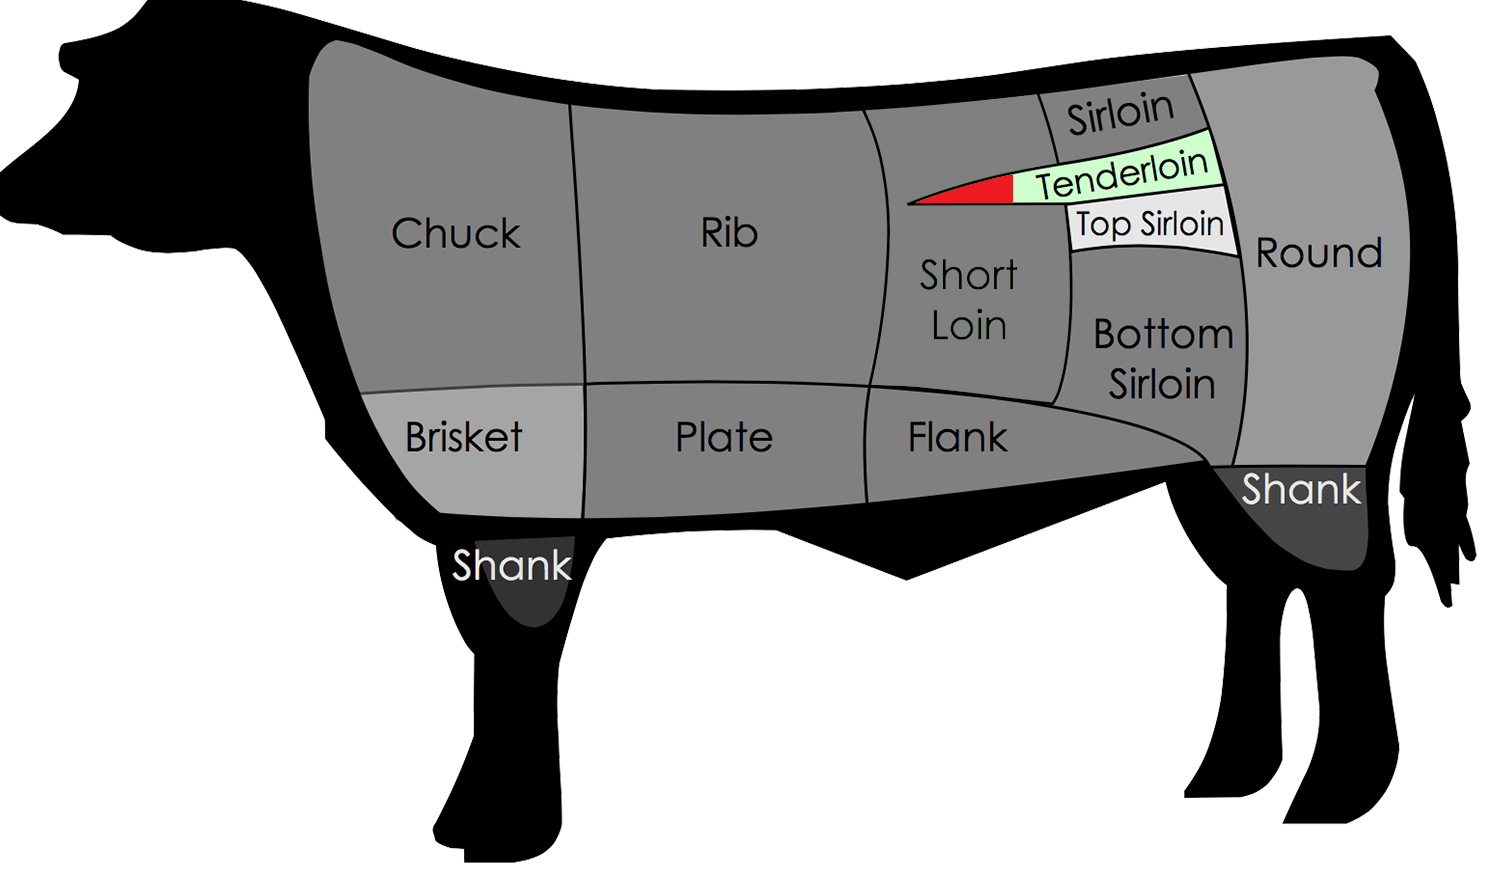
That is where Filet Mignon was typically located, though most butchers label all steaks cut from the tenderloin as Filet Mignon (this allows for larger portions). The tenderloins run along both sides of the spine. They taper from thick, in the posterior of the animal, to thin in the front.

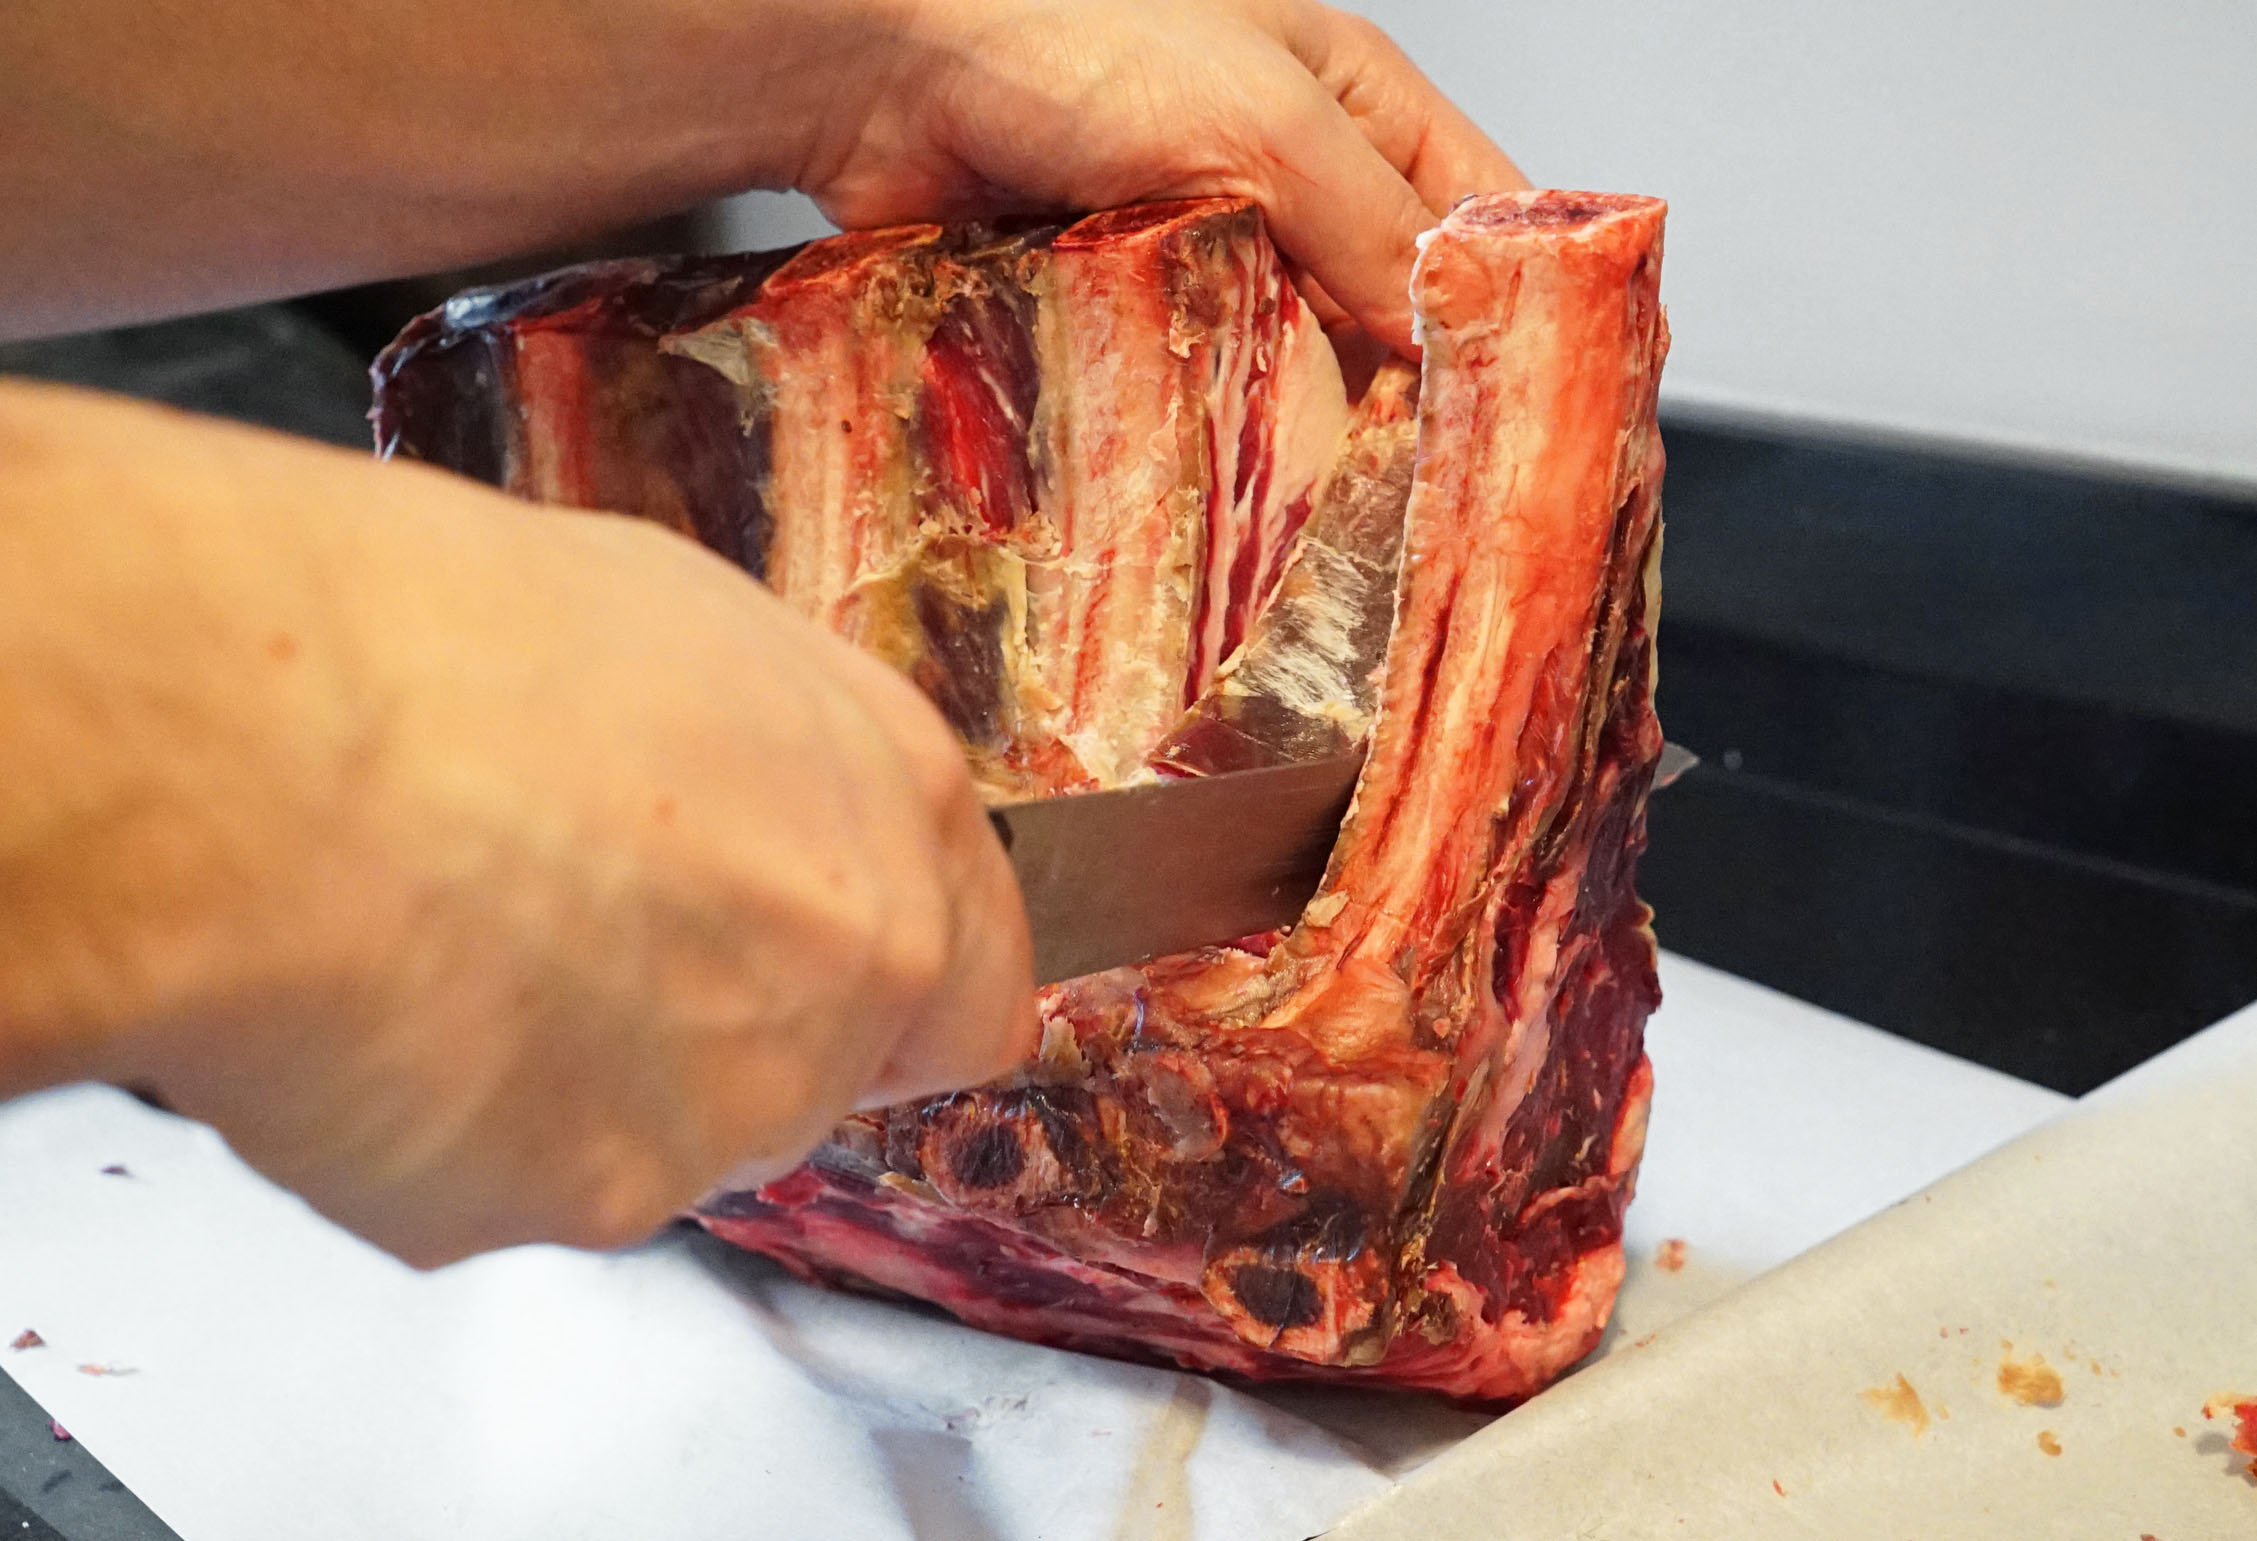
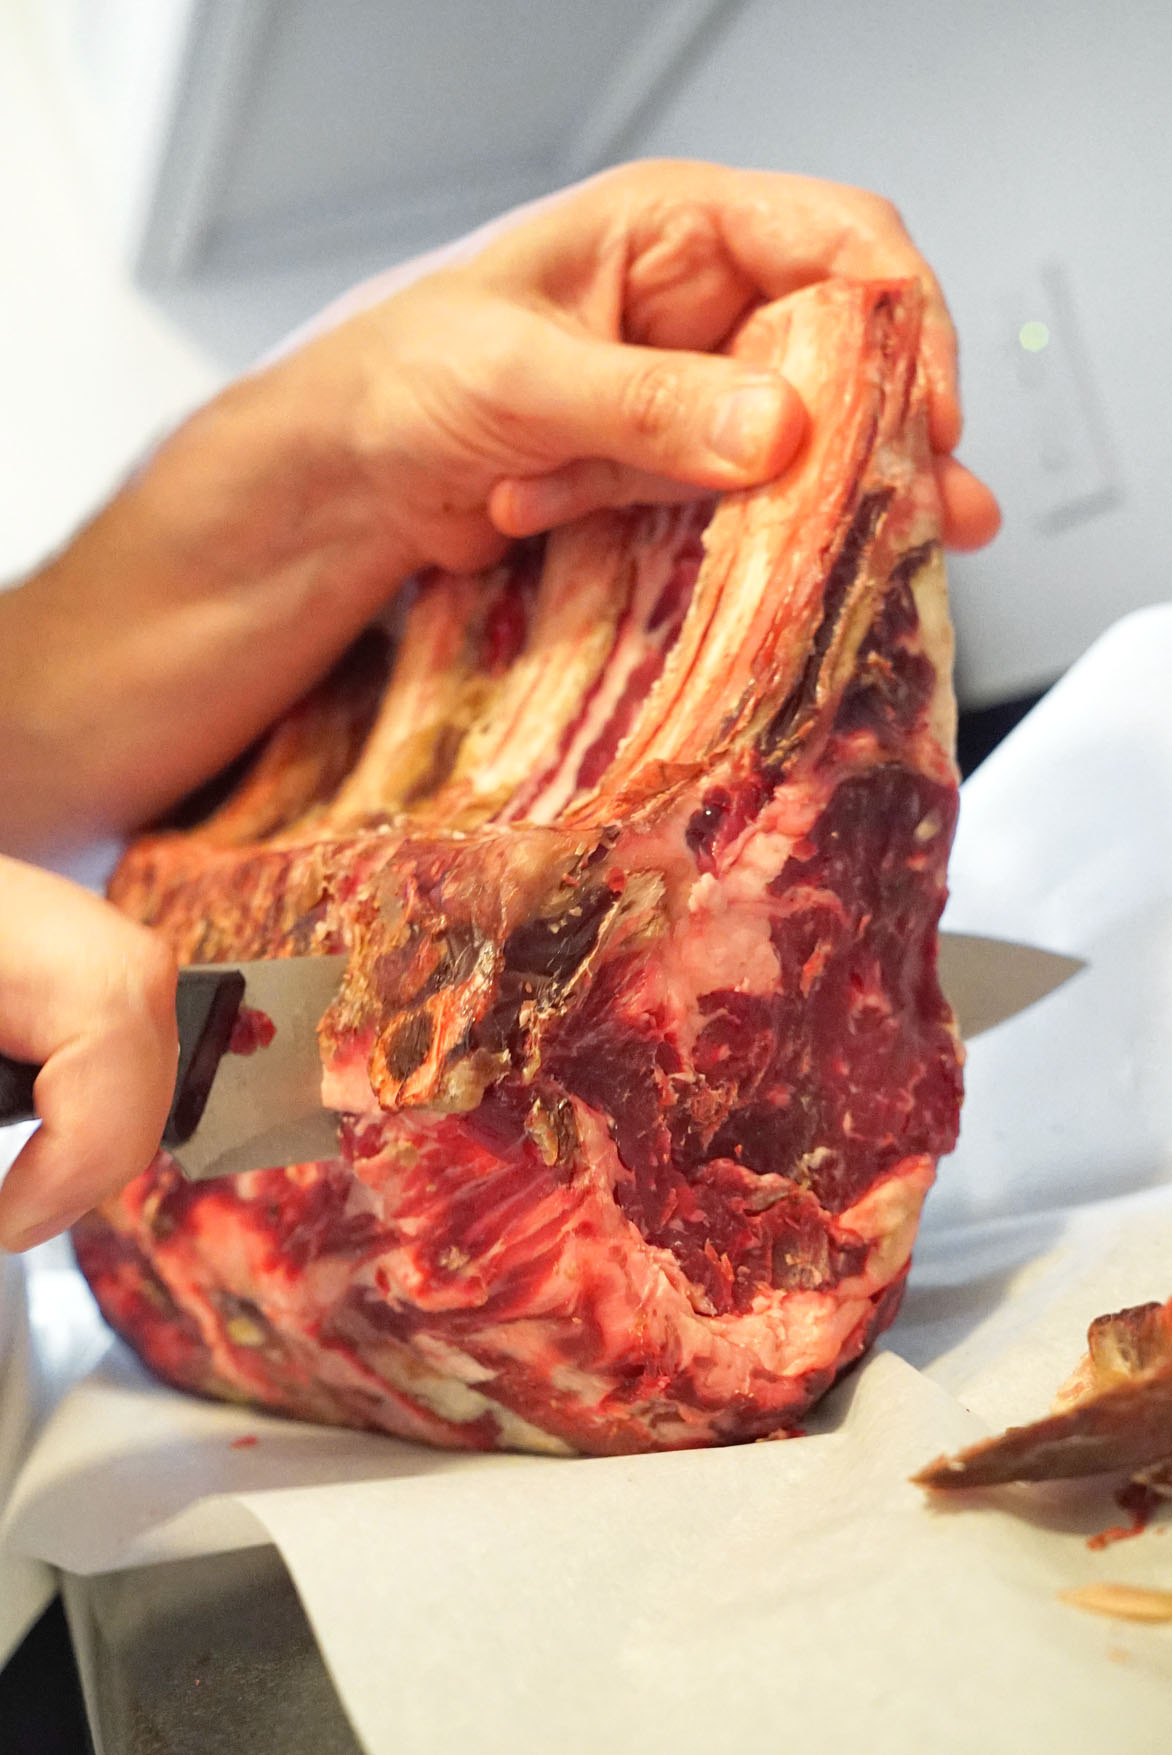
In their unbutchered form, they contain what’s called the “silver skin” still attached to the flesh. This is a thick connective tissue that is pretty much inedible. When butchering the full tenderloin, you will want to slice that off (it is NOT tender).

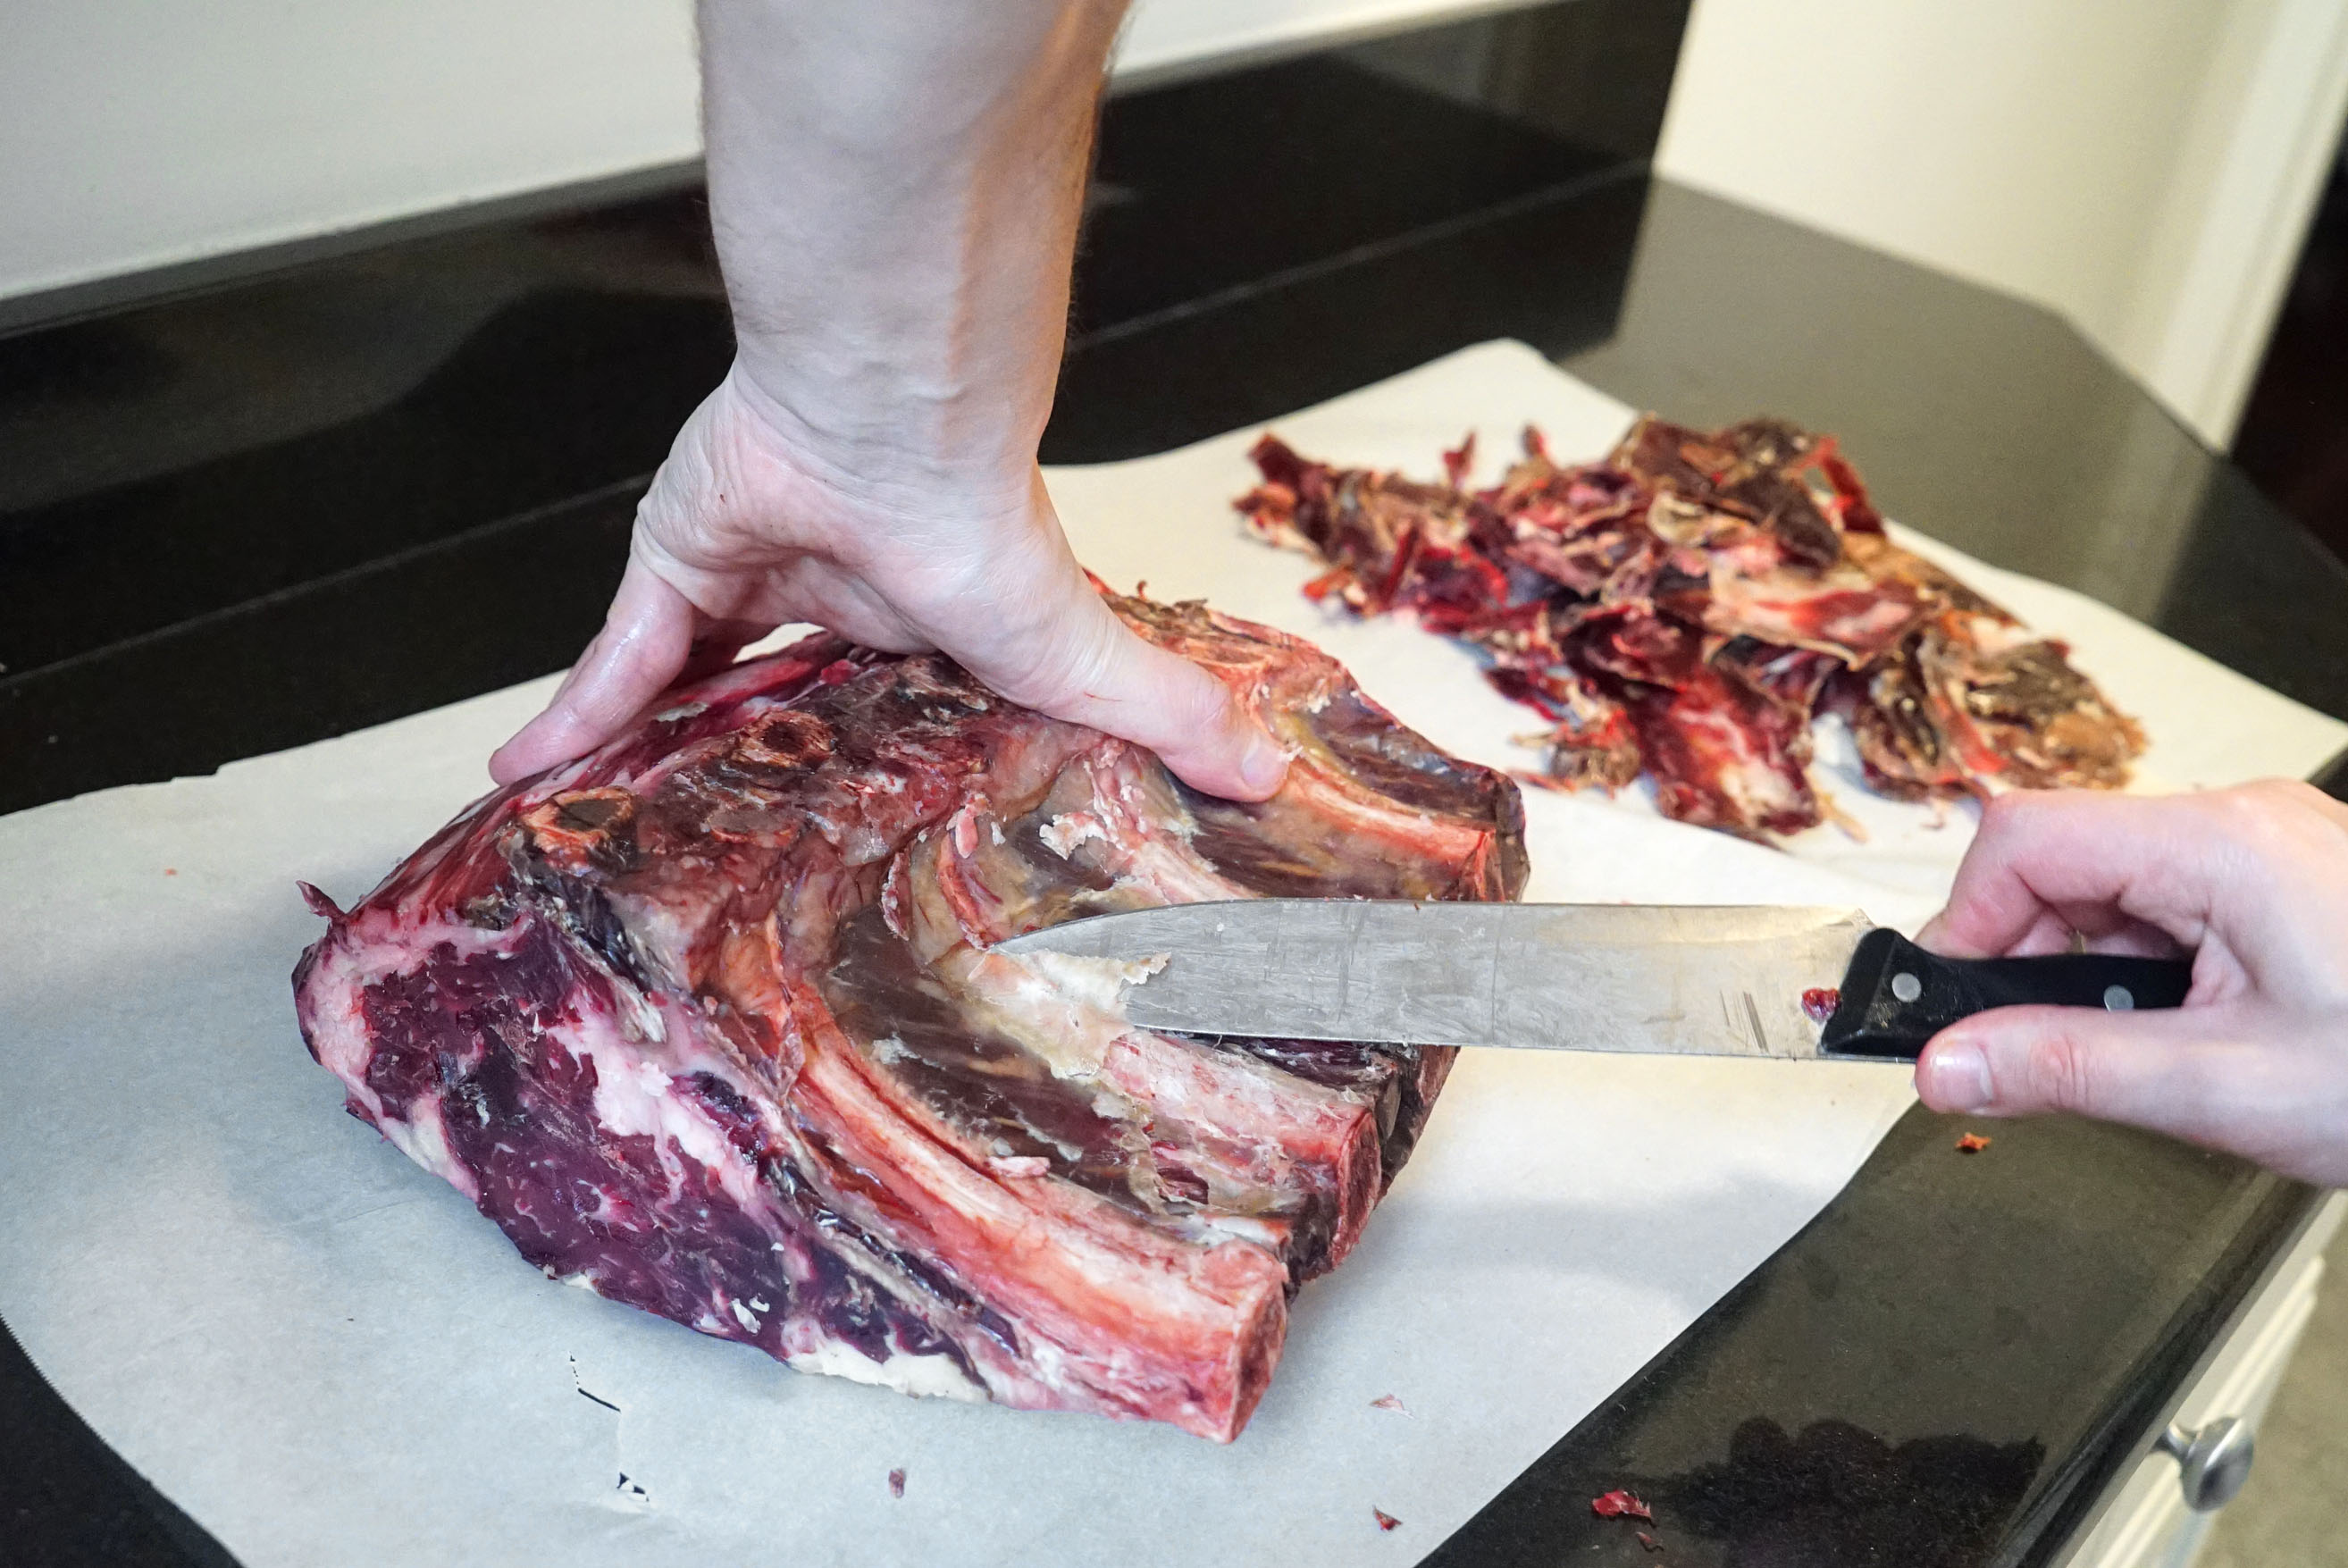
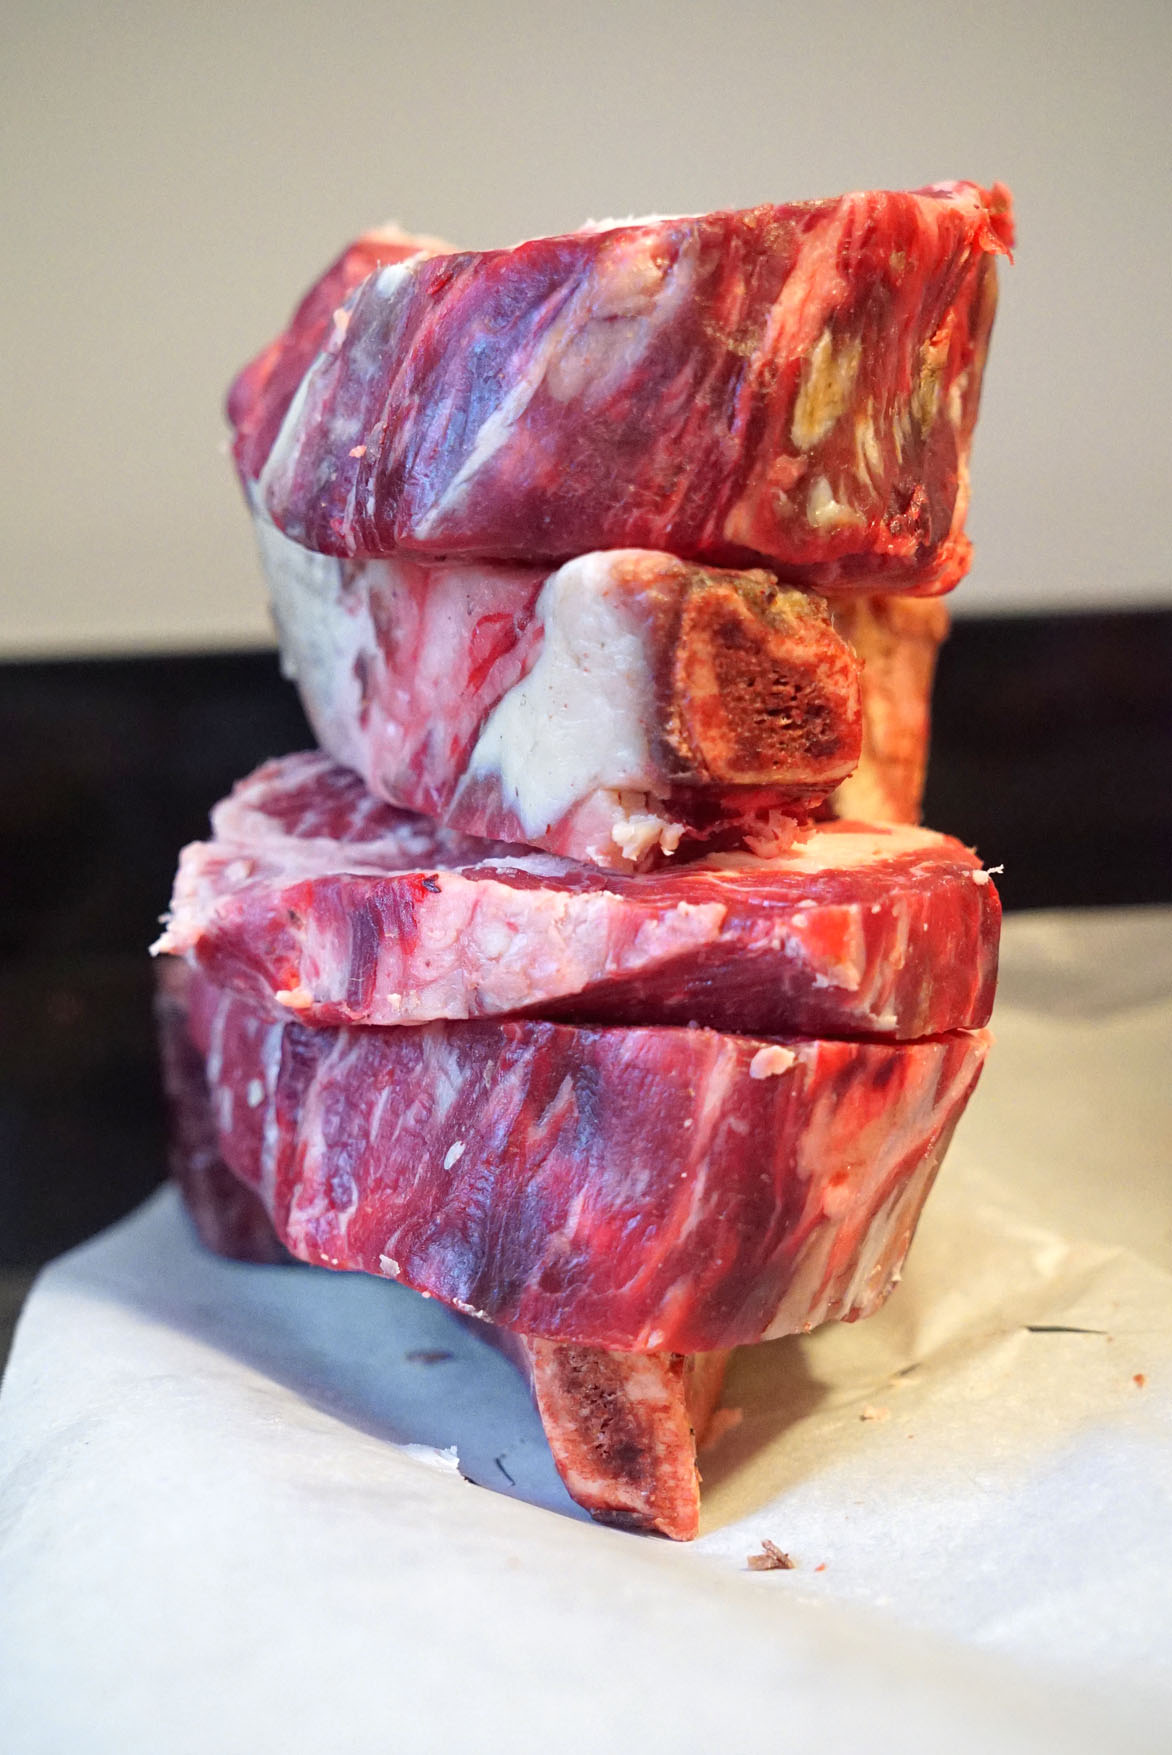
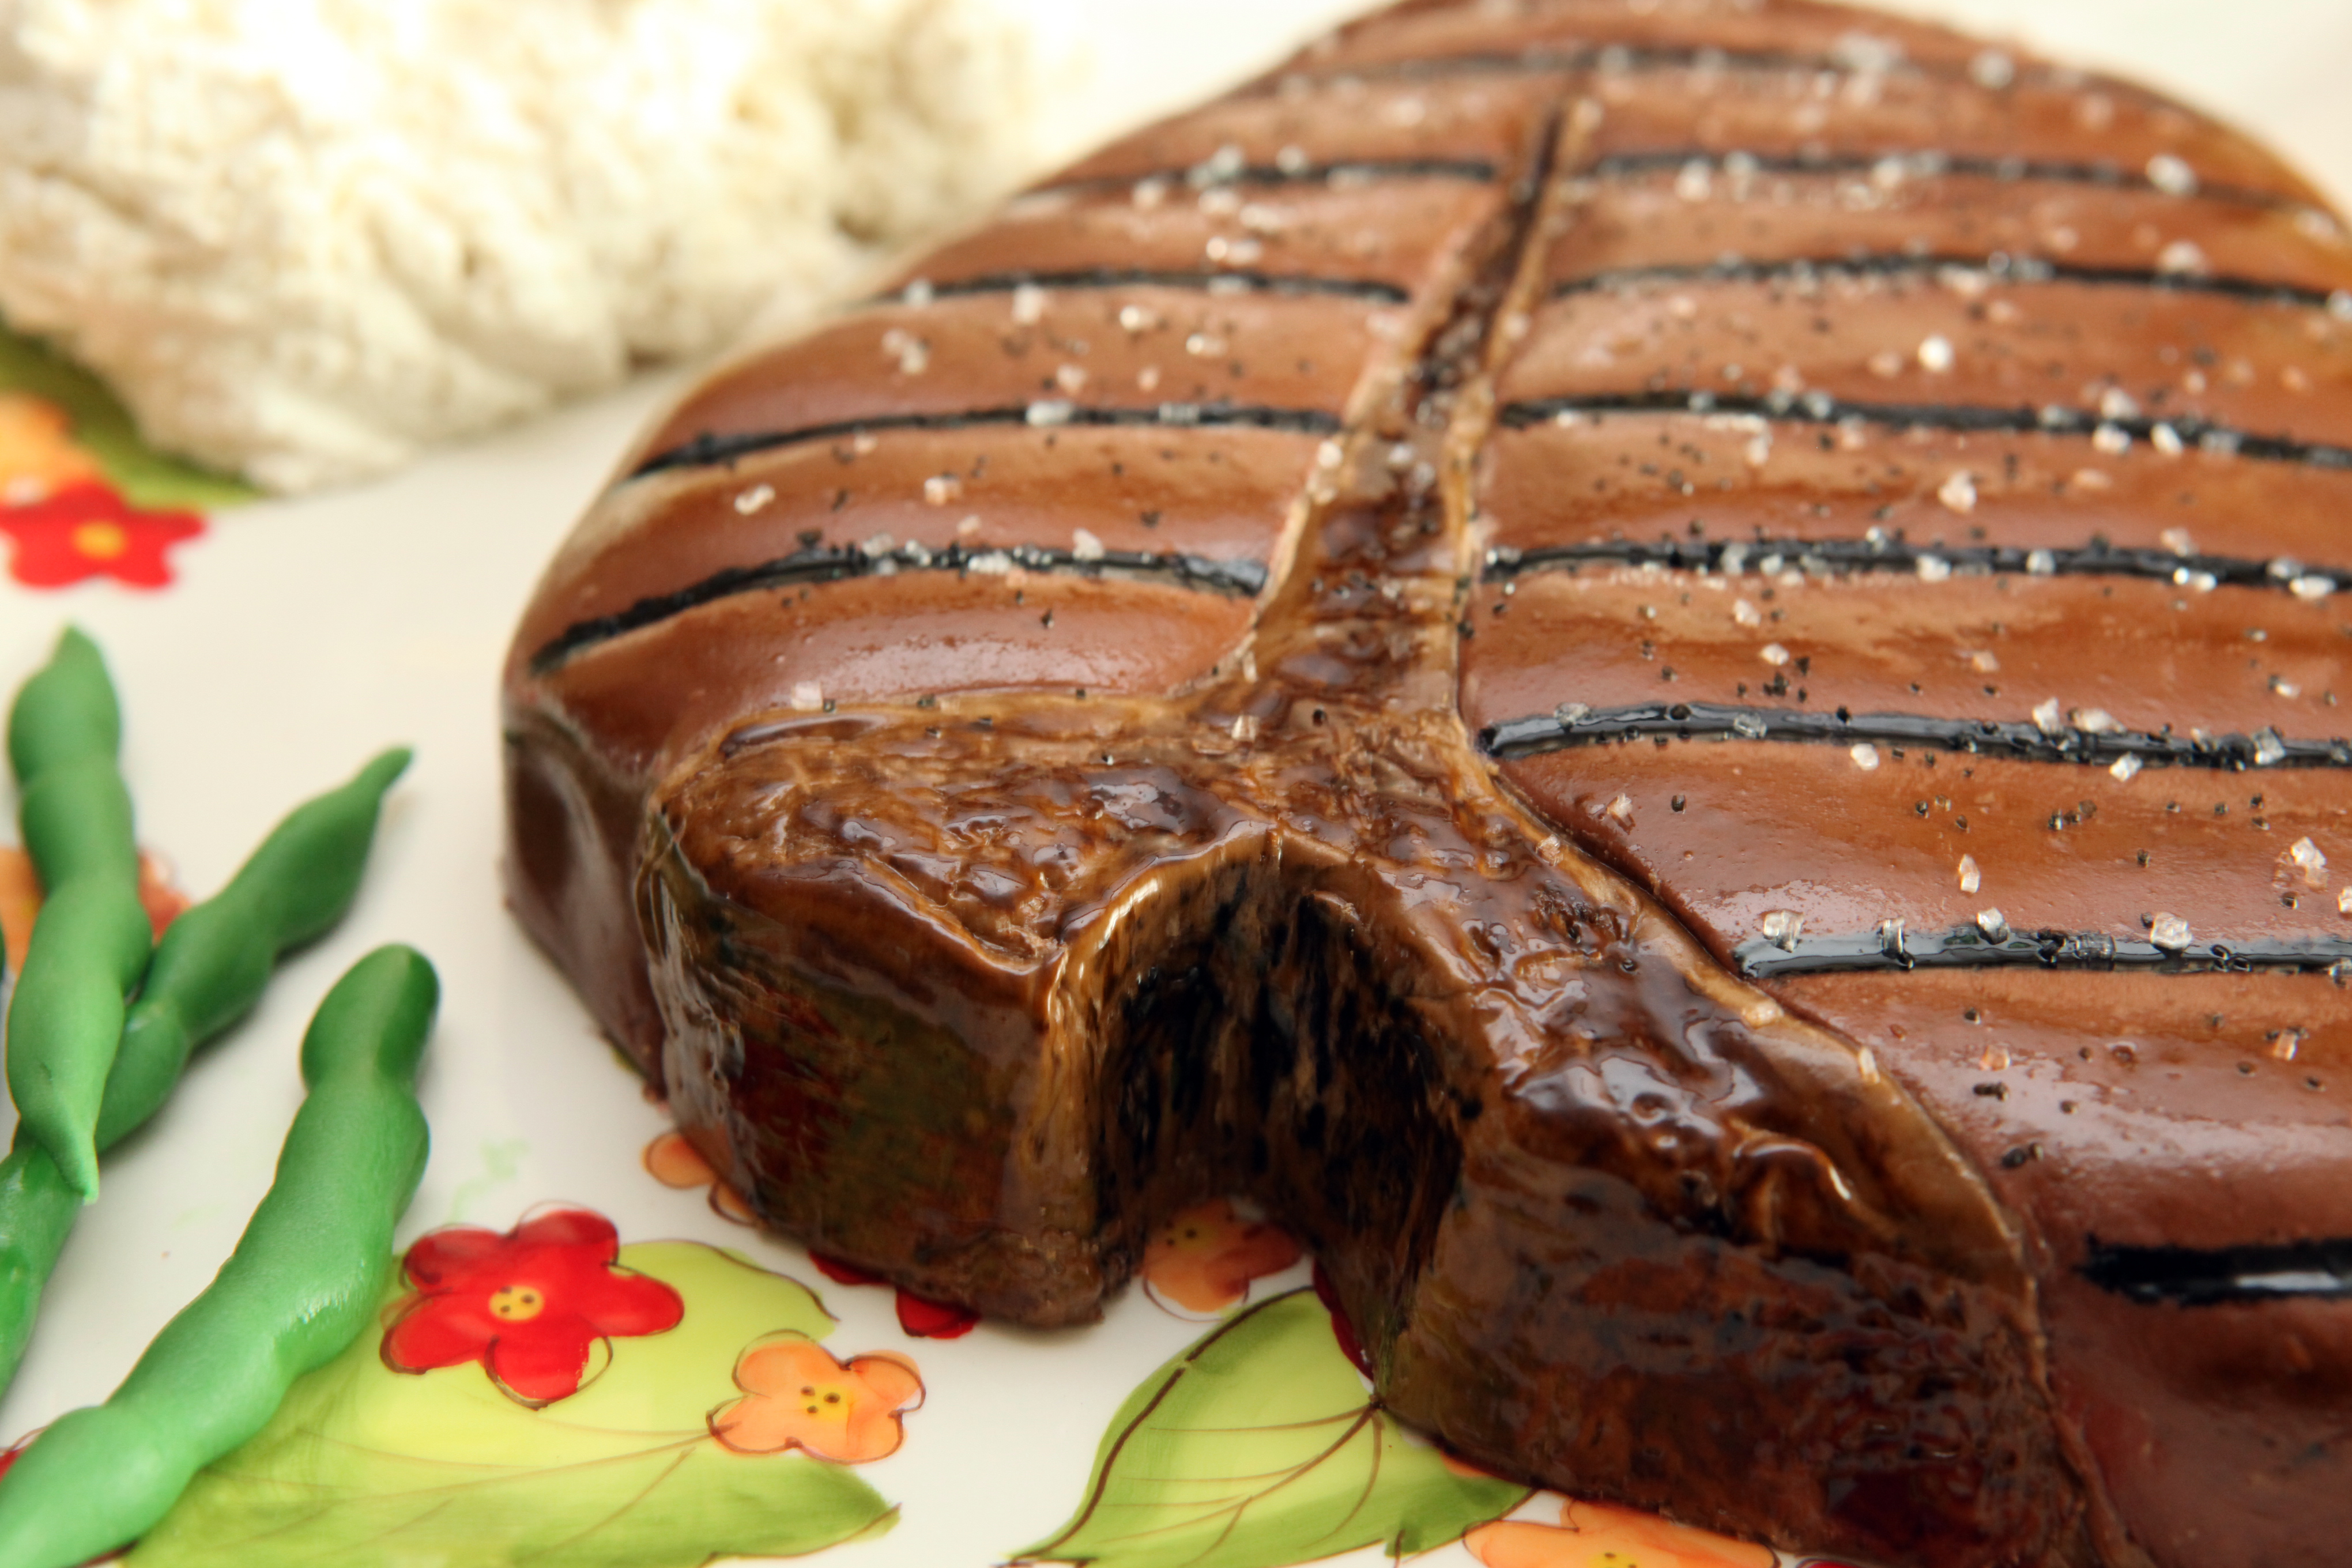
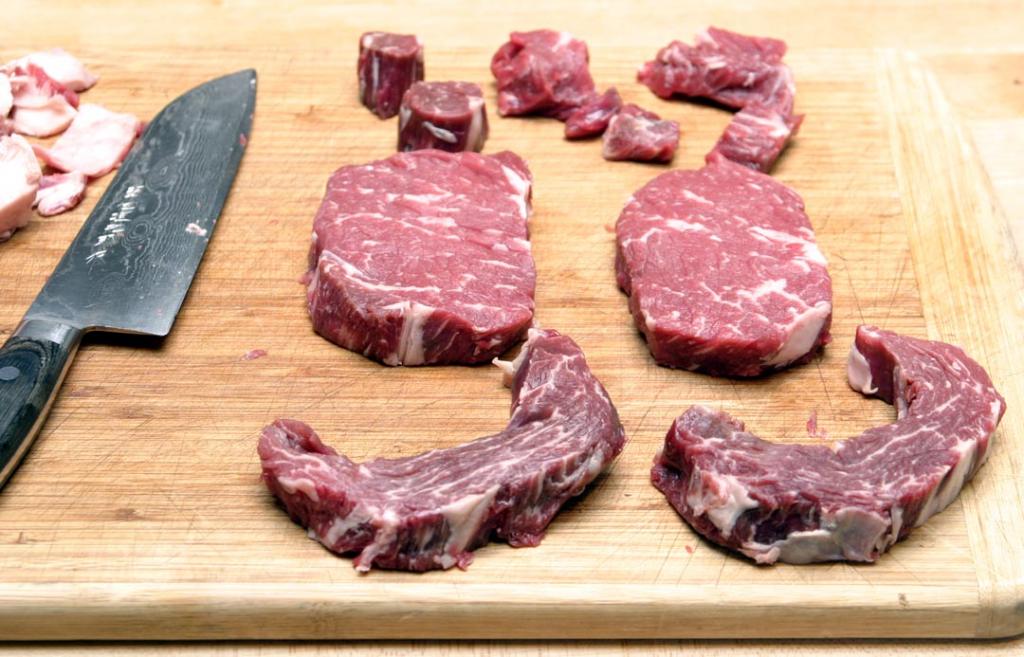
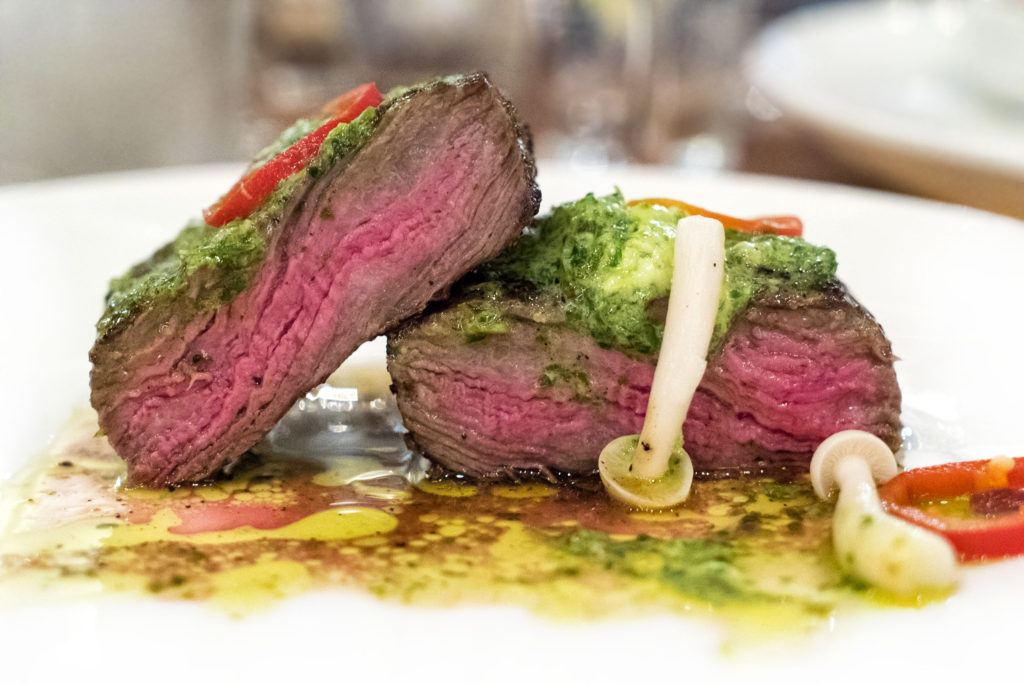
While this next photo is a repeat shot of a lamb vertebra Barnsley chop (the mutton chop from Keen’s), the anatomy is exactly the same for beef. This will illustrate exactly where the filet comes from. Essentially this is a double porterhouse, with a filet and a strip on each side. In addition to understanding the Filet Mignon, this image is useful in demonstrating the anatomy of the Strip and Porterhouse cuts as well, since they all come from the same place – the vertebrae of the animal:

DSC02003 illustrated watermark

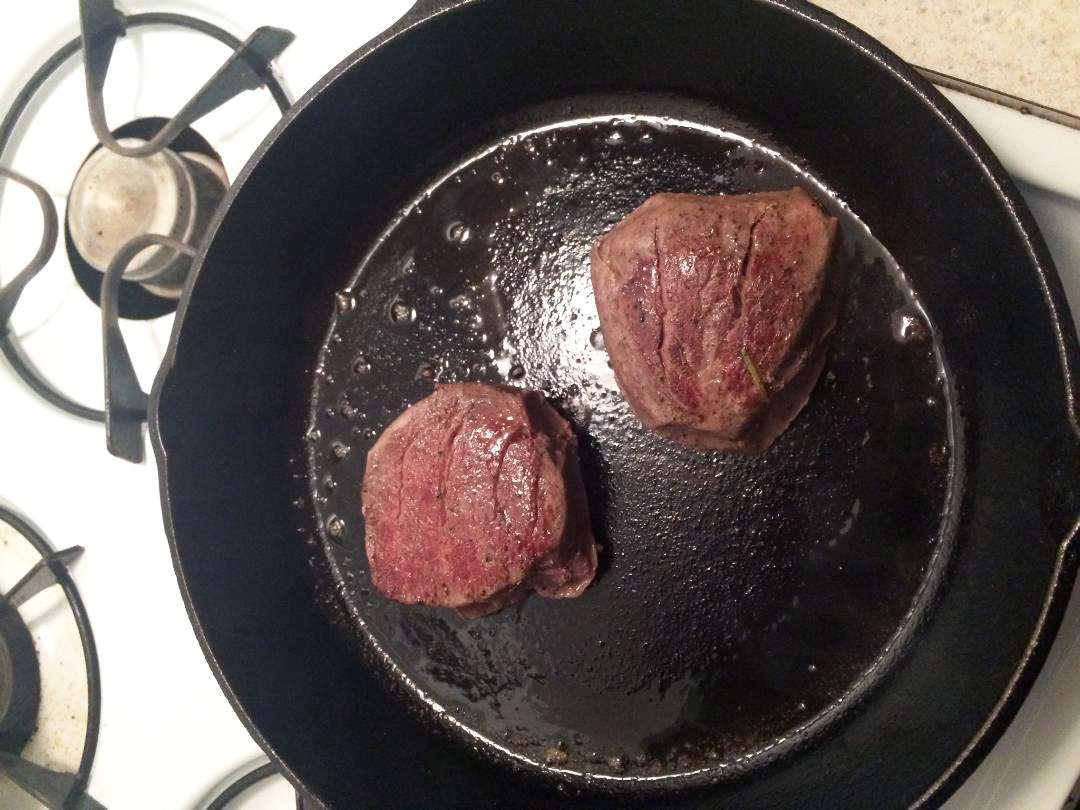
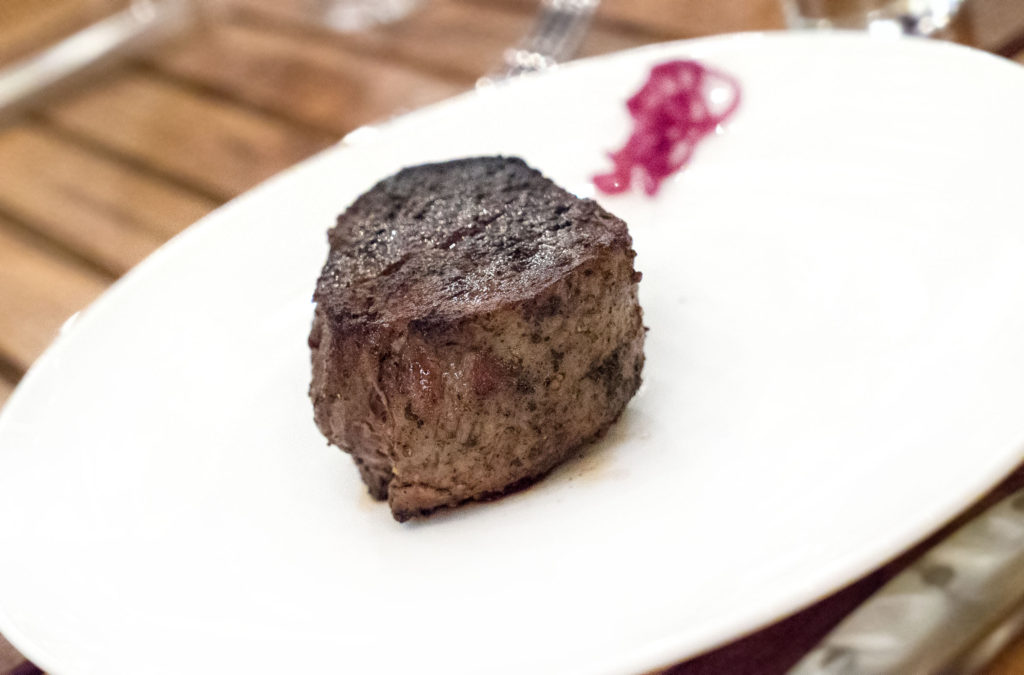
Preparation: Preparations of this cut vary greatly. You may see this cut sliced thin and pounded flat, served raw for carpaccio. You may also see it finely chopped for tartare. A simple pan sear with butter and herbs, however, is probably the most common preparation.

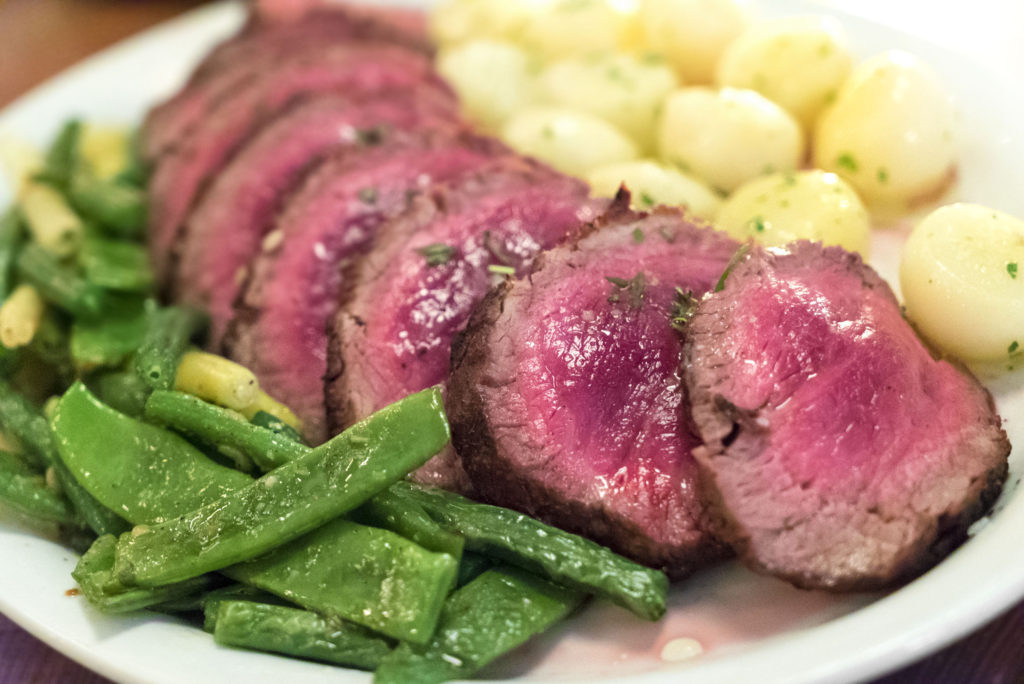
Yet another style is Chateaubriand, which is a large section of the thick portion of the tenderloin that is roasted boneless, then sliced and served with a reduction sauce.

DSC03866

There is also Beef Wellington, which is a portion of tenderloin that has been coated with pate and then wrapped in puff pastry dough prior to cooking.

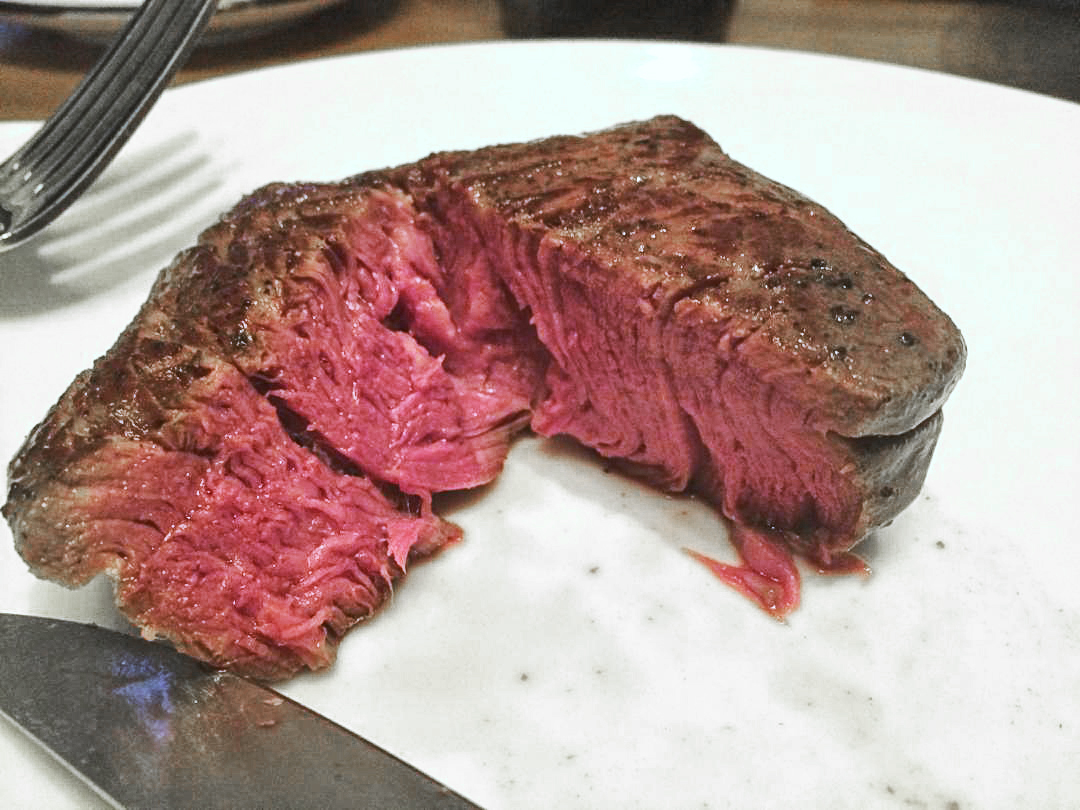
Flavor: Widely considered the most tender and least fatty cut of beef on the animal, the flavor should be uniform from one end to the other, with very tender and soft texture the whole way through. There is hardly any fat content in the standard cut of Filet Mignon. Some chefs will wrap the filet in caul fat (a lacy, fatty, web-like membrane that surrounds the stomach of an animal) before cooking. The webbing melts away during cooking and imparts a fat flavor into the meat. But it is more common to use things like butter, or to wrap a filet in bacon to add the fat flavor into the meat.

3. Strip Steak

Etymology: According to the National Cattlemen’s Beef Association, this steak is marketed under various names, including Ambassador Steak, Club Steak, Hotel-Style Steak, Veiny Steak, Kansas City Steak and New York Strip Steak. Delmonico’s offered Strip as a signature dish way back in the early 1800’s. Due to the cut’s association with NYC, the New York Strip Steak name was born.

Anatomy: The Strip is cut from the other side of the tenderloin, across the vertebra on the T-bone or Porterhouse.

DSC02821

Also known as strip loin, the Strip Steak is cut from the short loin part of the animal, from a muscle that does little work, like the Filet Mignon. It is generally more tender than the similarly situated but more posterior-located sirloin section of the animal. While it is essentially the same kind of meat as sirloin, the muscles in the rear do a bit more work than the short loin, so can be a bit more tough.

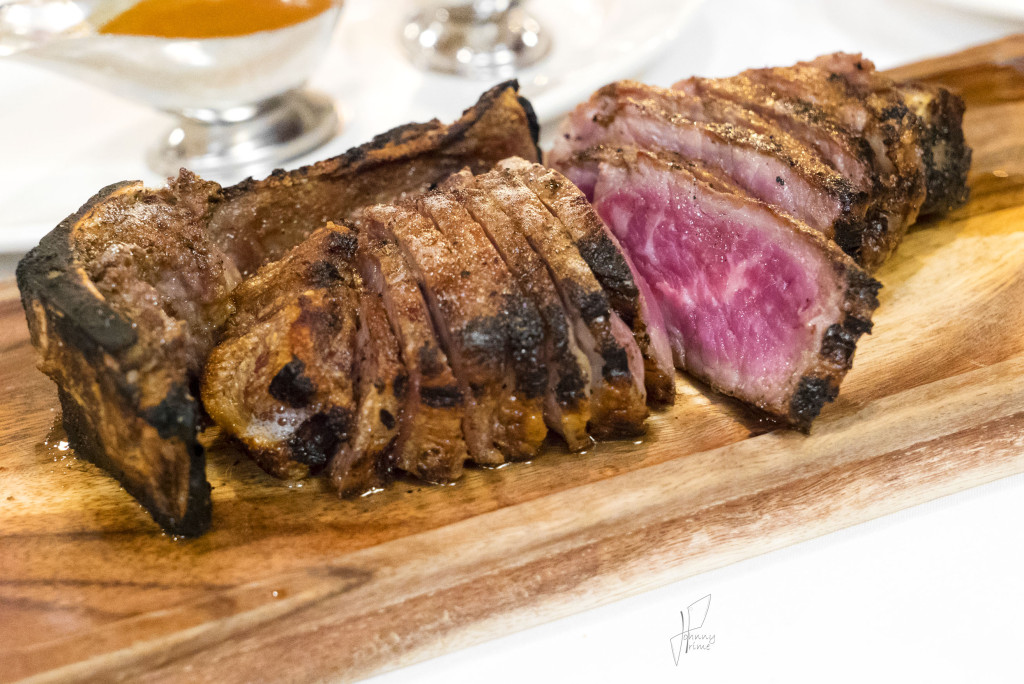
Preparation: For me, the Strip is best at medium rare, to preserve the tenderness and reduce any mealy or grainy textures that can develop from overcooking. It is always best to get a really great quality cut for this chop, something prime+, as all the intra-muscular fat, or marbling, will become soft and the muscle will tenderize all over.  You will often see it marinated or rubbed with spices, to impart additional flavors, but grilling and broiling in the traditional style is fantastic as well, especially with butter and herbs.  It can be served bone-in or boneless. Leaving the bone in will impart more flavor and help with the cooking process, since the bone conveys heat into the center of the meat while locking in juices.  At home, marinade this puppy in something like soy sauce and garlic, and slap it on the BBQ for a few minutes on each side and you will have the perfect home-cooked steak.

Flavor: This cut contains fat in levels that are somewhat in between the tenderloin (virtually none) and the Rib Eye (plenty of good, melty fat). Like the tenderloin, there is little variation throughout the cut, so the flavors and textures are more uniform for the Strip Steak, unlike the Rib Eye which has varying textures and flavors from one end of the cut to the other. The texture of a Strip can sometimes be a little bit grainy or mealy, and a bit more tight than a Filet Mignon or a Rib Eye – especially if it’s cooked too much.
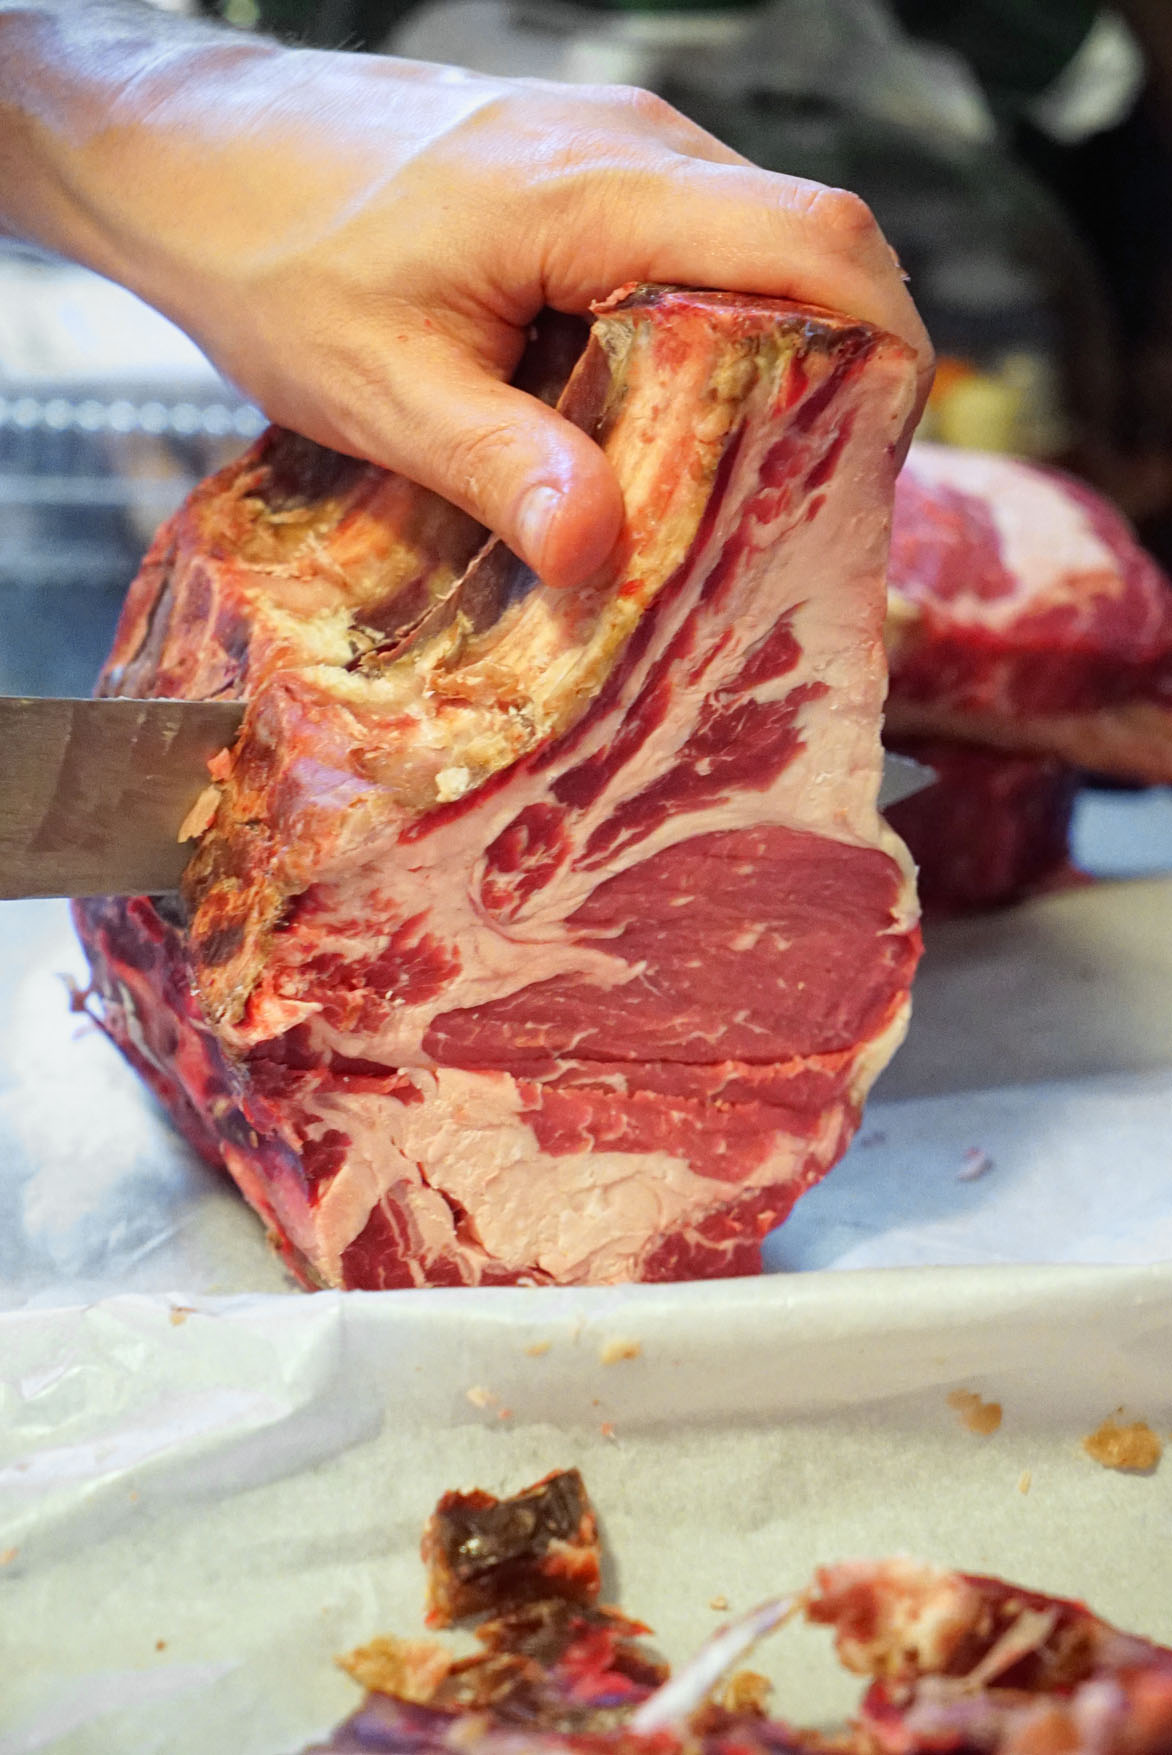
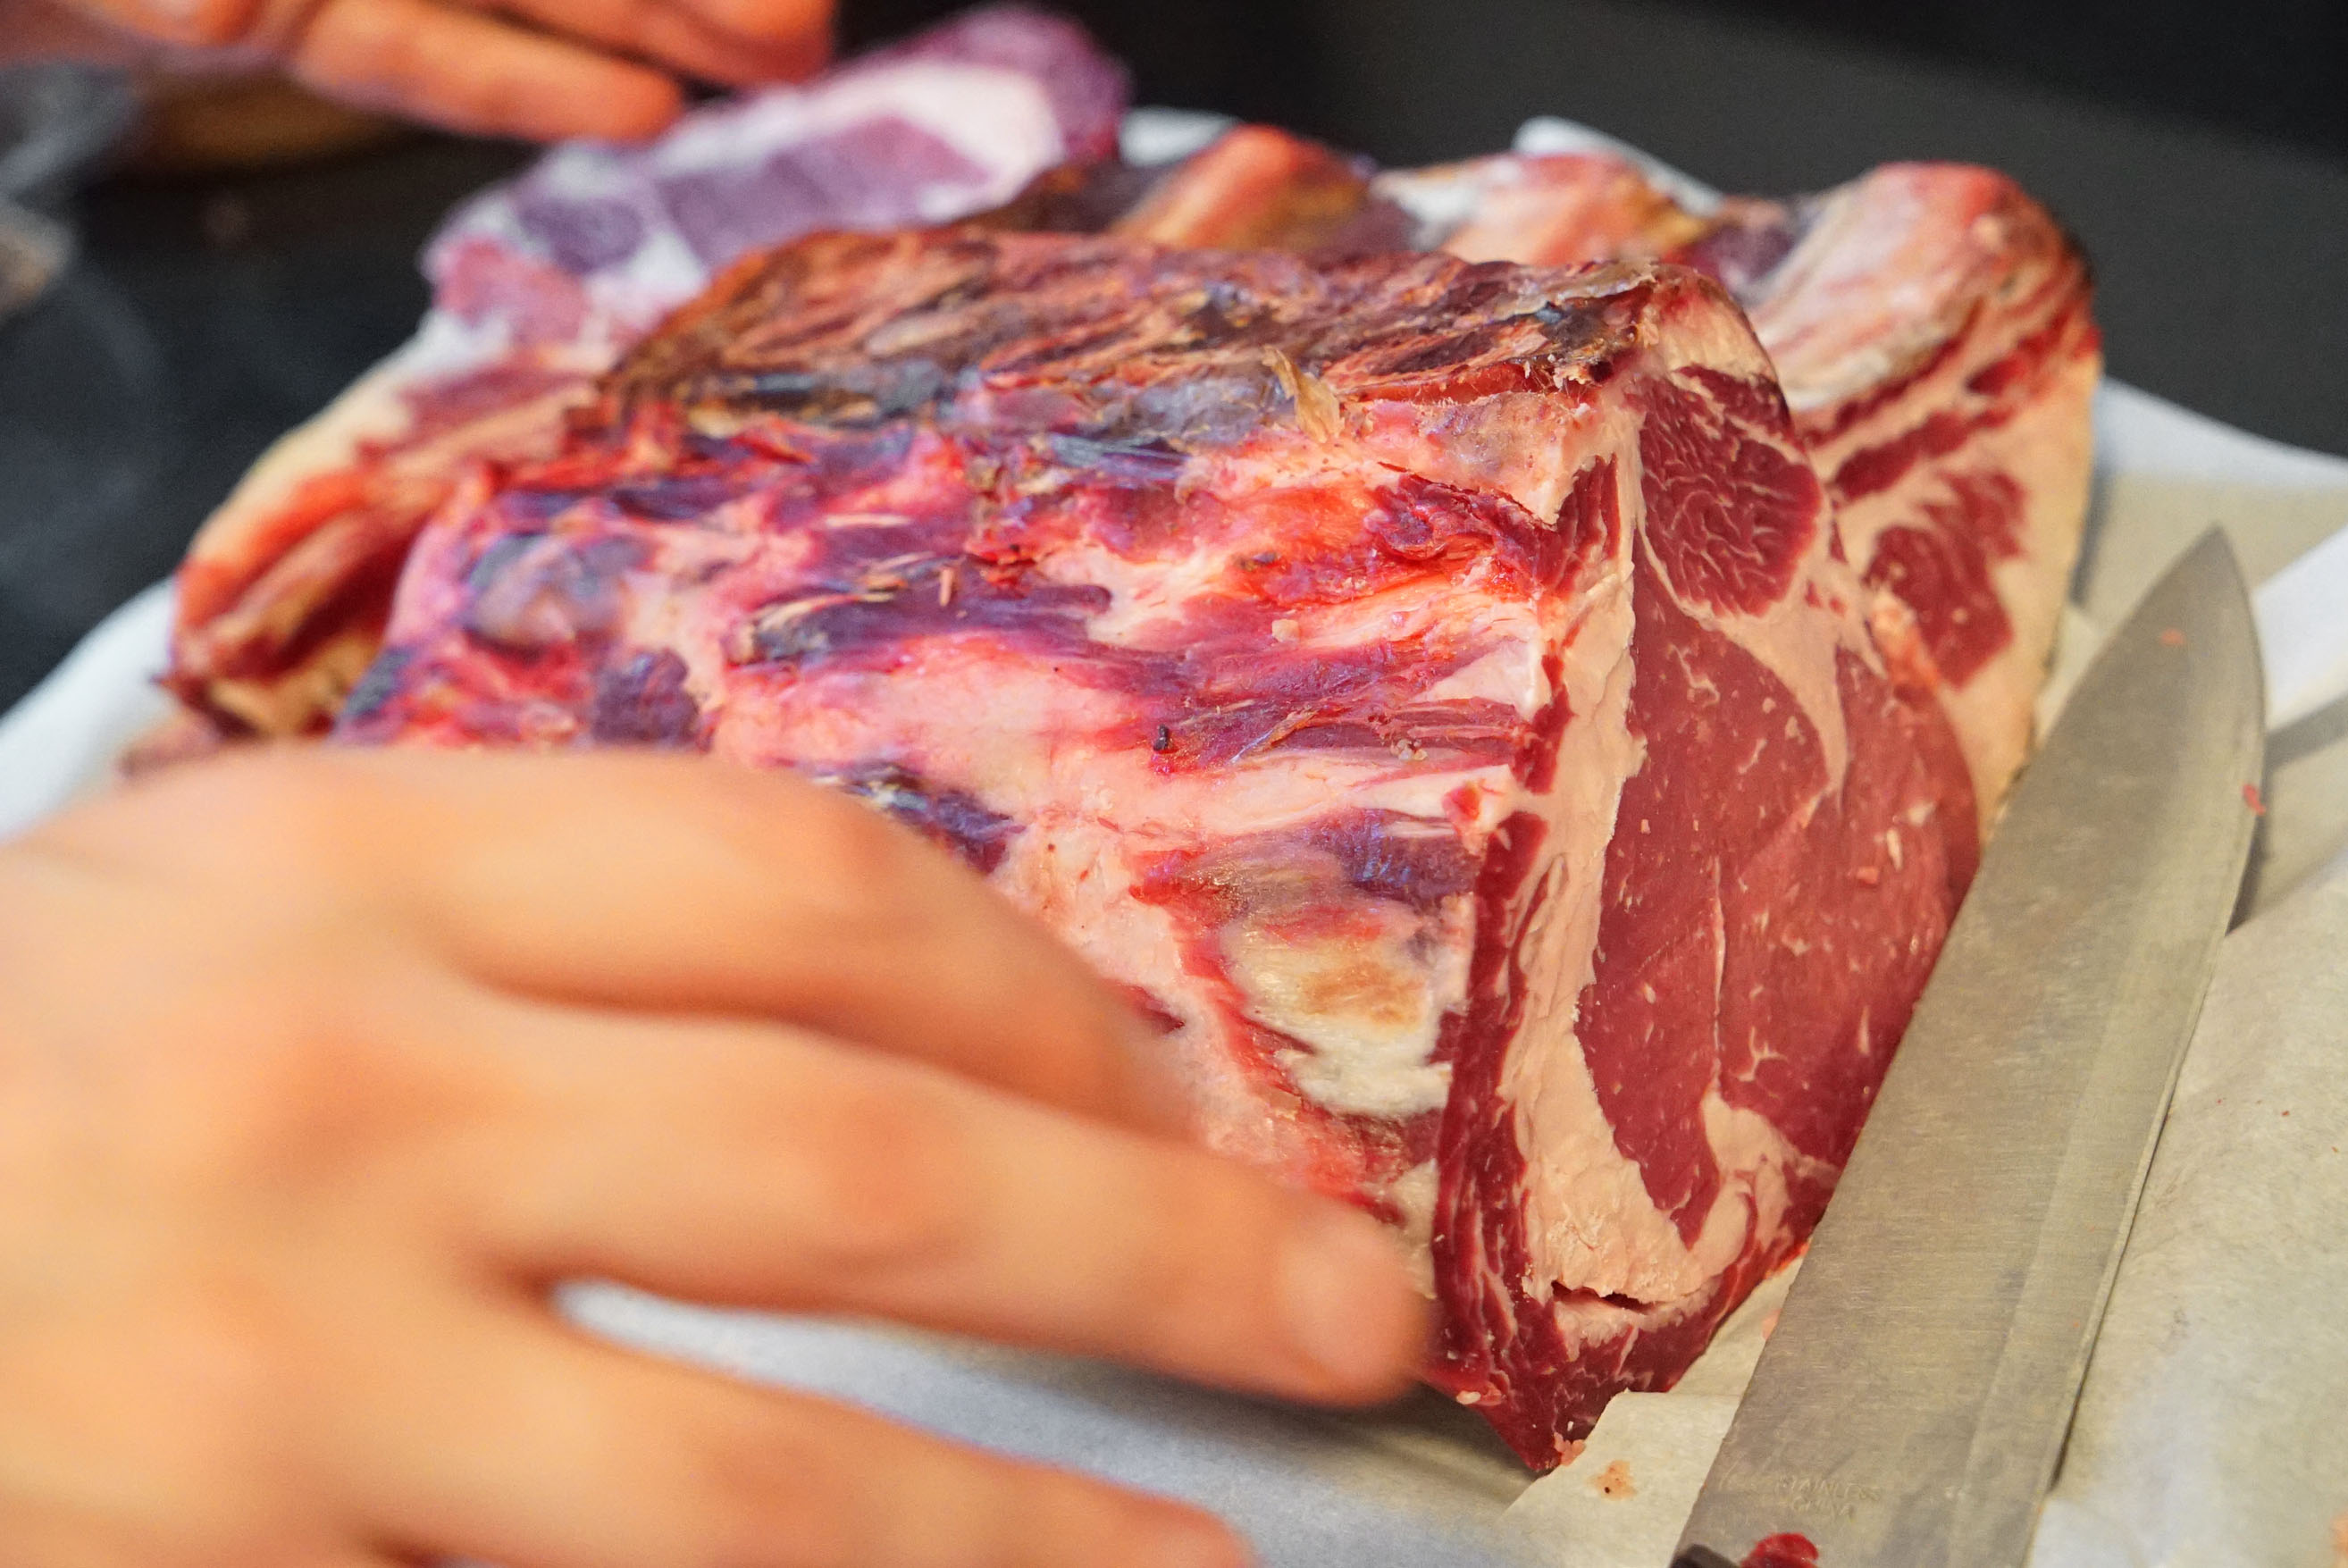
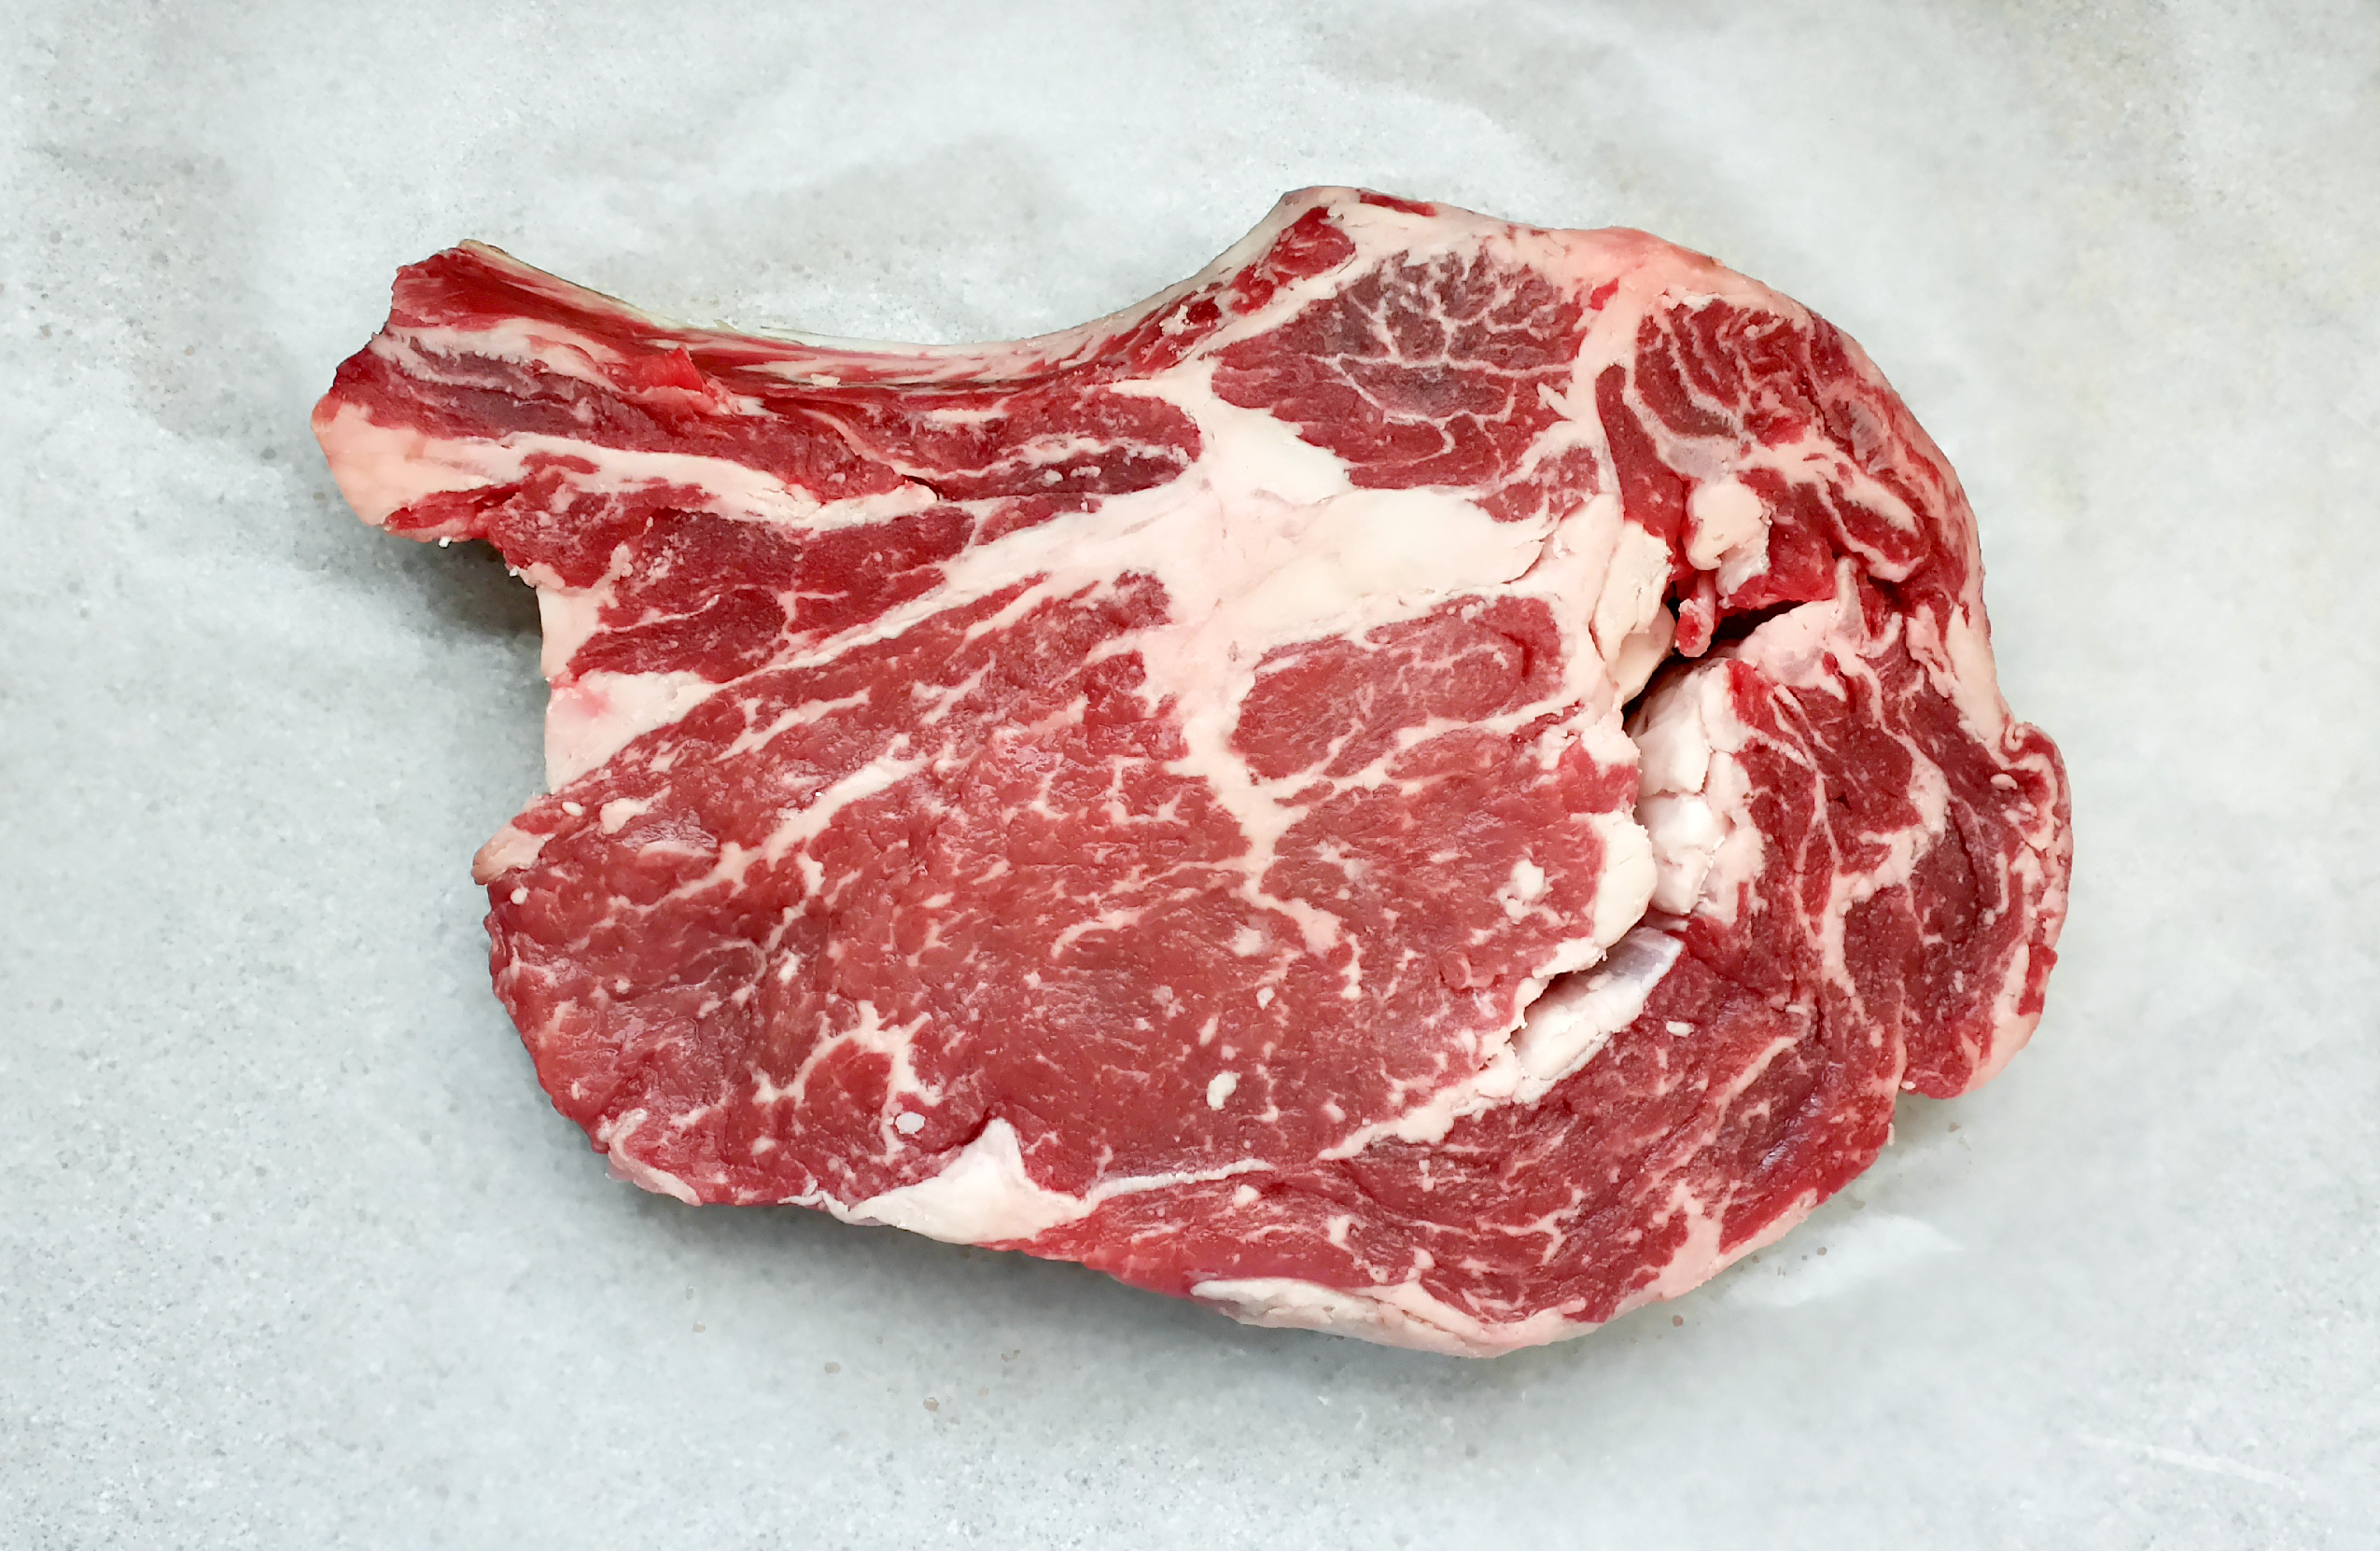
4. Rib Eye

I’ve saved the best for last. The Rib Eye is the most ultimate of steaks, period. It is an awesome cut of beef.

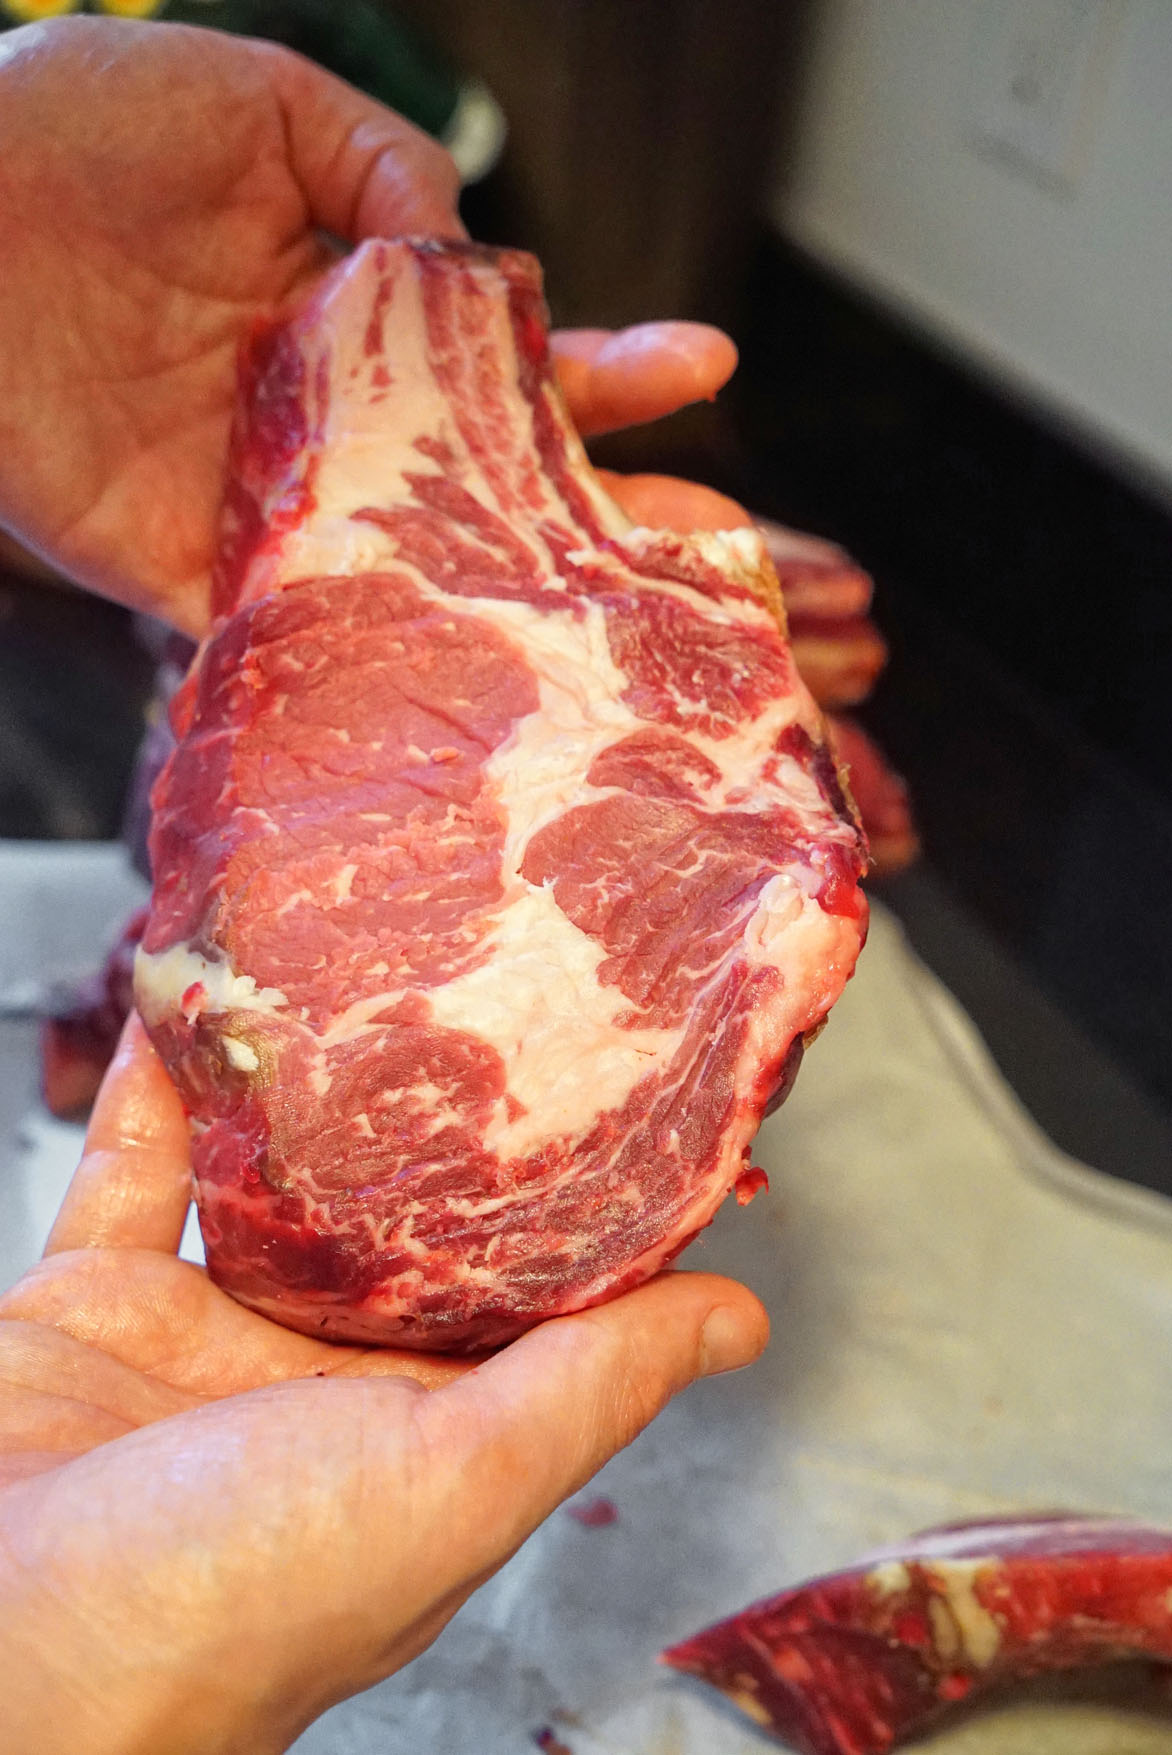
Etymology: The etymology on this is pretty self-explanatory. The “rib” part of the name is because this cut of meat is connected to a rib bone. The “eye” part of the name is a reference to the circular, more centrally located portion of the cut that is more uniform than the outer portions of the cut. You will likely see the Rib Eye steak, or rib chop, called by many names.

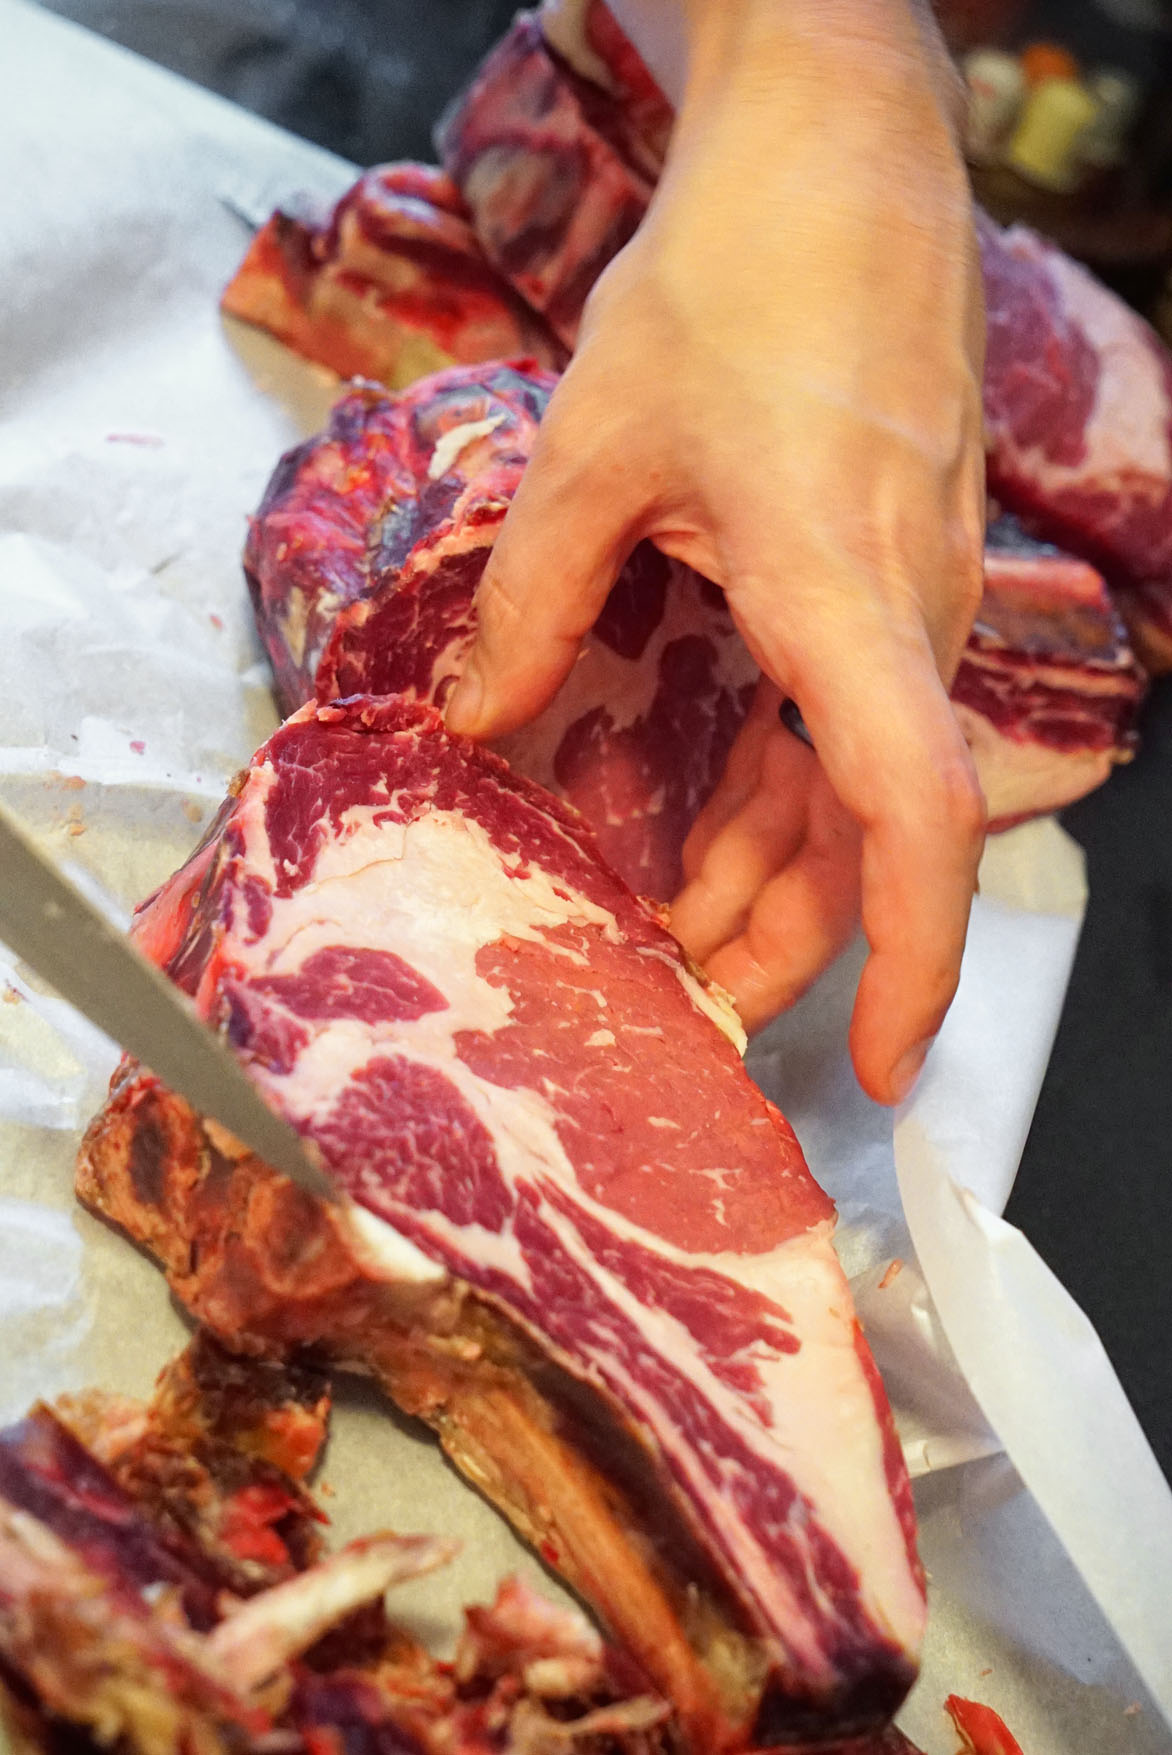
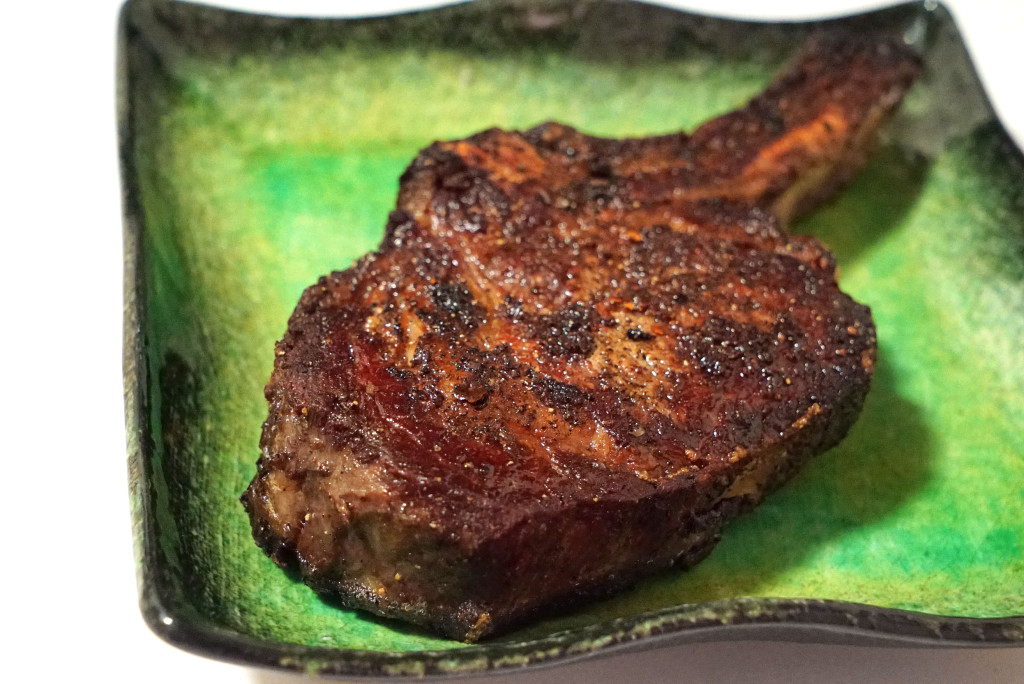
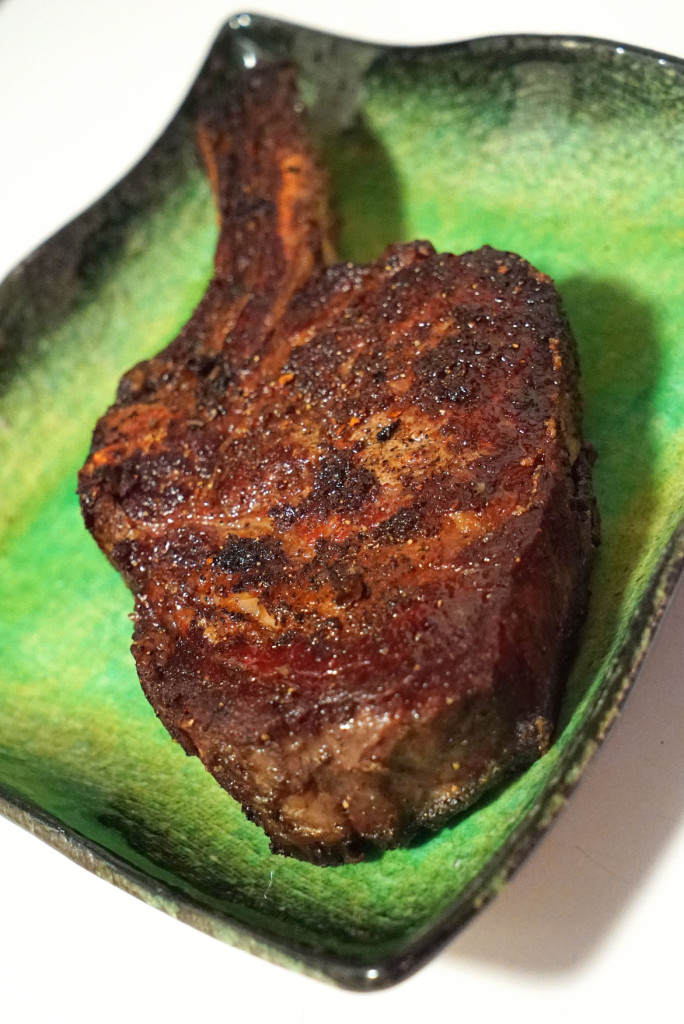
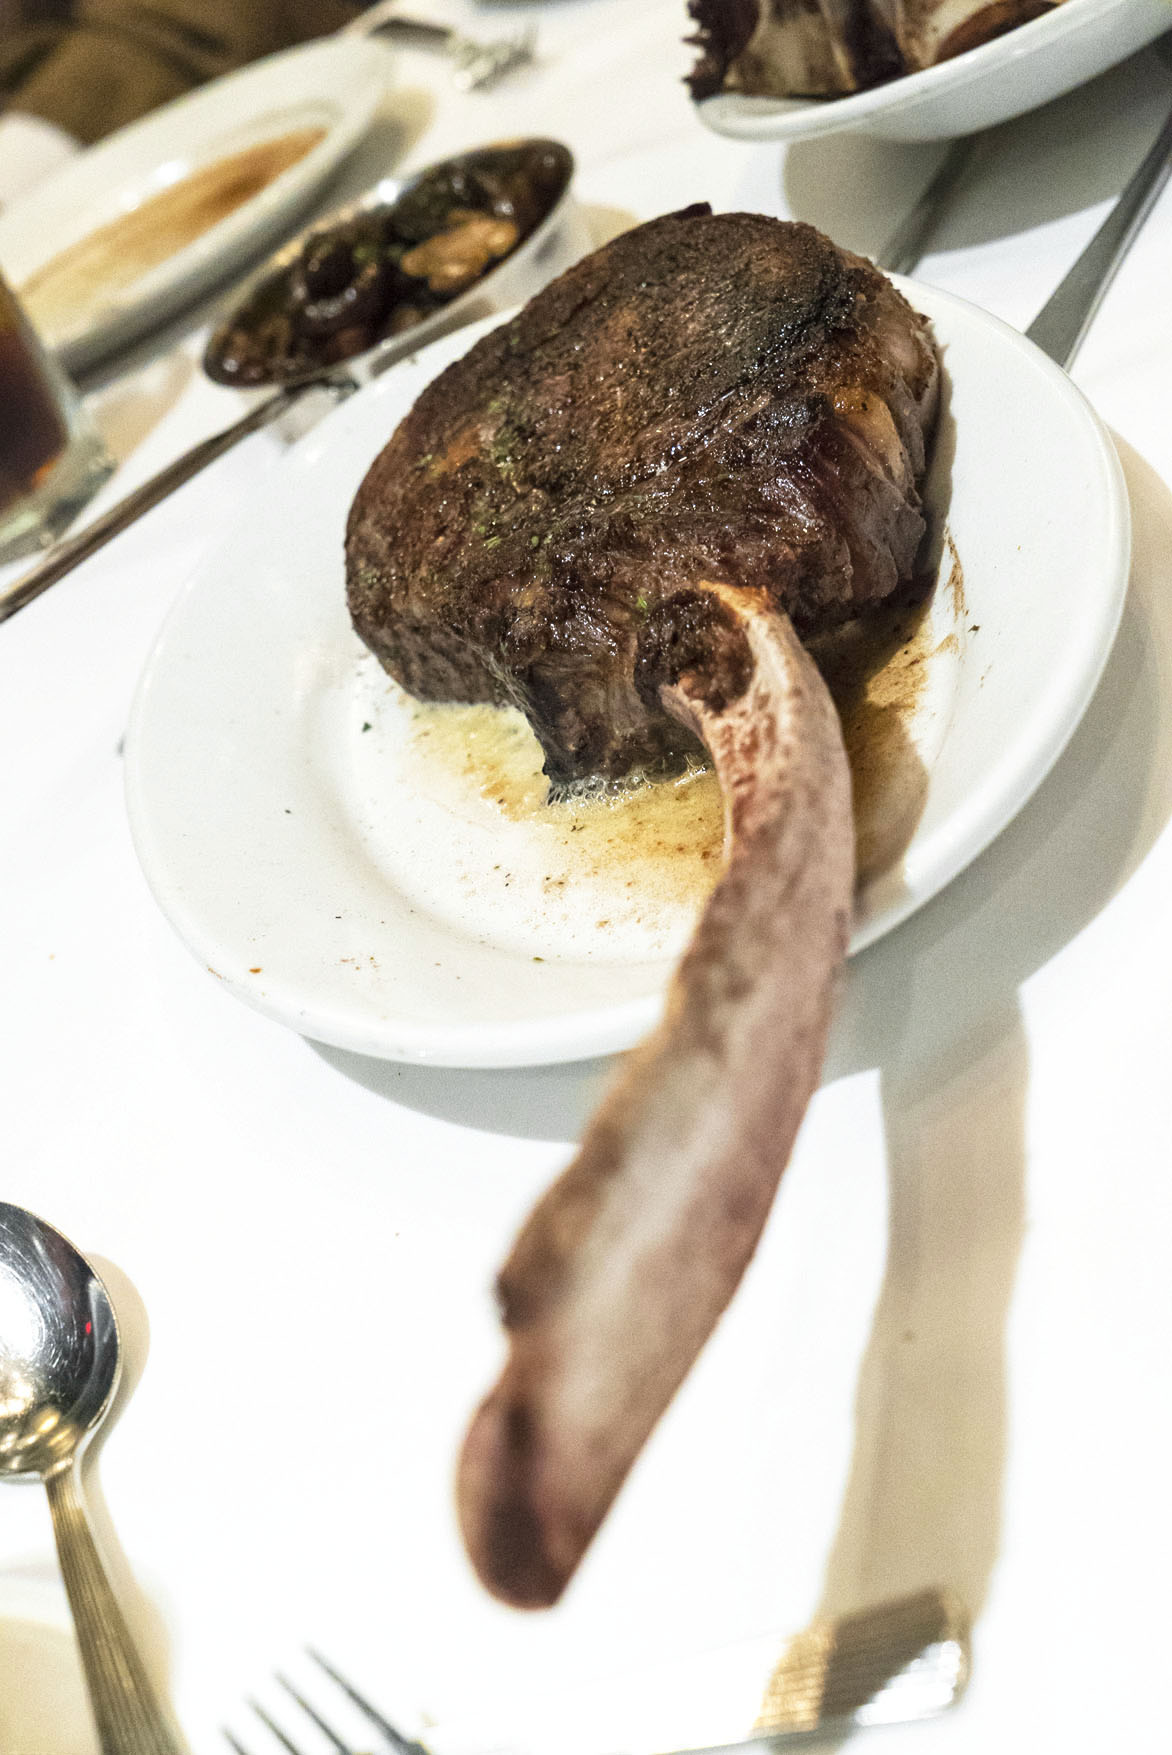
For example, the Cowboy Rib Eye is a bone-in version of the cut:

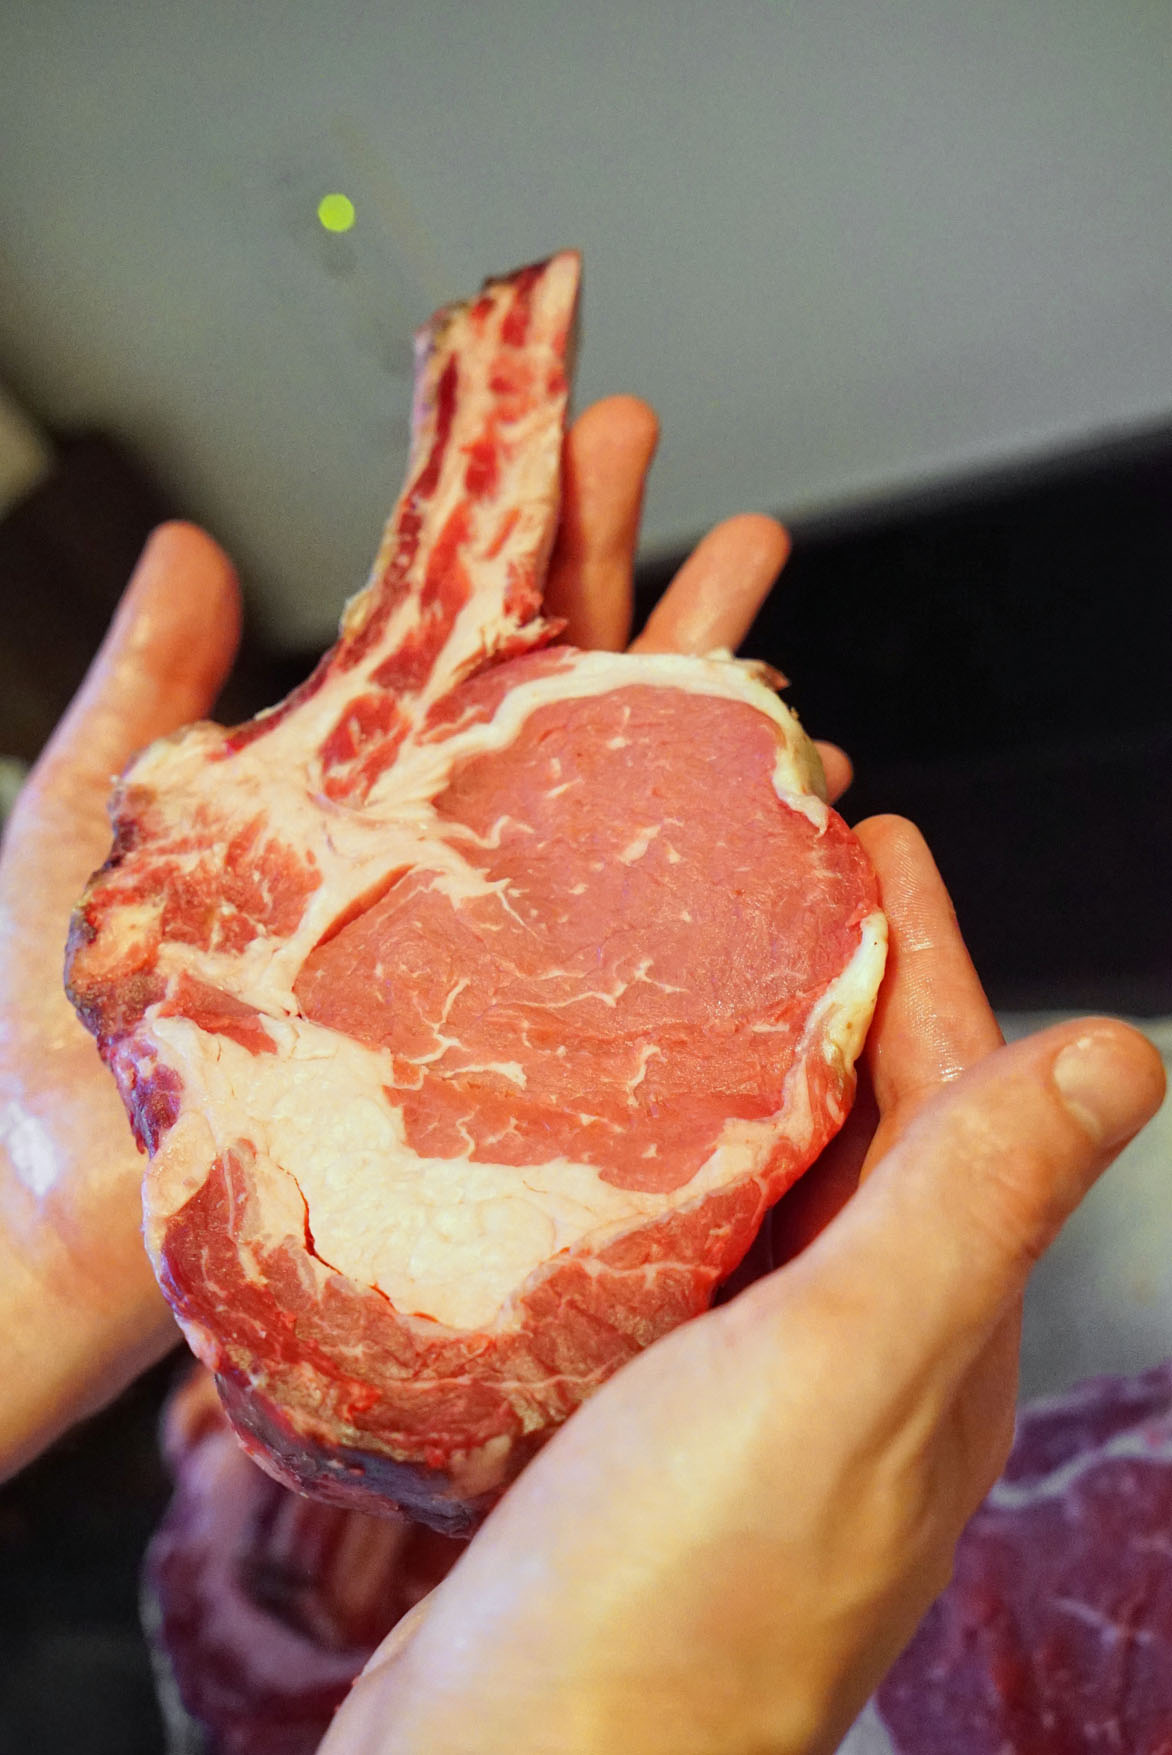
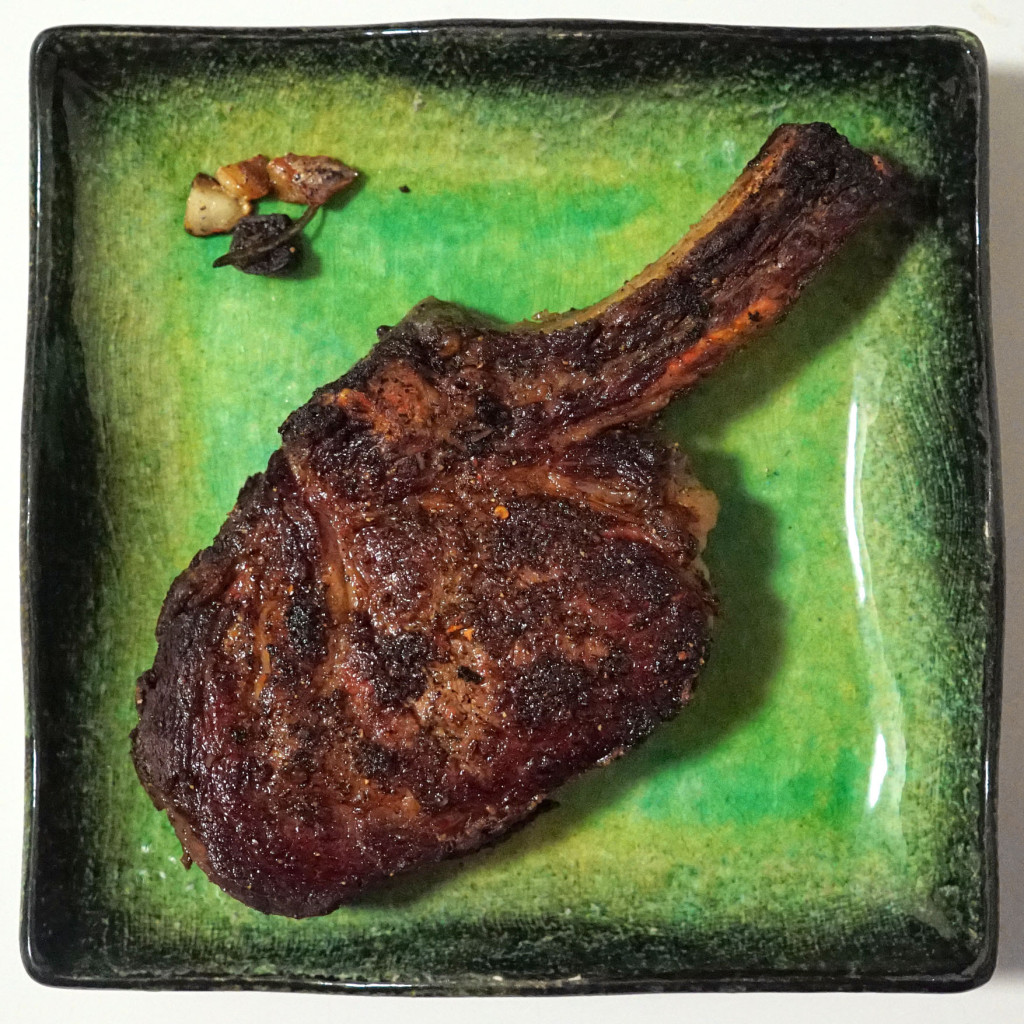
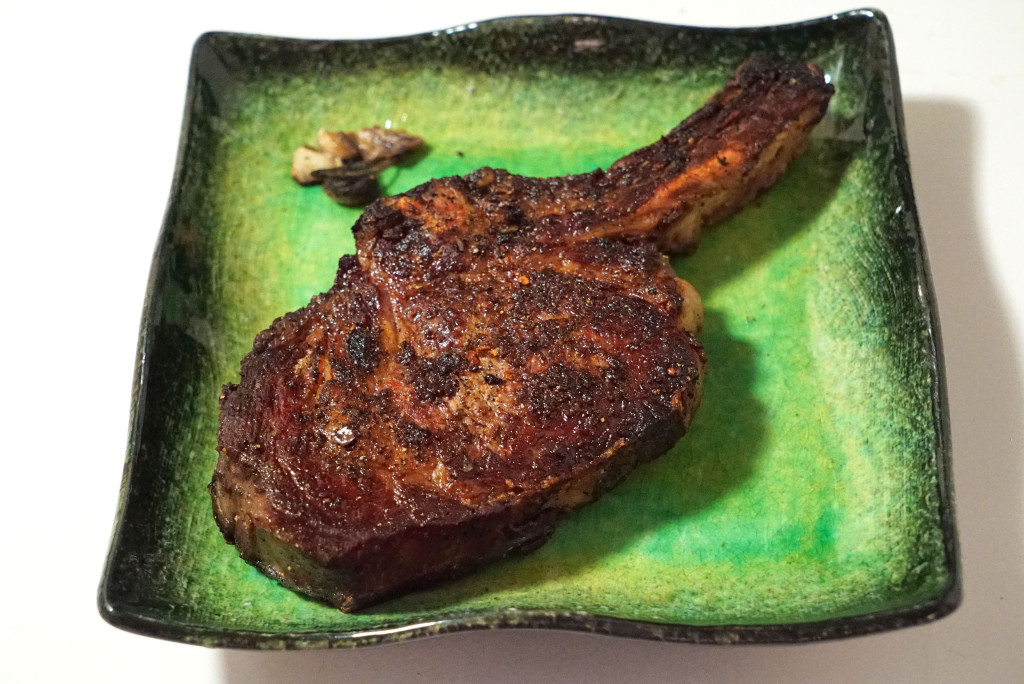
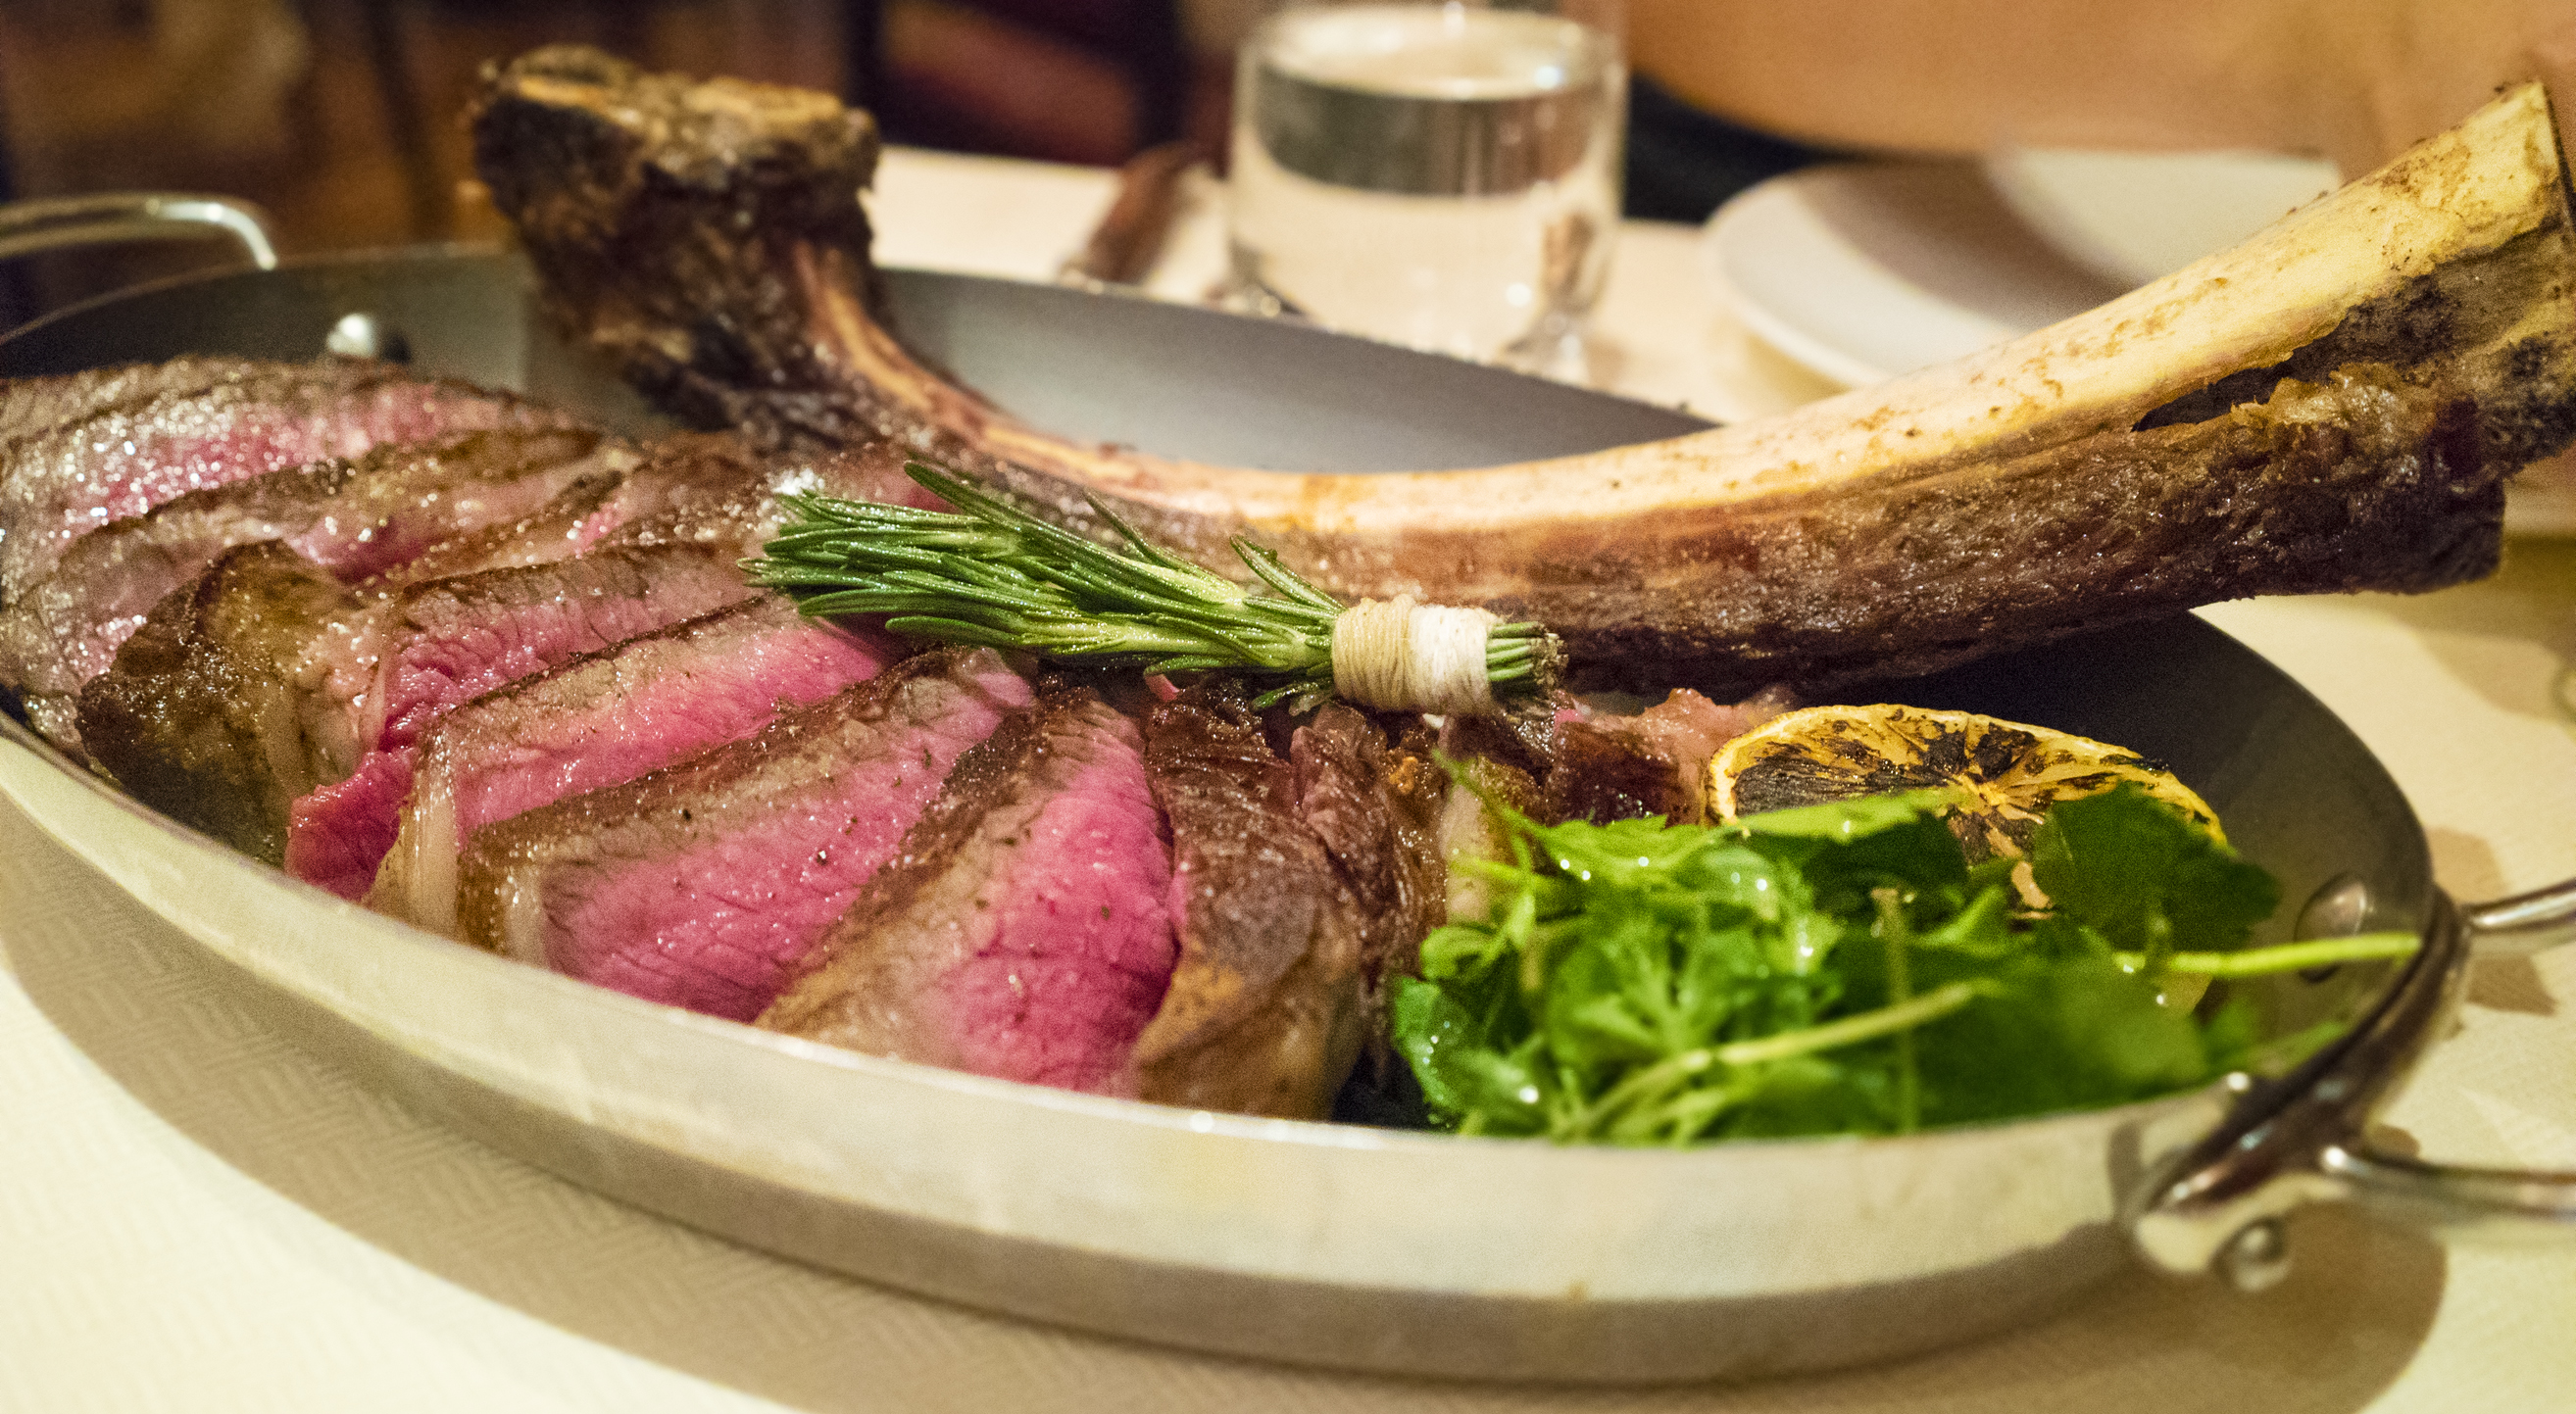
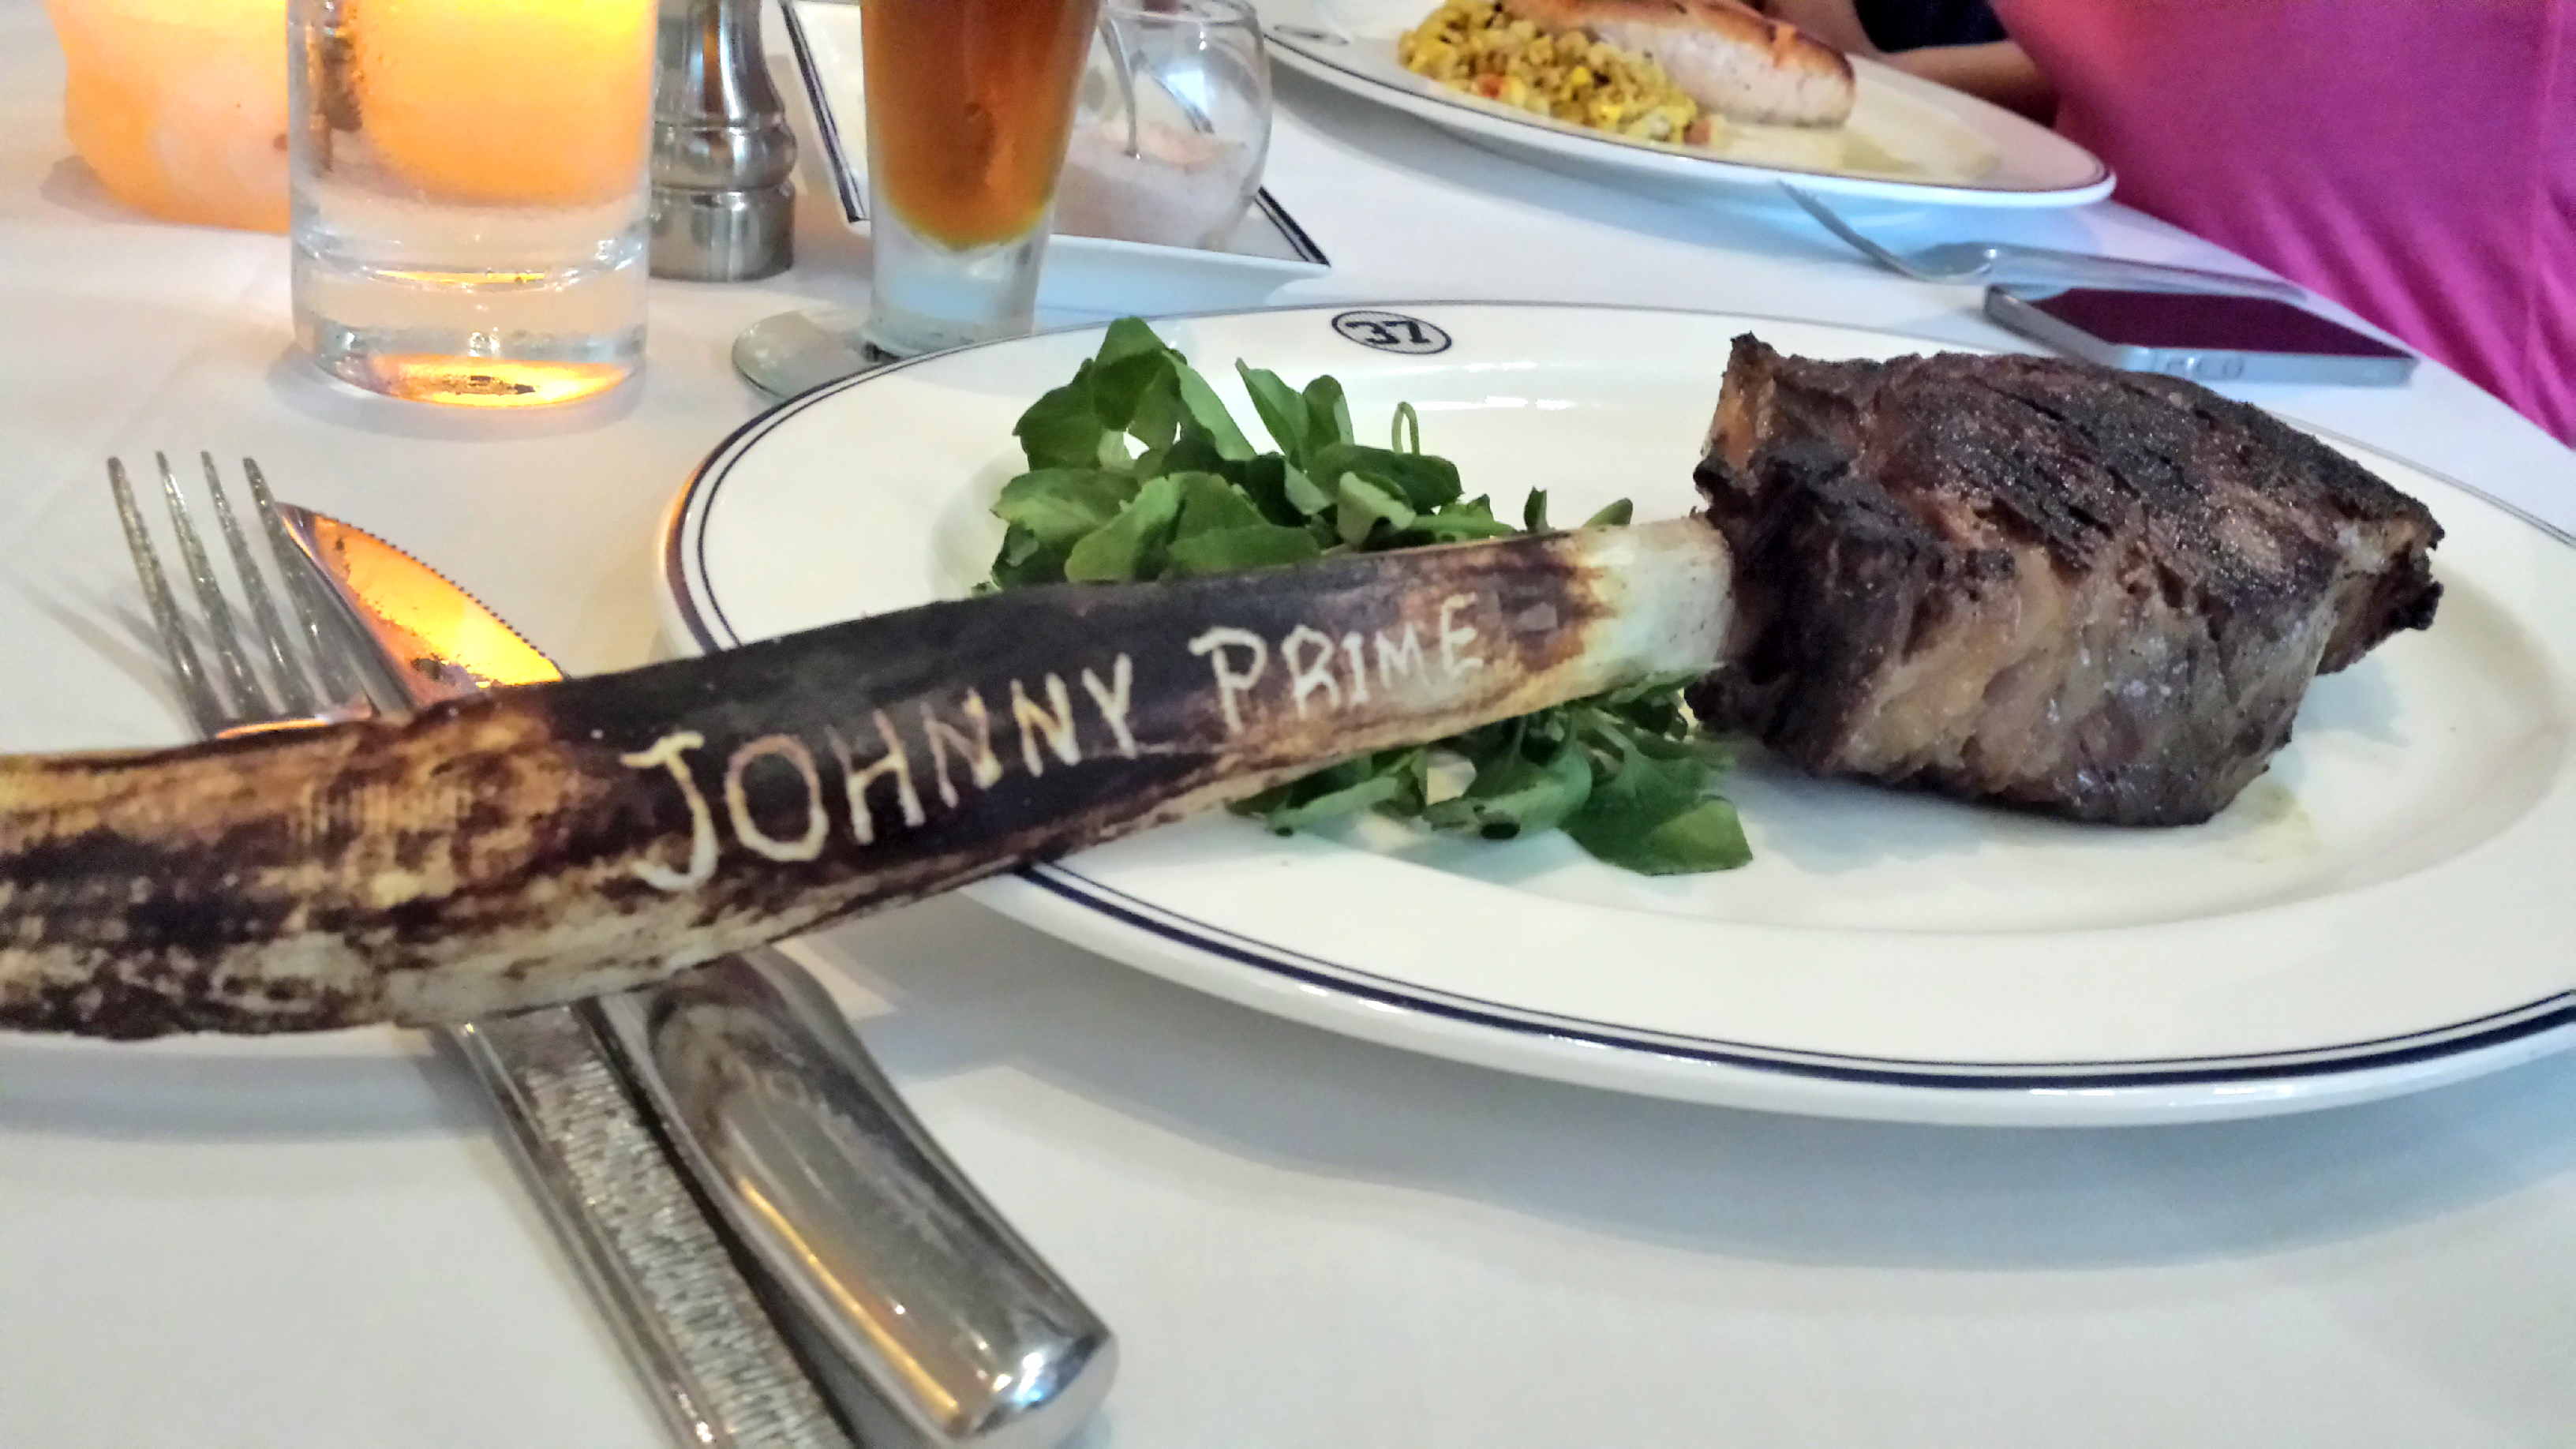
There’s also the Tomahawk Rib Eye, which is so named for its resemblance to a Tomahawk-style hatchet. When butchered, a long “handle” of rib is cut clean to expose the bone (it is “Frenched,” as they say), and the steak meat is left at the end of the handle to form the hatchet blade:

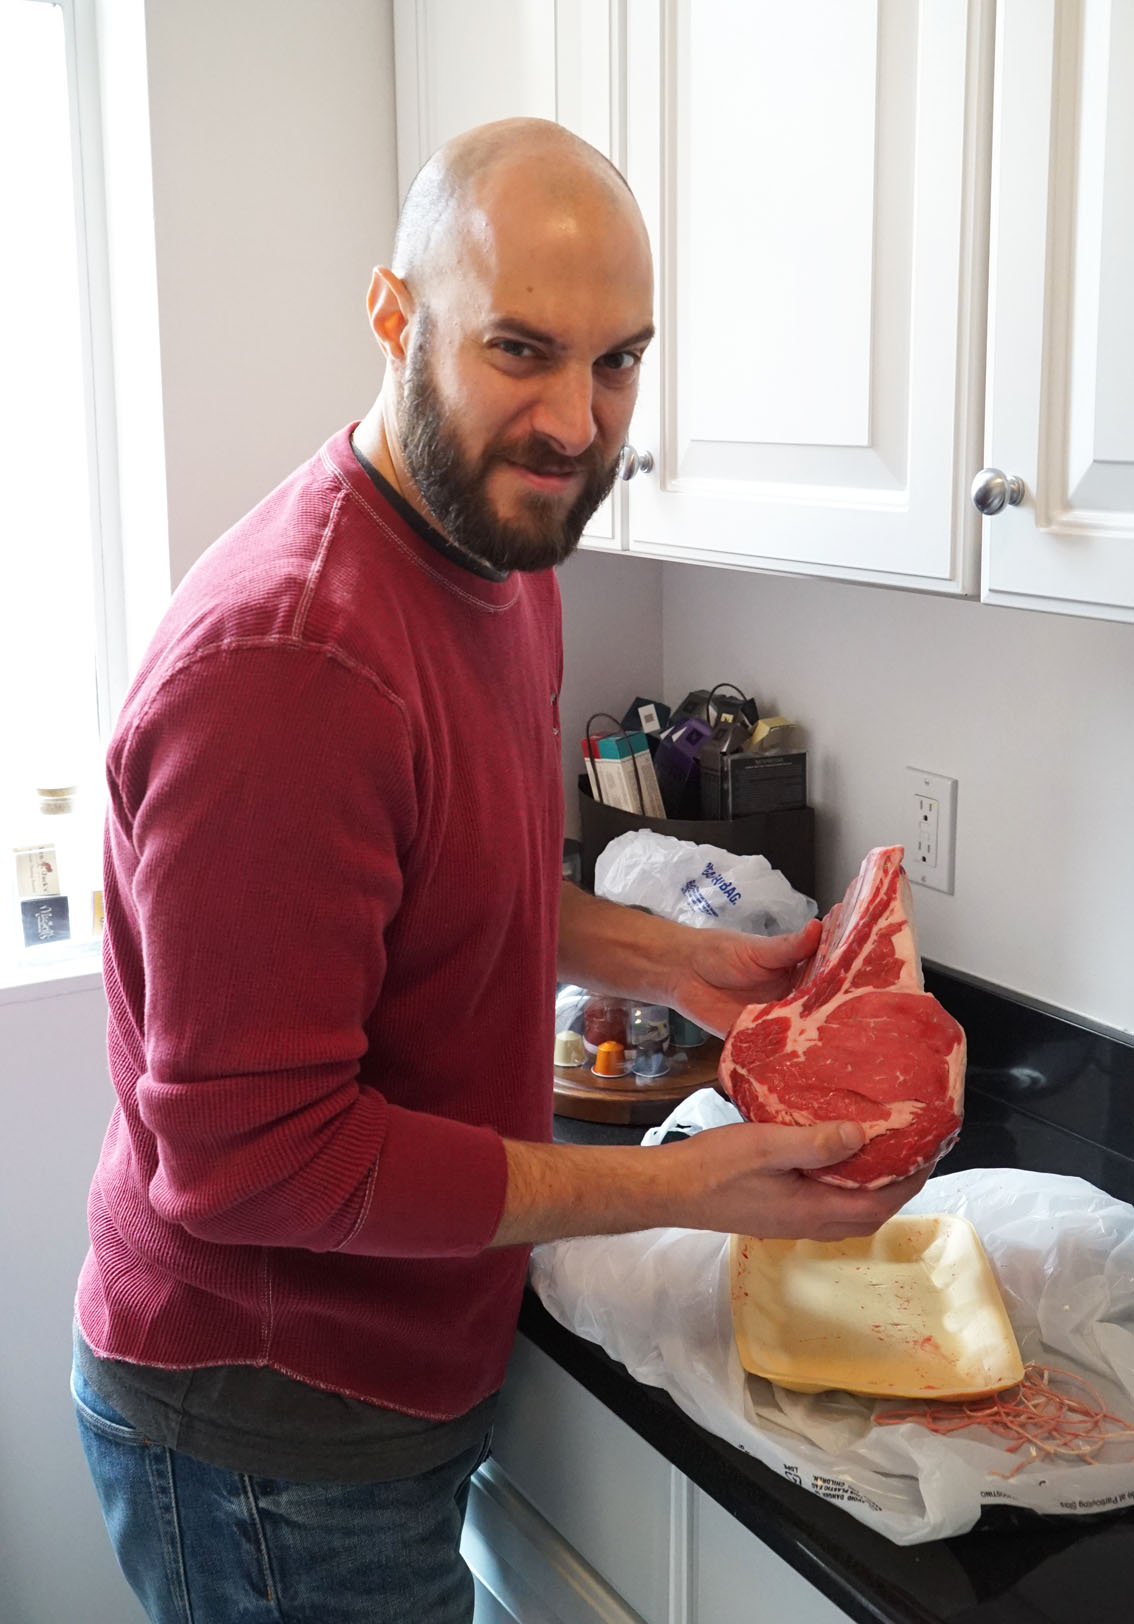
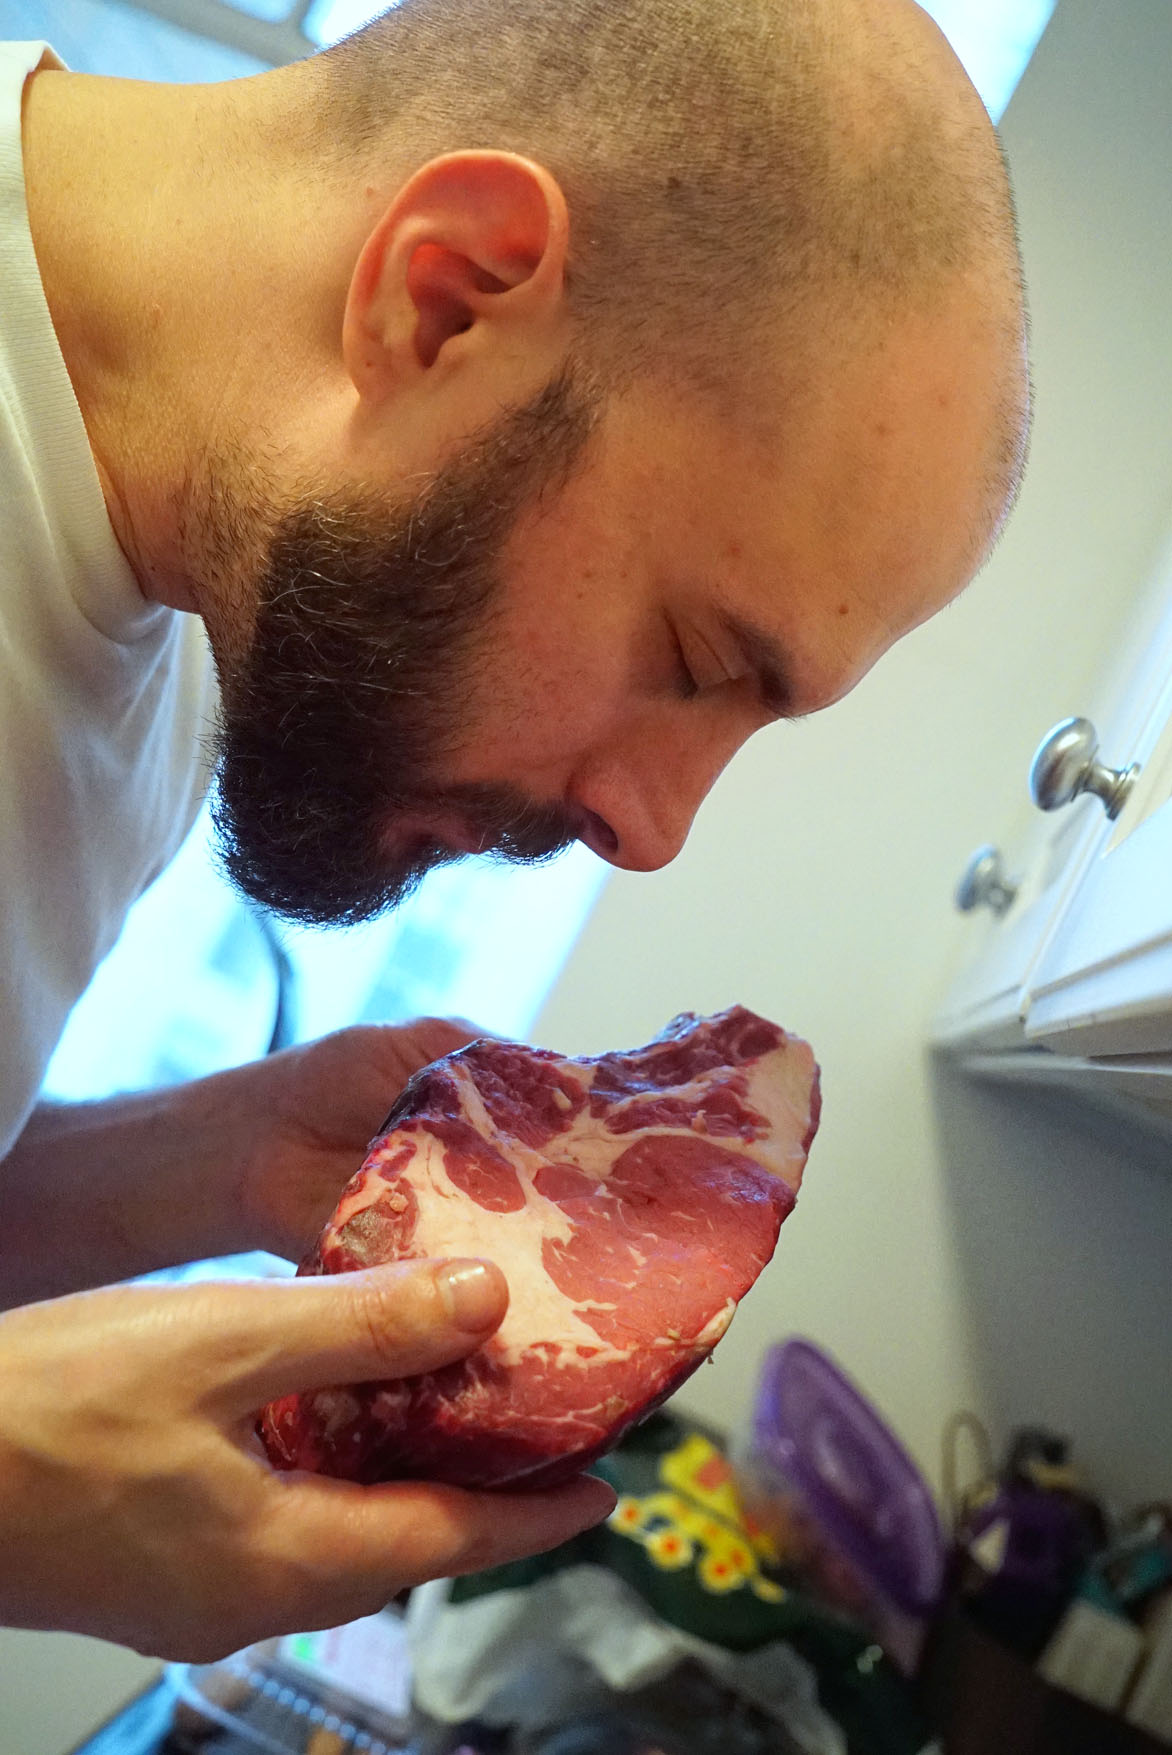
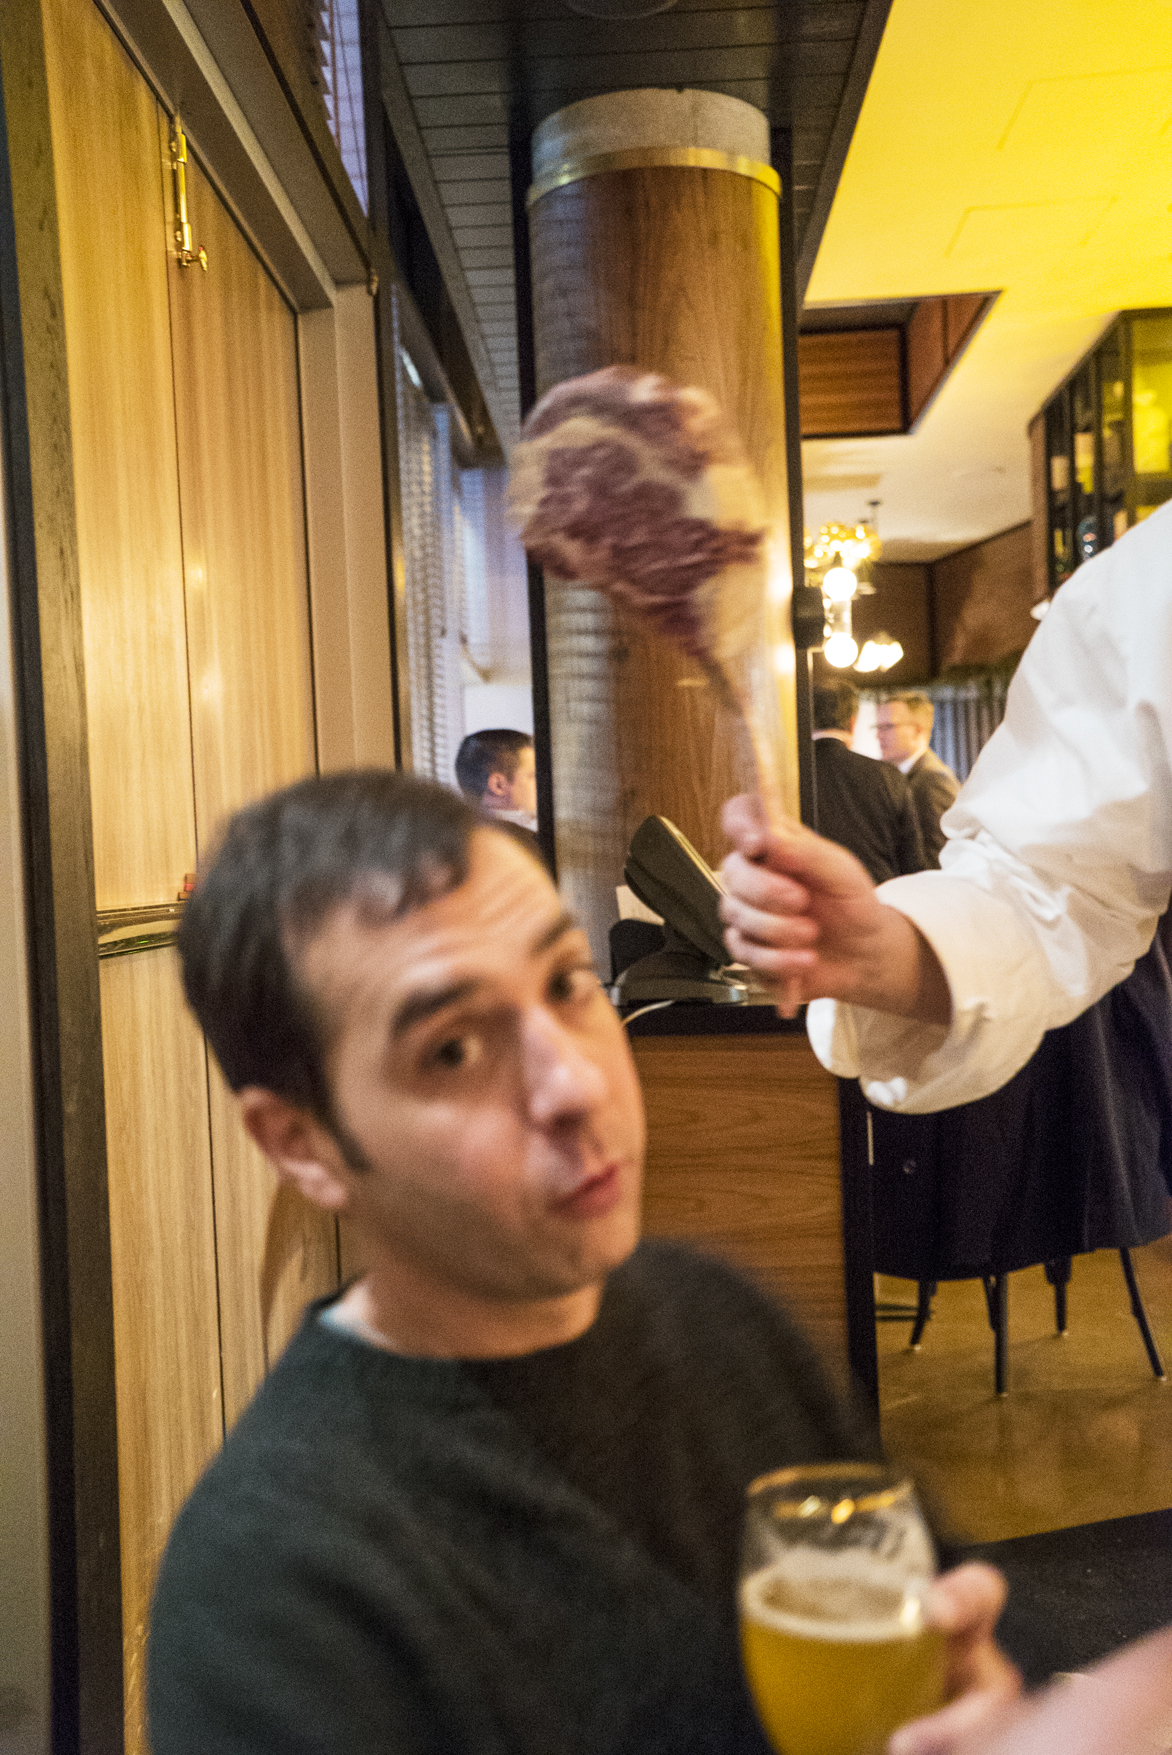
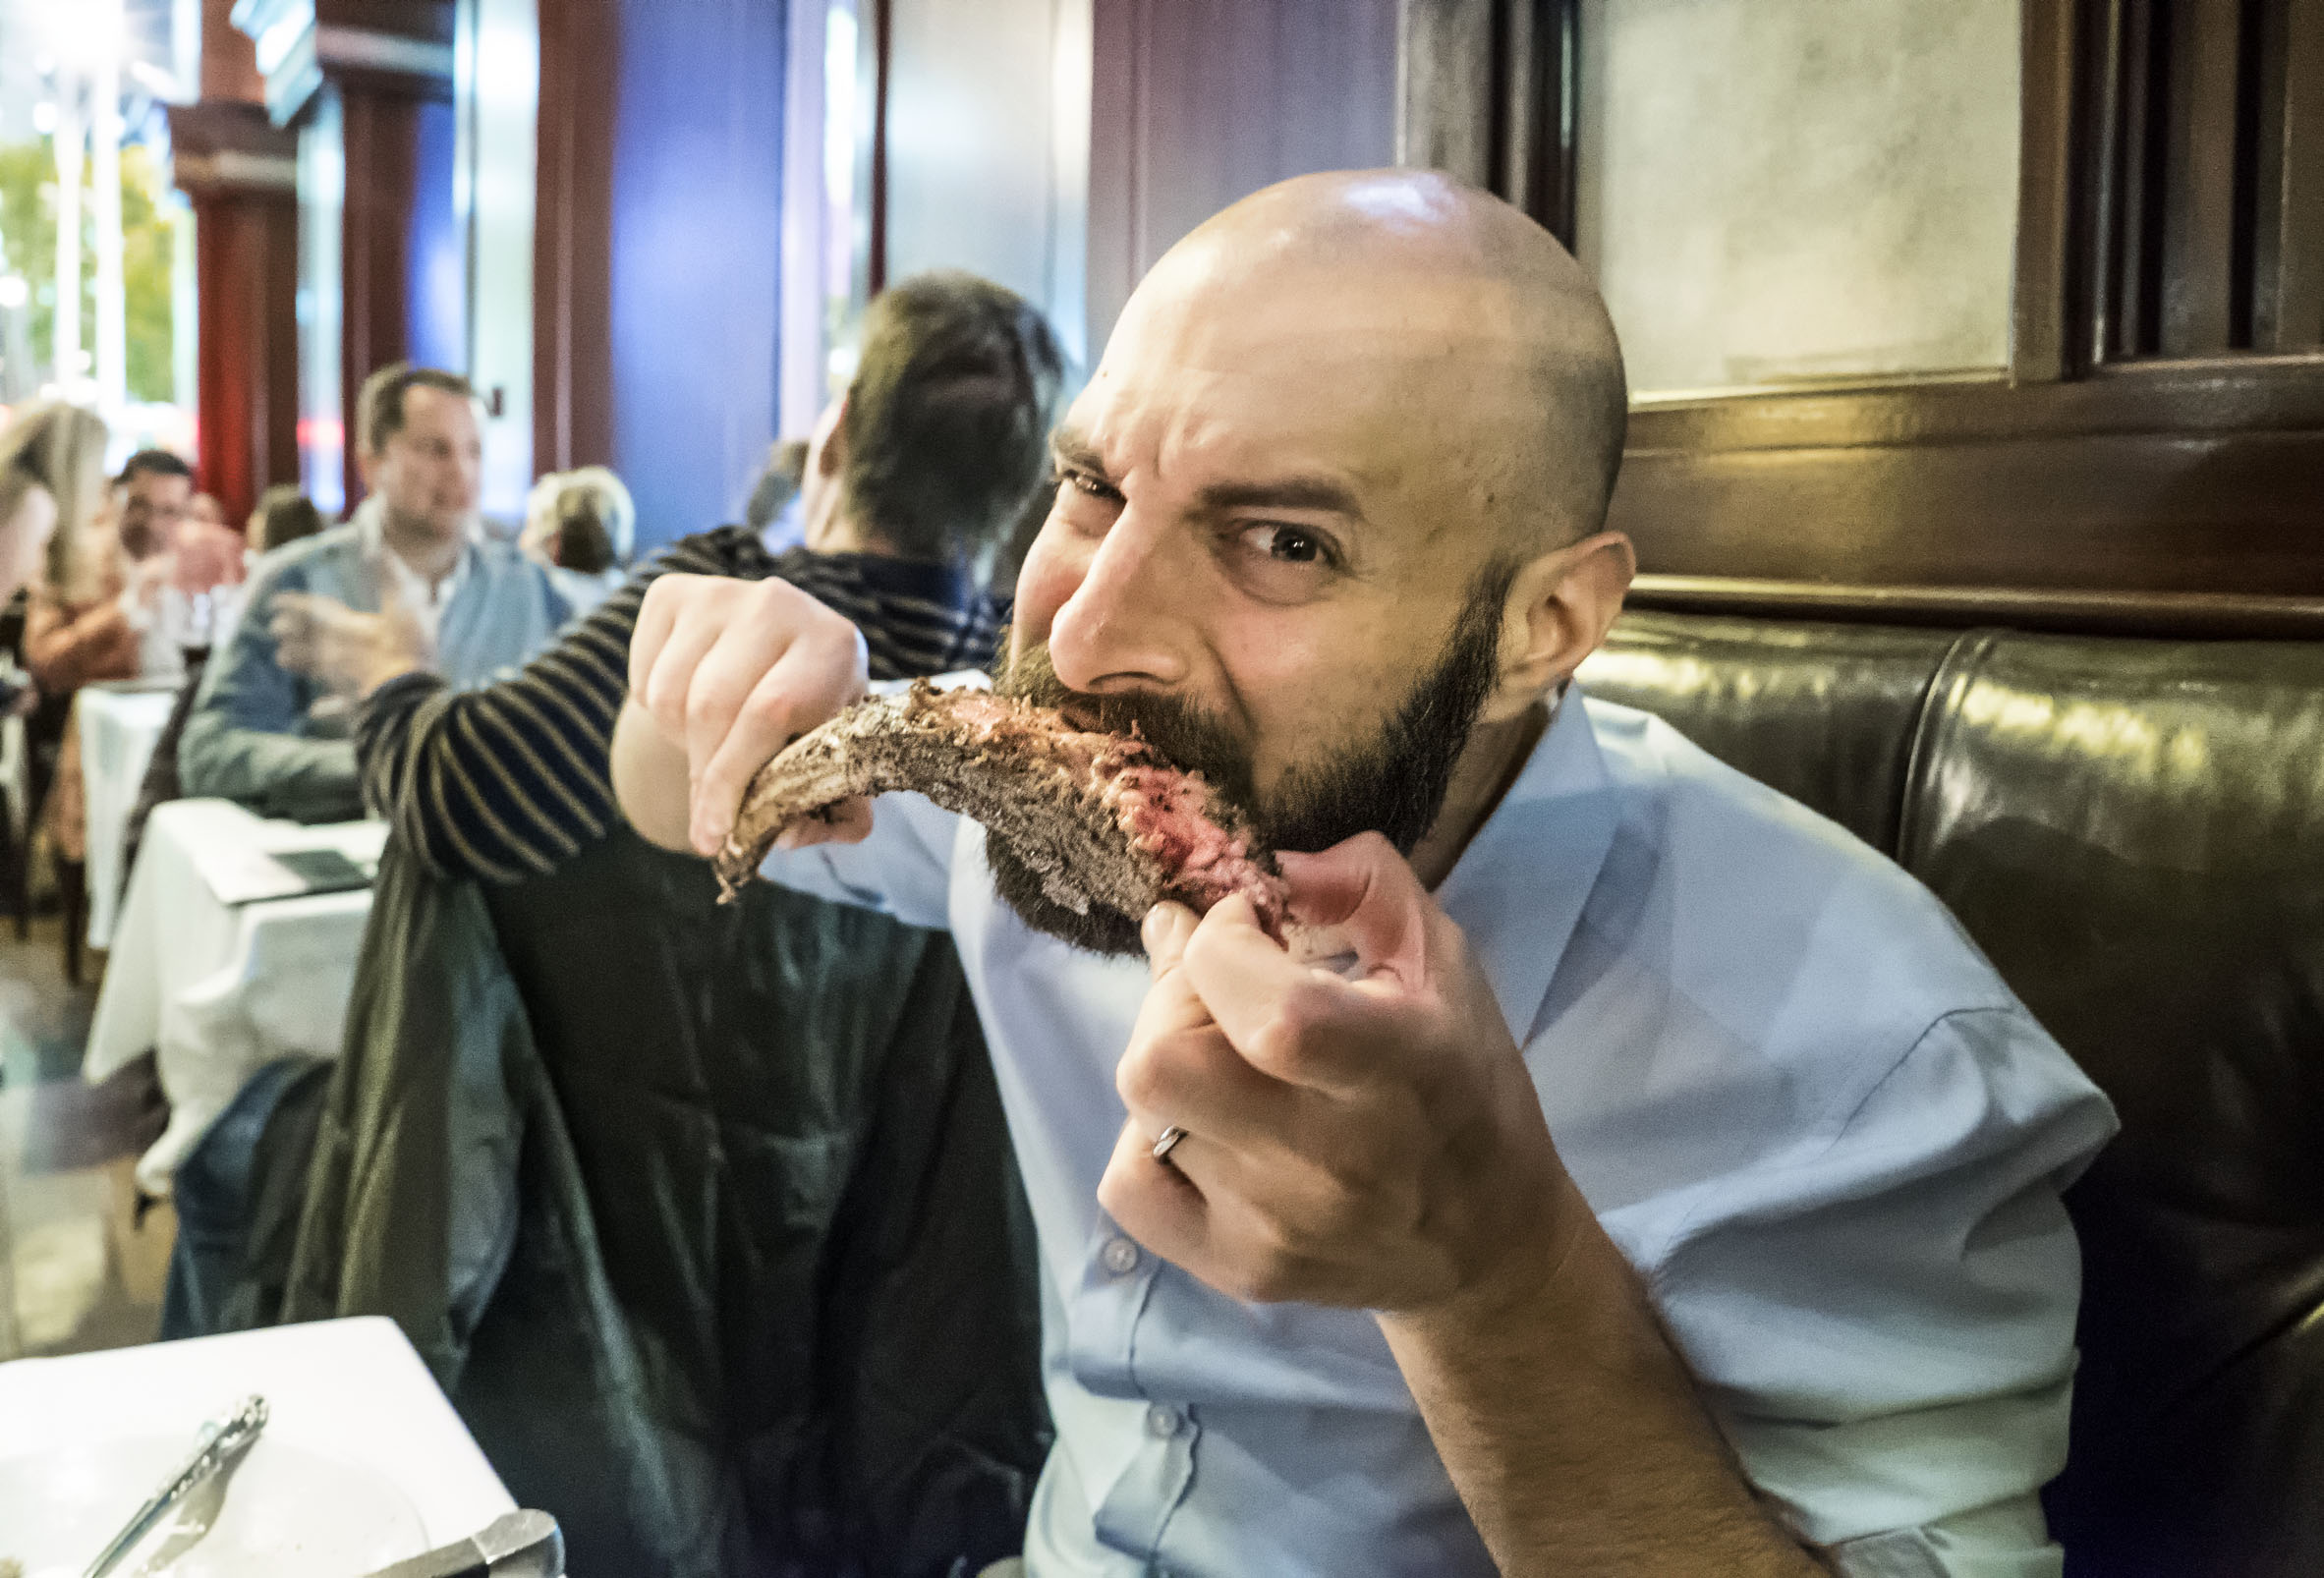
Here’s a shot of my buddy; he’s about to get clobbered with a Tomahawk Rib Eye by Chef Josh Capon at Bowery Meat Company:

There’s also the Delmonico cut, otherwise known as a Scotch Filet. Applying what you’ve learned here, you can probably guess that this cut is boneless (filet means “boneless” in French). Delmonico’s claims this cut as their own because they named a house special boneless cut Rib Eye steak after their restaurant, way back in the early 1800’s when they first opened.

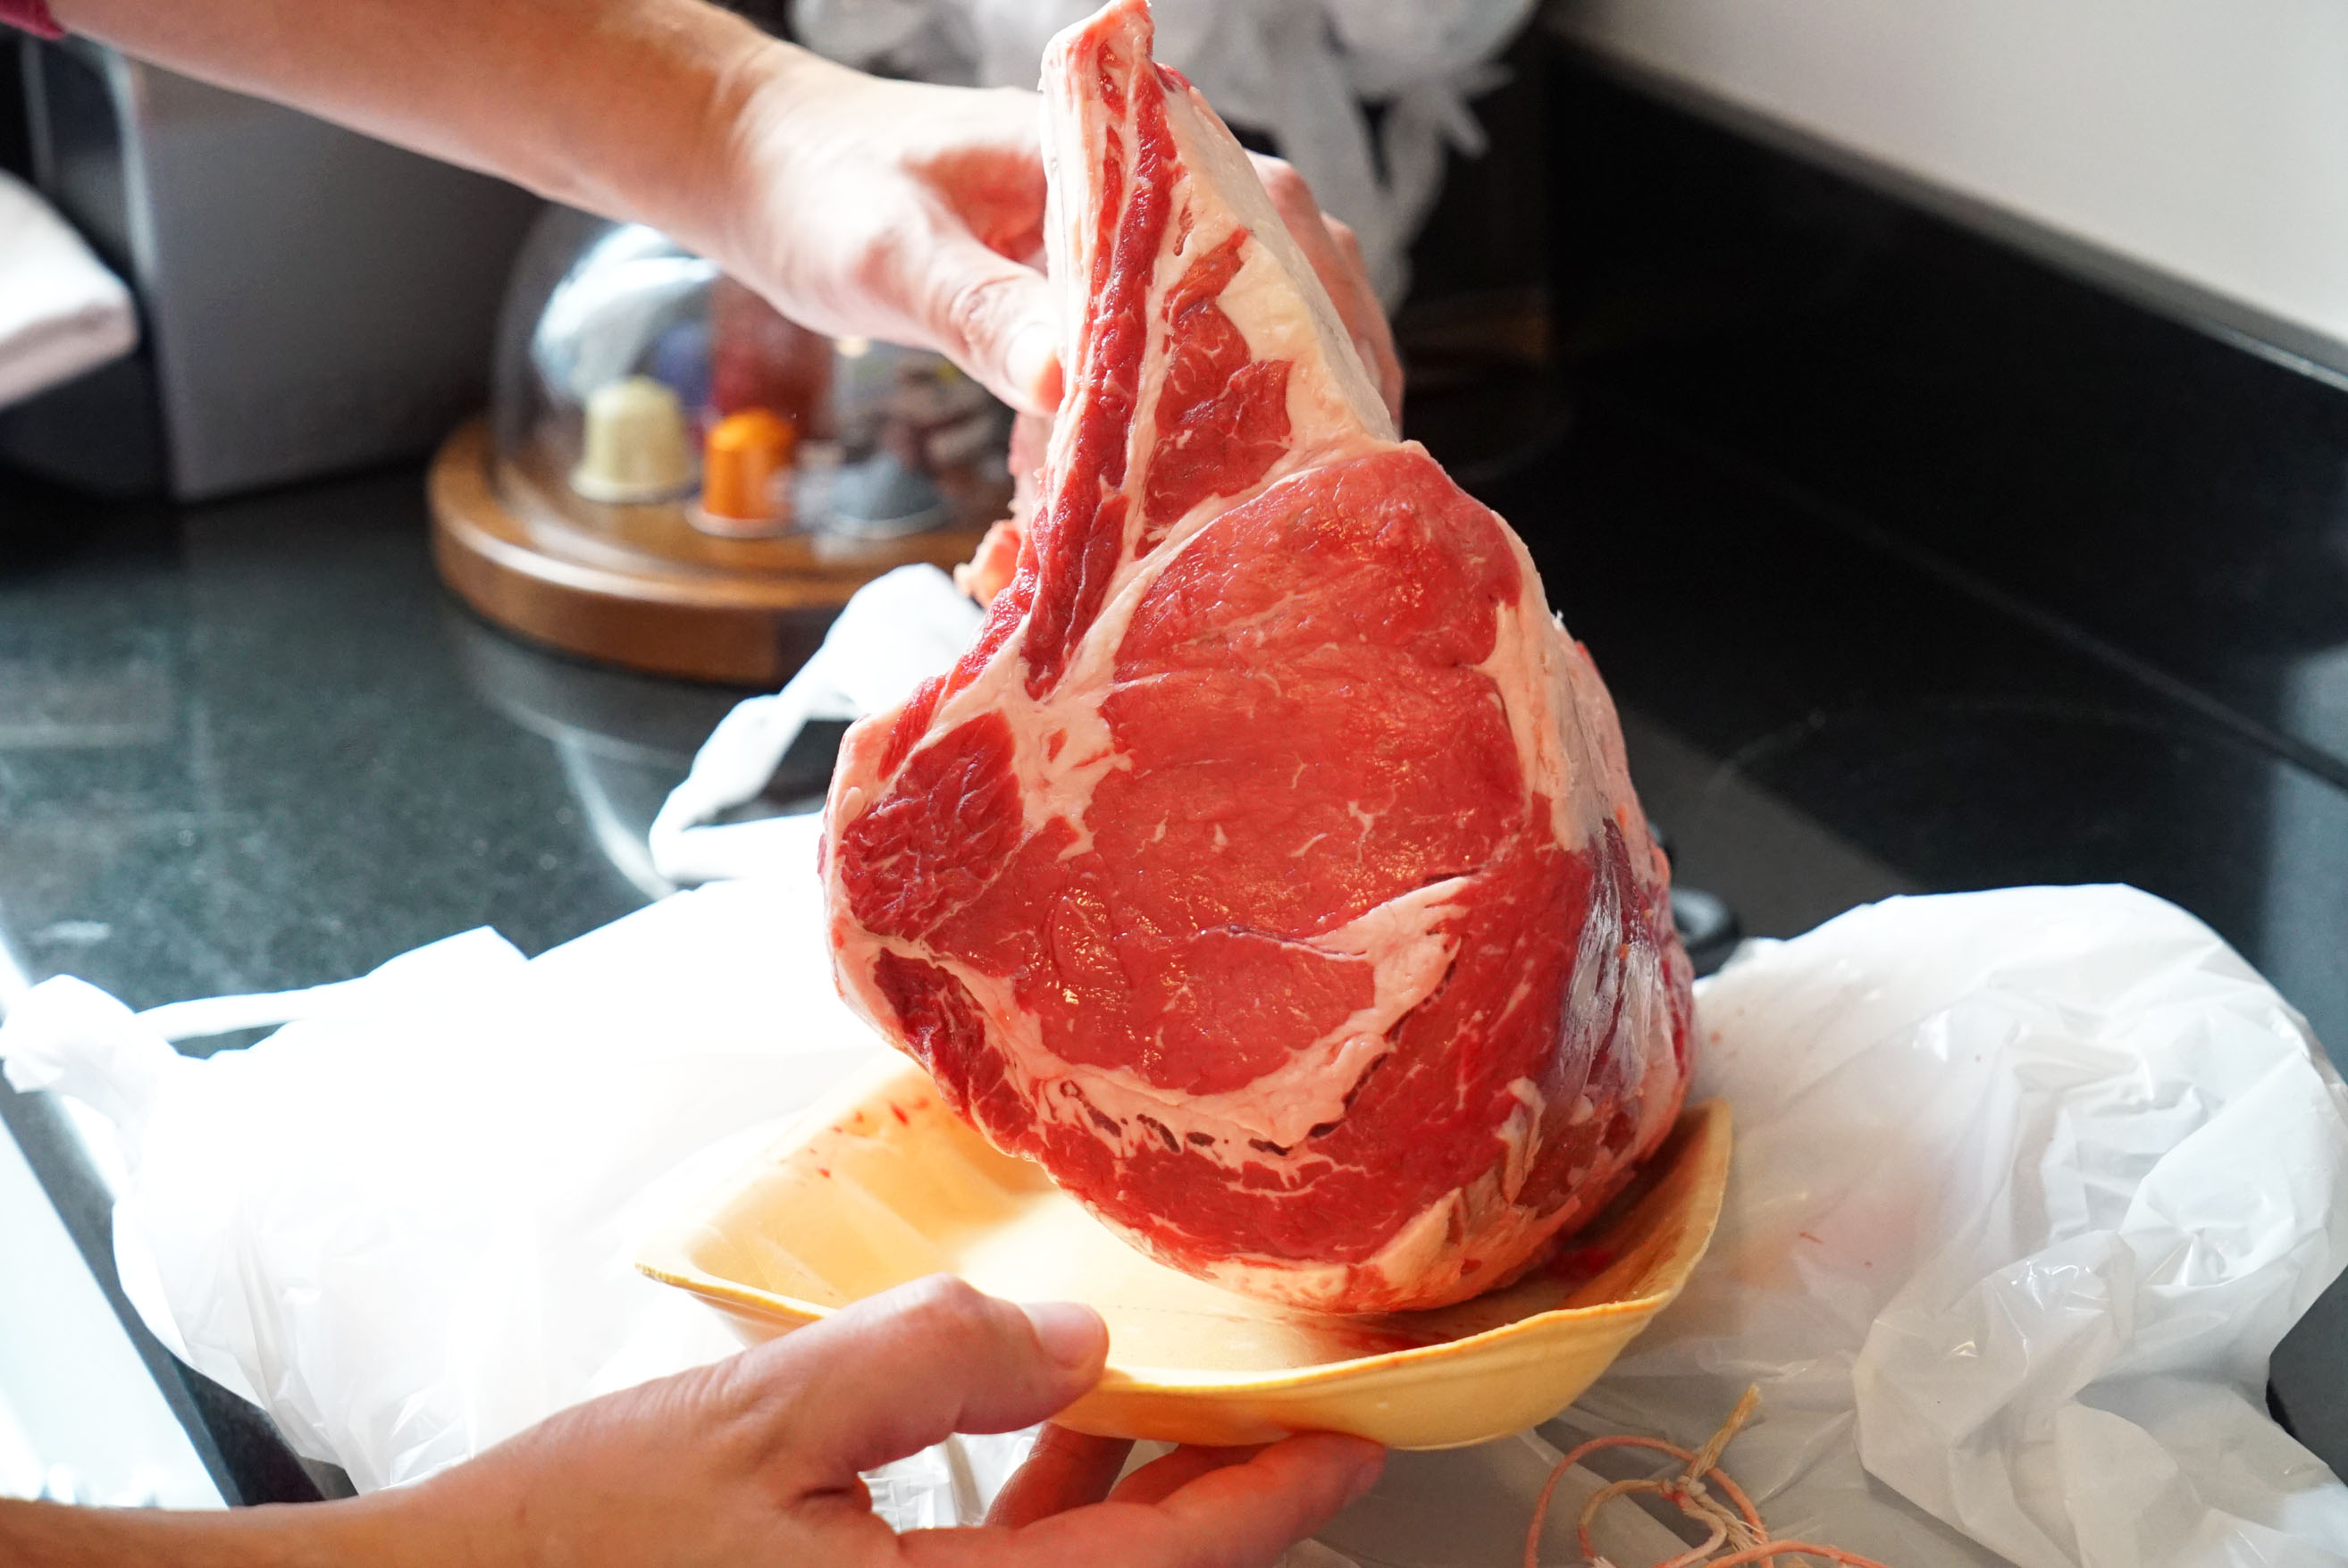
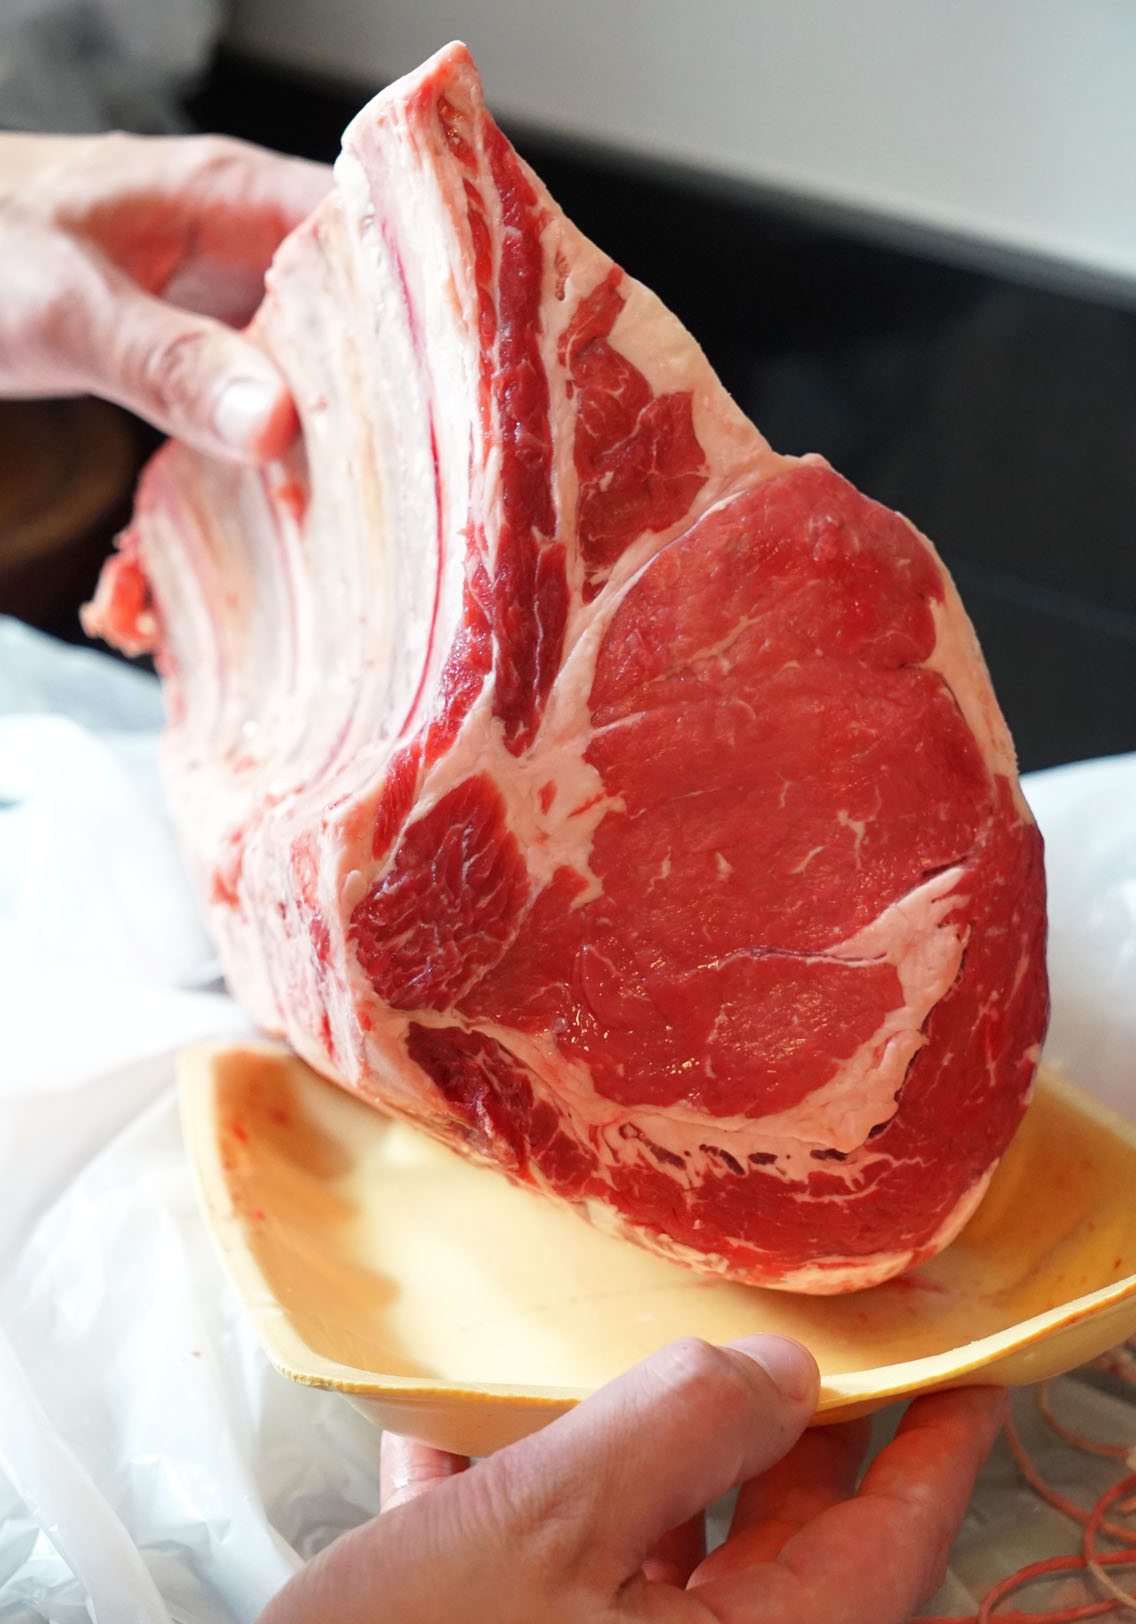
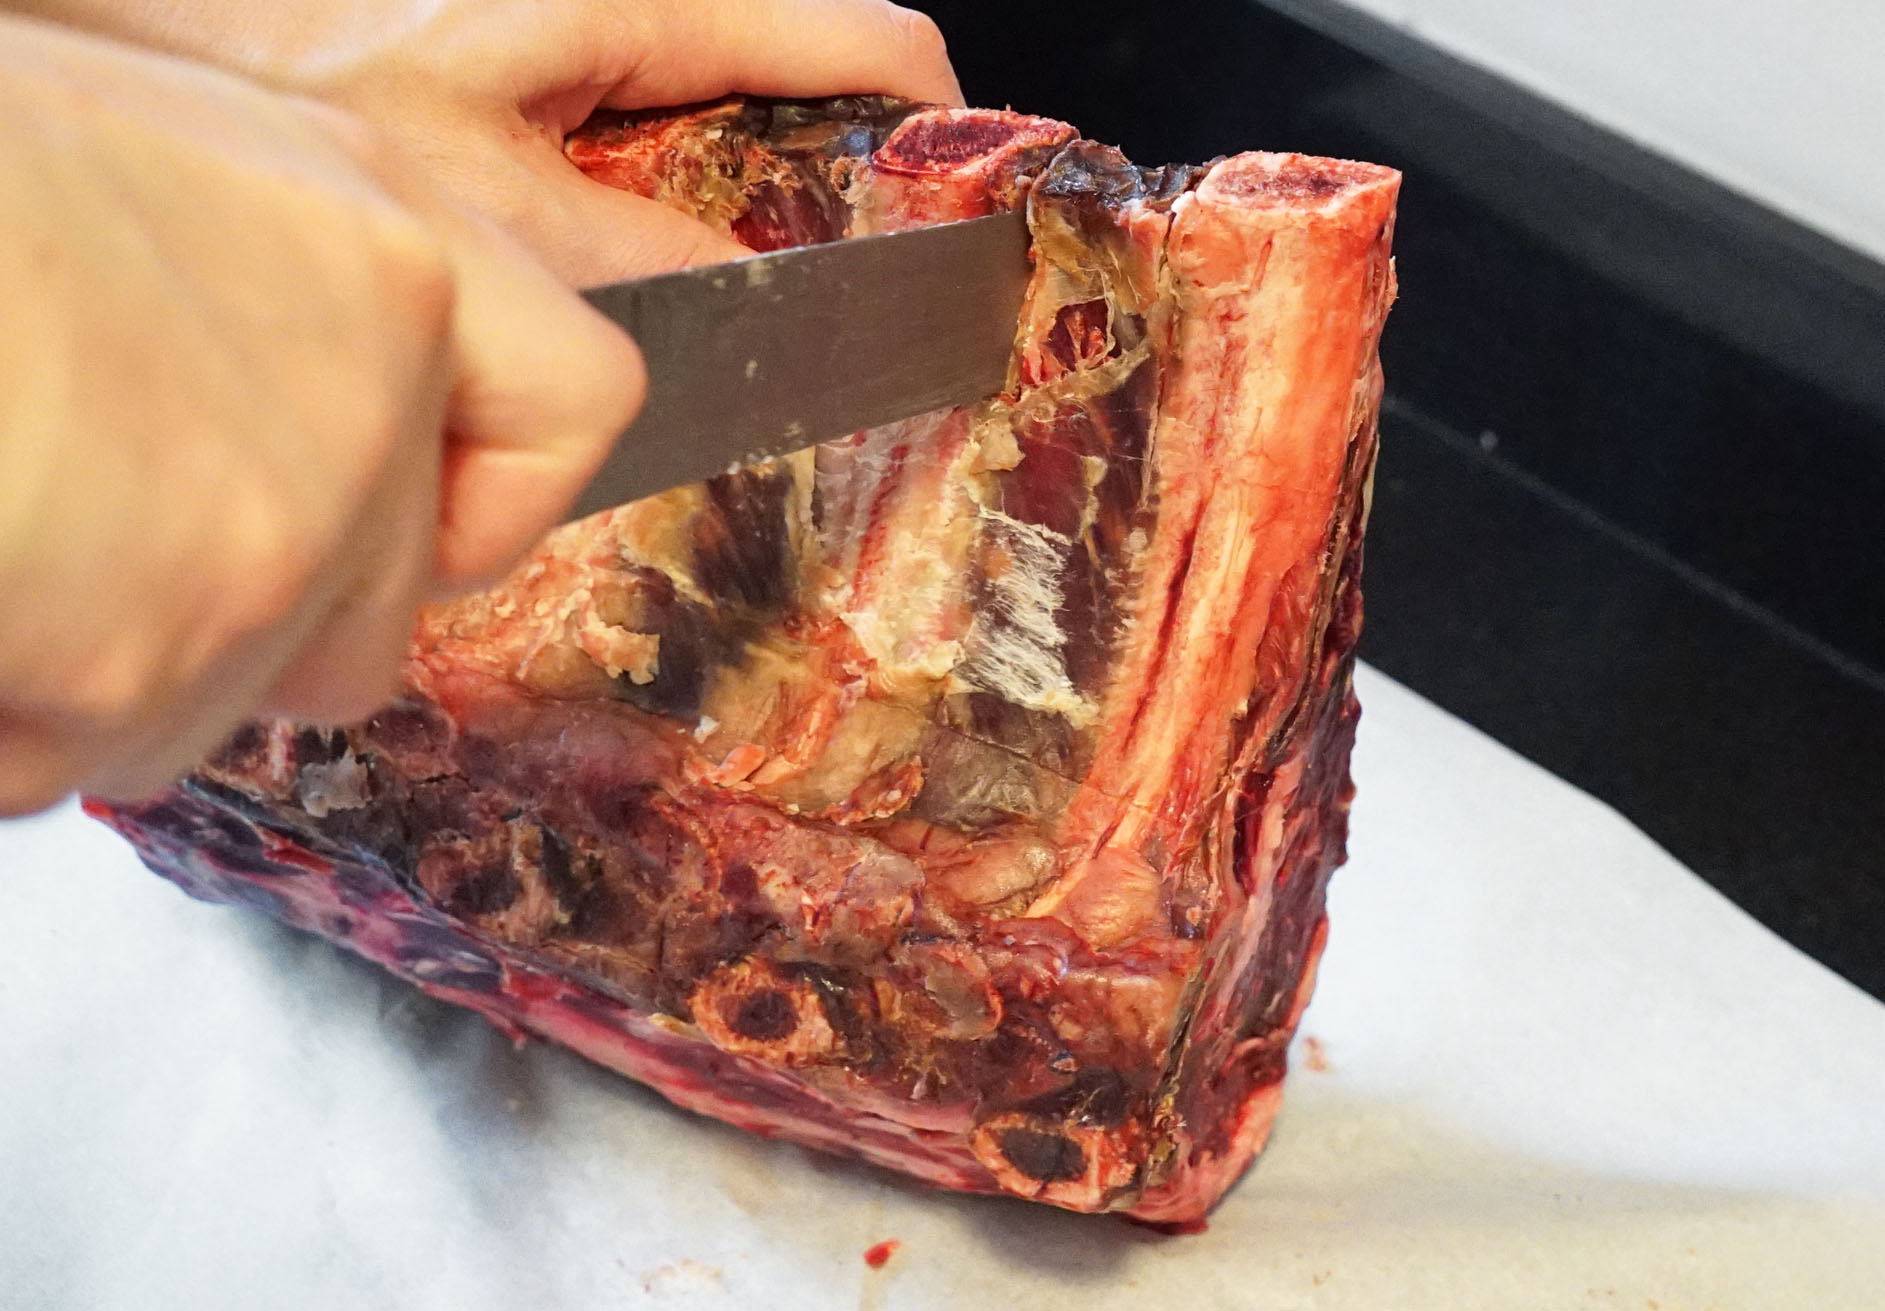
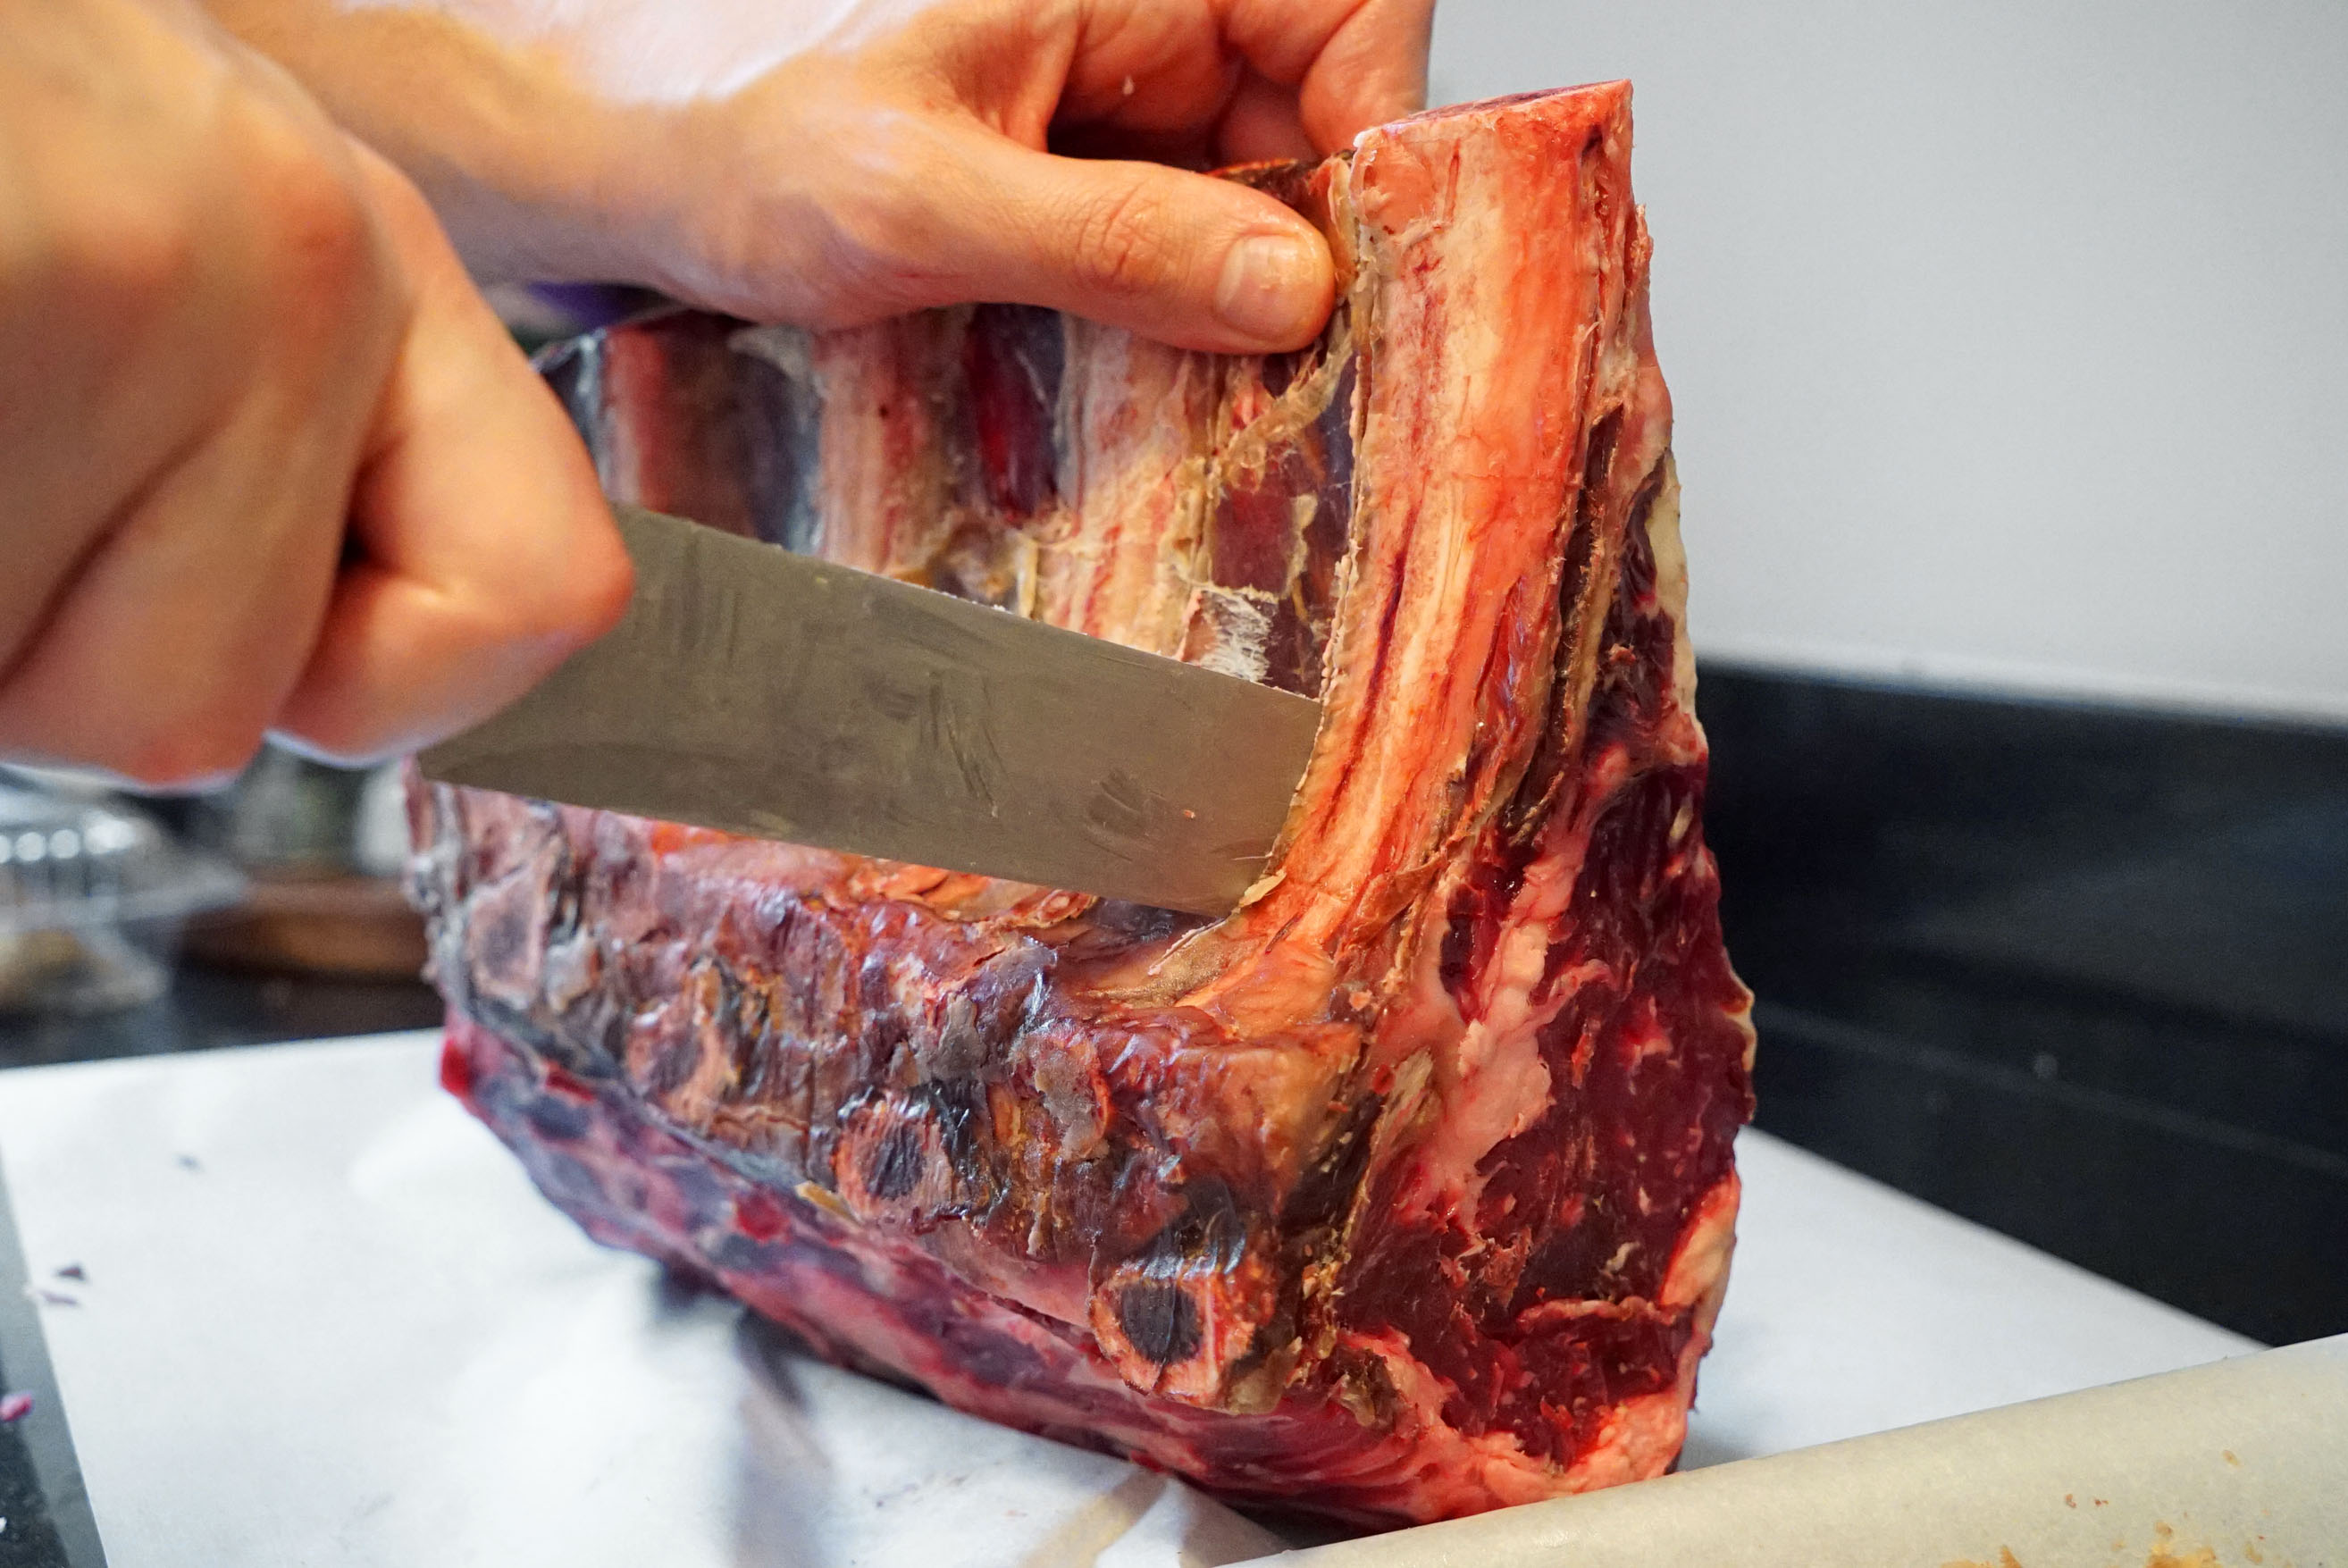
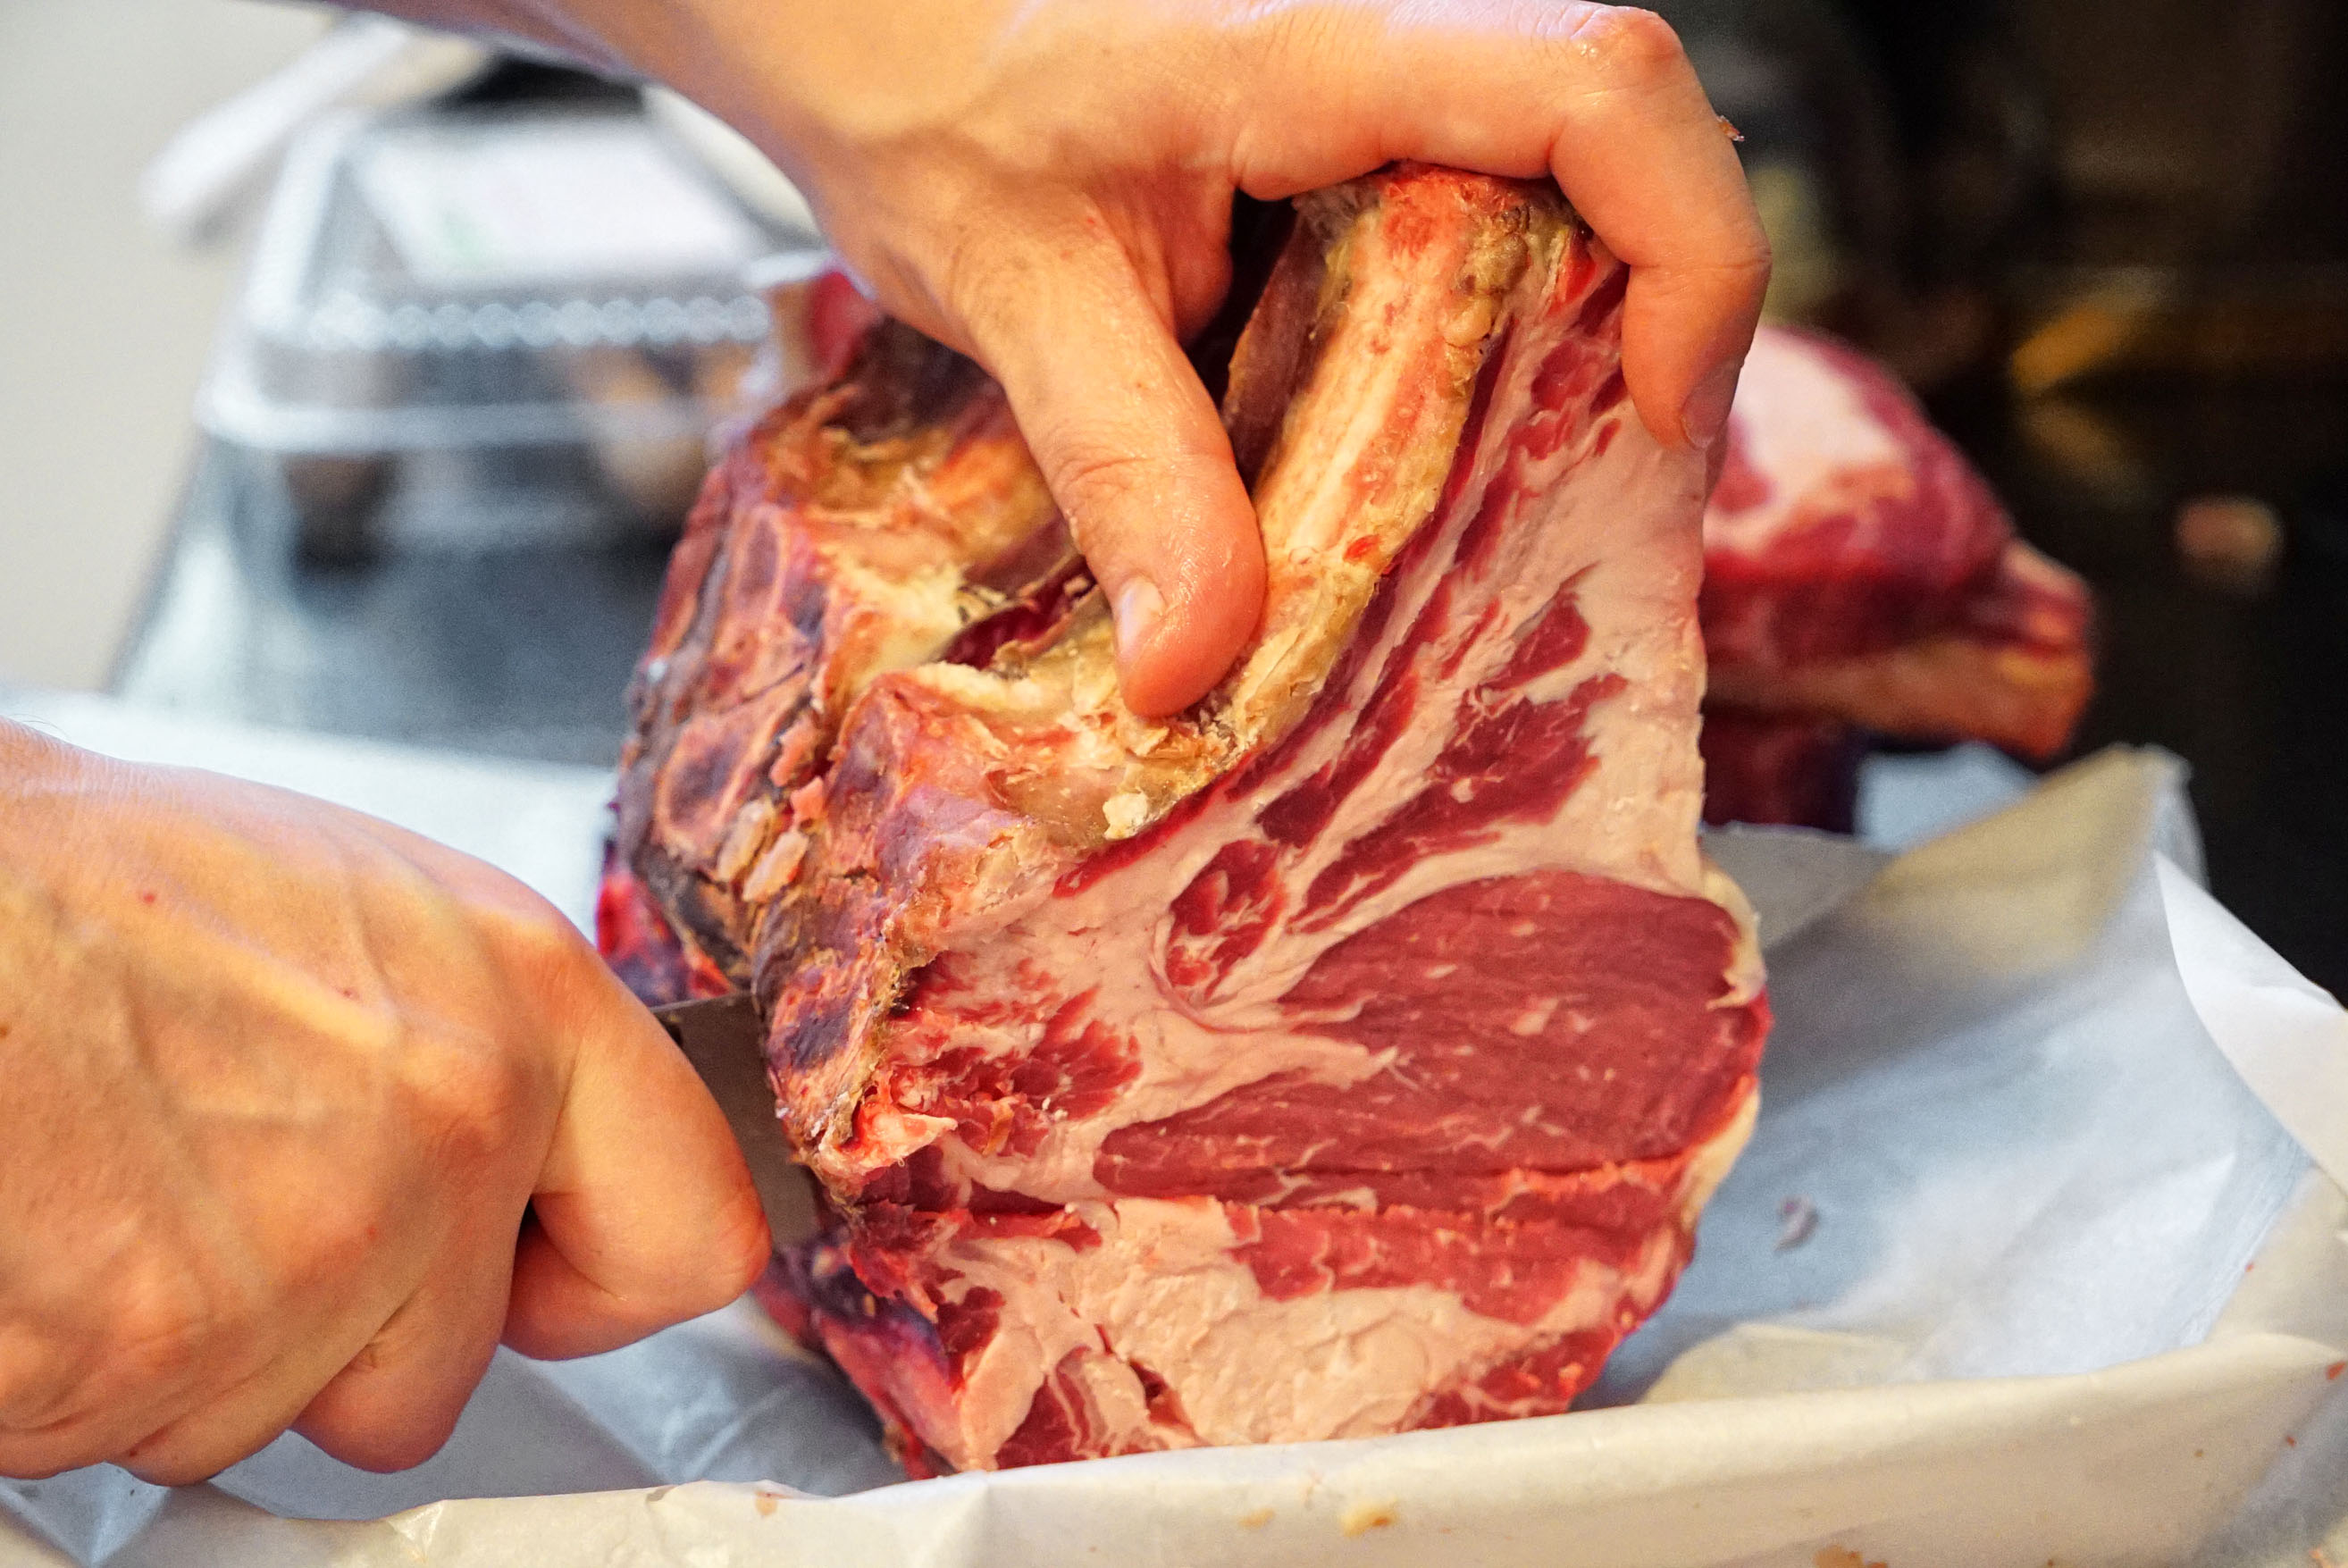
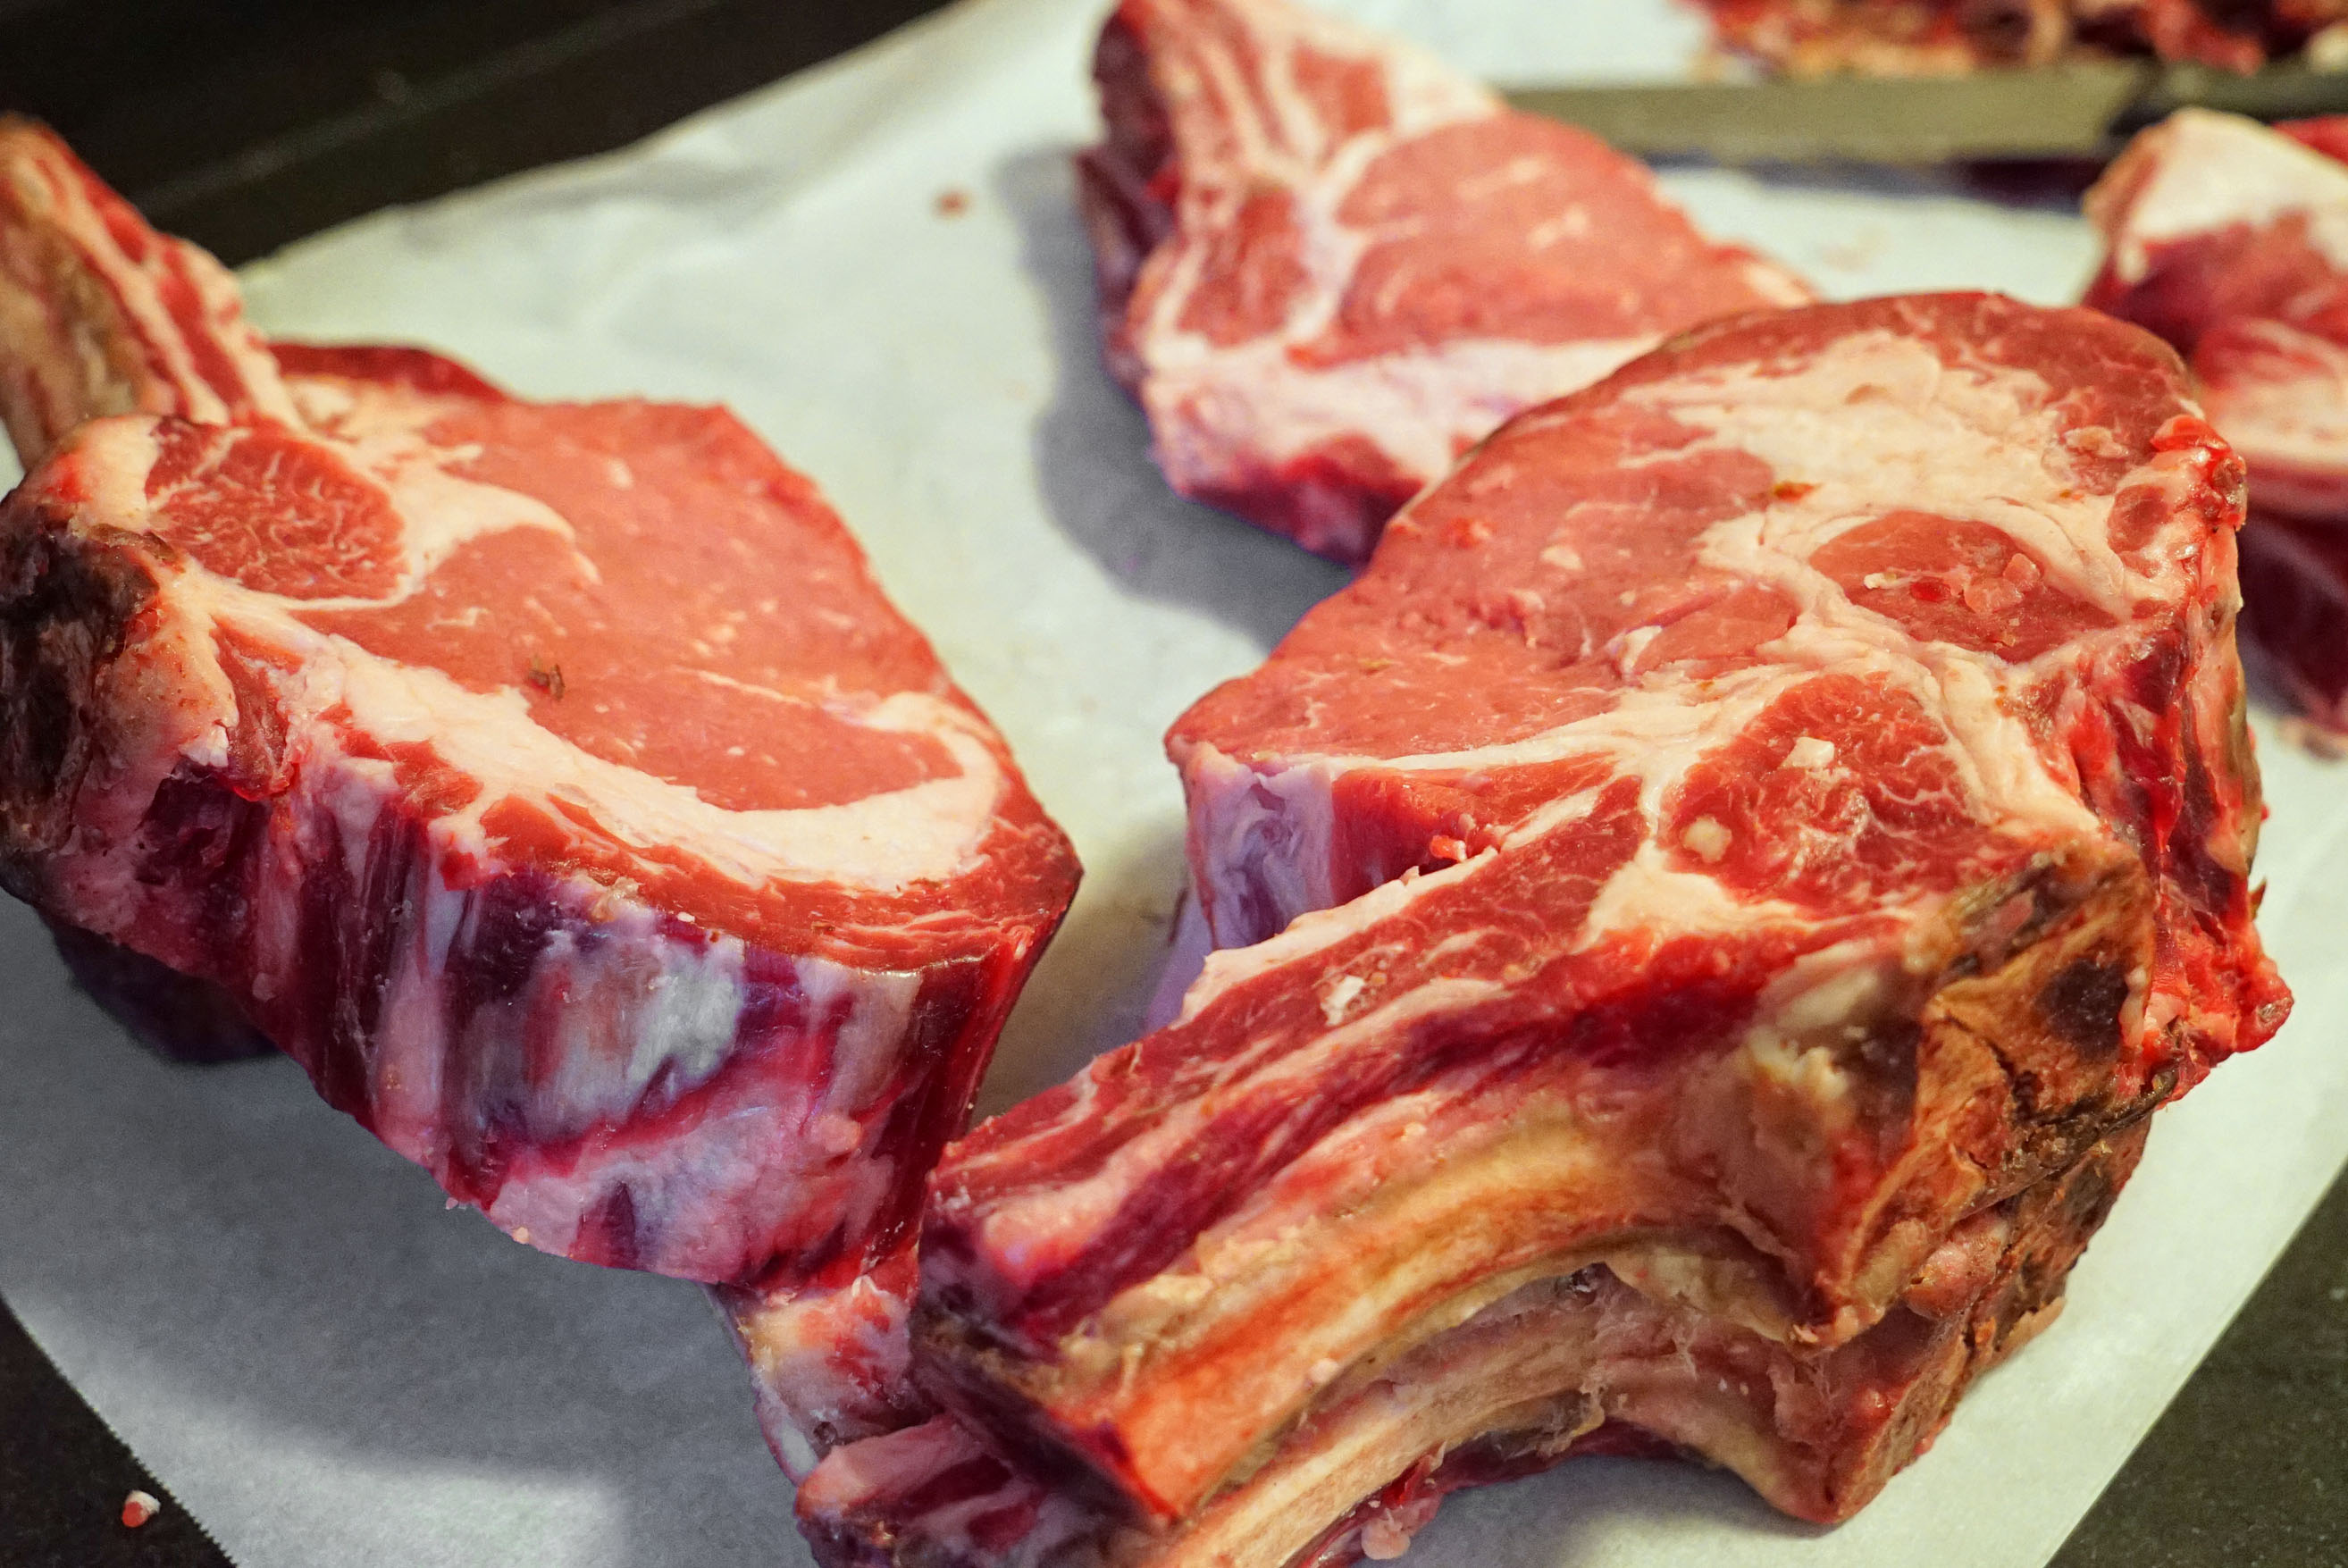
Anatomy: The rib section of beef spans from ribs six through twelve, and, obviously, hails from the rib section of the animal.

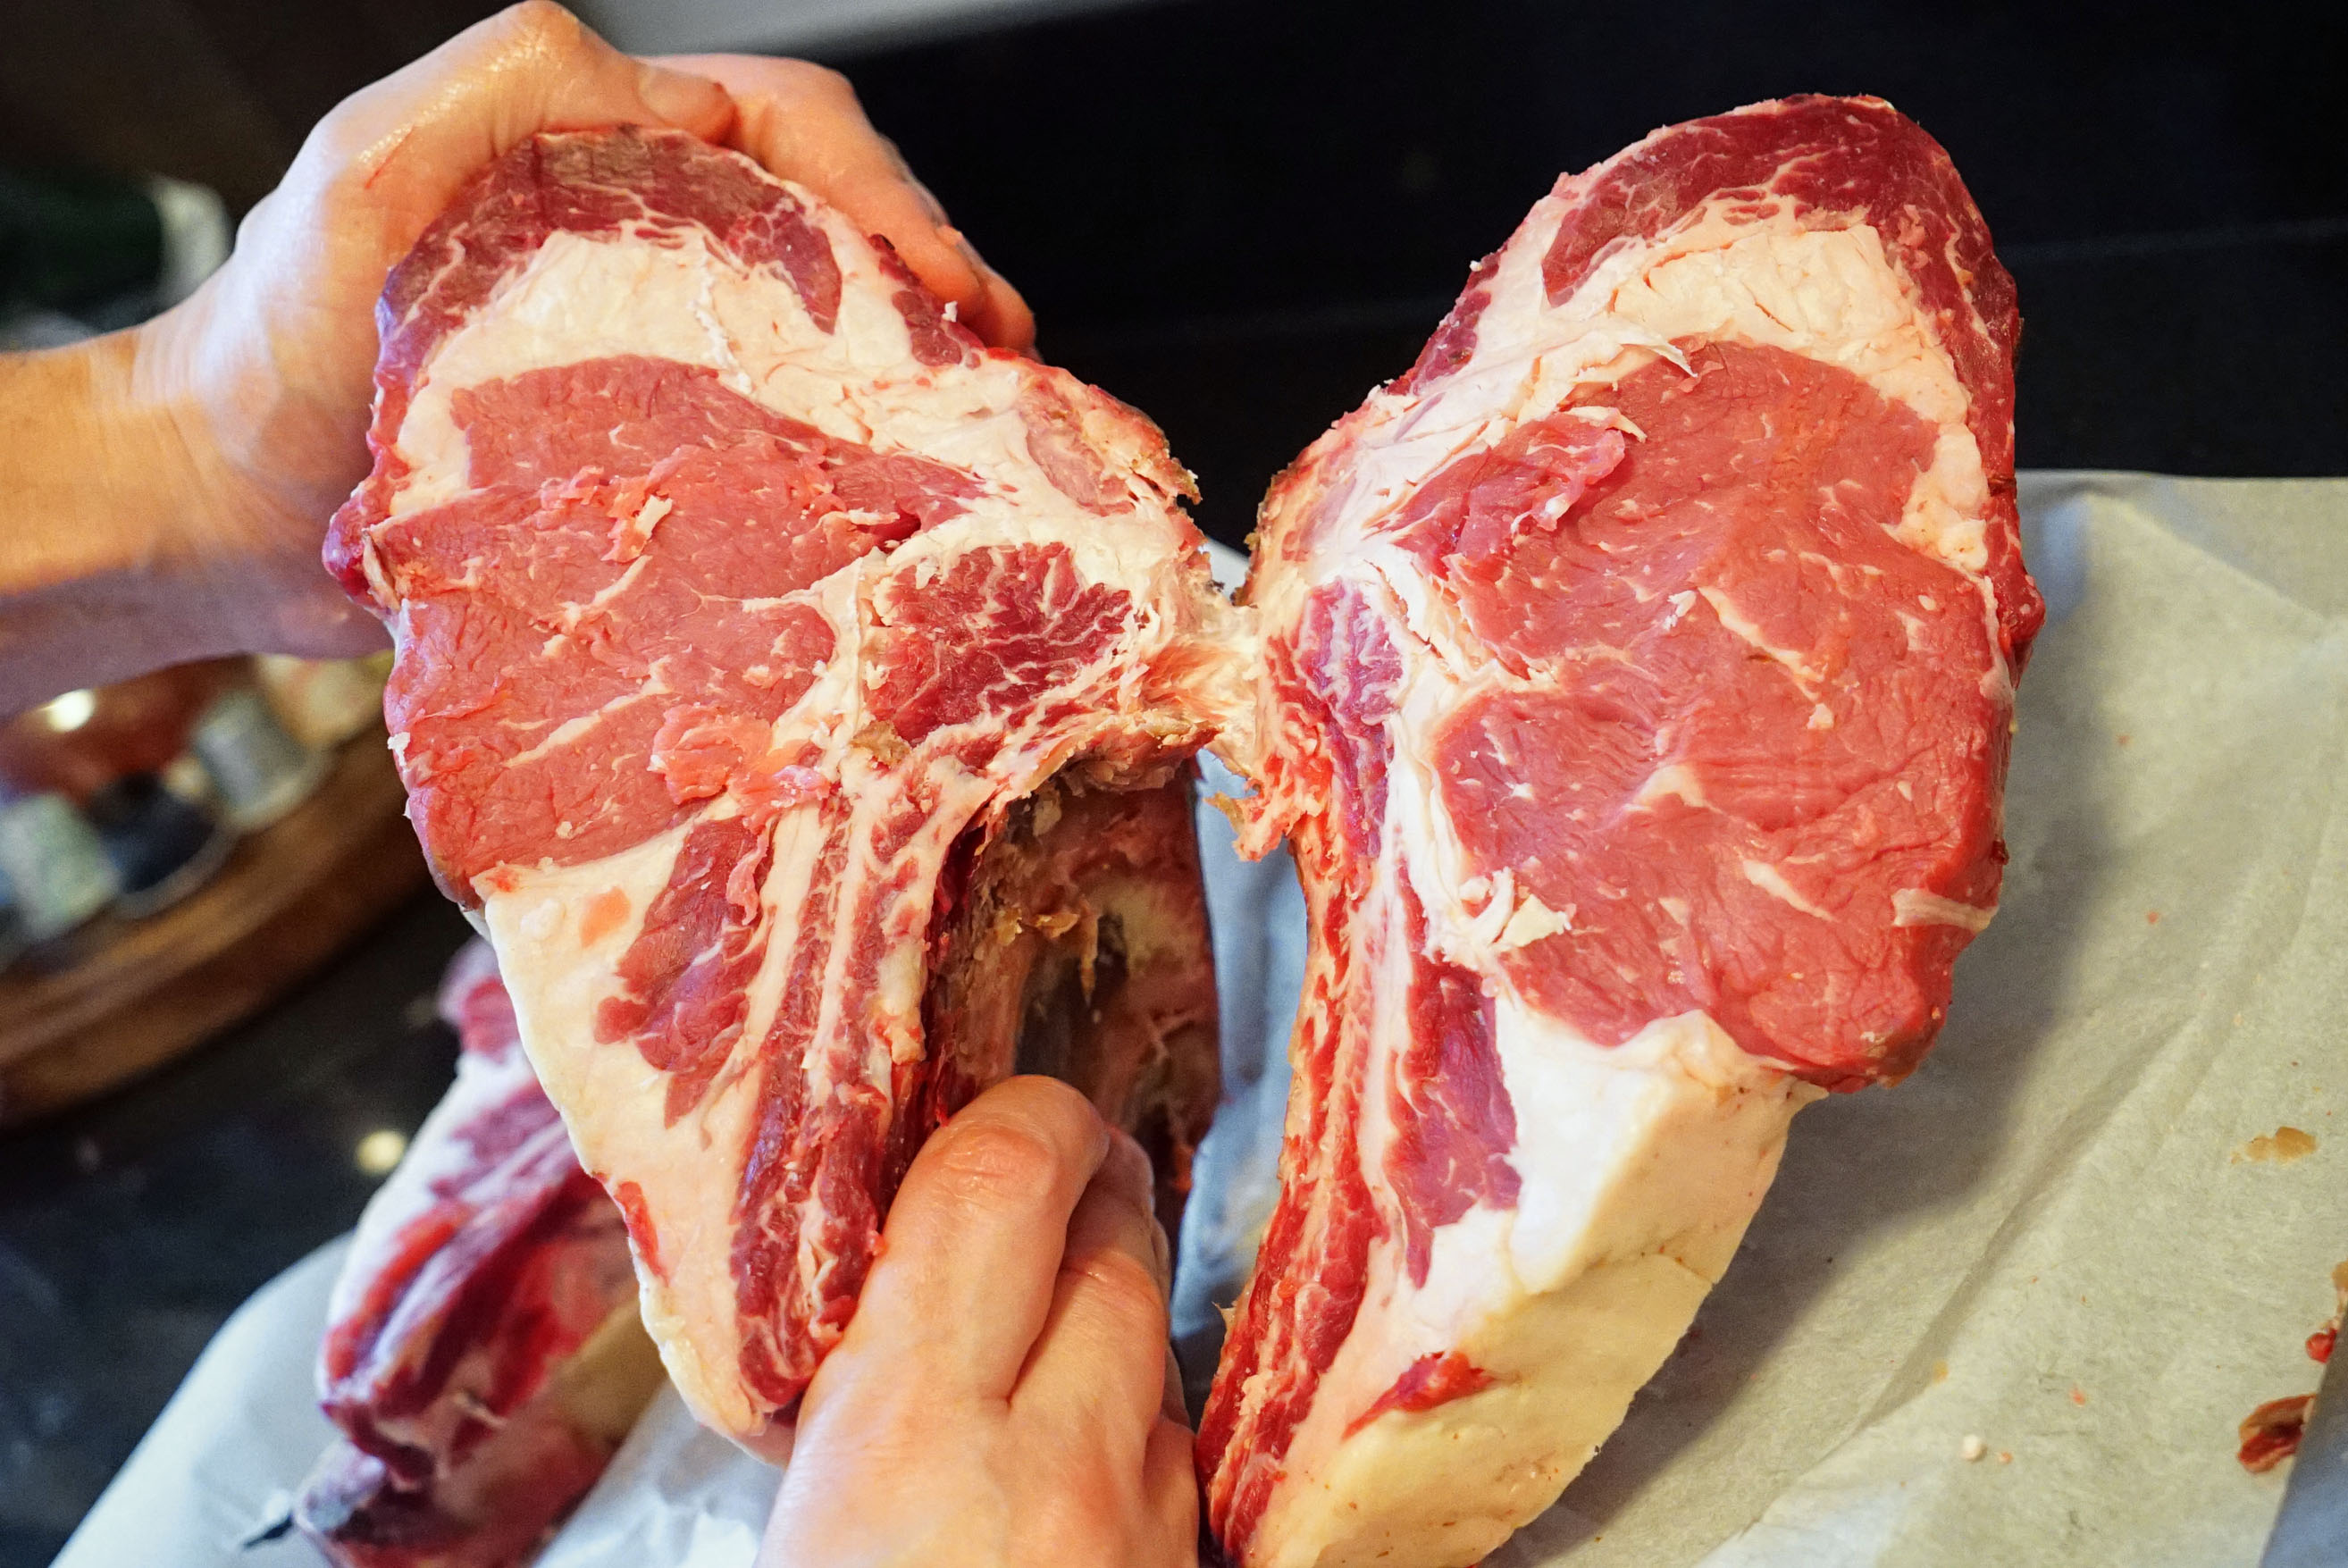
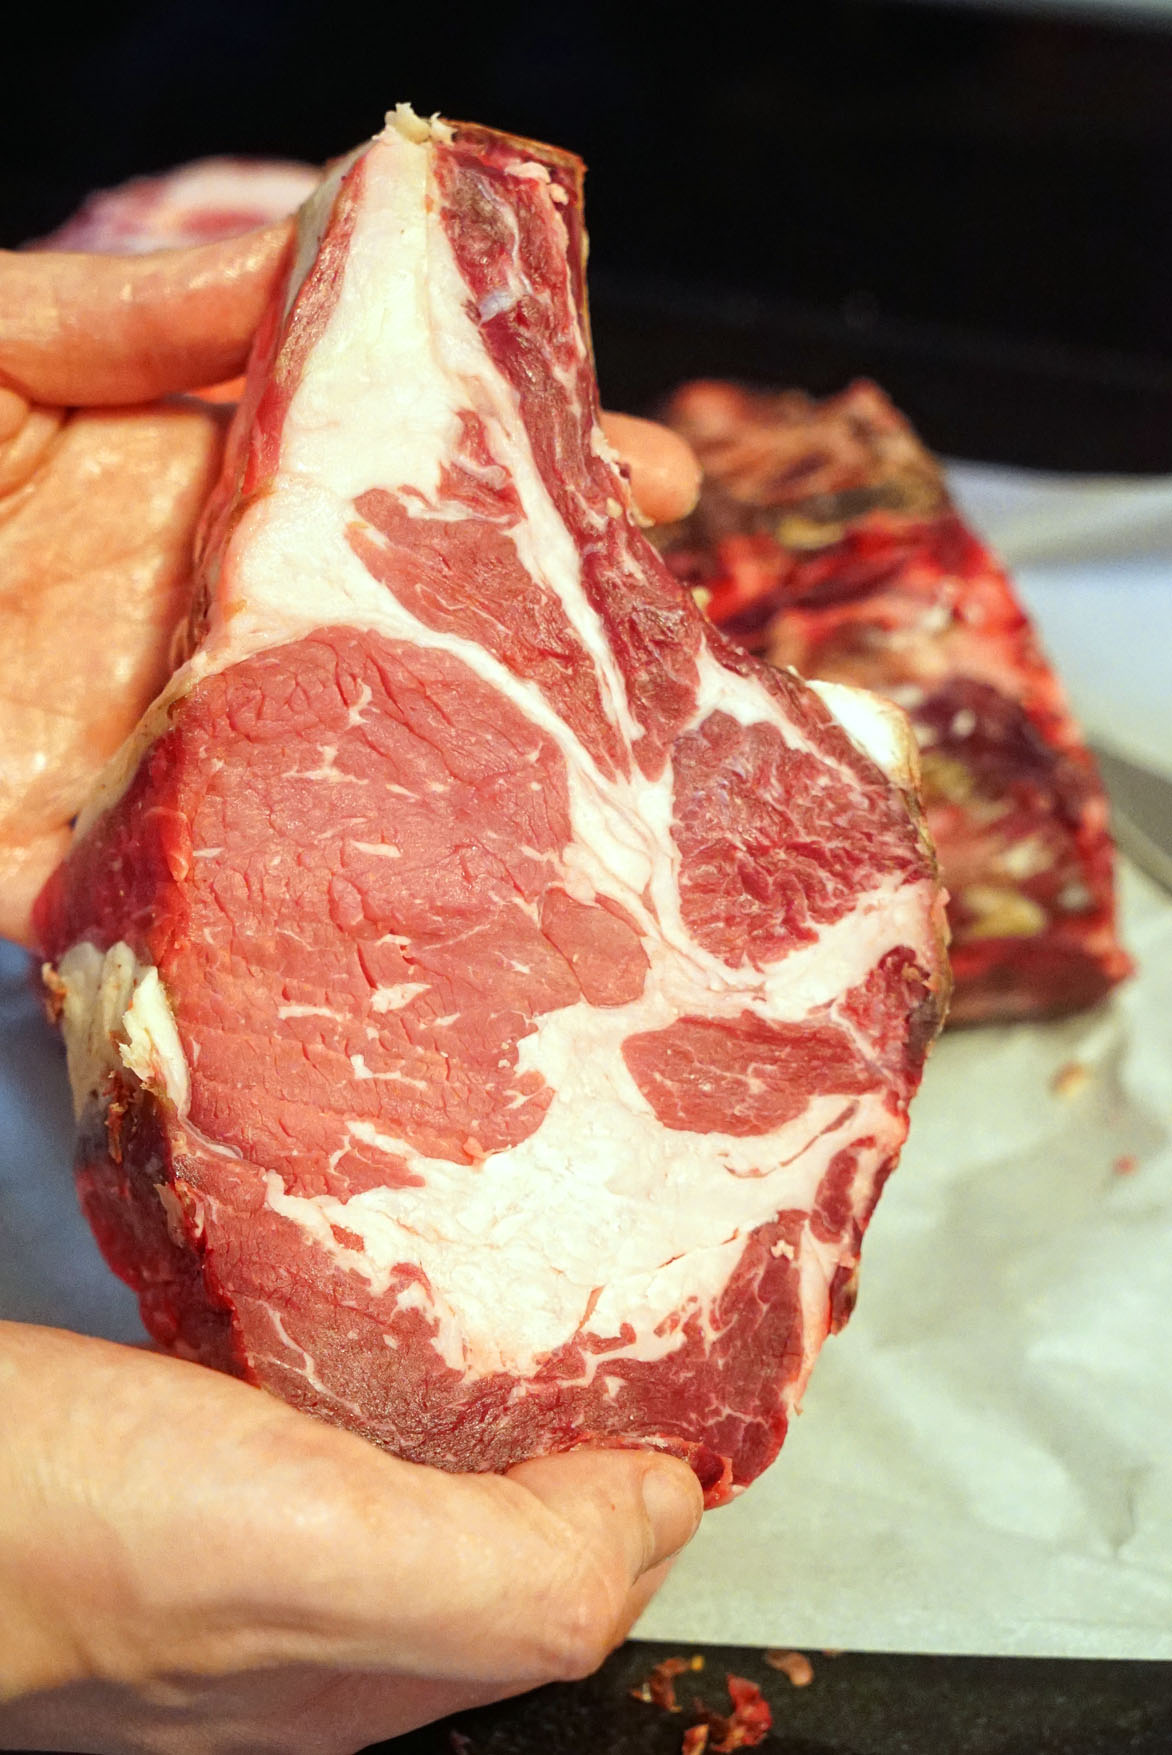
Rib Eye steaks are mainly composed of the Longissimus dorsi muscle (the “eye” portion of the steak) and the Spinalis dorsi muscle.

The more anterior your cut, the more Spinalis you’ll find in the steak. The Spinalis is the coveted cap of meat that wraps around the fatter end of the steak and usually has much more marbling than the rest of the Longissimus eye, or interior of the steak. That “fat cap” is also sometimes butchered away from the remaining eye.

photo credit: http://www.acookblog.com/wp-content/uploads/2011/03/IMG_7574.jpg

Highly skilled butchers know how to remove it from its position across an entire standing rib roast section of ribs, so as to keep it all together as one giant cut. But then that ruins the rib chop, in my opinion, since you’re taking away the best part. Some steakhouses have taken to tying several Spinalis cuts together in a spiral formation to create an all-fat-cap steak. Bowery Meat Company has one such cut, which they call the Bowery Steak:

STK also offers one on special from time to time:

DSC05705

DSC05726

The Spinalis has a more intense marbling, and, thus, much more flavor and tenderness. If you are so bold, the next time you order a Rib Eye at a steakhouse, ask for an anterior “chuck side” cut that has more of this fantastic Spinalis muscle.

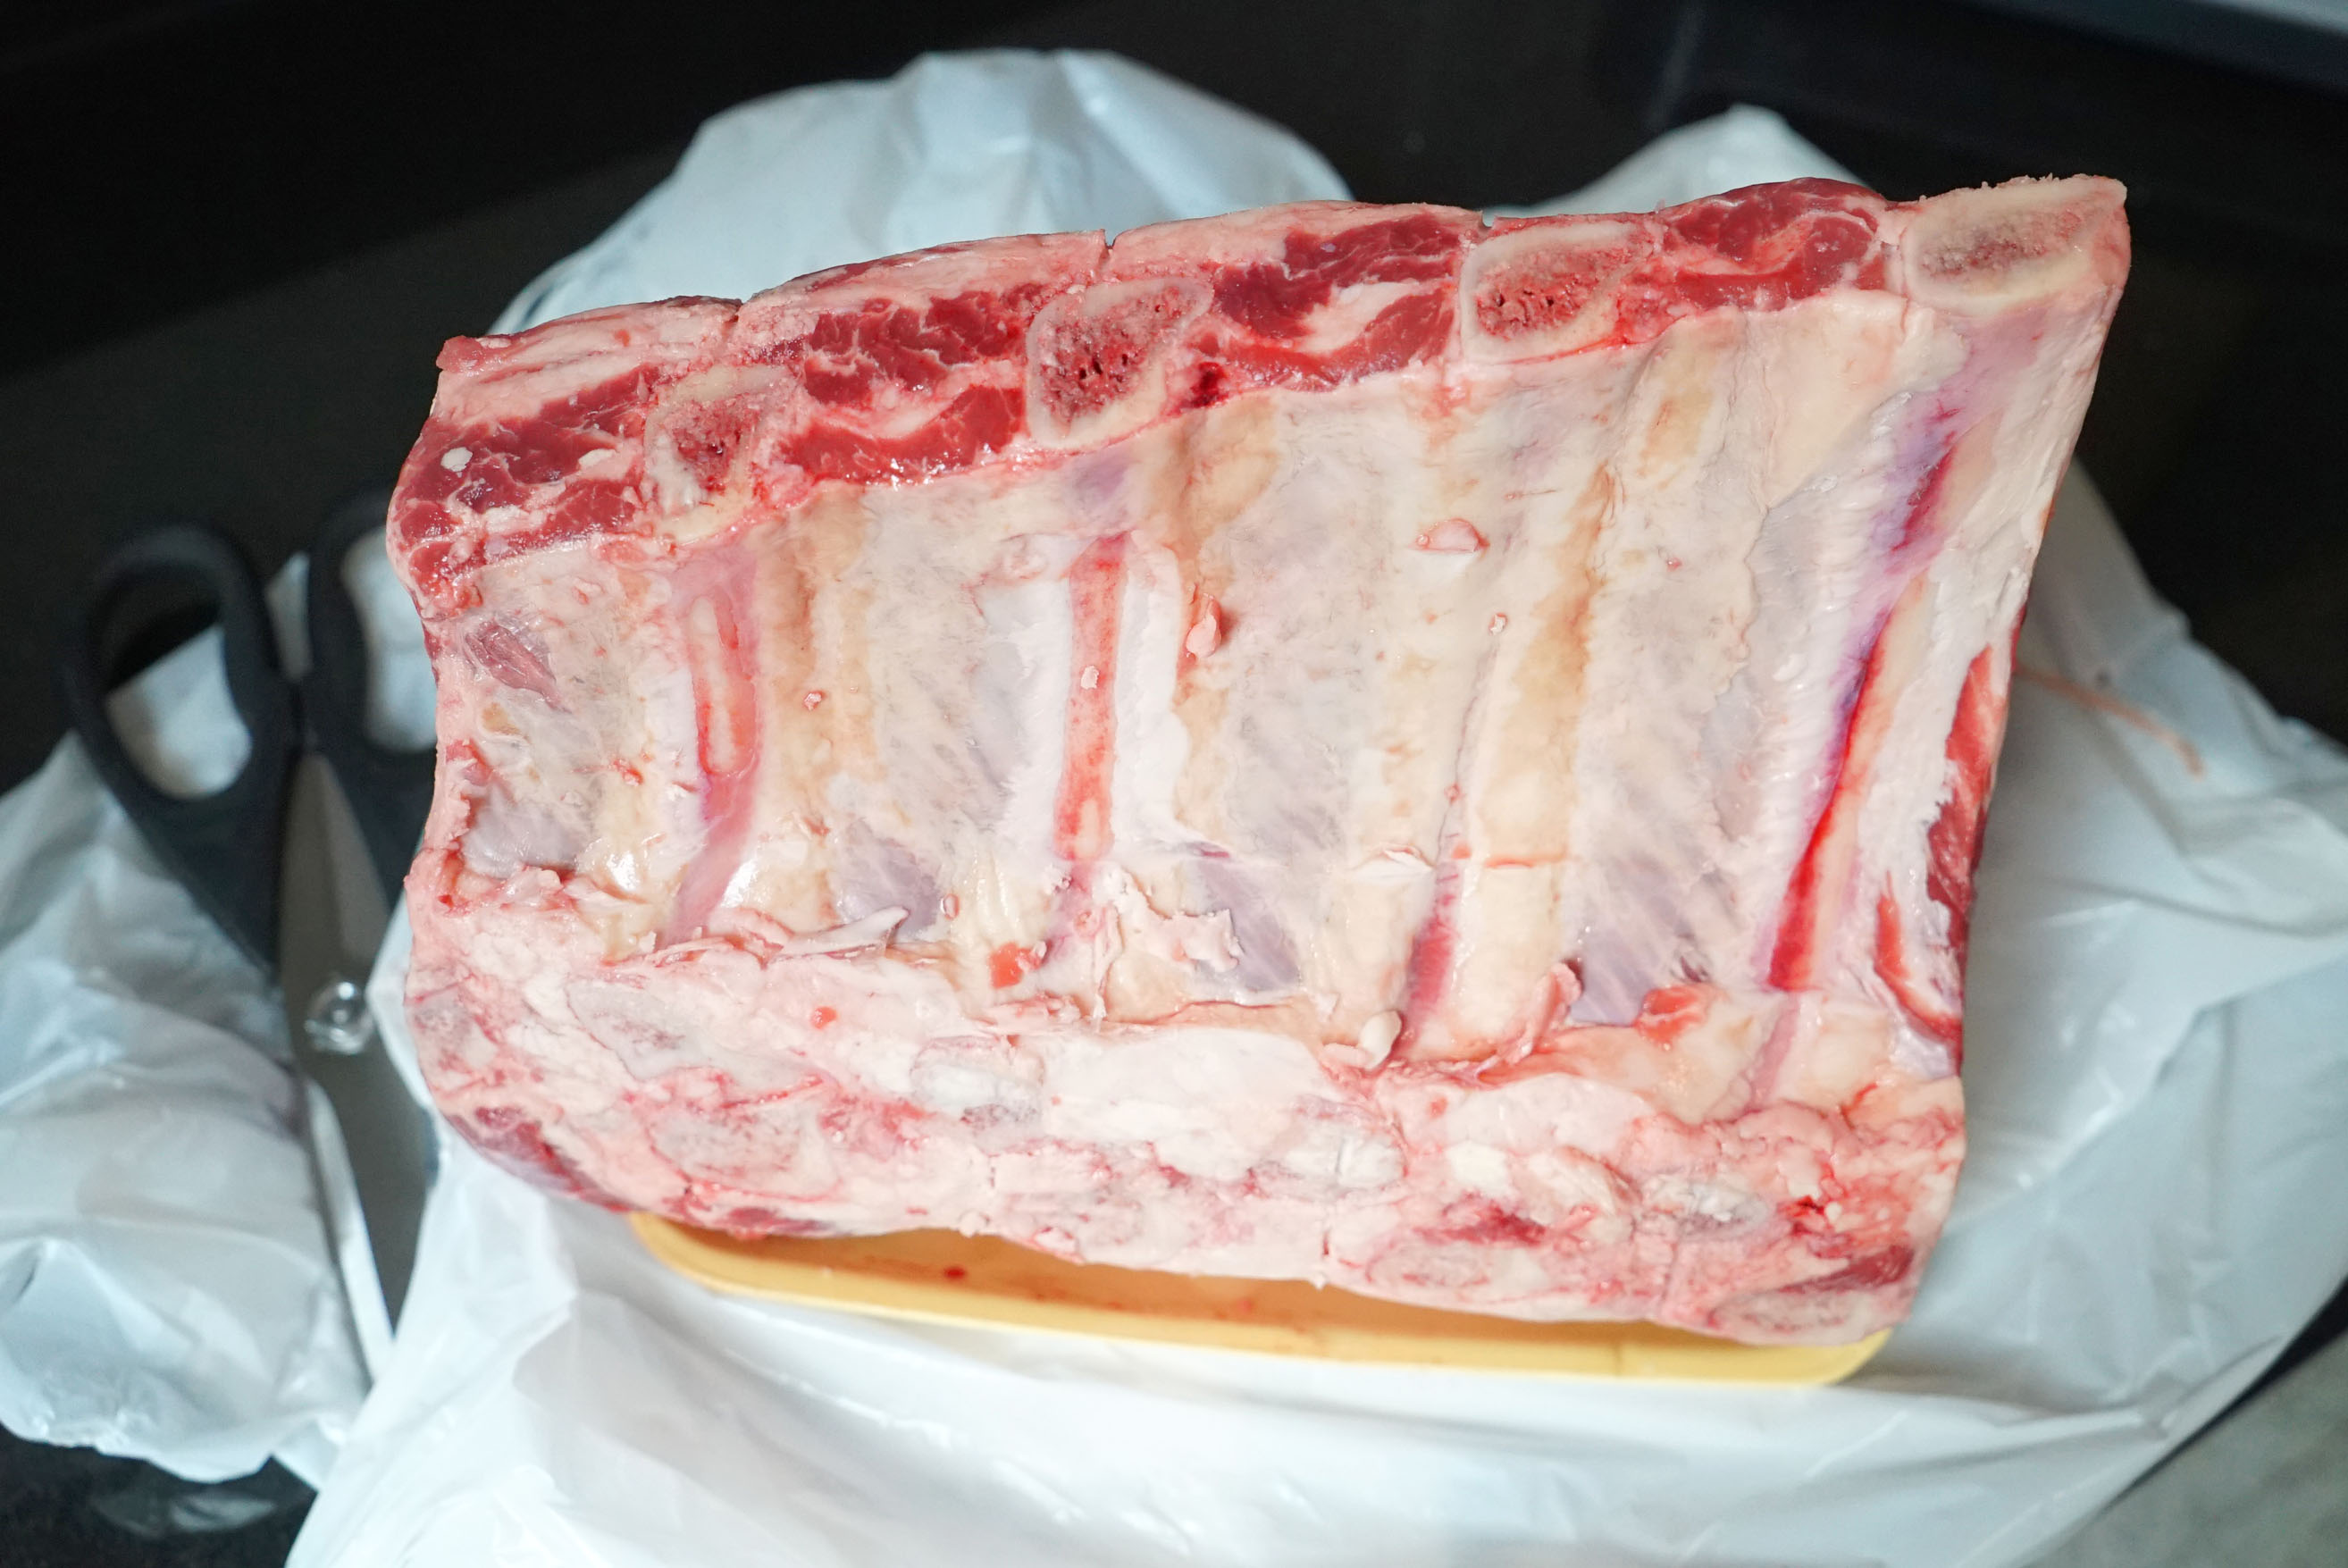
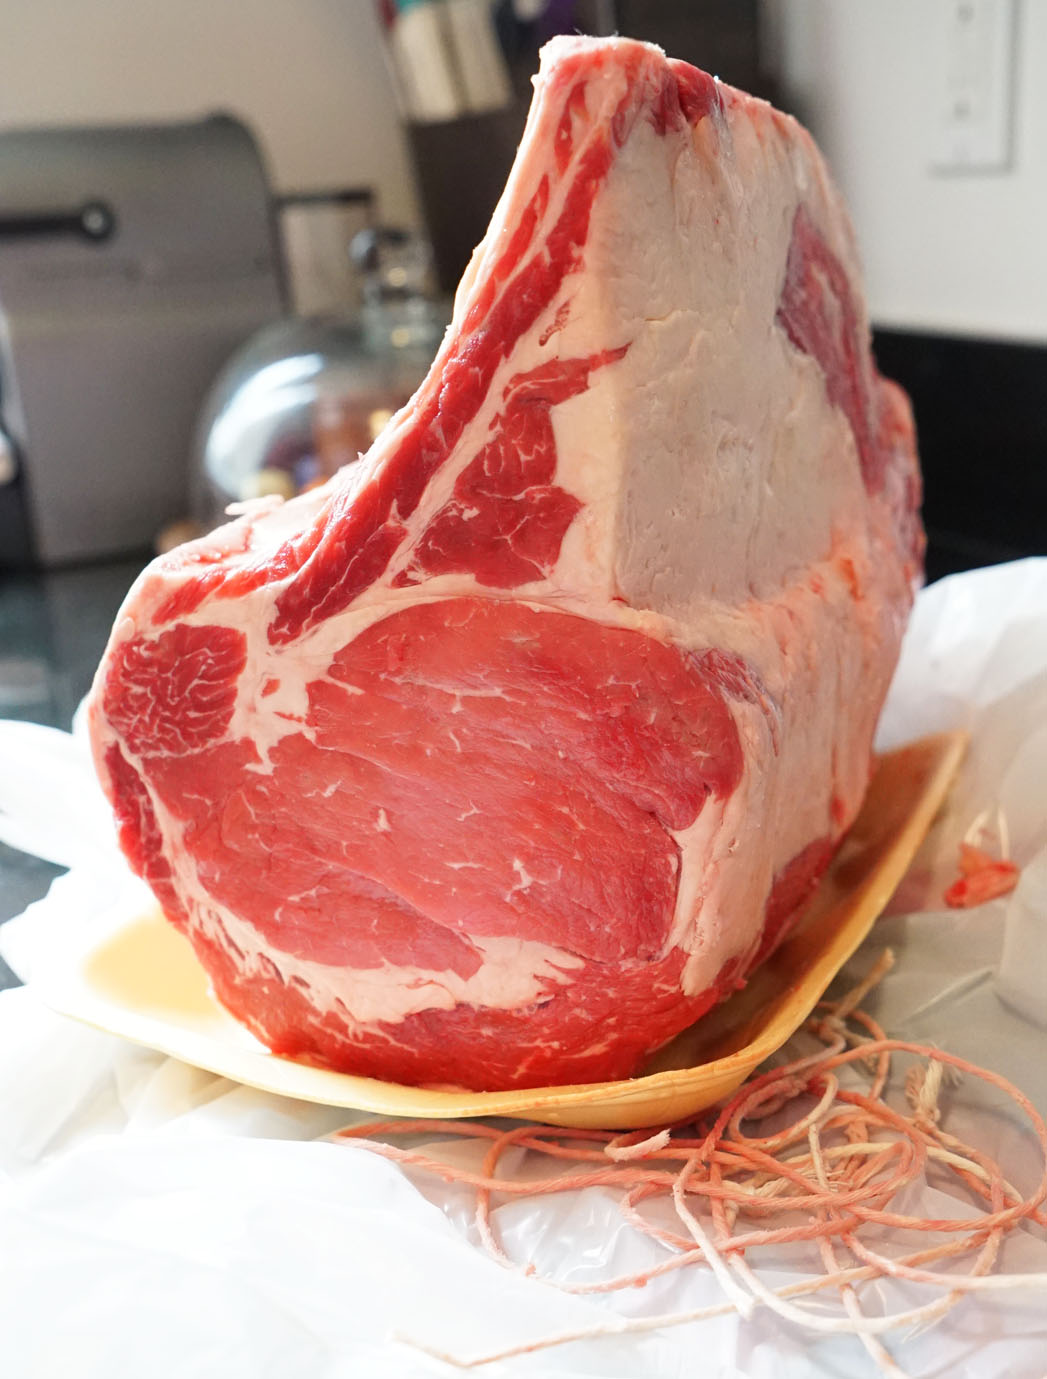
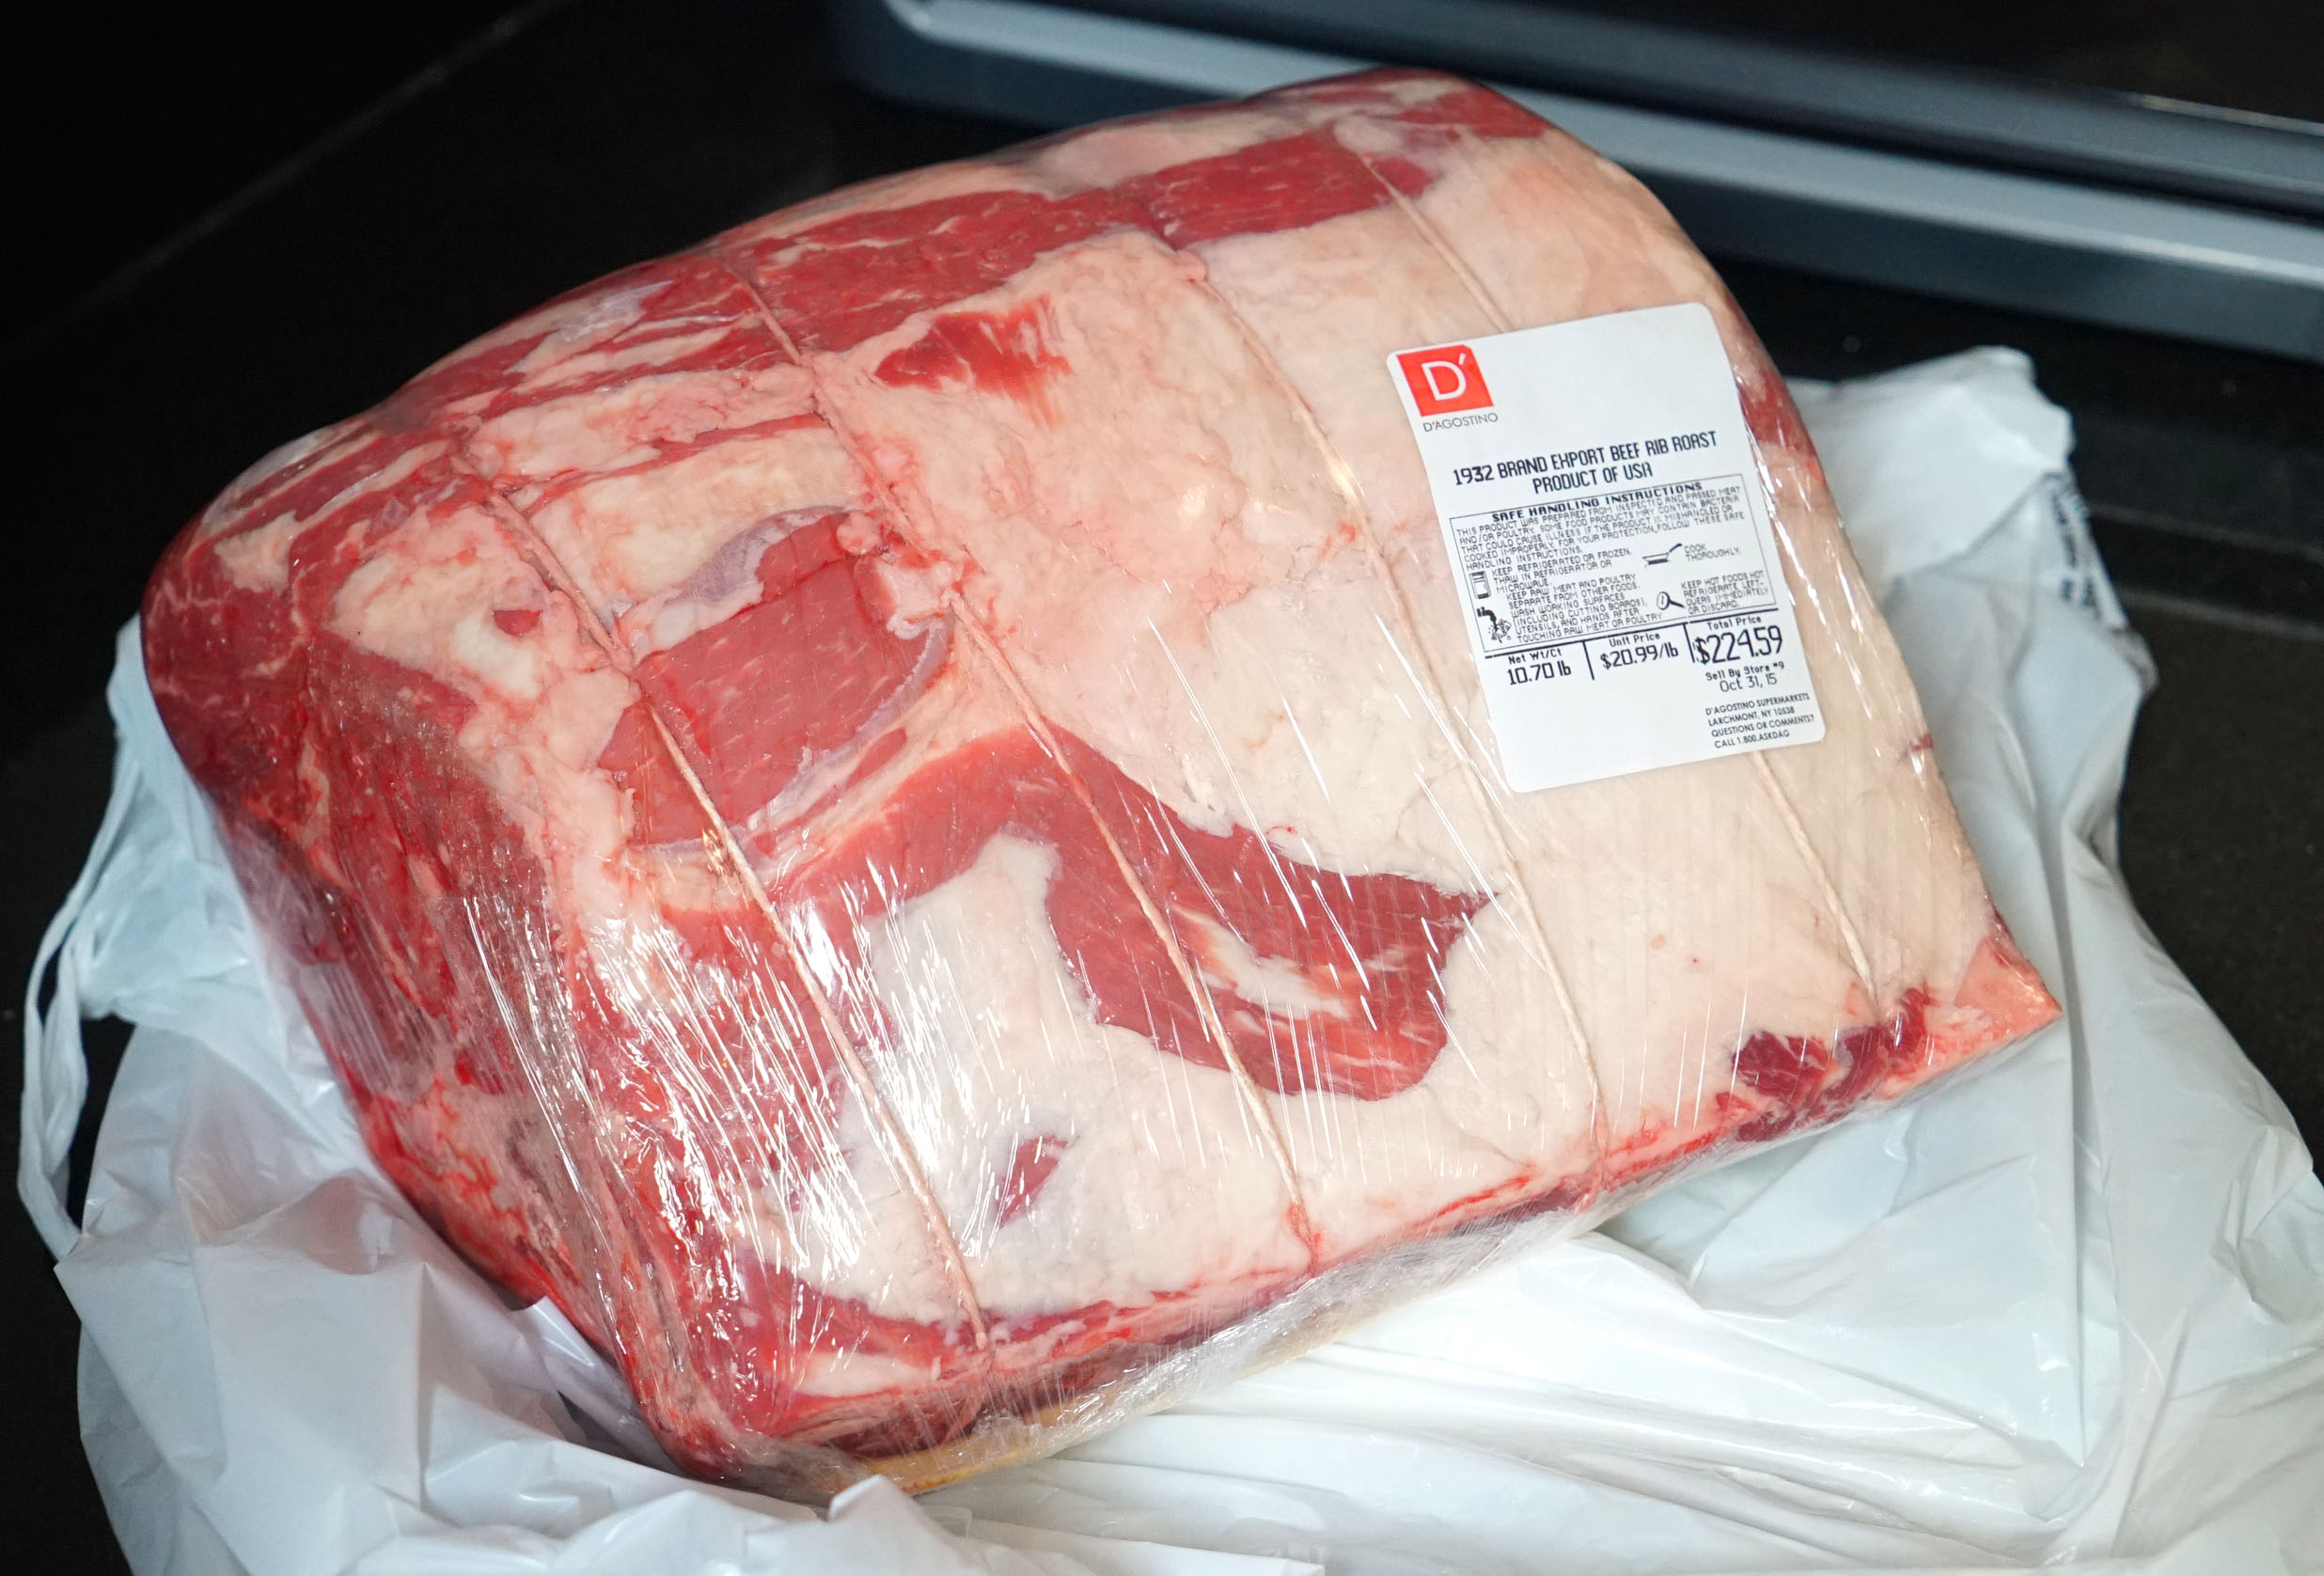
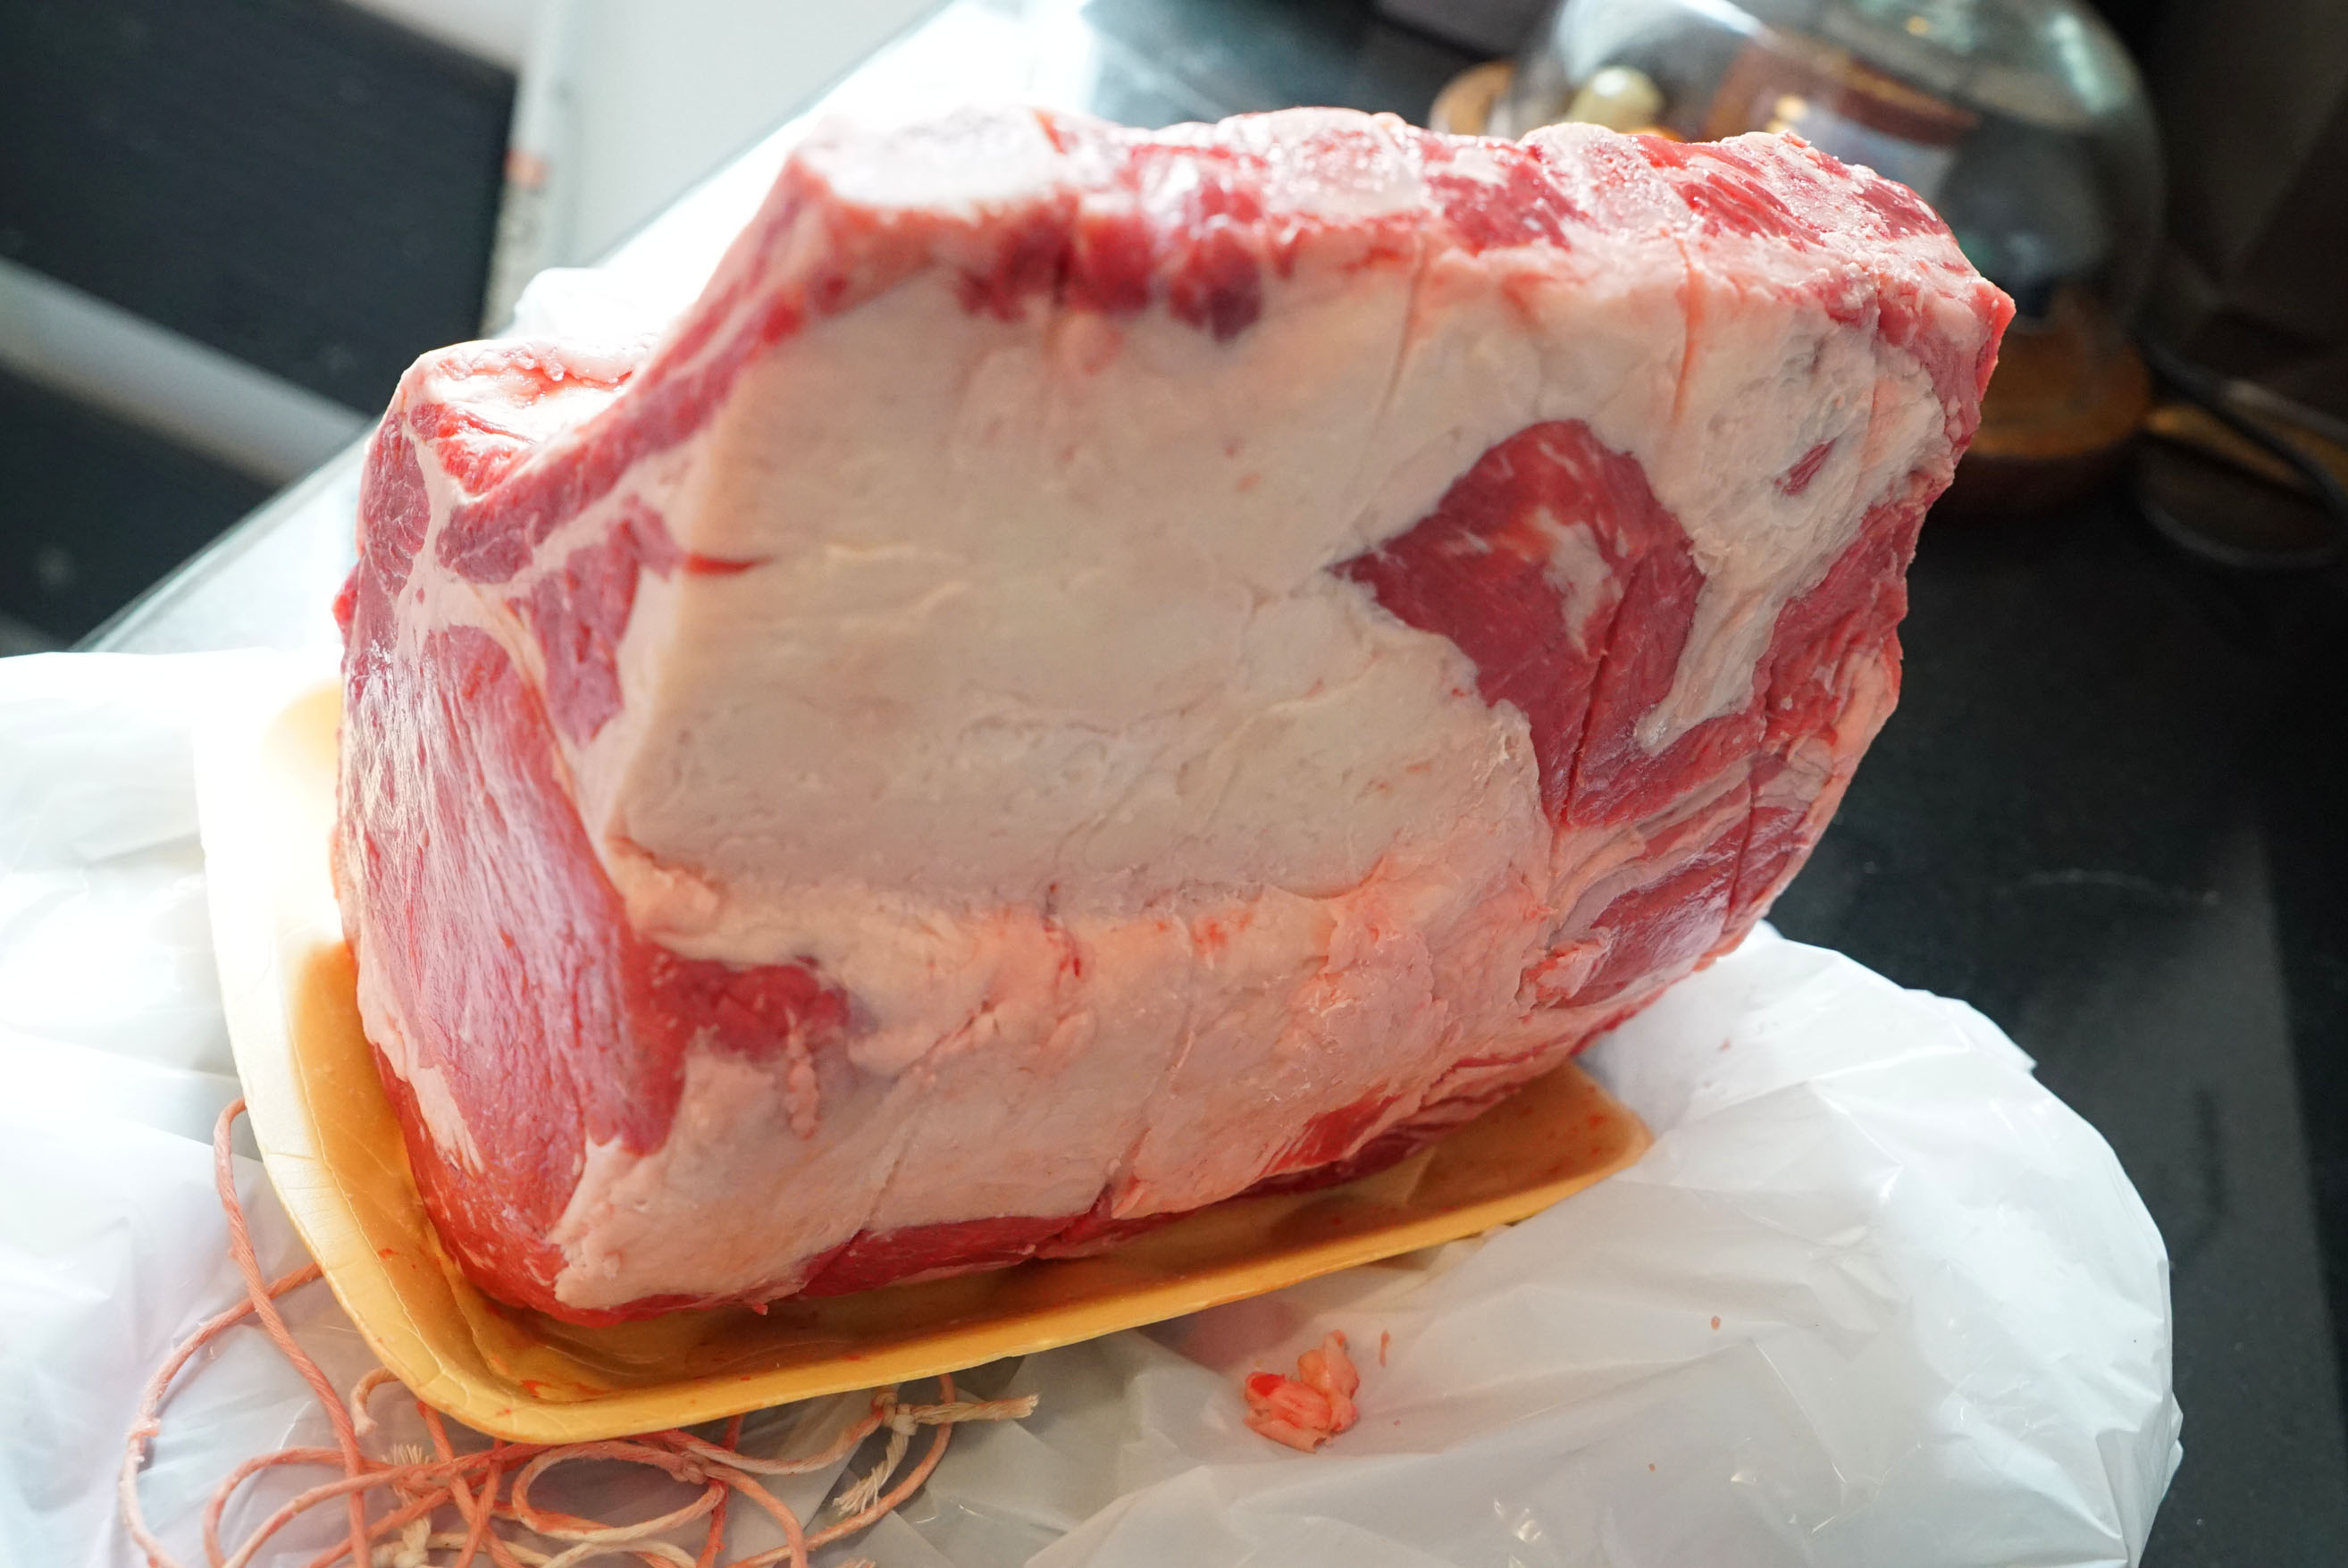
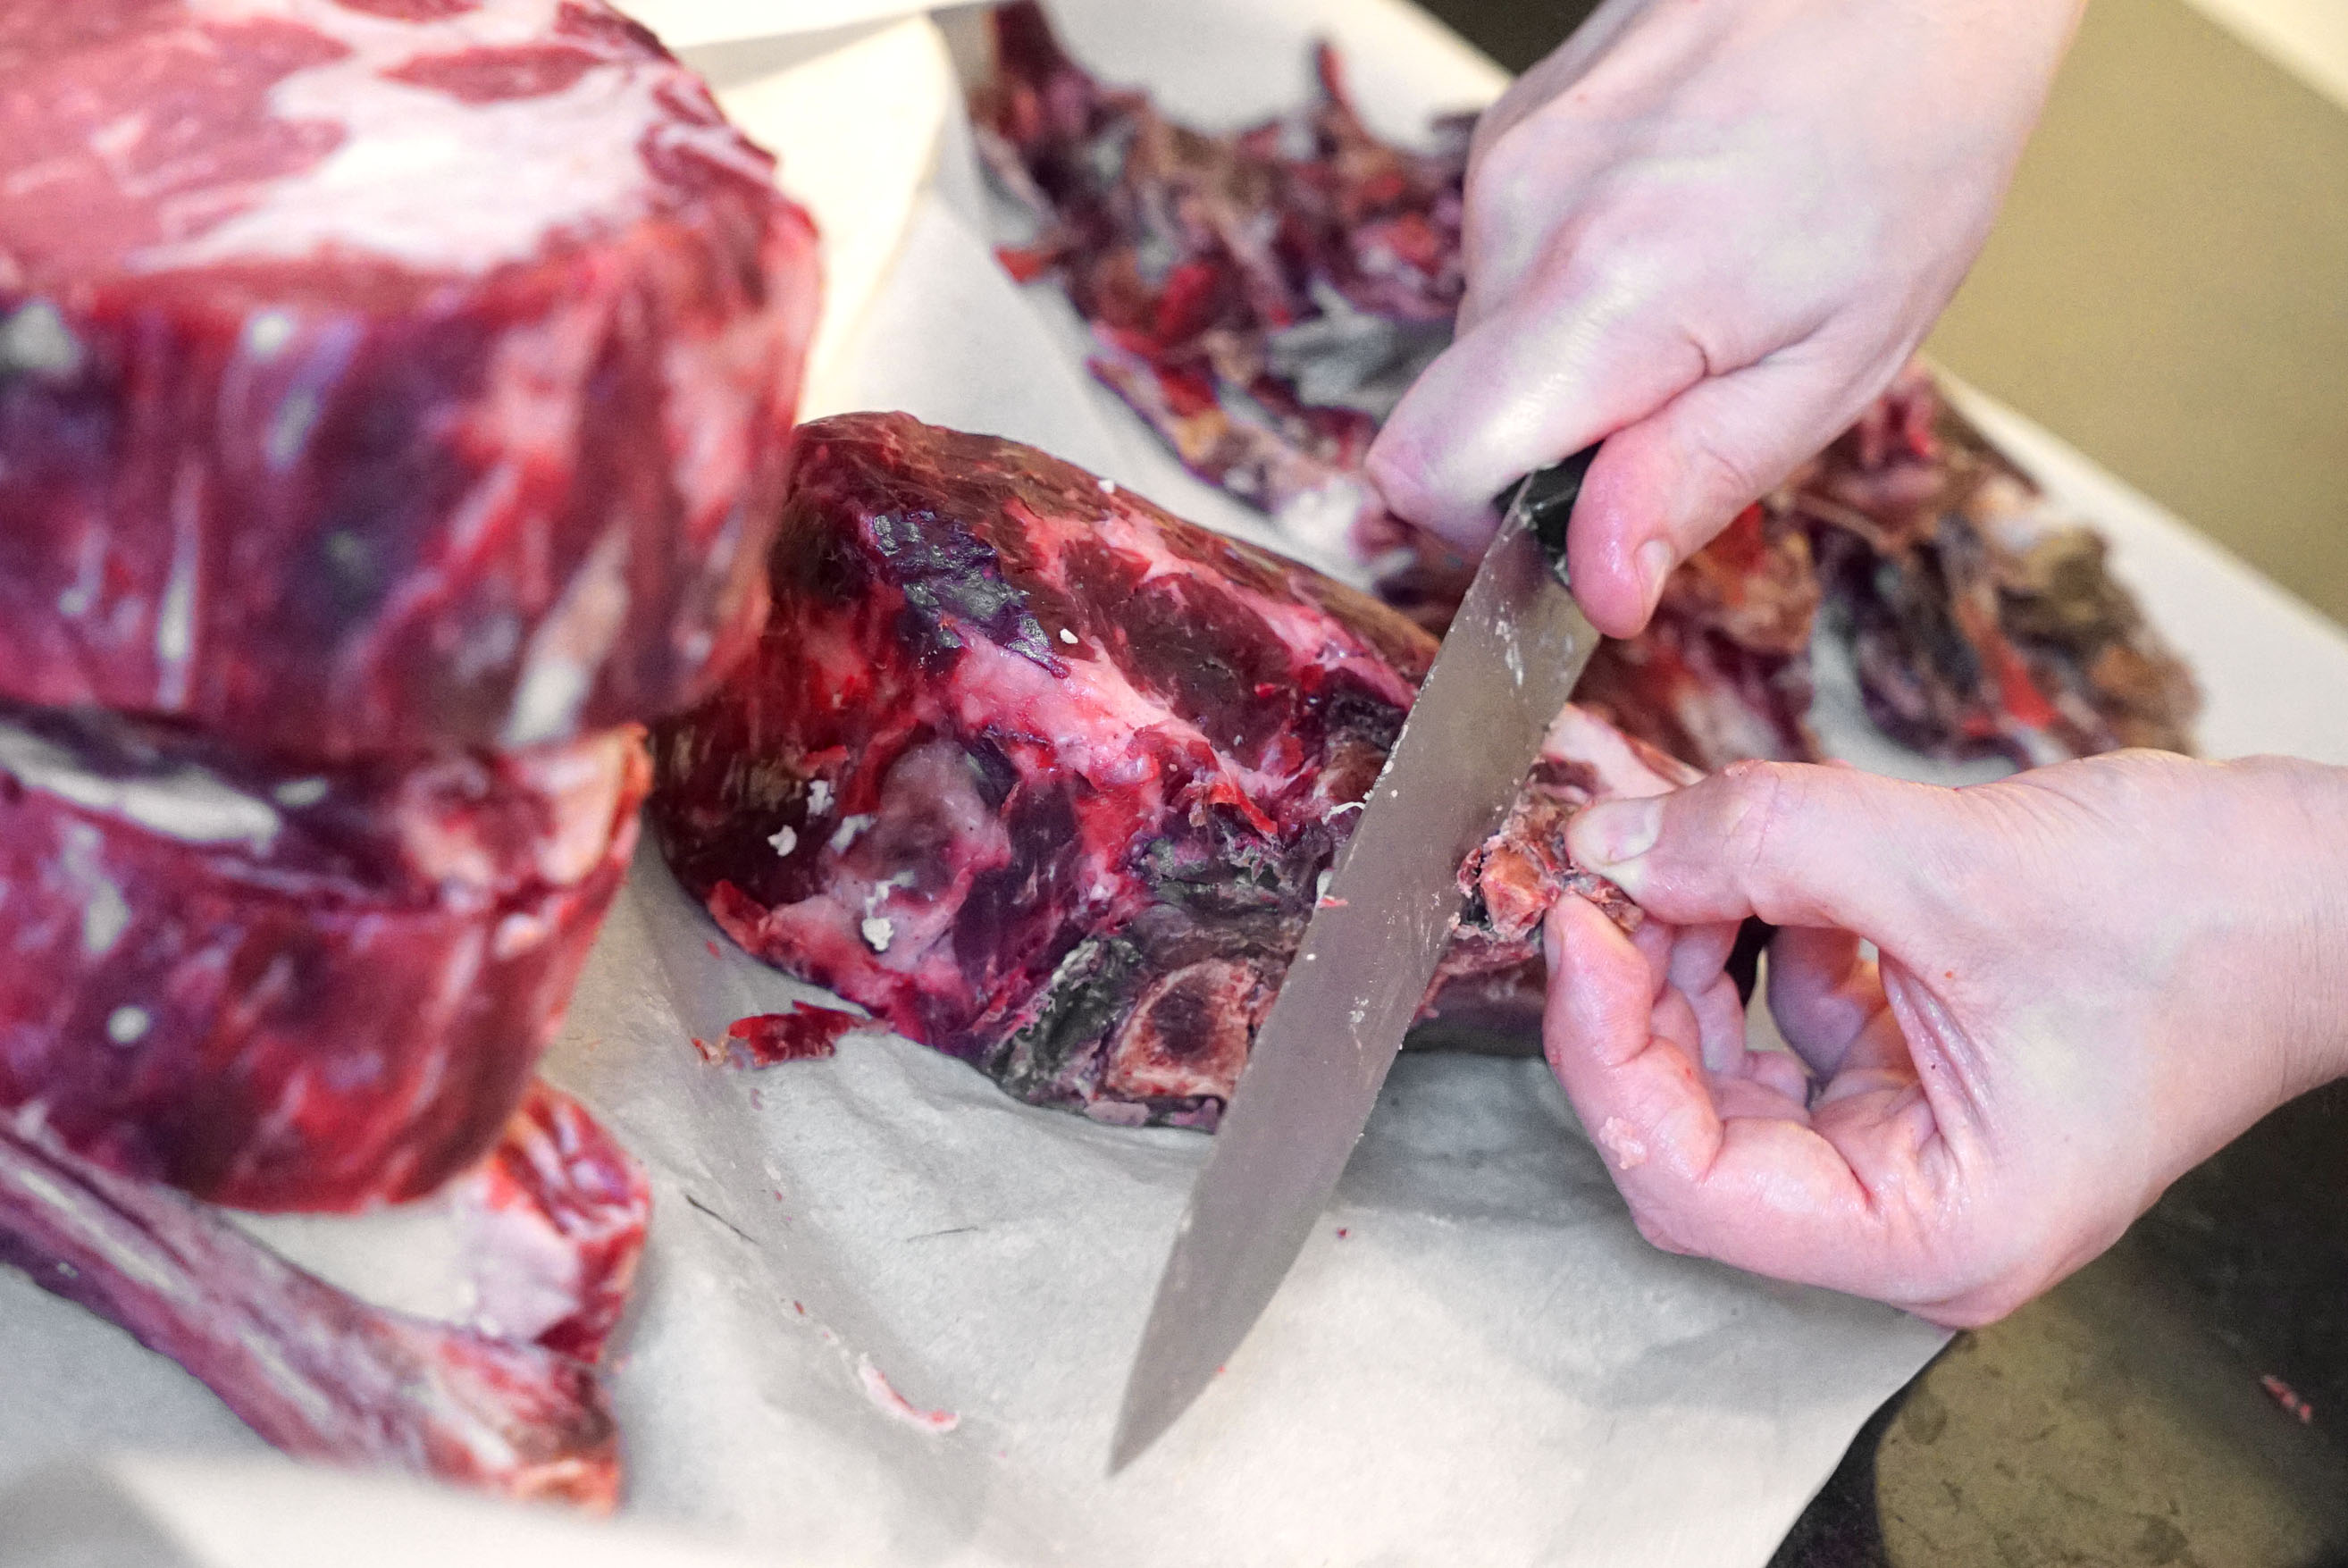
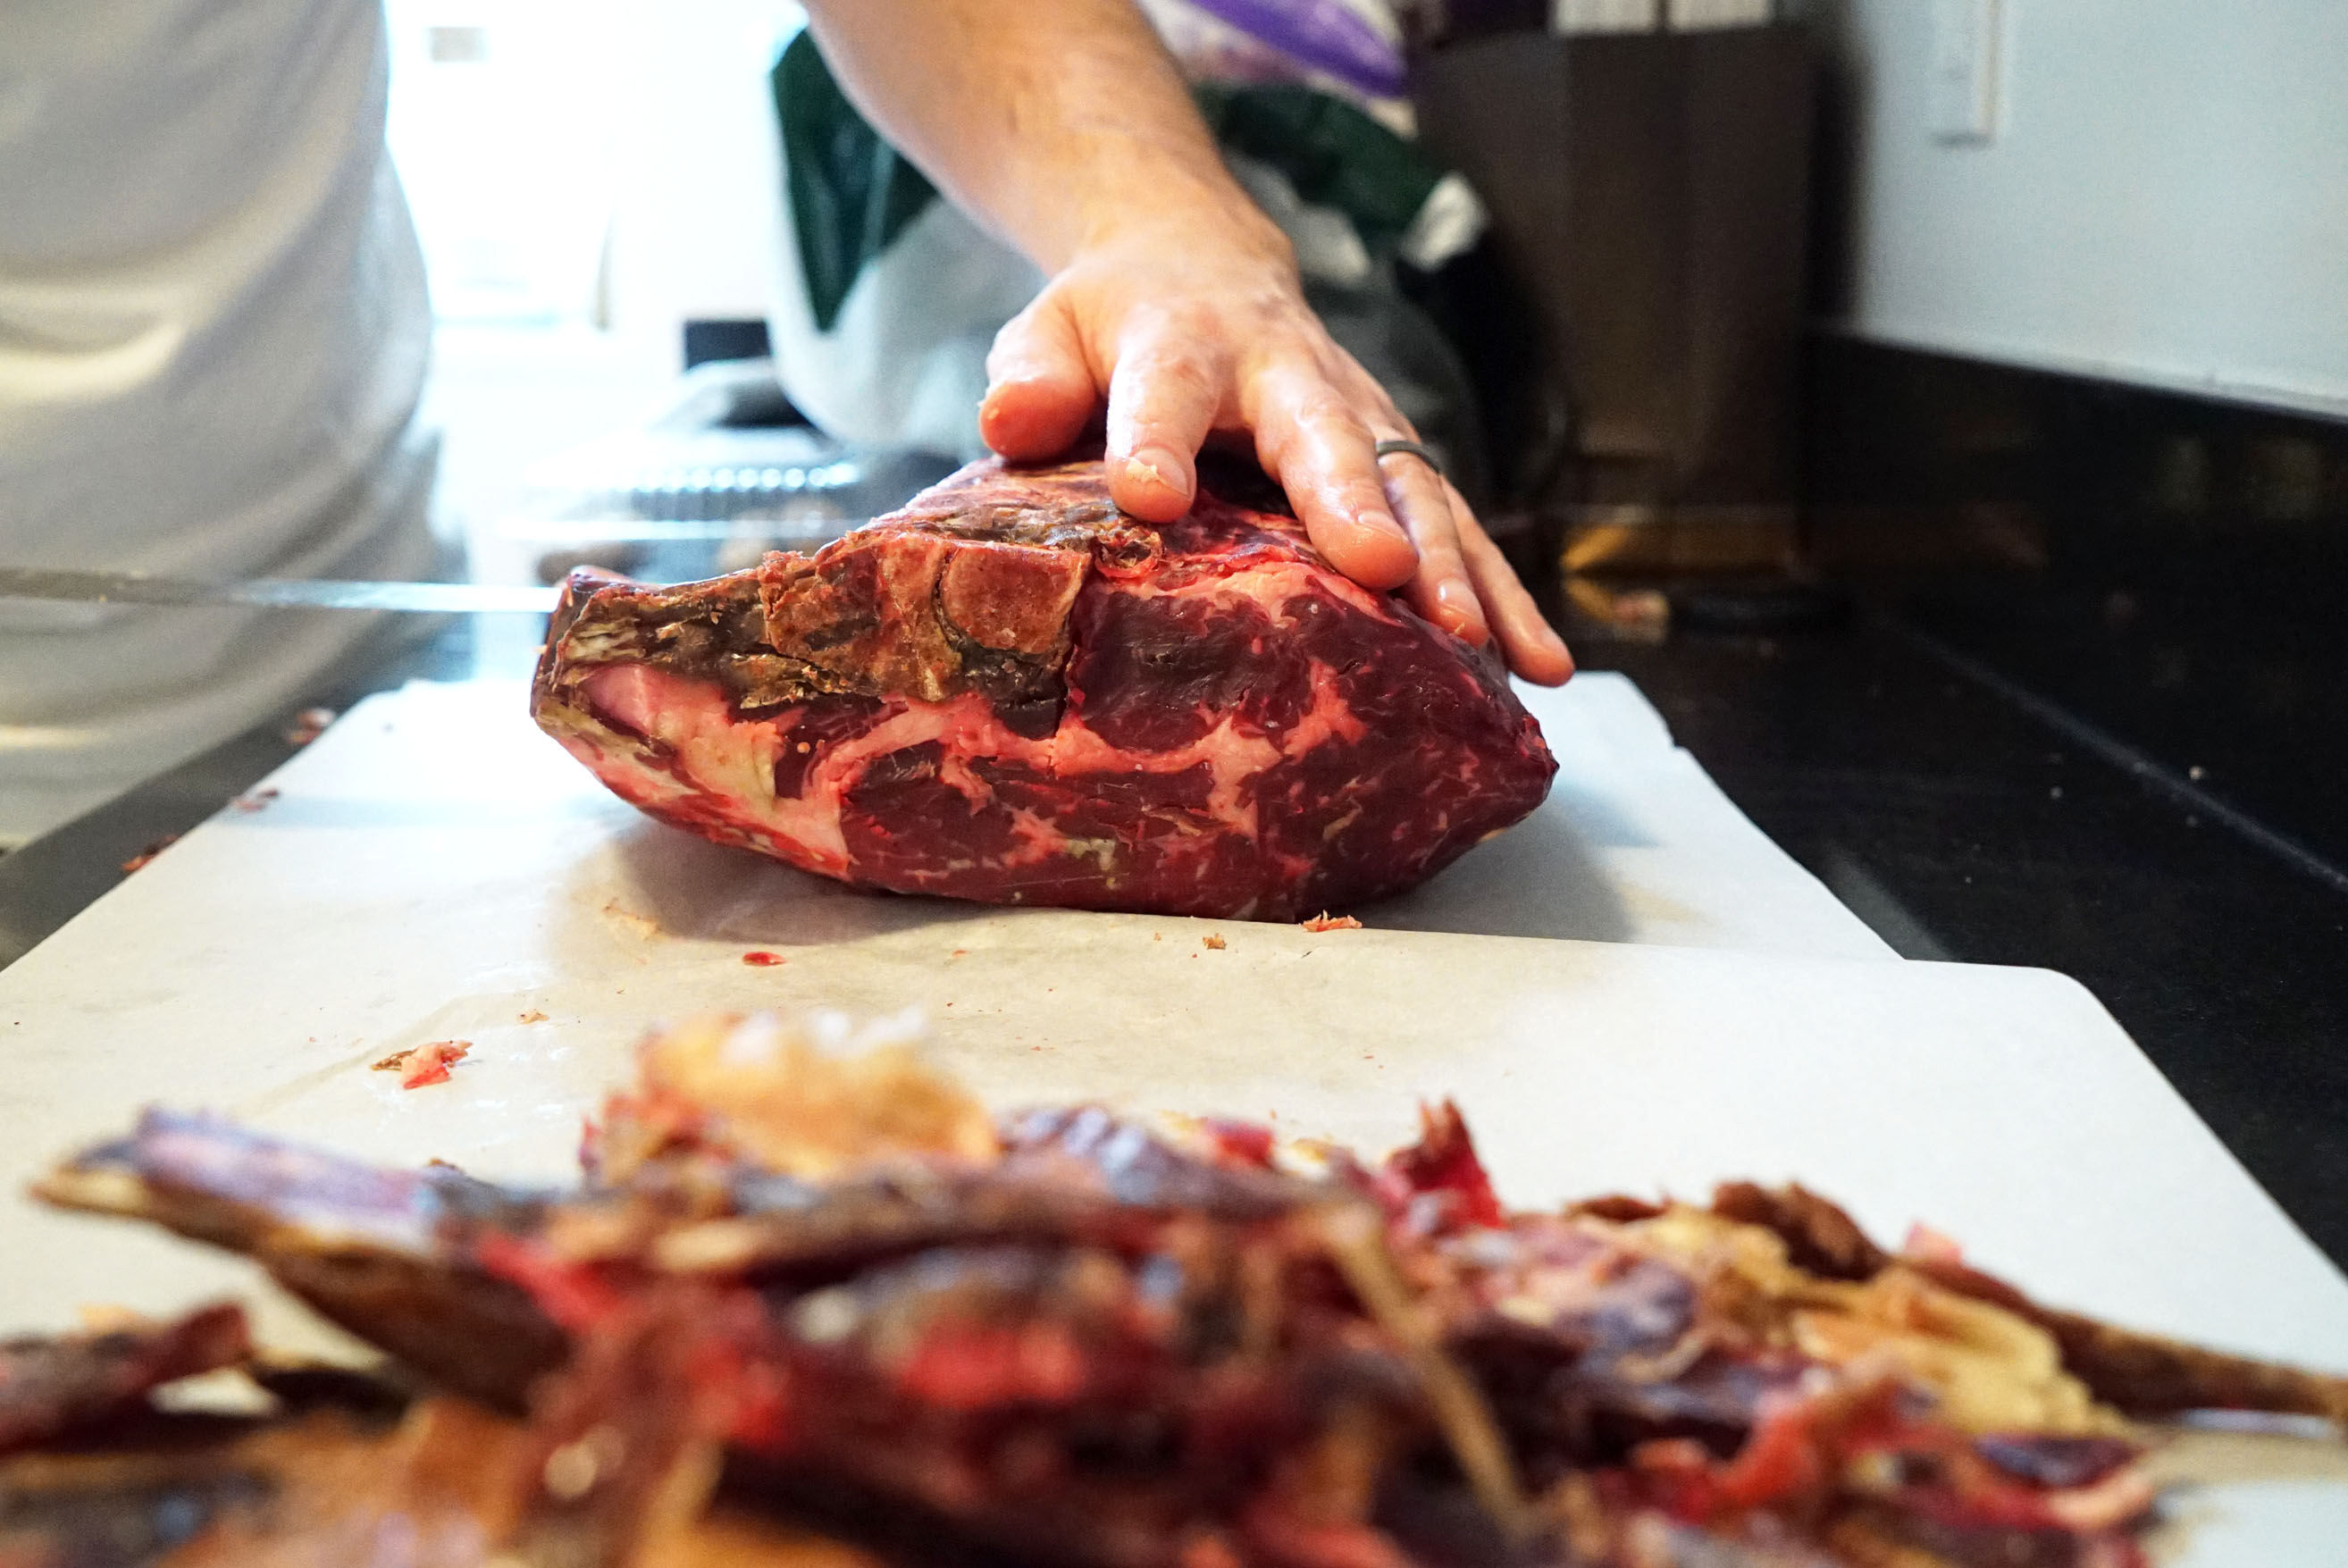
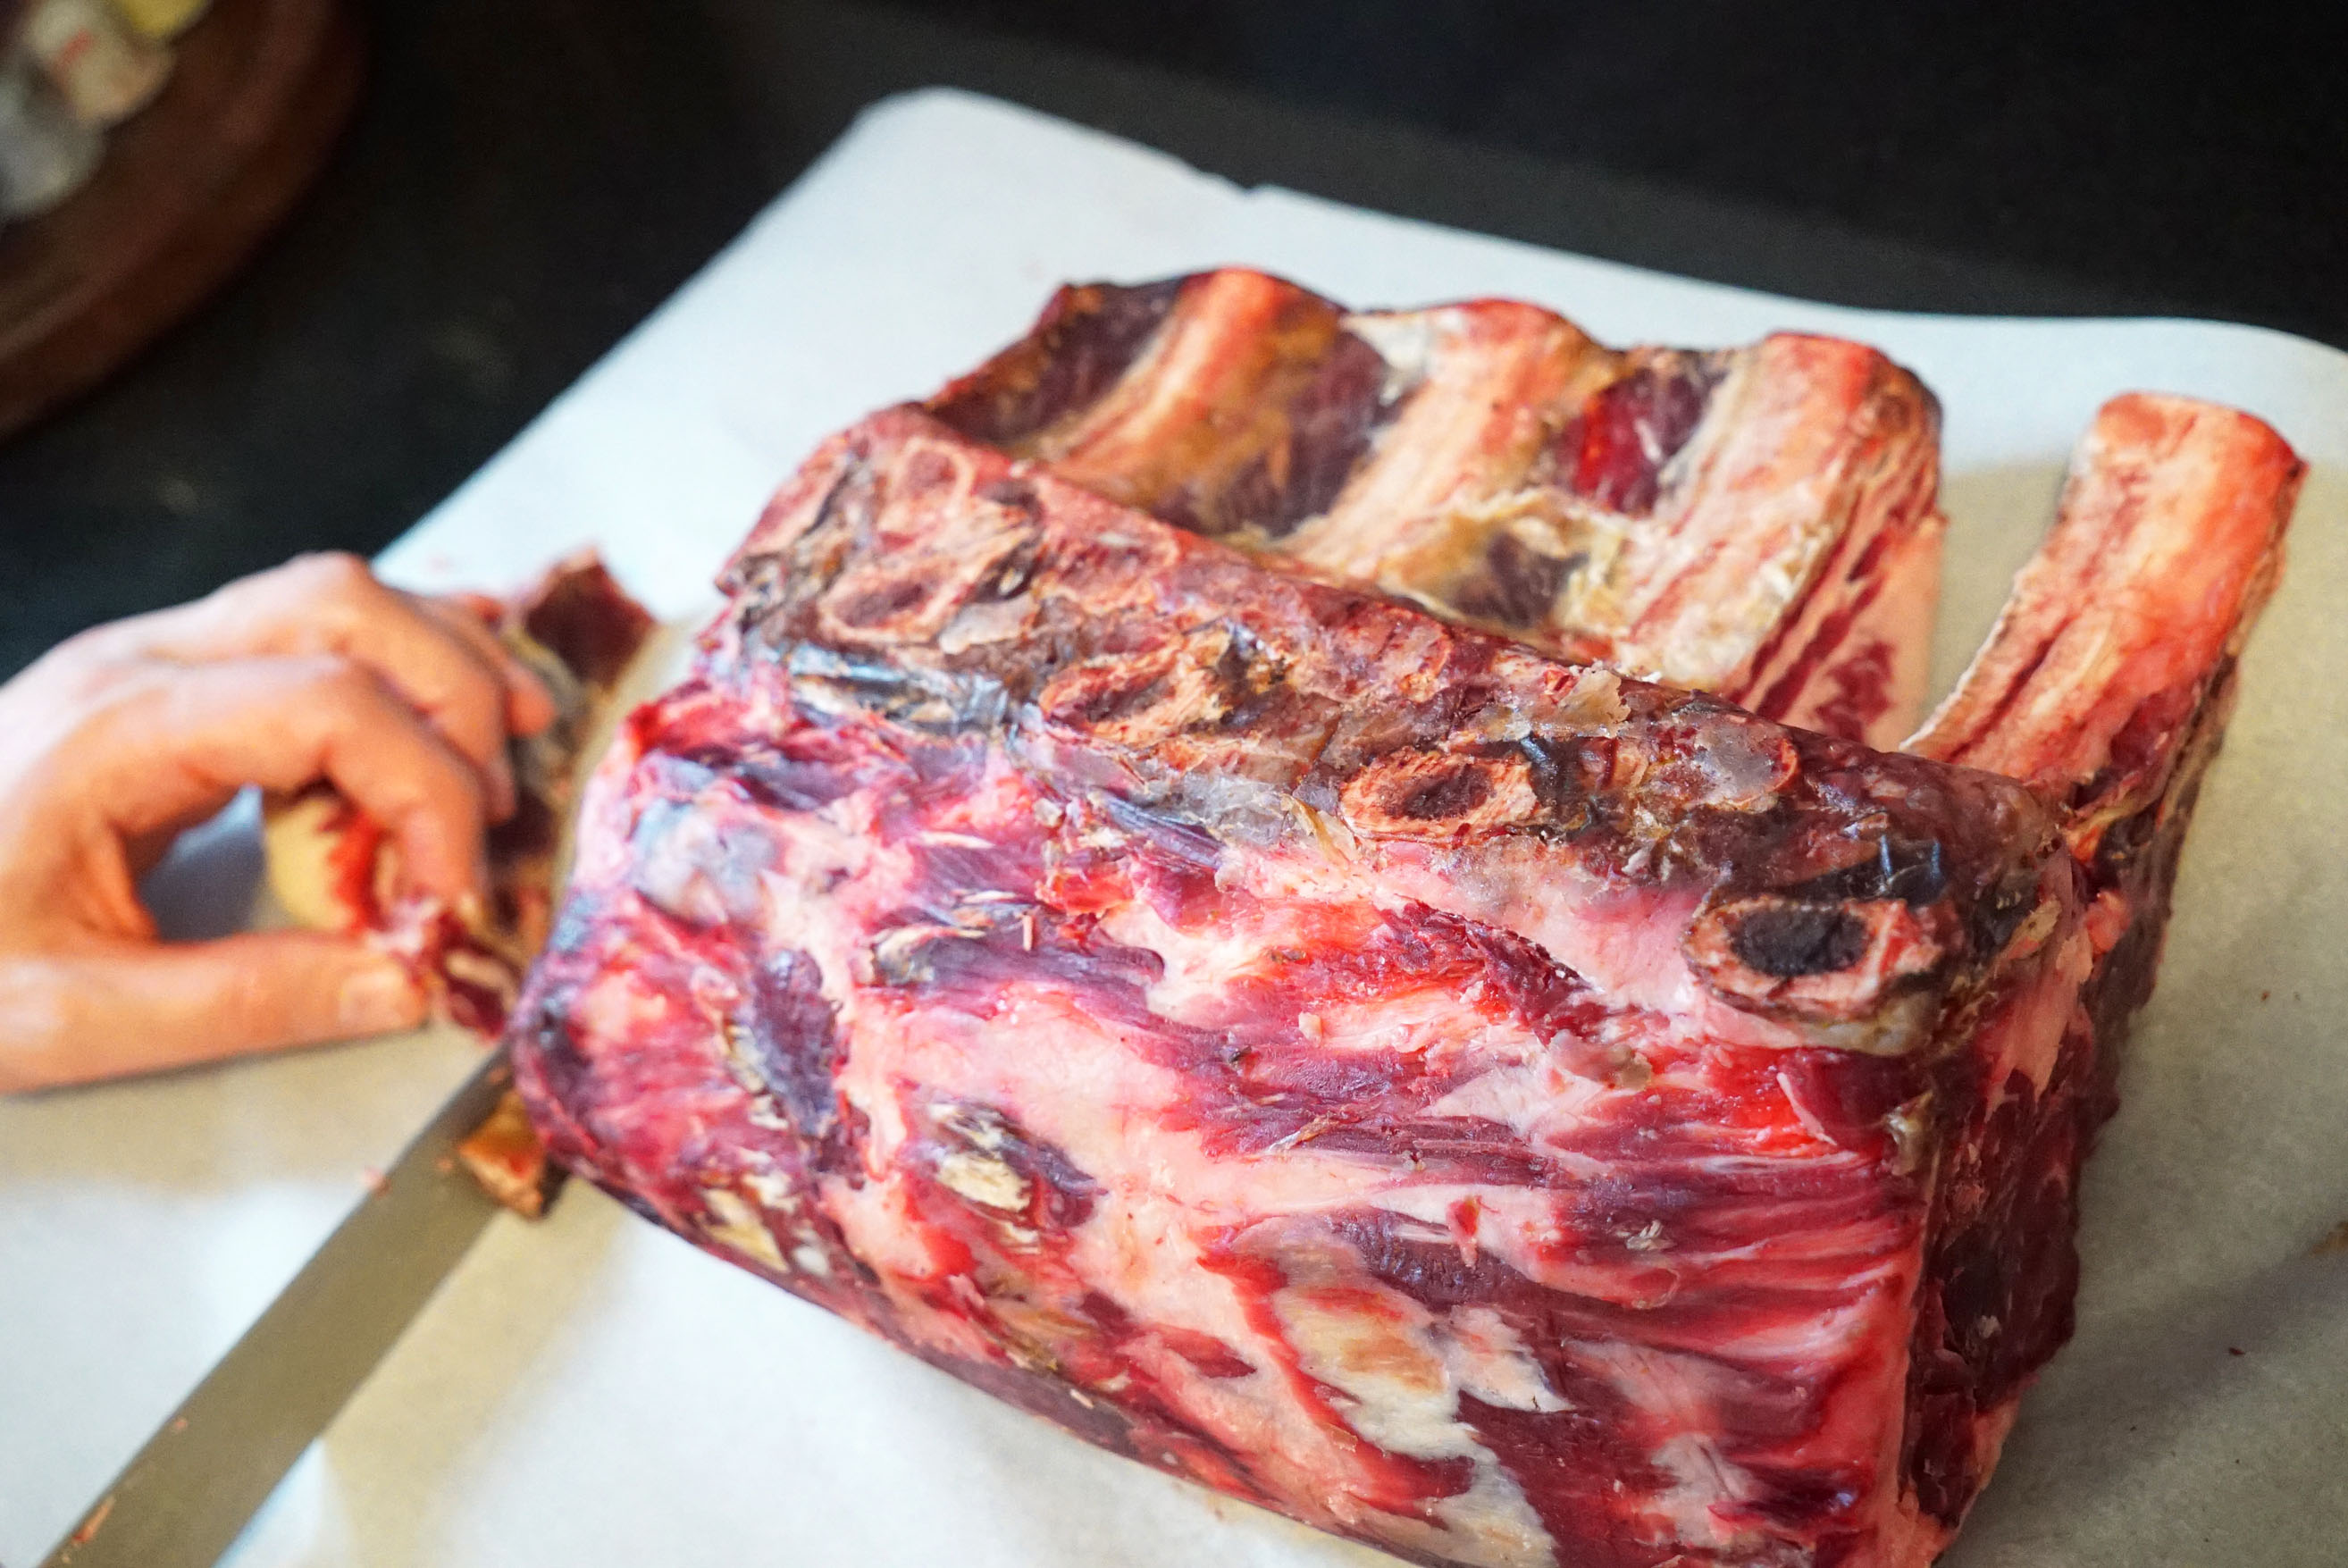
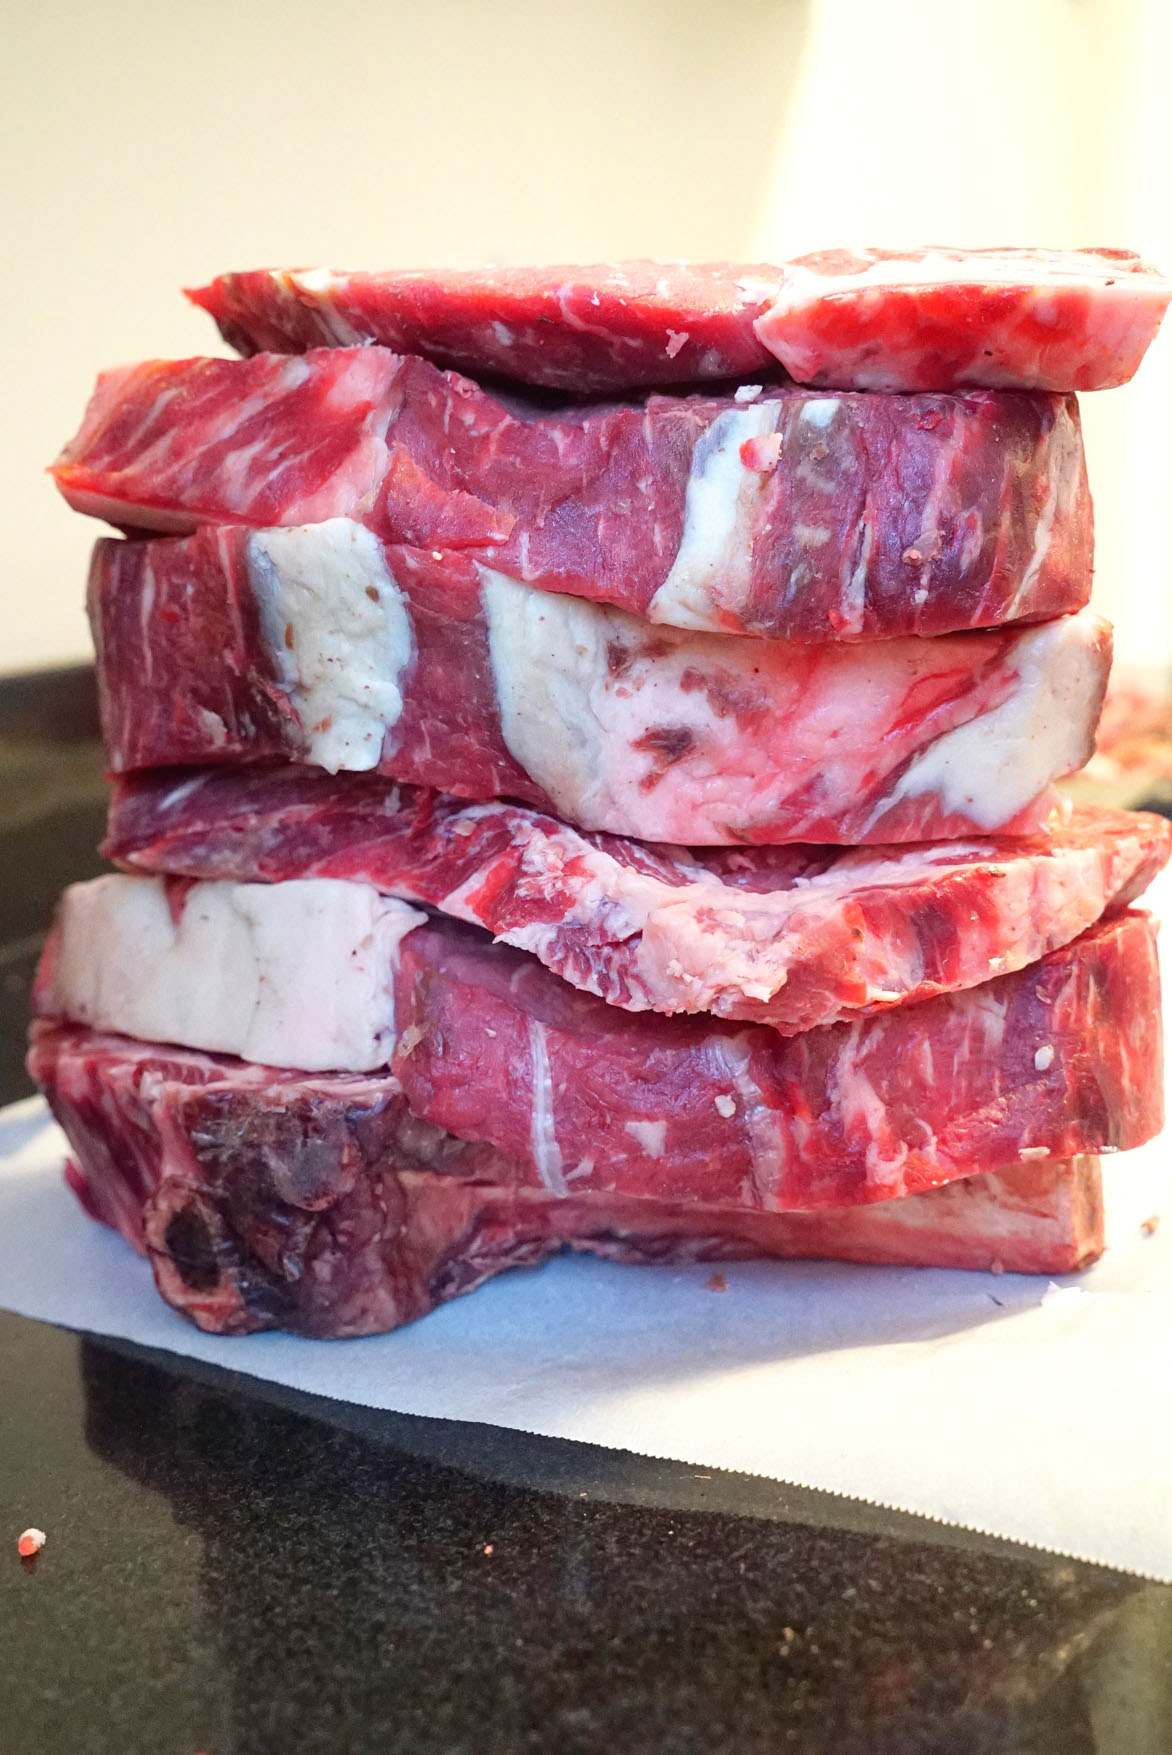
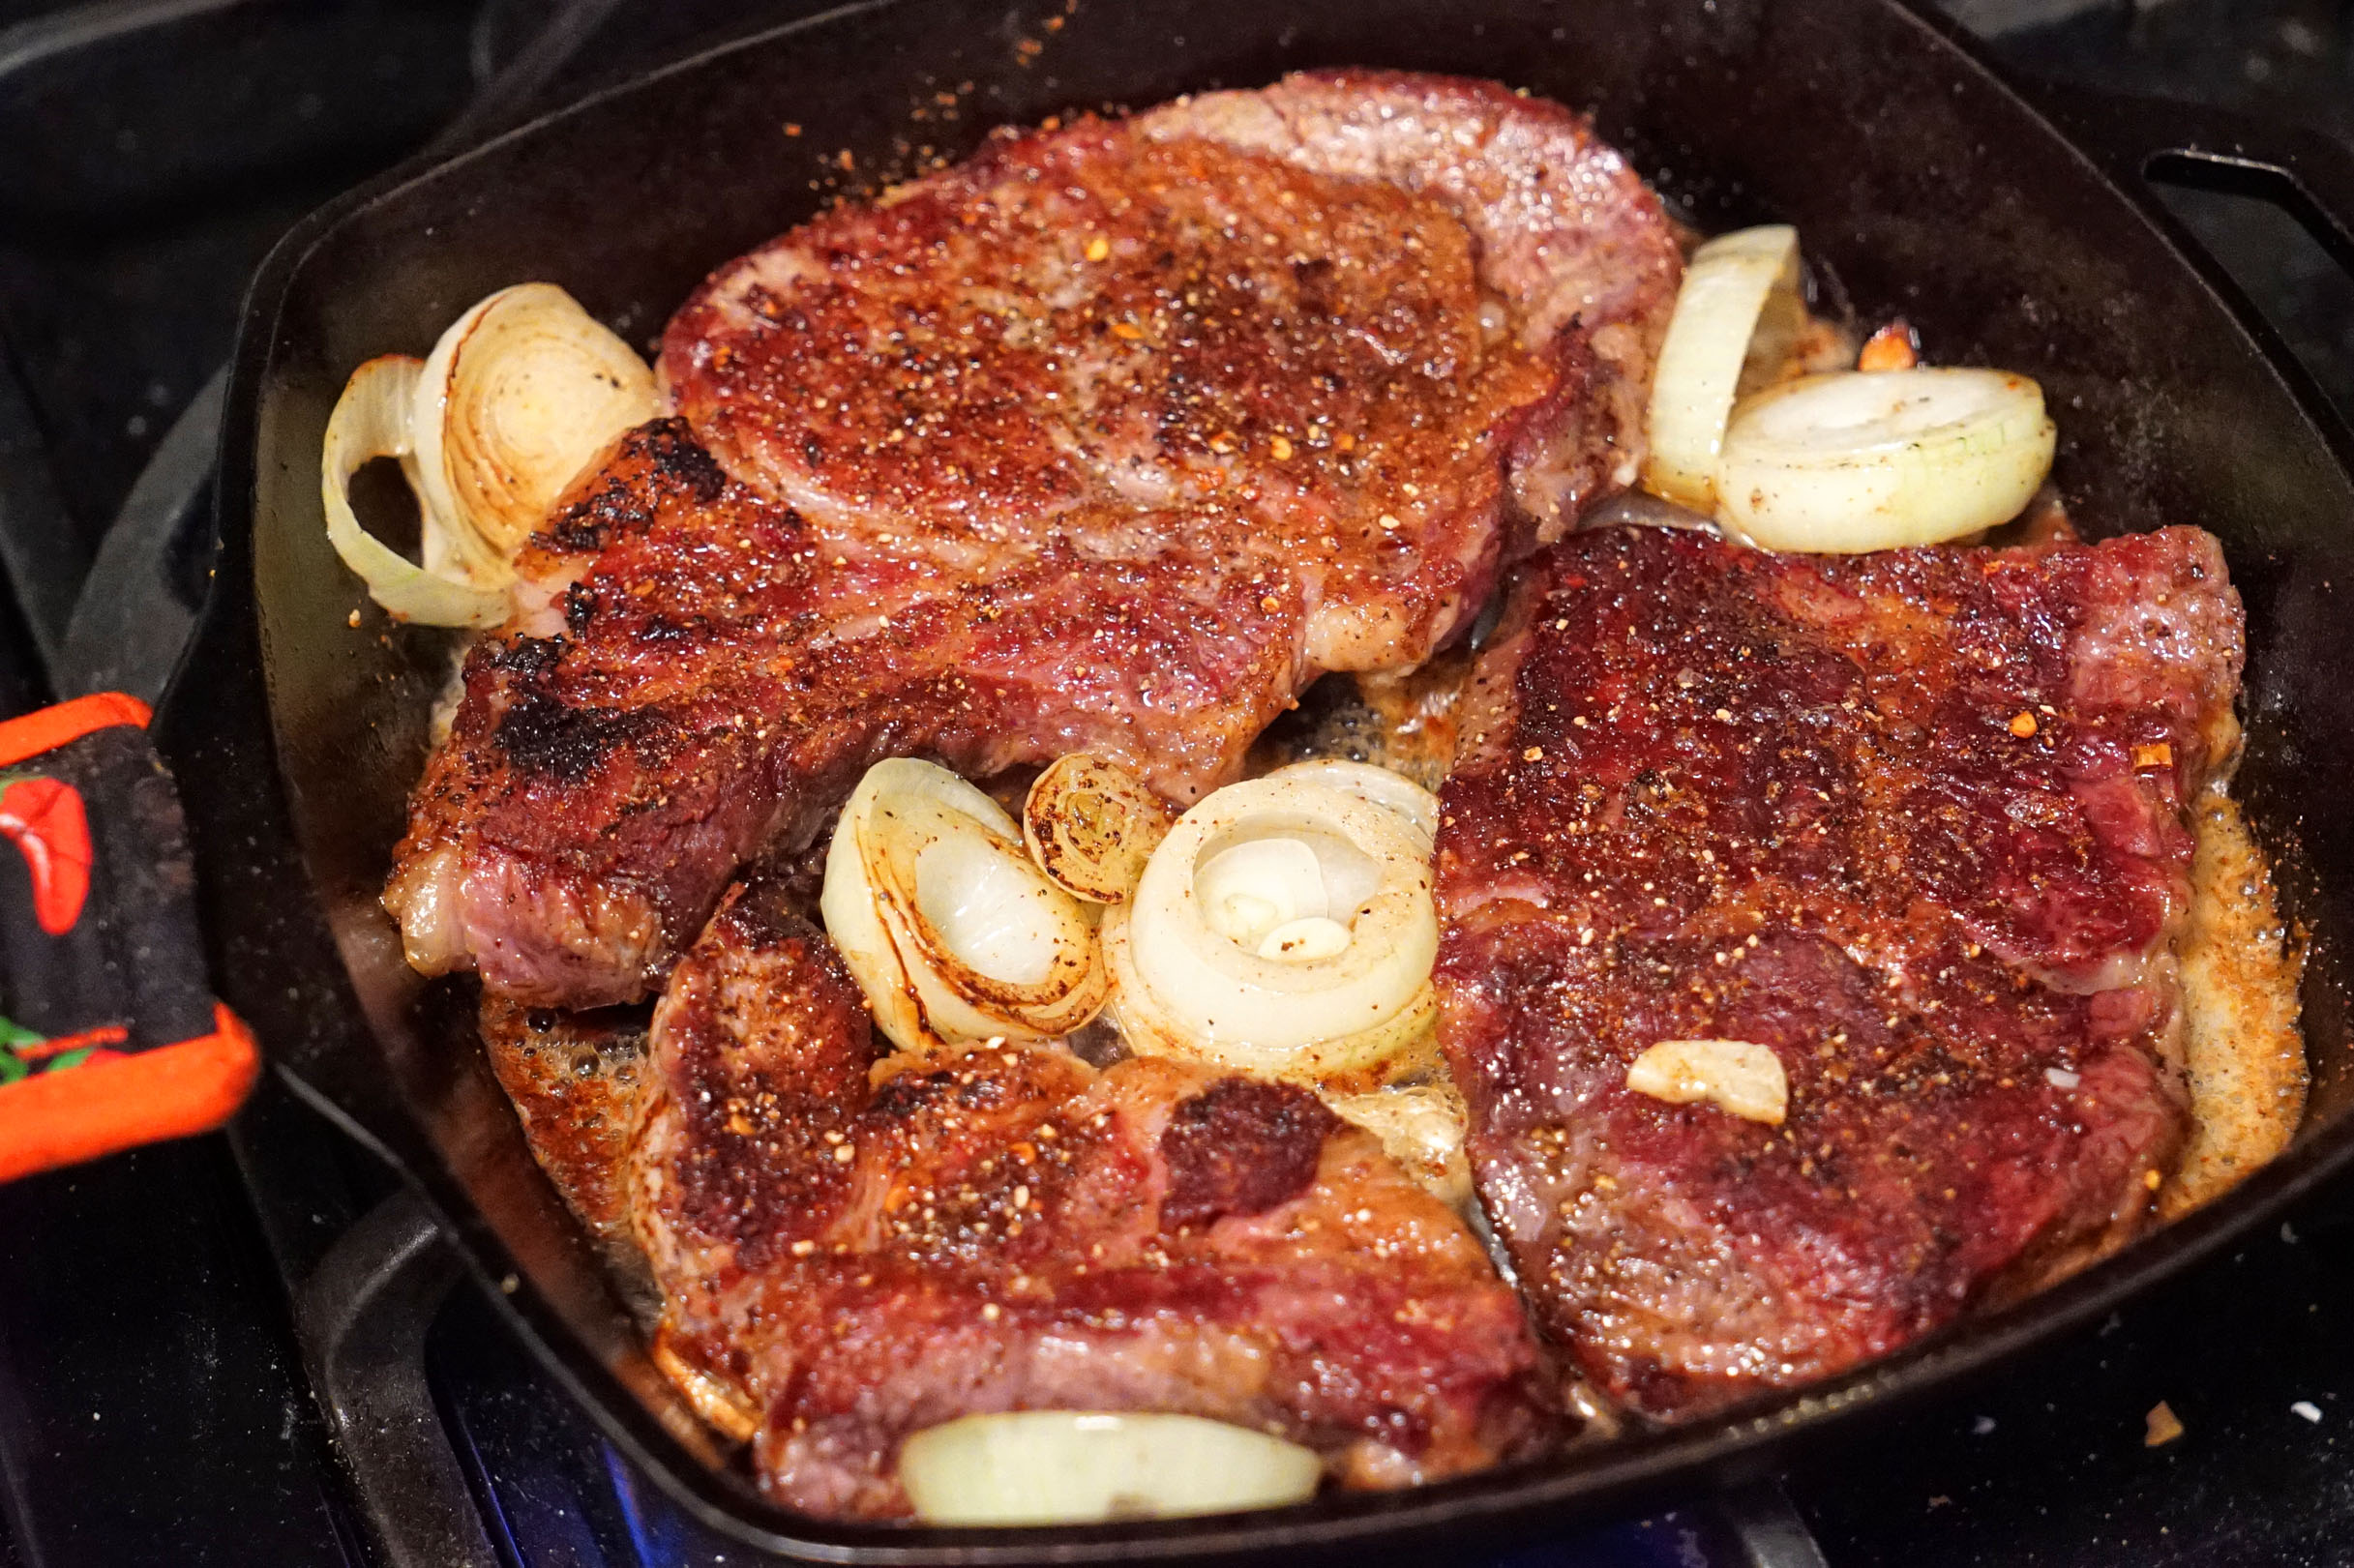
Preparation: There are a ton of ways to prepare a rib steak. The most comon forms are searing in a pan, grilling, or broiling. Another common method of preparing this kind of meat is roasting. A “standing rib roast” is a section of Rib Eye steaks that has not yet been portioned into individual steaks.

DSC08474

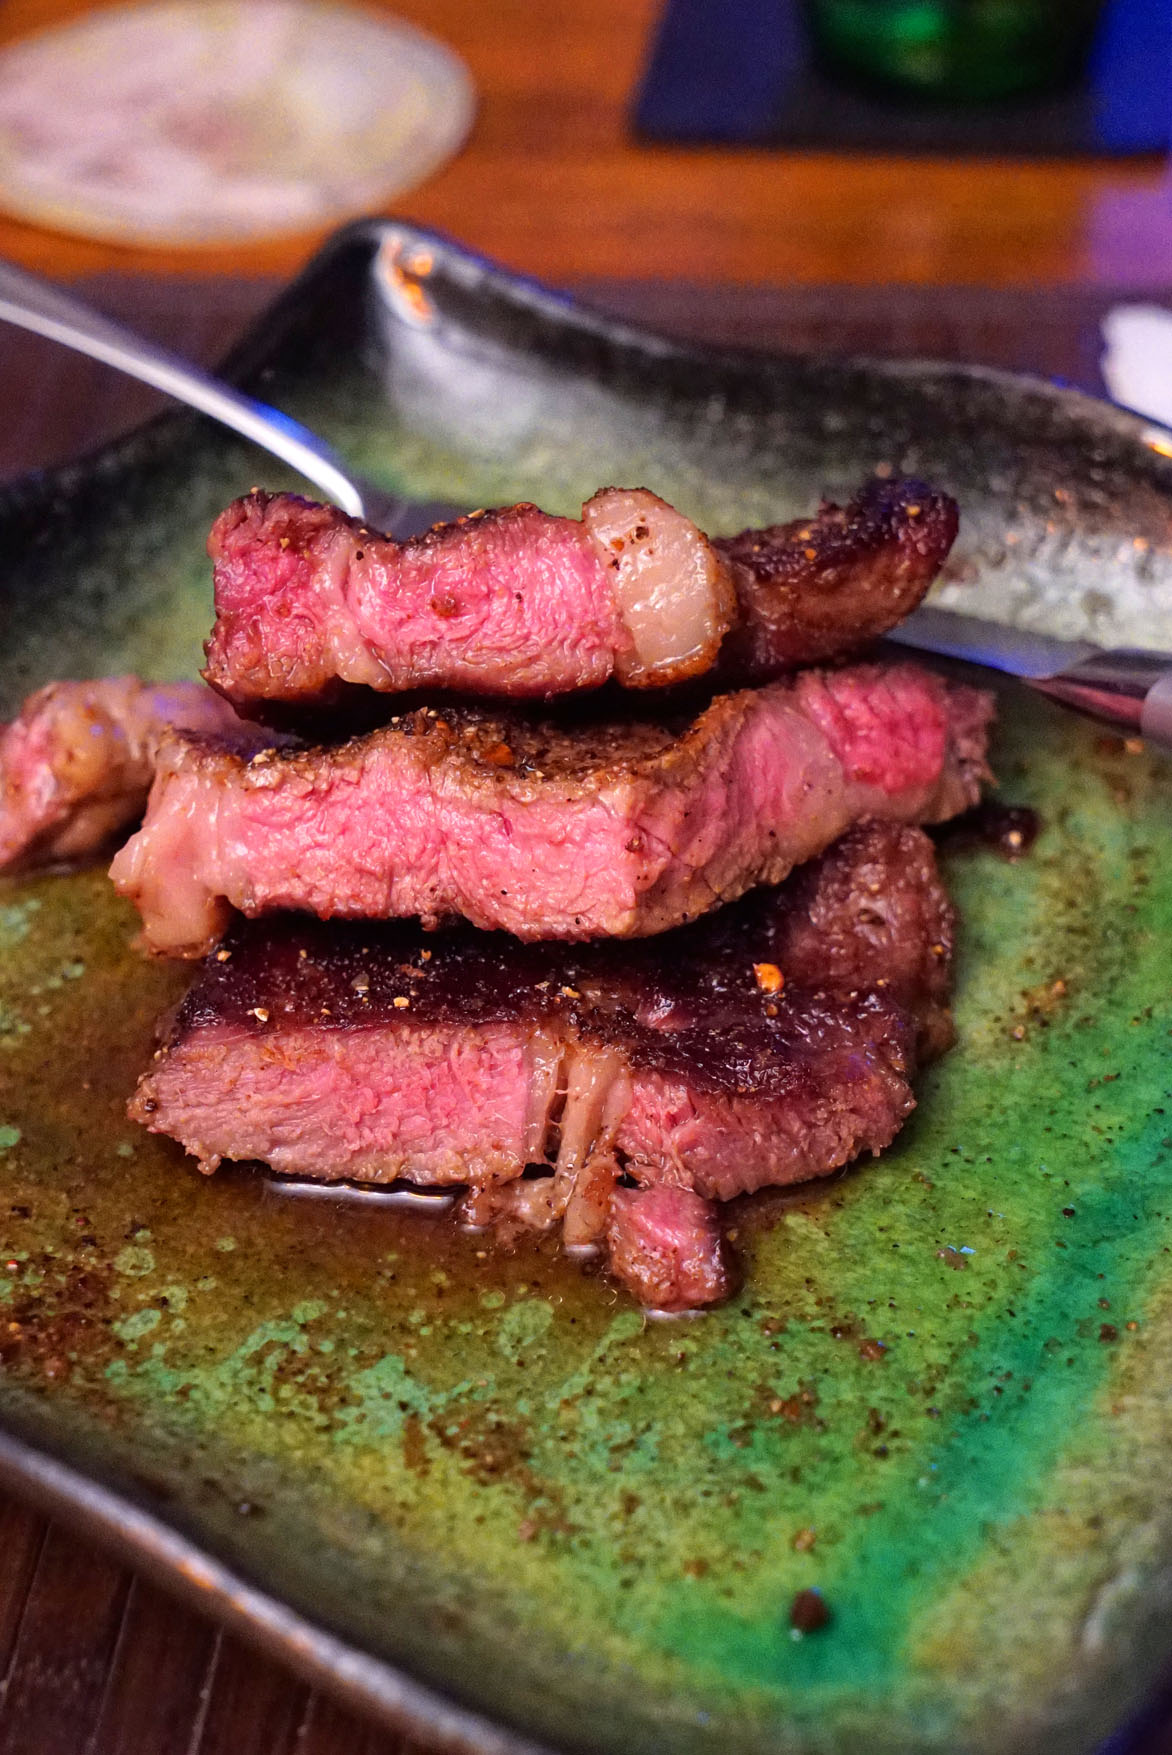
When this rack of ribs is roasted slow and low to a pink medium rare, the end product is called Prime Rib.

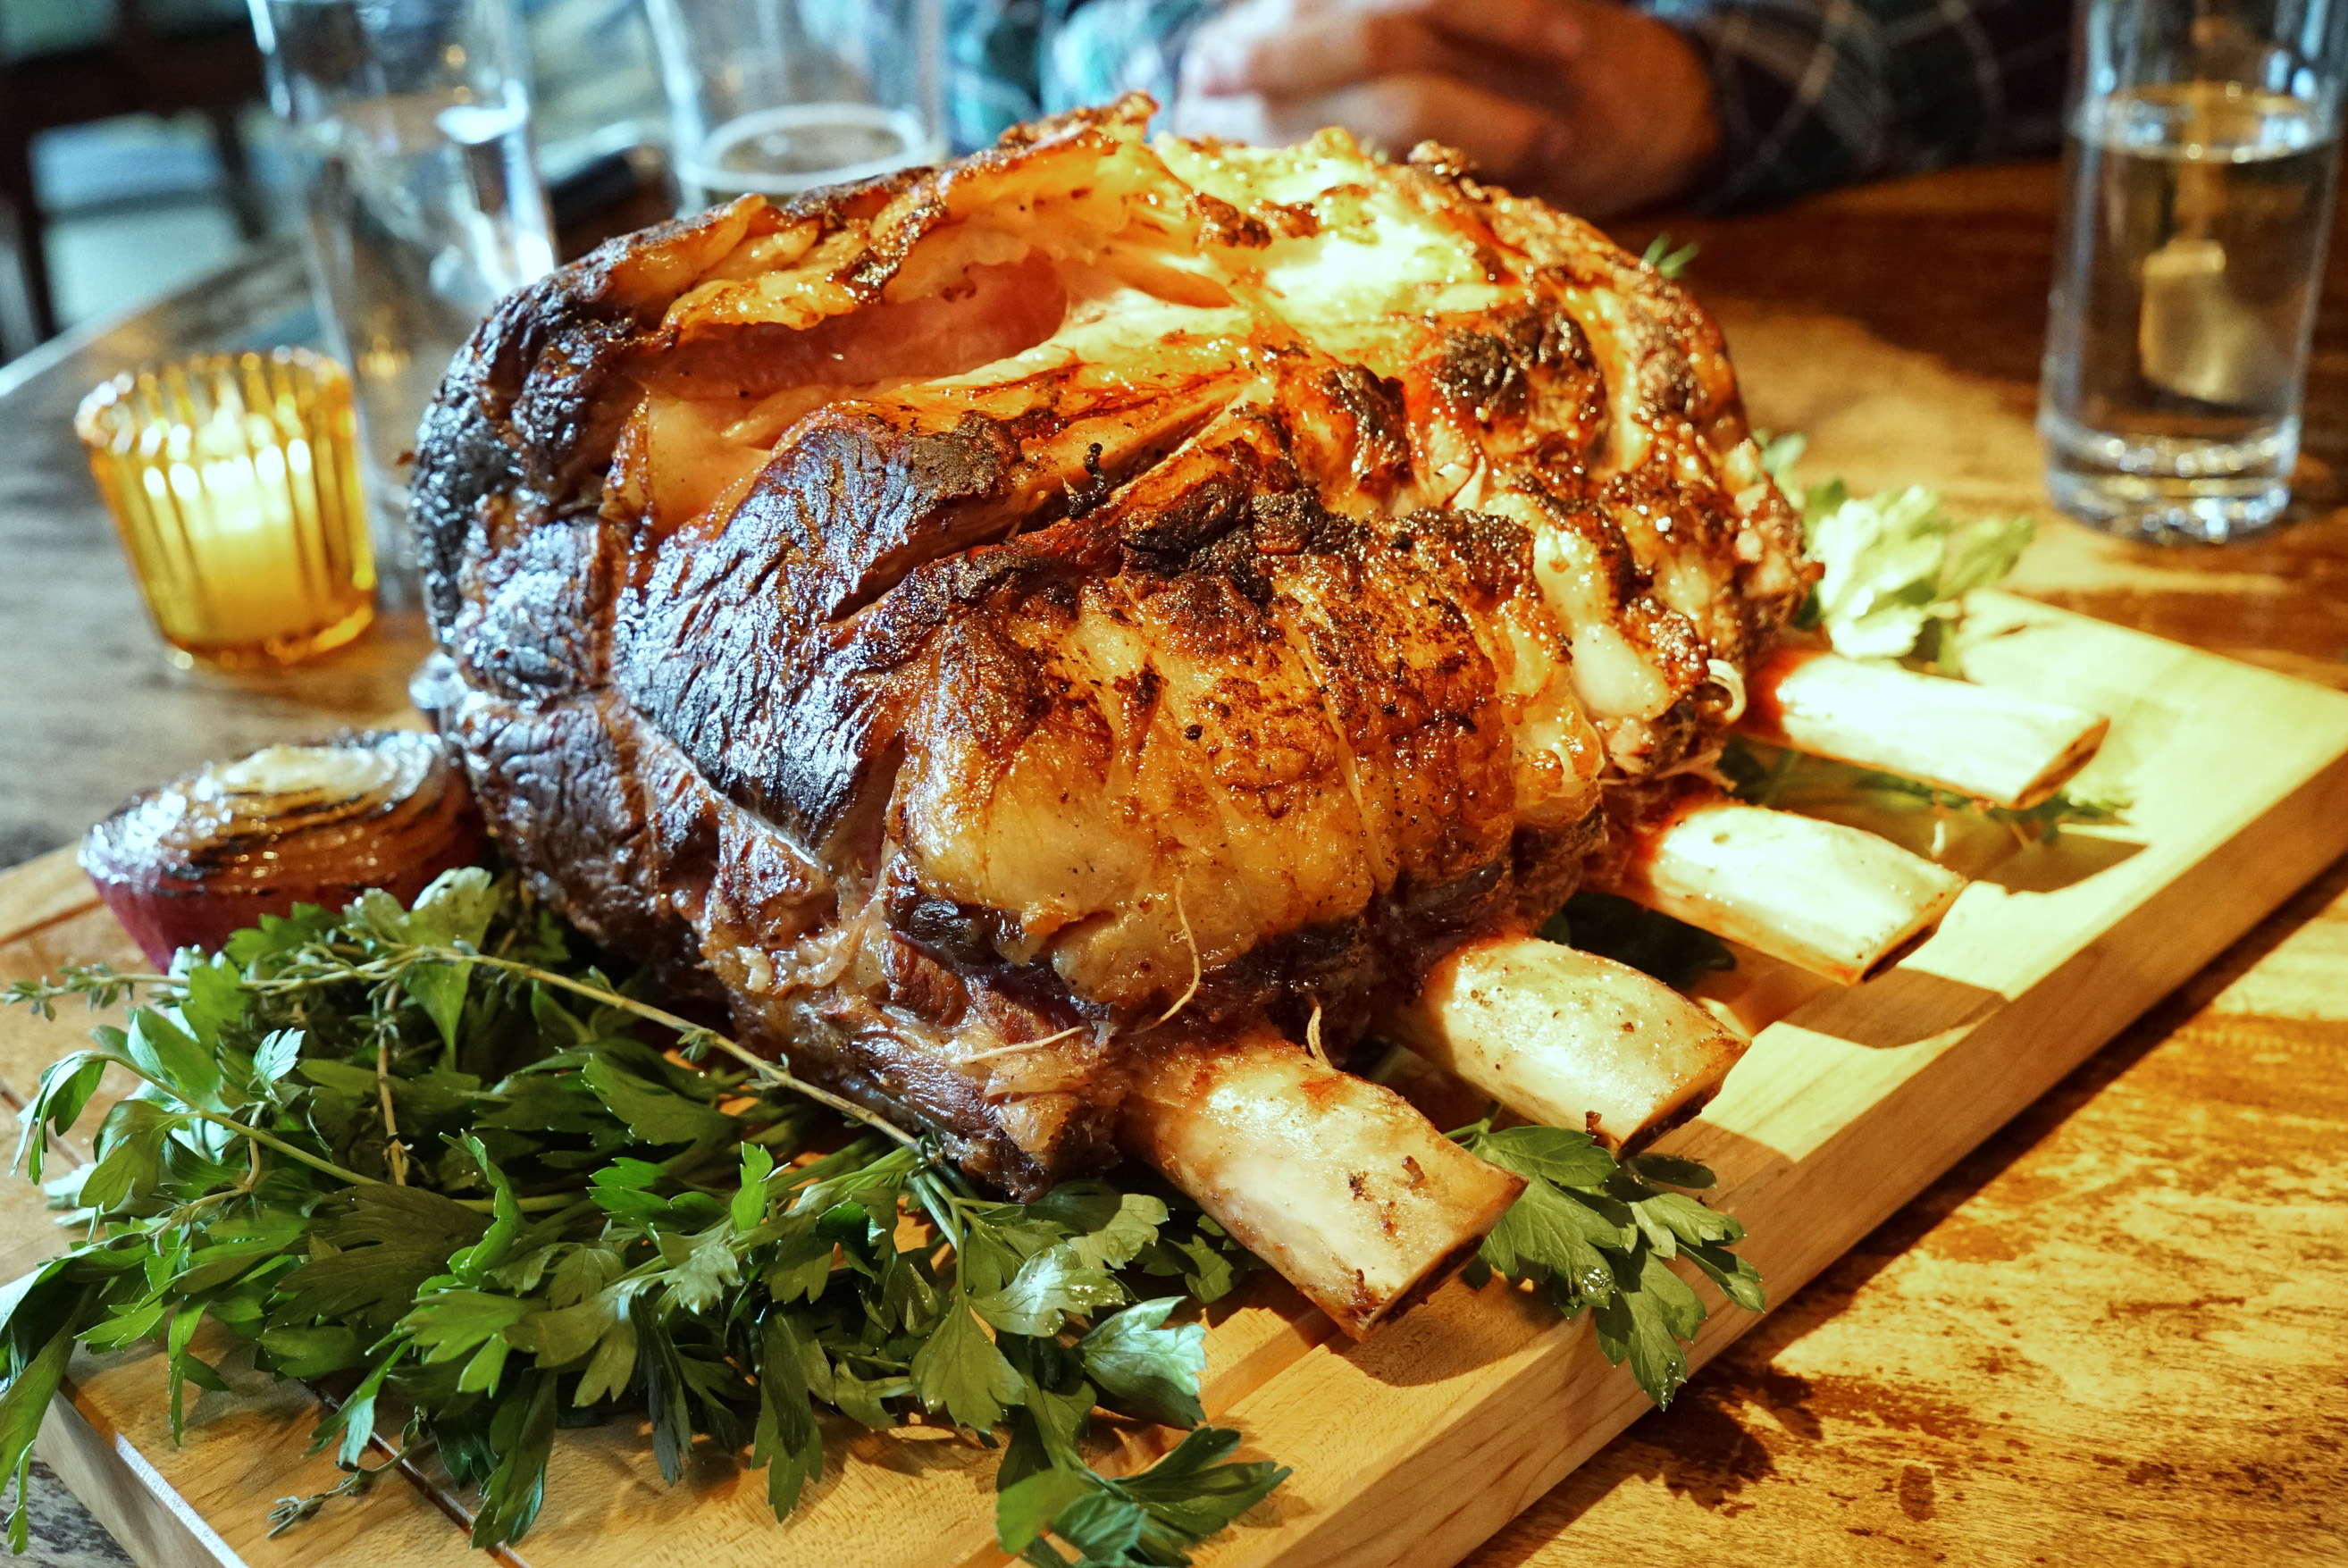
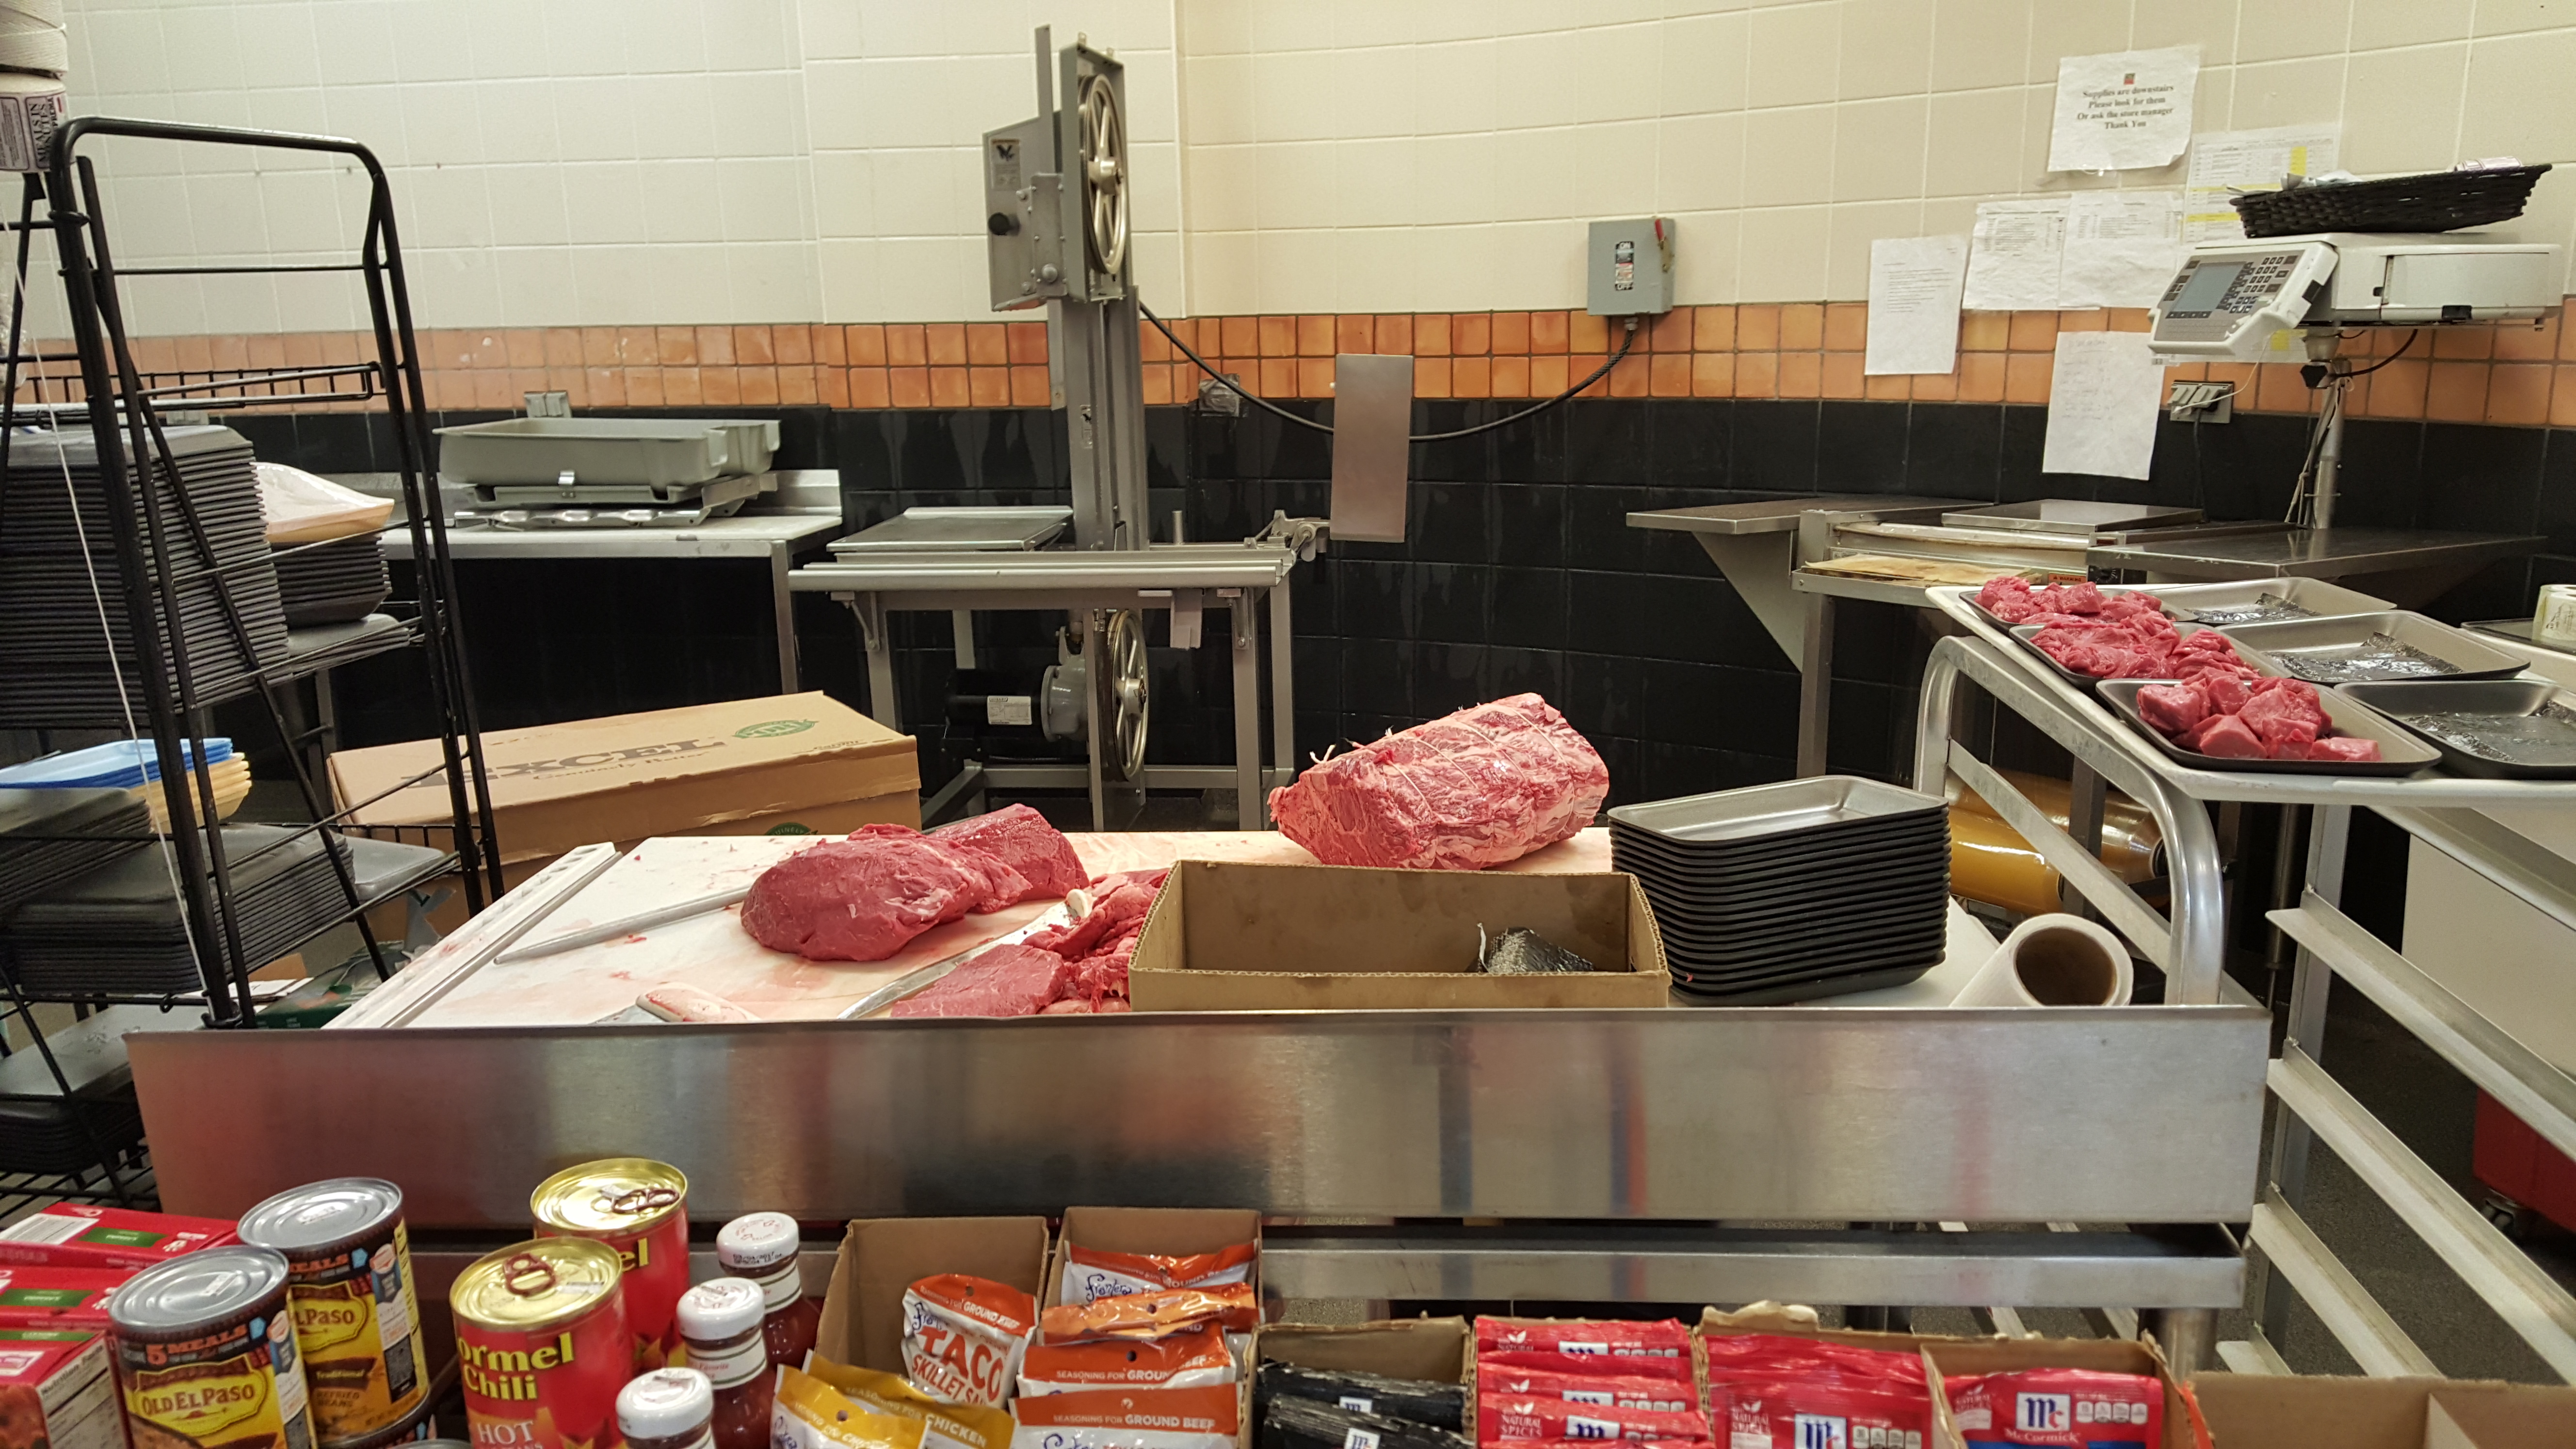
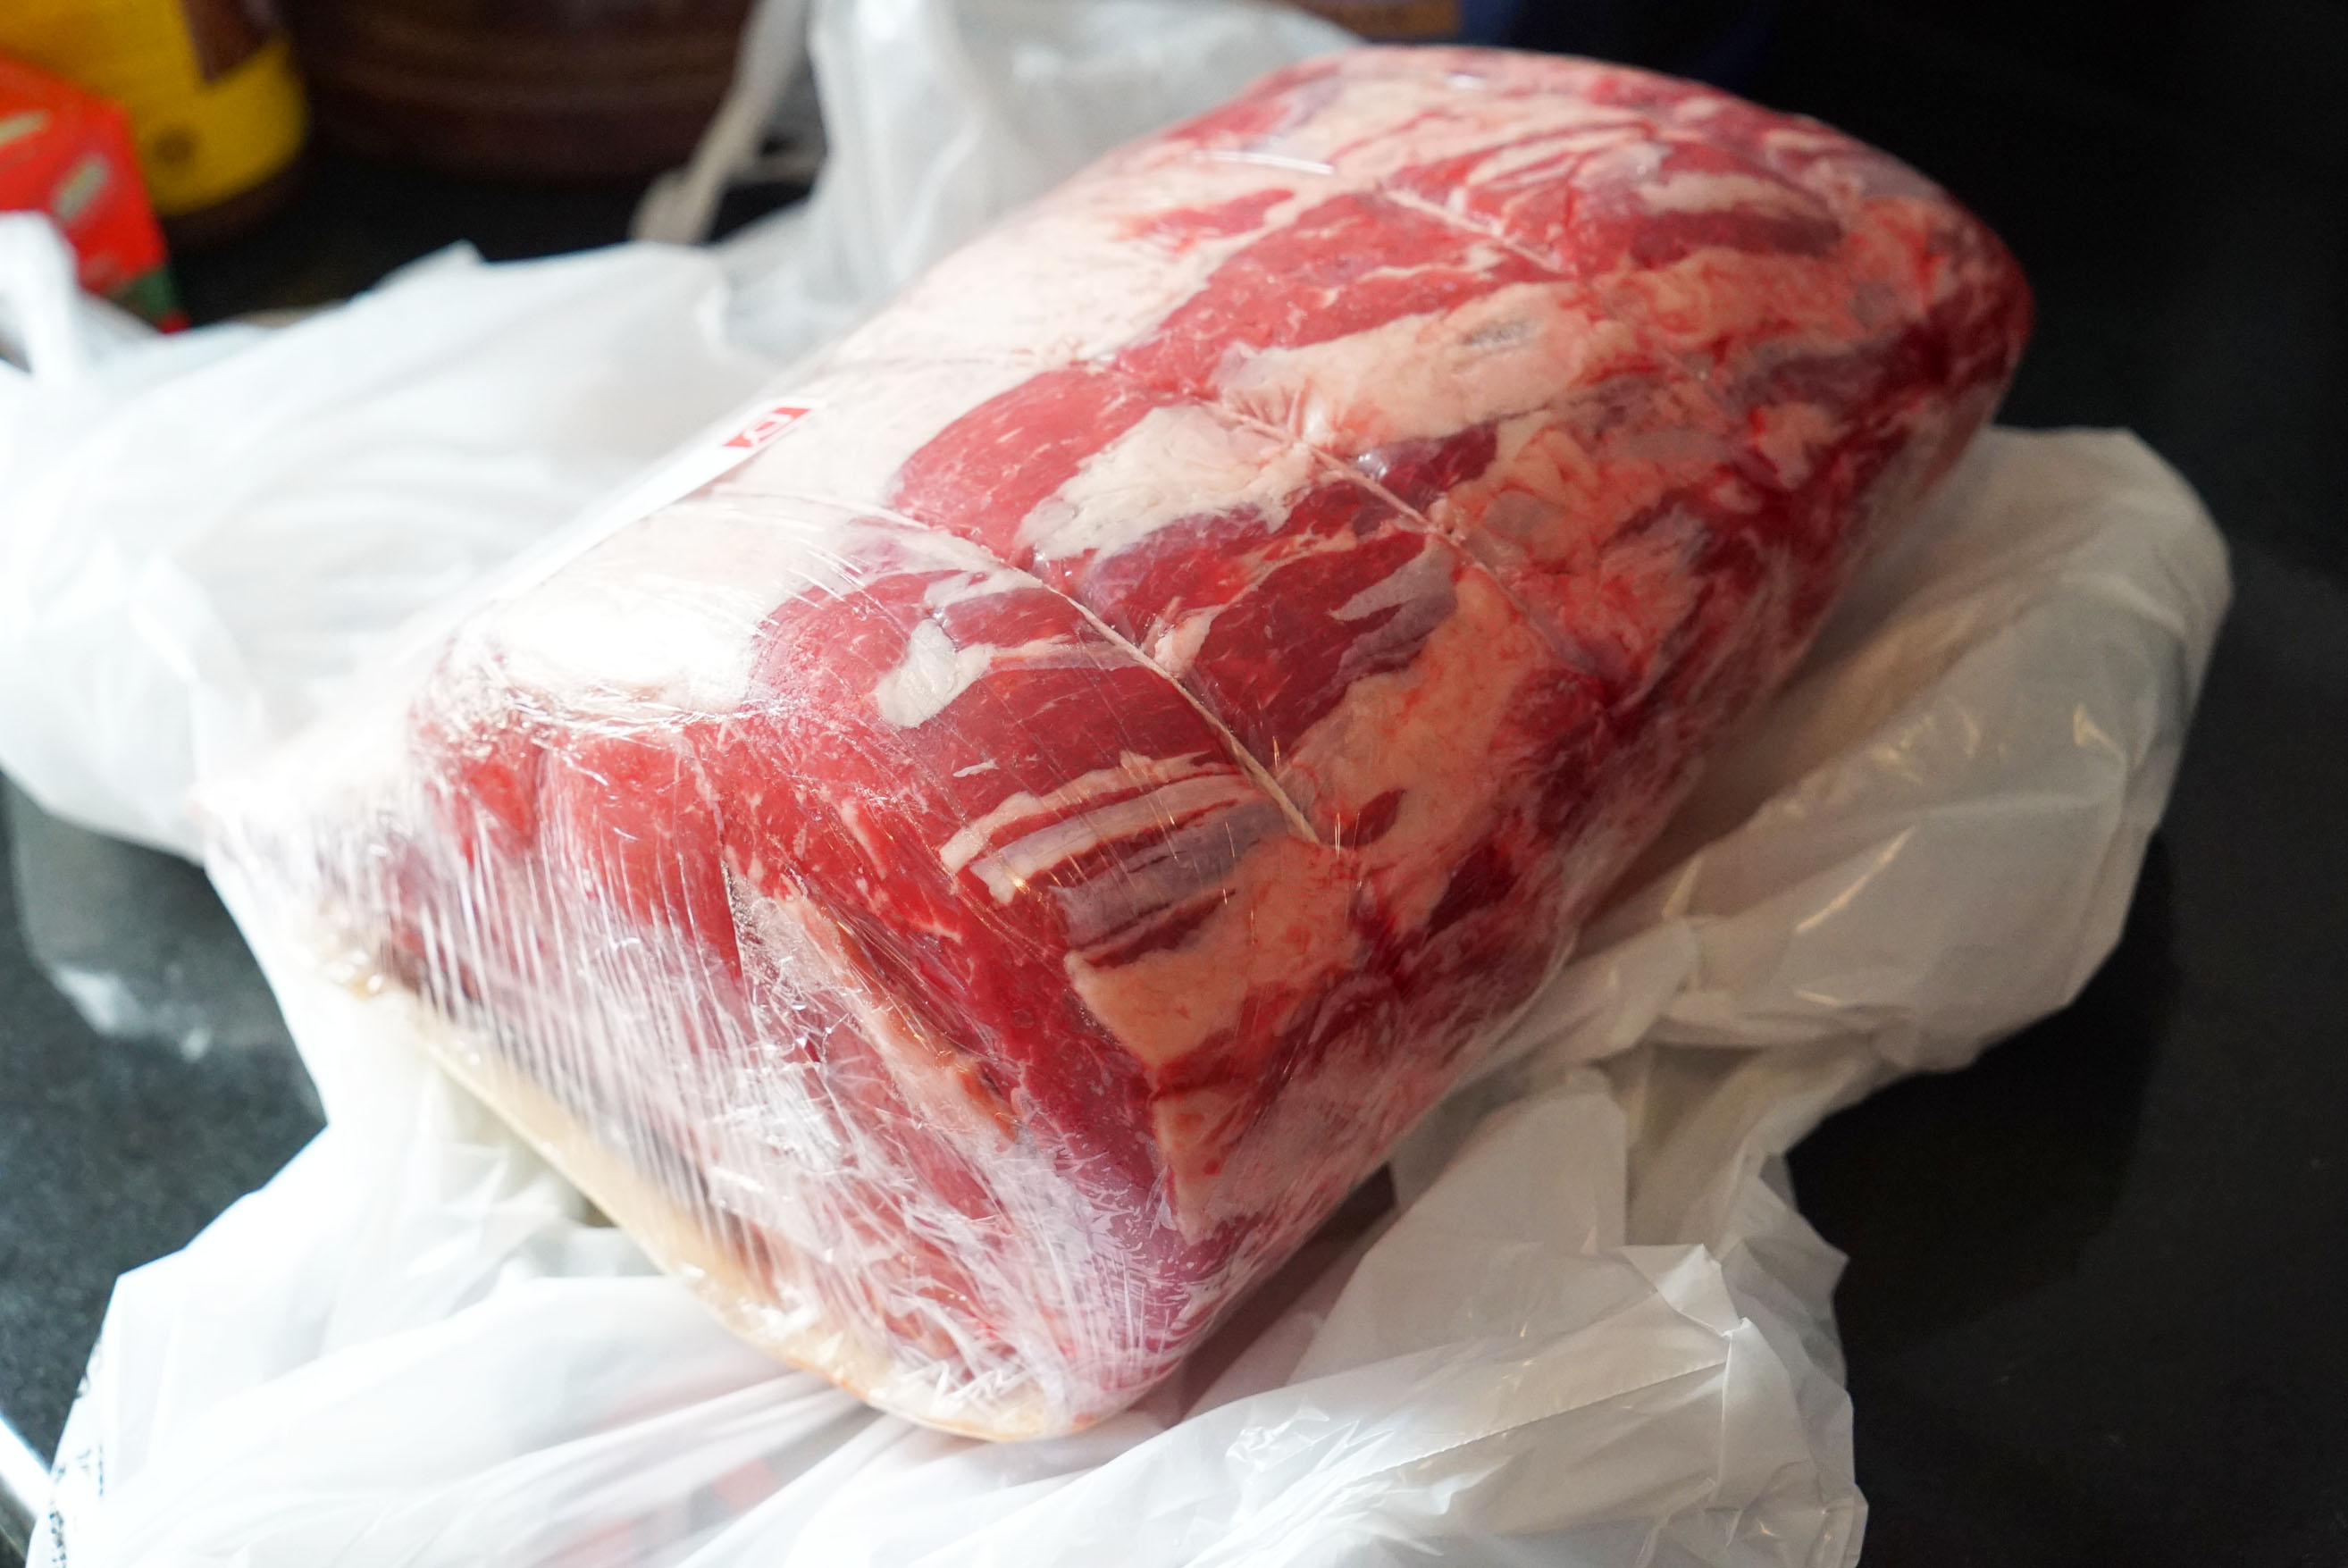
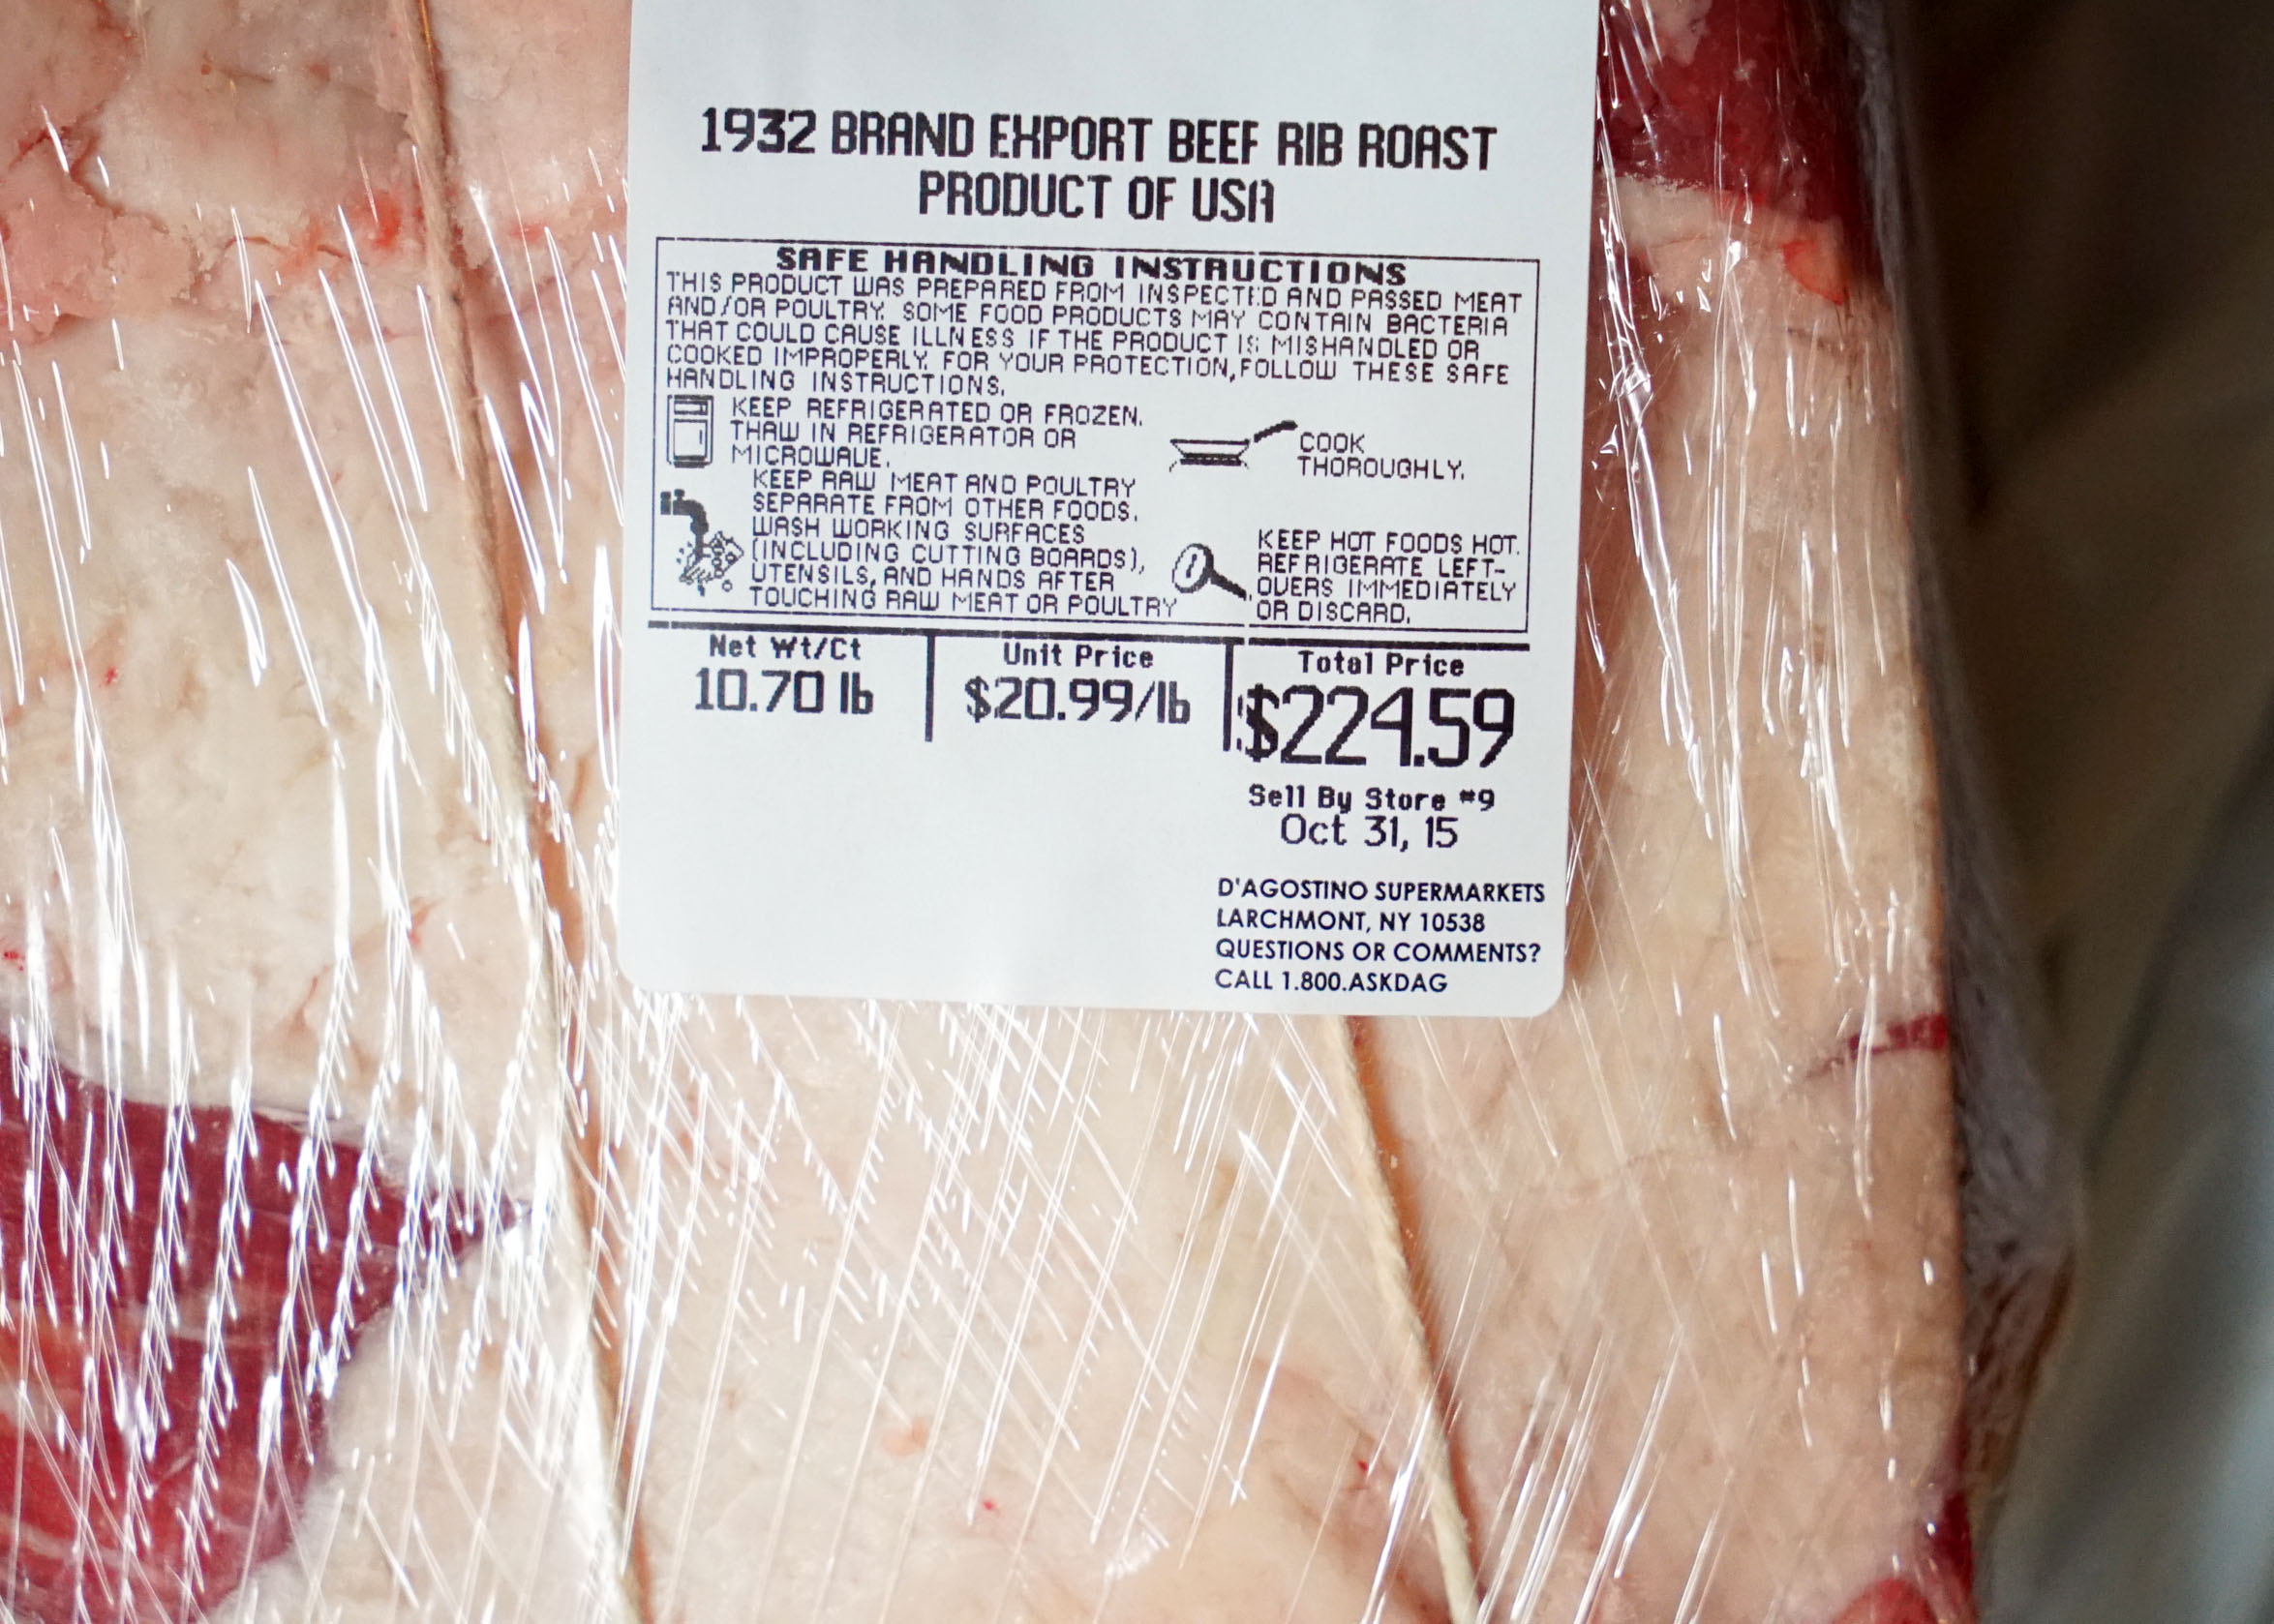
It then gets sliced out into portions for individual consumption. This is a mammoth cut that we got from Burger & Barrel:

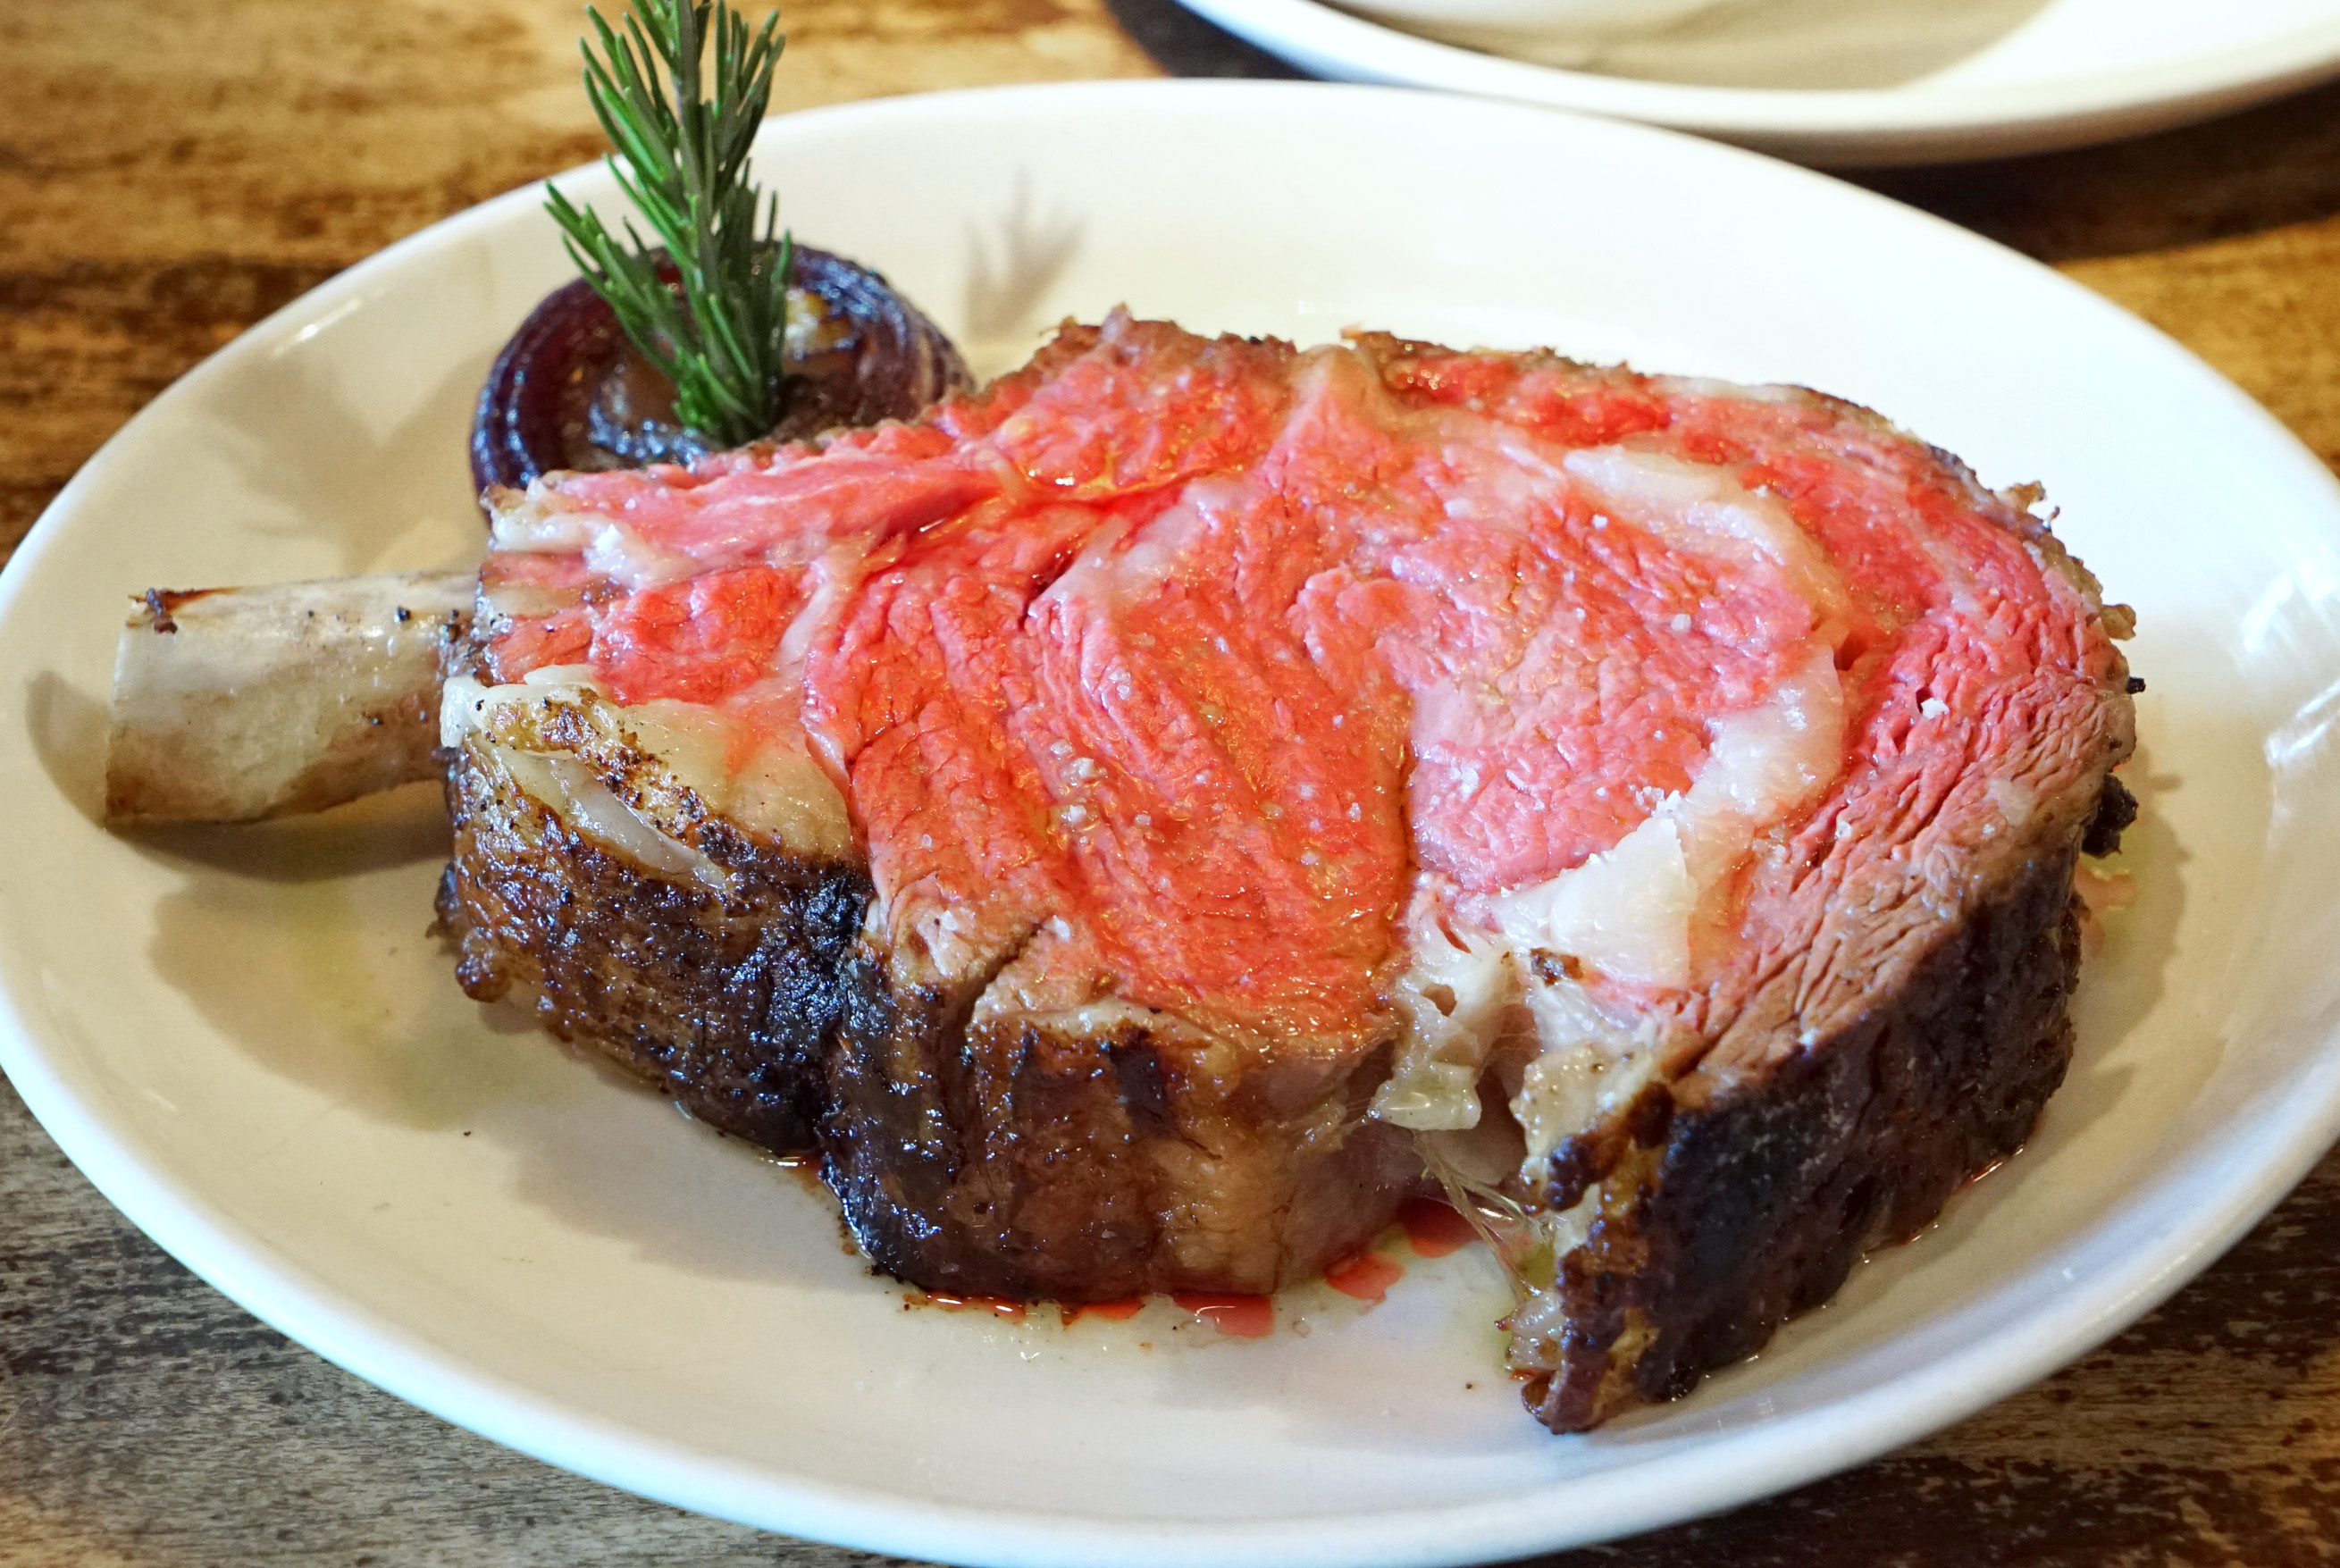
I know what you’re wondering, and the answer is Yes: Prime Rib and Rib Eye steak are the same exact thing. They are just prepared differently, using different cooking methods.

Cheaper cuts of rib steaks are actually the most common type of beef found in Philly Cheesesteaks as well. The meat is cut super thin and then cooked on a flat top with cheese, onions and other toppings, then shoved into long sandwich bread (incase you’re an asshole who has no fucking clue was a cheesesteak is).

Side Bar: is a Philly Cheesesteak better than a Cheeseburger? I think so… Man… Now I’m hungry for both…

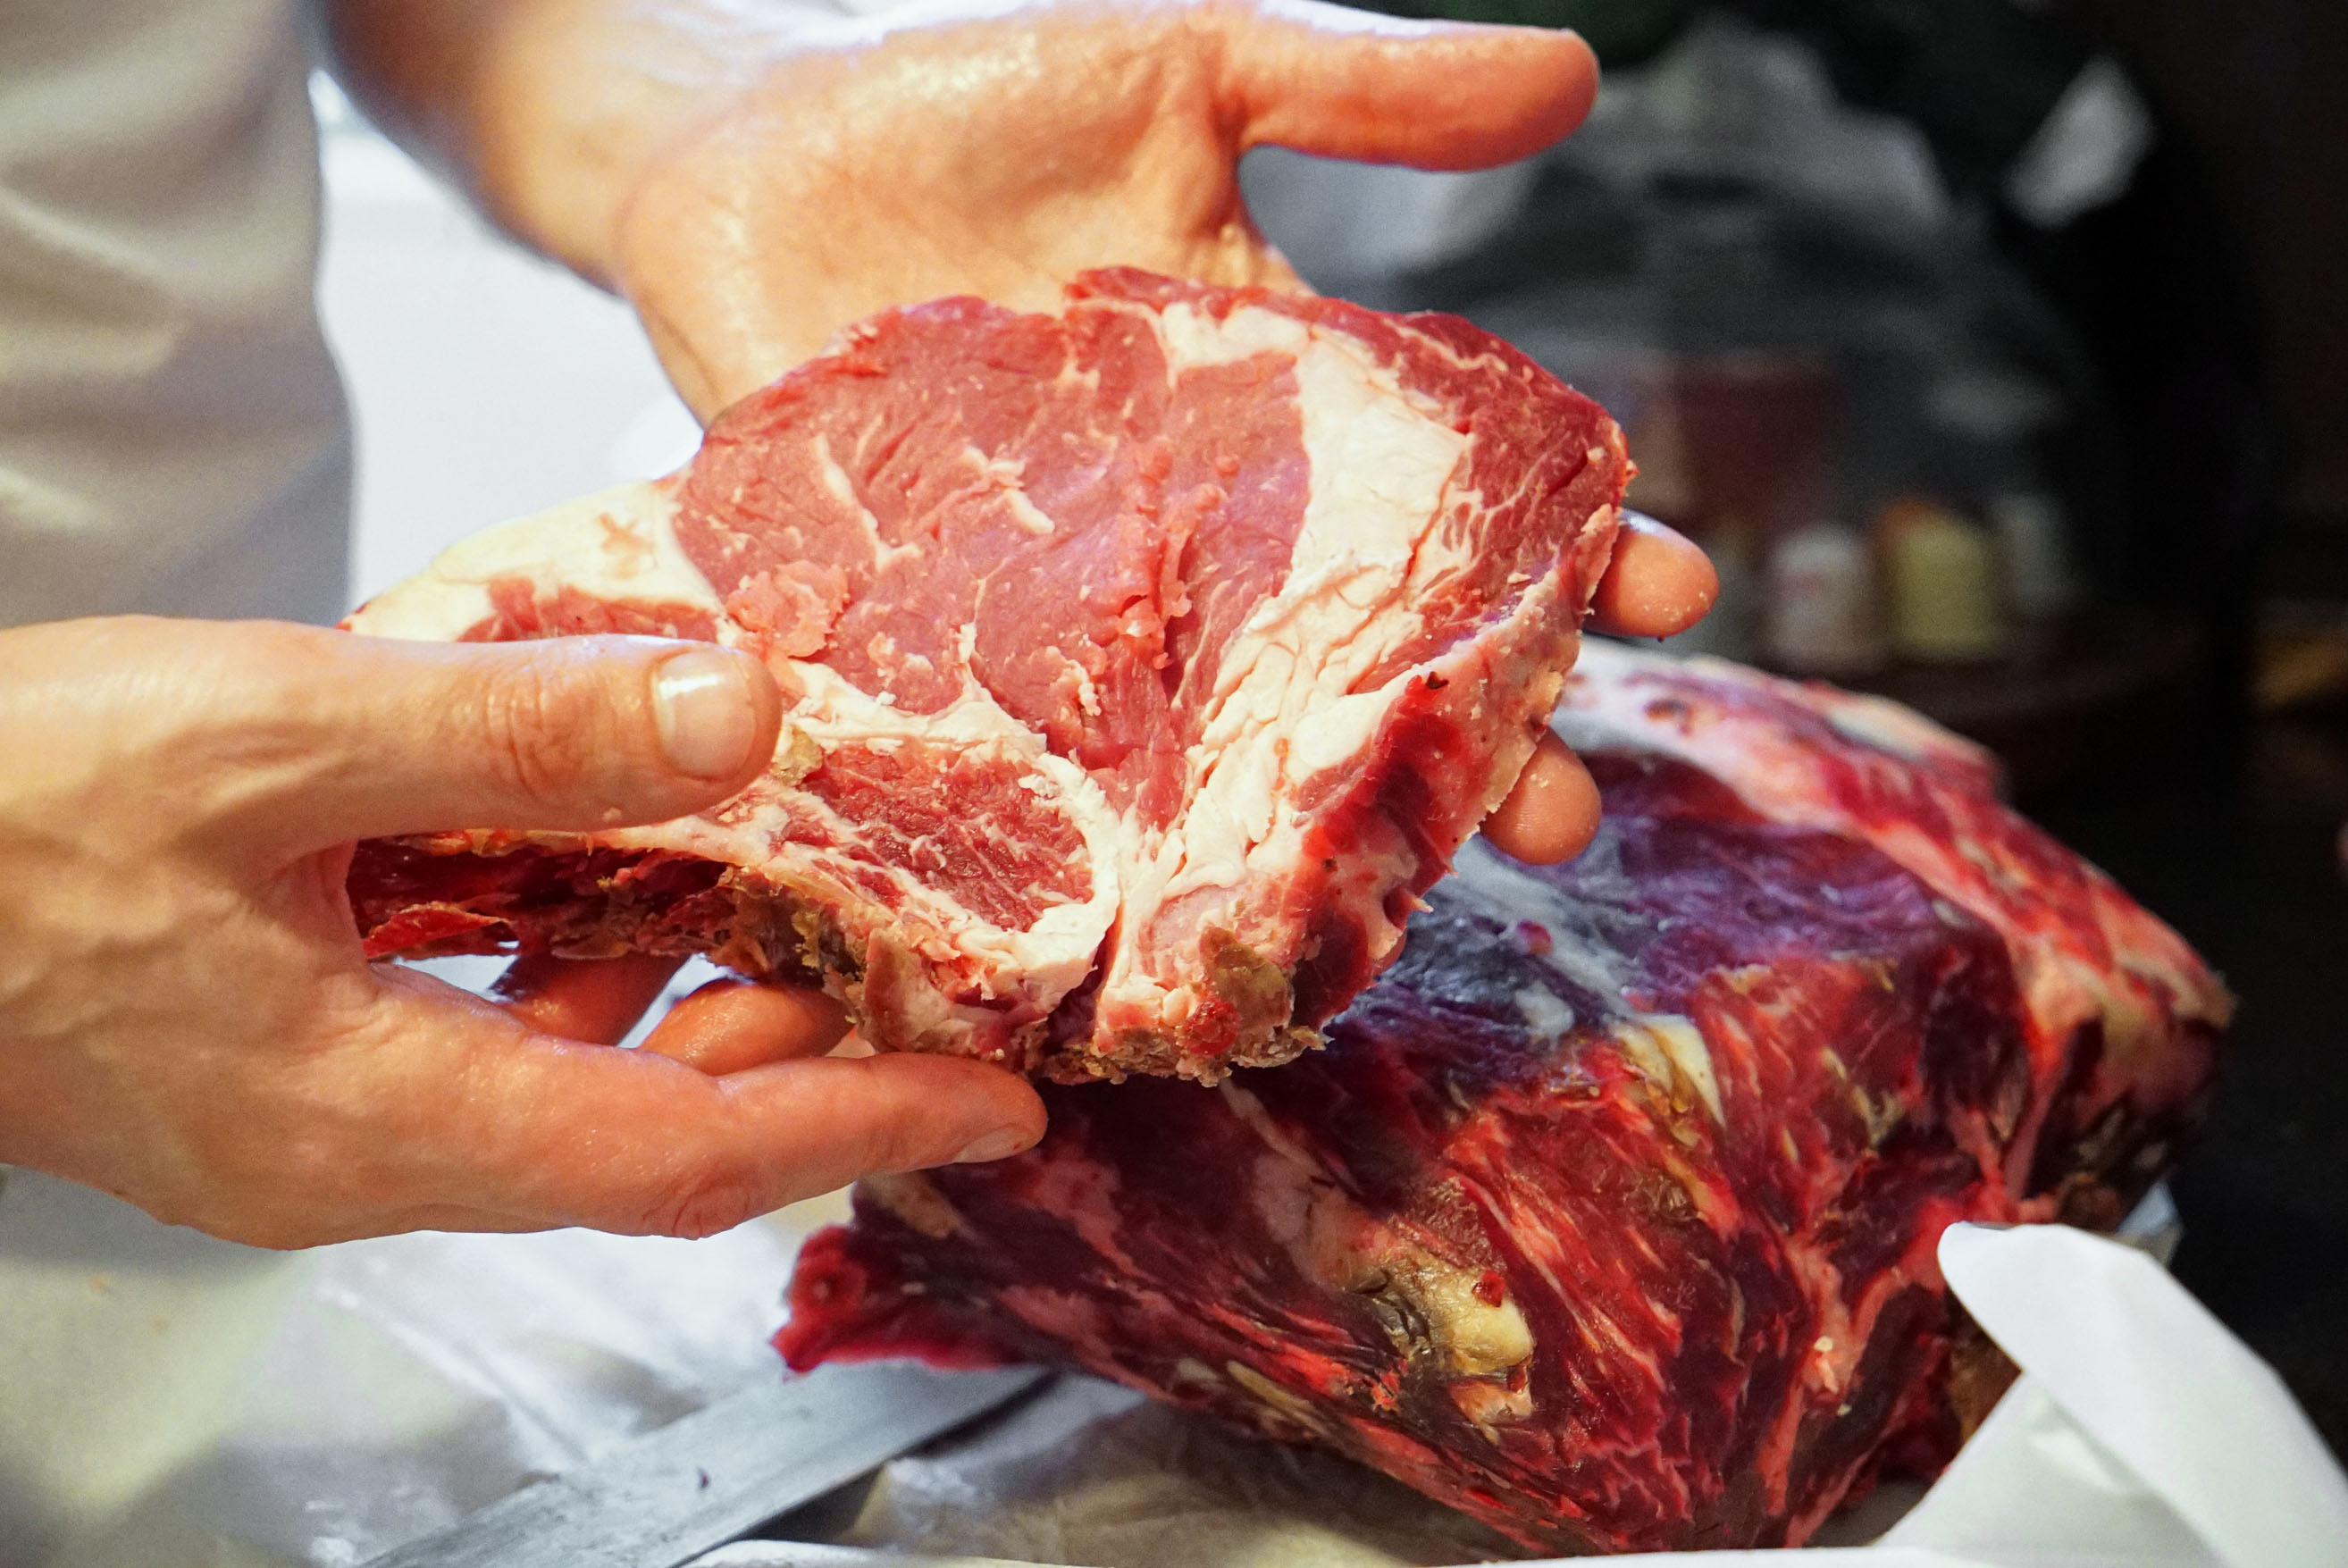
Flavor: This steak has a high fat content, and that makes it very important to have a quality cut of beef, or an aged cut of beef. In high quality and aged cuts, this fat will render out or melt away much easier during the cooking process. This will impart a tremendous amount of flavor into the steak, and it will leave the remaining flesh with a very tender and soft texture. Don’t be afraid of the fat. Fat is not the same as gristle. Fat is good. Fat is your friend. Any good butcher will get the gristle off and leave the good fat behind. And when that good fat is REALLY good, it’s like having a delicious beef jelly with each bite of steak.

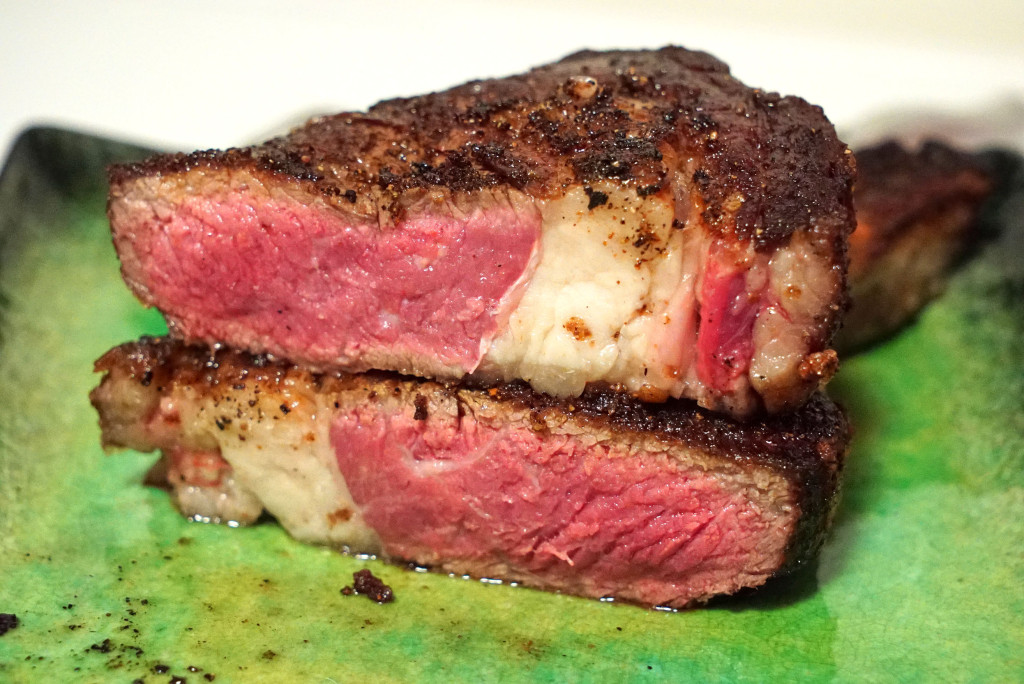
As discussed above, the Rib Eye is really like having two steaks in one (The small Spinalis or fat cap, and the larger Longissimus eye). The Spinalis is soft, tender, has lots of fat flavor and sometimes develops a crisp during cooking. The eye is more dense, but still well marbled so that it retains intense flavor. The eye is more uniform than the Spinalis. So: two steaks in one, kind of like the Porterhouse. Plus, there’s a nice, meaty beef spare rib to gnaw on at the end, if you order a bone-in chop.

Since there is generally more fat and marbling in this cut across its entirety, you will get better flavors than with the tenderloin or Strip, in my opinion. Clearly, high fat content is not for everyone. If you want to avoid fats in your diet, then go with the tenderloin. I actually really enjoy the flavor of fat. Fat, now, is sometimes referred to as the sixth flavor sensation. There were always four: (1) savory, (2) sweet, (3) bitter and (4) sour. “Umami” claims to be the fifth, and is meant to encompass the earthy, funky, fermented flavor sensations that you experience with mushrooms, truffles, aged beef and blue cheese. I just dislike the word “umami,” so I use “earthy” instead. The sixth is “fat,” apparently, as decreed by various food people who get paid to sit around and do these things. I’m not sure how it works, but I seem to be able to recognize a distinct sensation on my tastebuds, along with a buttery flavor and slippery feel, whenever I eat shit like pork bone ramen or a Rib Eye steak. Maybe there’s something to it?

Anyway, I hope this was an informative and educational post for you meat minions out there. Knowing this shit, I think, is very important.

Ramen Guide

With ramen season kicking into high gear, I suppose it’s high time that I put out a guide to ramen for all of you cold, hungry fucks out there looking to get your soup on. This should serve as your singular, all-encompassing resource for all things slurp. This is more of an informational page, clearly, so if you’ve landed here looking for my ramen reviews, you should go to the Ramen-Ate-R page, where you can read about the tremendous shitload of ramen that I’ve eaten.

There are a bunch of things you need to keep in mind when thinking about ramen. Namely, you need to think about the thickness of the broth, how the broth is made, how it is seasoned, what kind of noodles are used, the toppings, and, finally (if you’re into food knowledge), where the ramen style was developed and the history behind the dish. So let’s get into it:

BROTH THICKNESS

This is classified as either assari (light) or kotteri (rich). Assari broths are generally thin or clear, as they are typically flavored with vegetables, fish or seaweed. If animal bones are used at all, they are usually just simmered lightly for a short amount of time.

Kotteri, on the other hand, are thick and usually opaque, due to all the emulsified fats, proteins and minerals that are rendered from boiling animal bones for long periods of time. That makes them stocks, technically, not broths. Kotteri are also known as Paitan (from the Chinese). Paitan translates to white broth, which makes sense, given that they are usually cloudy in color and thick in texture.

SOUP BASE

Ramen soup bases are classified by the main ingredients that are boiled or simmered to make the soup stock (if bones are used) or broth  (if no bones are used). As expected, a stock can be made from animal bones (chicken, beef, pork, fish). But lighter broths can be made with dried seafood or kelp/seaweed (like dashi – a broth made from dried, smoked bonito flakes and kelp), and sometimes even just straight up roasted veggies and mushrooms + water.

An example I will use to illustrate here is tonkotsu. “Ton” means pork, and “kotsu” means bones. Thus, the tonkotsu ramen base is a kotteri style thick stock made from pork bones, which would then need to be seasoned with a salty or savory component, which is covered in the next section.

SEASONING

Tare or kaeshi is the seasoning – the main savory element or source of salt – that is used to flavor the ramen. Ramen seasoning comes in three major varieties: Shoyu, Shio and Miso.

Shoyu: This, simply, is soy sauce. If you didn’t know, soy sauce is made from a paste of fermented and boiled soybeans, roasted grains and seasoned water.

Shio: Sea salt. Pretty straightforward. As you can imagine, sea salt as a seasoning is nicely suited for thinner, assari style broths.

Miso: This is an earthy flavored, thick, fermented soybean paste. Seasoning with miso will almost always result in a thick, kotteri style broth, as you can see below:

NOODLES

Ramen noodles are made with wheat flour, water, salt and kansui, an alkaline water which gives the noodles their yellow color and characteristic bounce. In China, it’s more common to see ramen made with eggs instead of kansui.

Depending on the soup they’re added to, ramen noodles can range from wavy to straight, thick to thin, flat, round or square. The type of noodle selected for a bowl of ramen is based on its broth-clinging characteristics, its bounciness and its texture. For that reason, one noodle style may be better suited for a particular soup base or broth thickness than another.

Depending on the noodles used, cook times will vary as well. In addition, their ability to last for a while, soaking in the soup broth, will vary. After a few minutes certain noodles will lose their spring and bounce, and the texture will change.

Just an FYI here: if you need more noodles while you are eating, yell out kaedama!

TOPPINGS

We have a bunch of categories to discuss here. Let’s start with the most important one: meat.

Obviously if a ramen base is made with animal bones, it only makes sense to use the same animal meat as a topping for the soup. Tonkotsu should have copious amounts of kakuni (pork belly), or chashu (rolled pork loin or belly that is cooked slowly in a sweet soy and mirin sauce, stew-style, then sliced and sometimes charred or grilled afterward for texture). Clearly, chicken is a good topper for your chicken-based ramen. But some chefs get creative. For example I’ve had beef ramen that was topped with crispy beef intestines. I’ve even had chicken broth that was topped not only with chicken but with ground pork as well. Mixing is not a bad thing and it is quite common, as you’ll learn below.

In addition to meat, ramen broths also contain aromatics, such as garlic (fresh, charred, fried or fermented), onions (charred, pickled or raw), ginger (either pickled – beni shoga – or fresh), leeks (fresh or charred), scallions (usually fresh, typically sliced or shredded) and mushrooms (both dried and fresh, and a ton of different types). These can also be incorporated into the creation of the soup base at the start, not just as toppings that are added at the time of serving.

Other common toppings include seasoned soft boiled or hard boiled eggs, sliced fish cakes (naruto), bamboo shoots, corn, cabbage, seaweed, bean sprouts, spice pastes, butter and various oils, such as chili oil, onion oil, pepper oil, garlic oil or sesame oil (and certainly sesame seeds, too, for that matter).

On many occasions, the toppings you see will depend on the region in Japan from which the ramen hails.

REGIONAL STYLES

Japanese ramen varies greatly by region. Some areas focus on thinner fish- and seaweed-based broths, while others tend to be hearty and thick animal bone soups. I’ve highlighted some of the regional styles below, alphabetically:

Akayu: A sweet and mild ramen soup is topped with a spicy dollup of miso mixed with chili and garlic. Chewy, thick, wavy noodles grace this style, and it is usually served with powdered seaweed as well.

Asahikawa: Asahikawa is Hokkaido’s second-largest city, and is located at the base of the mountains in the middle of the island. Its ramen is a mix of chicken, pork and seafood broth, with a shoyu base. The soup is topped with a layer of melted pork fat to seal in the soup’s heat in the colder months, as well as pork meat, bamboo shoots and scallions.

Hakata: Also known as Nagahama ramen, this style comes from Fukuoka, a prefecture in Japan’s southern island of Kyushu, which is famous for its pork dishes. This is my favorite of ramen styles, because it is a thick, fatty, pork bone broth with thin, al-dente noodles. Toppings usually include sesame seeds, pink pickled ginger and fried garlic.

Hakodate: Ramen arrived in Hakodate from China. The soup is thin and light, and the shio-seasoned broth had a mild pork and chicken base. Noodles are usually soft, with toppings like roast pork, bamboo shoots, scallions, nori, fish cakes and spinach.

Kagoshima: Kagoshima is known for its Berkshire pork-like black pigs, yet the ramen is a mild mix of both veggies and chicken, combined with the black pork bone stock. The broth then gets finished off with burnt onions and seasoned with soy sauce. The noodles are soft, and toppings consist of pork meat (obviously), scallions, wood ear mushrooms (kikurage) and bean sprouts.

Kitakata: Kitakata is famous for a clean, light soy-based breakfast soup. In the bowl there’s usually a serving of chewy, wide, flat and curly hand-cut noodles with pork, scallions and bamboo shoots.

Kumamoto: When tonkotsu ramen arrived in Kumamoto prefecture from Kurume, the locals started cutting it with chicken broth. It’s also served with straight noodles, though they’re softer and thicker than the Kurume style. Most bowls have pickled mustard greens, sliced wood-ear mushrooms, bean sprouts, and cabbage on top, but the unique thing about Kumamoto ramen is the use of garlic. You’ll see fried garlic chips and mayu, the black liquid made from garlic that’s been burned in sesame oil. That shit is delicious.

Kurume: This town on the southern island of Kyushu is the birthplace of tonkotsu. Melted bone marrow, fried lard, sesame seeds, pickled ginger and garlic give Kurume ramen a unique and pungent style. Toppings include pork meat, scallions, nori, and spicy mustard greens, in addition to those just mentioned above.

Kyoto: Kyoto’s home to two distinct types of ramen: a thinner assari shoyu ramen, and a thick kotteri chicken soup. The thin version is a blend of pork and chicken broth, with a dark soy base. The thick version is a rich porridge-like chicken soup, topped with garlic, spicy bean paste, chives and odoriferous local onions called kujnoegi. Both are seasoned with shoyu, but the toppings vary for each.

Nagoya “Taiwan” Ramen: “Taiwan Ramen” is Nagoya’s reimagined version of Taiwanese danzimian, which has lots of ground pork, Chinese chives, hot peppers, green onions and garlic. This shit is for people who like spicy soup.

Onomichi: Take a bit of pork, a heap of chicken, some local seafood and a big mess of lard and you’ve got Onomichi ramen. The soup has a shoyu base and is served with chewy, homemade, wavy, flat noodles. It’s usually topped with roast pork, bamboo shoots, scallions and pork fat.

Sapporo: Sapporo-style ramen hails from Japan’s northernmost province, Hokkaido, which is the birthplace of miso ramen. Sapporo miso ramen generally has thick, strong noodles and is commonly topped with bean sprouts, sweet corn, cabbage and ground pork. Soft boiled eggs and thick slices of chashu pork are also common, as well as pats of butter.

Shirakawa: This town developed a refined ramen typified by light, simple soup and hand pulled noodles. It features a shoyu broth, but local mineral ­water makes for springy noodles with a good chew. Toppings include roast pork, bamboo shoots, fish cake, scallions, seaweed, spinach and even wontons.

Tokushima: Shikoku is the smallest of Japan’s four main islands, and udon is the preferred noodle. But Tokushima prefecture has an aged, extra strong shoyu soup that originated with tonkotsu stocks made from leftover pork bones from nearby ham factories. This is similar to Wakayama ramen. Ramen shops here will add a few strips of thinly sliced pork belly and break a raw egg on top. Tokushima ramen is sometimes divided into “yellow,” “black,” and “white” styles (how racist) of varying strengths. Other toppings for this ramen consist of scallions, bamboo shoots and bean sprouts.

Tokyo: This ramen is usually made with pork and chicken broth and typically features slightly curly, somewhat wide noodles. Very often in Toyko you’ll find broths that are flavored with dashi (broth made from aged bonito flakes and sea kelp). This style of ramen is generally seasoned with shoyu and has a medium-thickness. It’s similar to Yokohama ramen, though that tends to be heavier and meatier than the dashi broths of Tokyo ramen.

Tsubame-Sanjo: The cities of Tsubame and Sanjo are in a freezing cold area, and the ramen from this spot is bizarre and unhealthy. The hearty stock is made of chicken, sardines and pork bones, and the bowls are blasted with tons of pork fat (common in soups from the colder climates). There’s thick, flat noodles in this shoyu-based soup, and toppings include pork meat, bamboo shoots and lots of chopped white onions.

Wakayama: This is the median between thick, rich tonkotsu, and thin, clear broth. Wakayama ramen has a strong shoyu tare seasoning with a long-simmered tonkotsu base. The noodles resemble the thin, firm and long threads of Hakata style ramen, but you also get fish cakes like those in Tokyo style ramen. These soups are also topped with the seemingly ever-present and most common of toppings: roast pork, scallions and bamboo shoots.

Yokohama Ie-Kei: Yokohama is known for ie-kei ramen, a viscous, salty, and fatty tonkotsu shoyu style of ramen. When ordering, diners can designate how firm they want their noodles, the amount of fat they like on top, and the saltiness or strength of the soup. This is my kind of ramen – catering specifically to each unique diner. The toppings for this style of ramen usually include sheets of nori (seaweed paper), spinach, garlic, spicy bean paste and ginger.

RAMEN-LIKE DISHES

Although these dishes are not quite ramen, they’ll still be able to satisfy the most intense need for a ramen fix.

Abura Soba: The name of this soupless noodle dish translates to “oil noodles.” It consists of cooked ramen noodles dressed with flavored oil and tare (usually shoyu). It often comes topped with an egg, and diners are meant to stir everything together in the bowl to form a creamy, fatty, thickened sauce. One can also add vinegar, chili oil and other shit before slurping. Hot peppers, mayonnaise, fried noodles, chopped garlic and pork fat are also crowd favorites to add in.

Chanpon: This originated in Nagasaki and is made by boiling thick noodles directly in a thick pork and seafood soup. It’s viscous, and eats more like stew than ramen.

Hiyashi Chuka: This literally means “cold Chinese.” As such it’s a dish made with cold ramen noodles and various toppings like fried egg, ham, carrot, cucumber and chicken. It is usually dressed in a light soy-vinegar sauce. I’ve even seen fish sauce used in some versions around NYC.

Mazemen: This is a hearty “dry” ramen, characterized by thick noodles and weird toppings like cheese. Similar to Abura Soba, this is essentially cooked noodles with a small amount of strongly flavored sauce on the side for dipping. Toppings and sauces can vary a great deal, and are often experimental in nature.

Tantan-Men: This is an off-shoot of Chinese dandan noodles. Based on a pork broth, it comes with a scoop of heavily spiced ground pork and is generally served with bok choy and/or spinach.

Tsukemen: This, like Mazemen, is also a “dipping” ramen. Cold, undressed (nekkit) noodles are served alongside a hot, concentrated ramen broth. You dip the noodles into a bowl of broth as you eat, grabbing the toppings whenever you choose to.

Yakisoba: This is the Japanese version of Chinese fried noodles. It’s made with egg noodles that get stir-fried with veggies and occasionally meat or seafood. This shit then gets hit with a Worcestershire style anchovy and vegetable sauce. It’s often topped with shaved bonito flakes and pickled ginger (beni shoga).

FUSION RAMEN

All around NYC we are seeing various kinds of fusion ramen items being offered, which makes a lot of sense given that the history of ramen in Japan involves a lot of Japanese-Chinese fusion.

However some of the more wild examples I’ve seen in NYC include:

Korean-inspired kimchi ramen (Mokbar):

Thai green curry ramen (Bassanova):

Flavors common to Burmese cuisine that feature coconut milk in the broth base (Tabata):

Indian-inspired massaman curry ramen, even complete with potatoes and carrots and (Yasha):

Italian spaghetti ramen, with pepper oil, arugula and crispy porchetta (Maialino):

Thanksgiving turkey ramen, with gravy, mushrooms, stuffing and cranberries, of course (Talde):

And Jamaican jerk chicken ramen (Miss Lily’s 9A):

There are even ramen burgers (L&L Drive Inn, among others)…

…and now ramen cake (courtesy of my wife, The Cake Dealer).

So that about does it here. If ramen isn’t your thing, but soup most definitely IS your thing, as a general matter, then there’s always pho, bun bo hue and laksa out there to soothe your hot soup needs in the cold winter weather that’s about to strike.

Wine Pairing Website Resource

A gentleman named Derek over at Wine.net reached out to me and asked if I’d feature his post on pairing white wines with steak. I know what you’re thinking: BLASPHEMY! RED goes with steak! But hang on a second… Chef John at The Pines recently paired a very white-esque rose with a Denver cut blade steak…

DSC08644

DSC08655

So is it really that absurd? After reading the post at Wine.net, and after my experience at The Pines, I don’t think it is anymore. Whatever works, right?

DSC09001_2

Anyway, upon further browsing the Wine.net website, I realized it was probably a worthy resource to share with my readers. So there you have it. Go poke around, especially if you’re a wine connoisseur. Shit, even if you’re an amateur like me, or just looking for something like what wine to pair with your Thanksgiving turkey dinner, this is a great resource. Check it out.

Scotch & Whiskey

This page is dedicated to the greatest liquor around: whiskey. Aside from a dirty, dry, gin martini, a glass of scotch and/or whiskey is probably the greatest thing to happen to the male sex since the discovery of female tits, ass and vagina. Read and learn all about these great accompaniments to dinner.

You may sometimes see it spelled “whisky,” or generically (and often erroneously) referred to as “scotch.” You might also see scotch lumped in with things like bourbon or rye. Shit, you’ll even see single malts confused with blends. But words have meanings, my friends, and this is where you will learn them, and where you will find my opinions about which are the best.

Terminology

Whiskey/Whisky: Whisky is alcohol that’s been distilled from fermented grain mash. All whiskey must be distilled at a minimum of 40% and a maximum of 94.8% ABV. The spelling is generally different based on which country it is from. A nice rule of thumb is that countries that do not have an E in their name do not spell whisky with an E. Examples: Scotland/Japan = Whisky; America/Ireland = Whiskey

Where Brooklyn at???

Grain Whisky: Whisky made, at least in part, from grains other than malted barley.

Malt Whisky: Whisky made primarily from malted barley.

Irish Whiskey: Yup, you guessed it… whiskey made in Ireland. It must be distilled to an ABV of less than 94.8%. Additional rules are that it must be aged three or more years in wooden barrels, and if two or more distillates are used the whiskey must be labeled as a “blend.”

DSC01237

Scotch: The mash must be barley, it must be from Scotland, and it must be aged in oak barrels for three or more years at an ABV of less than 94.8%. Pretty simple.

Single Malt: Essentially this just means that the whisky is a product of a single distillery.  A single-malt Laphroaig may contain whisky from many barrels produced at their distillery, but it must contain whisky produced only at Laphroaig.

Blended Malt: Also known as vatted malts, these are a blend of single malts from two or more distilleries.

Single Grain: Very misleading. It means barley and one or more other cereal grains were used, produced only at a single distillery (similar to single malt).

Blended Grain: Blend of single grains from two or more distilleries.

Blended Scotch Whisky: A mix of both single malt whisky and single grain whisky, sourced from several different distilleries.

DSC01253

Single Barrel: This is a whisky from a single barrel, unmixed with other barrels. Very rare.

Bourbon: Grain mix must be at least 51% corn, and bourbons are from the USA and aged in new charred oak barrels. Straight bourbon is a bourbon that has aged two or more years. While most bourbon is made in Kentucky, it is not a requirement. Bourbon can be no more than 80% alcohol (160 proof) and no more than 62.5% when put into casks for aging in new charred oak barrels.

Tennessee Whiskey: Straight bourbon made in Tennessee and filtered through charcoal.

Rye: In Canada, there must be some rye in the mash. In the USA, however, there must be at least 51% rye in the mash, and they must be aged in new charred oak barrels. Like bourbon, straight rye is a rye that has aged two or more years. Rye can be no more than 80% alcohol (160 proof) and no more than 62.5% when put into casks for aging in new charred oak barrels.

Personal Preferences

I have two distinct likes when it comes to scotch. I enjoy the extremes of the spectrum: creamy and sweet like butterscotch, and super medicinal and peaty.

Let’s start with the peaty ones: Laphroaig 10 is like baseball glove leather, and I mean that in the best way possible. Very smokey and definitely an acquired taste. I absolutely love it.

DSC01242

That, Ardbeg (both the 10 year and the Corryvreckan) and Lagavulin are my favorite of the smokey, peaty varieties.

DSC01241

I have a great book called “Michael Jacksons Complete Guide to Single Malt Scotch” that I found to be very useful (Not Jacko – some other dude). It also rates them out of 100. Lagavulin 16 (their most common) gets like 96/100. That’s pretty fucking amazing for a bottle that typically costs $75-$100 (depending on how hard you are being raped in cities). Tasting anything higher ranked is going to cost you a shitload of scratch. In fact, I don’t think I’ve tasted anything rated higher than Lagavulin. Get it. It’s fucking totally mint.

For the smoother types: I like Macallan 18, Glenlivet 21, Balvenie Double Wood 12, and Glenmorangie 18.

DSC01239

That Glenlivet 21 is as clean as a freshly shaved snatch too, assuming there was a shower taken afterwards, and no STDs or weird rashes… One Christmas Eve I drank nearly half a bottle of GL21 and had no hangover whatsoever the next morning. Happy Birthday Jesus!!! The smoothies I listed here are all a bit more expensive (though Balvenie is not) but well worth it.

DSC01250

The Macallan and Glen Livet 12 years are nice to start with if you’d like to try something smooth as well, but I prefer the Balvenie Double Wood by far at that price point. They call it “double wood” because it has two hard cocks. No… because it is aged for most years in oak casks, but then finished in sherry casks, so it has a unique flavor.

DSC01240

Scotch Flavor Map

I came across this pretty cool chart thing a while back, and kept it handy for quick reference. This gives you a little visual of the flavor profiles people often discuss with scotch:

Map
From http://www.foodrepublic.com/2012/01/03/all-hail-scottish-whisky-flavour-map

Regions of Scotch Production

There are essentially four main regions of scotch production in Scotland, and each region has flavors that are often typically associated with their scotches.

Speyside: fruity and delicate. The valley of the river Spey is often associated with flavors like vanilla, honey, apples and pears.

Lowlands: fresh, light. These malts are fragrant, floral, taste of cereal and are light in color.

Highlands: smooth and floral. In the west, you have some maritime influence in the flavor, and in the central highlands you get some honey and heather.

Islay/Skye Islands: peaty and briny. These robust malts are laden with the medicinal / iodine aromas of the sea.

Drinking Tips

One thing I like to do: drink the first half of my glass neat, then throw one or two ice cubes in and allow the flavors to change. It’s like having two different glasses of scotch in one, because the ice and water allow the scotch to open up (kind of like wine), and different aromas and flavors can be more easily detected.

DSC01243

The ice sphere is so much cooler than the ice cube. The ice cube is such a square.

Another cool thing I learned at a tasting: splash a little scotch on the palm of your hand and rub your hands together like Mr. Miyagi. Then smell your hands. All sorts of aromas are unleashed. You’ll smell florals, vanillas, nuts, wood, etc. Very cool.

An interesting trick: suck air in through your teeth as you have some scotch in your mouth and on your tongue. The break-up and aeration of the liquid will release aromas and flavors that you might have otherwise missed.

Most important: take your time. I sometimes see scotch amateurs order a nice scotch and then shoot it fast. What a waste! Don’t be that fucking guy.

Organize a tasting: maximize your exposure to various scotches. If you’re anything like me, you have a bunch of buddies who love to drink. Chances are, a good crew of them dig scotch. Call them up and organize a scotch tasting. Everyone can bring their stash and you’ll have a really big selection to work with. Check out this selection we amassed last Christmas. Fuck yeah! I think we had 30 bottles total when a last minute arrival showed up, and it was something he brought back from China. Sweet!

1503256_10152024526138592_1458127122_n

A final note: scotch isn’t for everyone. Some people just don’t like this shit. Tastes are subjective, but tastes do change over time. I always hated tequila, for instance. But I respect the spirit and understand how tons of variety exists in the product lines. In fact I’ve recently started to come around to tequila through my enjoyment of aged mezcal. Maybe you’ll come around to scotch if your first impression is bad. Keep trying. You never know – your taste buds might have adjusted and now you might love scotch if you tried some good ones.

Other Resources

For a more in-depth dive into terminology, check out THIS SITE. Start at A, and work your way through Z. Do it. Don’t be a bitch.

Www.Maltmadness.com is a great resource, as is www.Malts.com. Whisky Magazine (out of the UK) is fantastic as well, also online at www.WhiskyMag.com.

You should also check out my post on the Whisky Advent Calendar. Needless to say that was a great December – a December to remember for sure.

day 24: master of malt 50 yr speyside (3rd edition)

Smoking Pipe Tobacco

Something that many discerning men enjoy after a steak is scotch. But these days, there are a dwindling few who have a chance to partake in the OTHER delight of a post-steak meal: a good smoke. Whether you’re a cigar or a pipe guy, or even one of those ridiculous e-cigarette fanatics, NYC has pretty much fucked your world when it comes to lighting up at the table as you wait for the bill.

Look – I get it – no one wants to go home smelling like an ash tray. And by now it’s old news that NYC has a ban on smoking in food establishments. There are a precious handful of places where you can still smoke, but there’s one thing I always thought was unfair about the smoking ban: PIPES SMELL AWESOME!

Pipe smoking is real altruism: I know it’s bad for me, but you’re getting enjoyment from it because the smoke smells fucking fantastic. I’m not really a cigar guy. Occasionally I will have one. I’m not really a cigarette person, either. If I’m out drinking and a friend offers, I might smoke one to be social. Generally cigars and cigarettes smell like shit to me, and they don’t taste all that great to boot. I DO like a clove cigarette, on occasion. And I DO like pipe tobacco. Those both taste and smell excellent, and typically neither product gets inhaled, so they’re slightly better for you than a cigarette. I guess mouth cancer is less shitty than lung cancer.

Why pipes, though? Who gets into that kind of thing? People who want to look distinguished, that’s who.

DSCF5700

OLYMPUS DIGITAL CAMERA

pipe portrait

I began my foray into pipe smoking sometime in 2003 or 2004. A friend sent over a random video of himself and a friend – set to classy jazz music of course – puffing away on a long churchwarden pipe like some kind of hobbit.

A churchwarden pipe, by the way, is named so because men who kept watch over churches at night (wardens of the church) would often want a long-stemmed pipe that they could rest on their belly as they sat back in a chair.

DSC08282

DSC08283

OLYMPUS DIGITAL CAMERA

Anyway I saw that video from my friend and I laughed. But I thought, “This is actually pretty fucking cool. I need to get one now.” In fact a small group of us all picked up some pipes soon after, and we started a club called the Aromatic Embers Pipe Smoking Club.

pipers

k-pipe

DSCF1936

OLYMPUS DIGITAL CAMERA

It was great! Every week we would meet at a local Starbucks and puff away in the outdoor seating area.

OLYMPUS DIGITAL CAMERA

OLYMPUS DIGITAL CAMERA

Without fail people would comment about how great it smelled. We had membership cards, a nice logo, and we were even in the process of building a website.

DSC08299

webpage

So here are a few things you’ll need to know about pipe smoking, that way you’re ready to rock when you decide to take up this healthy and enjoyable habit.

Types of Pipe Tobacco

Astoundingly similar to scotch, pipe tobacco can vary from smoky like baseball glove leather, to sweet like caramel. In fact I often pair a smoky scotch with something like a Latakia tobacco, which has the similar medicinal, iodine-y aroma of peat moss mixed with leather.

DSC08319

Those types of tobaccos are generally less pleasant to smell when burning, but they’re still not as noxious as a cigar or cigarette. They’re not UNpleasant by any means; they just have a characteristic odor that takes a little getting used to.

DSC08325

Other tobaccos are infused with flavorings and even sugars to make them taste different or become very aromatic and scented when burning. It’s as if you’re burning a nice-smelling candle in the room. The smoke does tend to cling, though, so make sure you have good air circulation. If not, you may soon find yourself wading through a thick fog of pipe smoke. Here’s a more specific look at the various types of tobacco:

Major Breakdown of Tobacco Styles

Aromatic: During the manufacturing process, flavors or “casings” are added to the tobacco, as mentioned above. Some of the most common are vanilla, nougat, cherry and chocolate. Depending on the amount of flavor used, a blend in this category can also be deemed semi- or lightly-aromatic.

Non Aromatic: Natural tobaccos that derive flavors, in many cases, through aging, curing, smoking or fermenting. This technique increases the sweetness and/or flavor without using sugar additives.

English Blend: Until 1986, additives were not allowed in English tobaccos. While non-aromatic tobaccos are manufactured all over the world, a true English blend is one containing Oriental tobaccos, most notably Latakia. The most common English blends consist of Latakia, Virginia, and Perique. Depending on how much Latakia is mixed into the blend ultimately determines the overall strength of the mixture, described as mild-, medium-, or full-bodied.

Blending Tobaccos

These tobaccos are often blended together to form different flavor profiles in commercially packaged and loose pipe tobaccos.

Virginia: This is the most common and mildest of all aromatic blending tobaccos. With the highest natural sugar content, it can burn hot and “bubble” or boil while smoldering in the pipe bowl. It lights  up easily, and has a sweet taste, which increases when aged prior to blending. It is sometimes sticky or damp.

Burley: This has a thicker leaf than Virginia, with a soft, nutty flavor. It burns slowly and contains little sugar. As such it is commonly used in high sugar blends to keep them from burning too hot. The color ranges from mahogany to light brown, and is typically air-cured for 30-60 days in large barns.

Spice or Taste Tobaccos

These are blending tobaccos that are used like seasonings. You add a particular amount to your blend to give it a characteristic flavor or unique kick. Examples would include varieties like Perique, Brazil, Kentucky, Oriental and Latakia. These are all commonly found in English blends.

Perique: This is a dark tobacco from St. James, Louisiana that’s spicy in flavor. It is a rare, slow burning and strong-tasting tobacco. Production is small, so its value is high. Perique’s cured leaves are put in large oak barrels under heavy pressure and fermented for a year or longer. The aroma is full bodied. The nicotine content is very high, so Perique isn’t smoked by itself. The most you usually see in a blend is about 5 %, and it’s usually mixed with Virginia.

Brazil: A dark tobacco with a strong, sweet flavor.

Kentucky: This is actually a special fire-cured Burley tobacco produced in Kentucky. It’s very aromatic and unique. The nicotine content tends to be high, so it is used sparingly.

Oriental: A generalized grouping of dry tobaccos that includes Latakia and is known for unique “spice” flavors. Tobaccos in this category come from Russia, Macedonia, Turkey, Greece, Cyprus, the Balkans and Syria. Some popular Macedonian tobacco varietals include Komotini, Samsun, Xanthi, Drama, Serrus, Izmir, Yenidji, Cavella and Bursa.

Latakia: This is a full-bodied dark, dry tobacco from Cyprus and Syria that gives off a smoky aroma that’s similar to burning tree leaves, peat moss or baseball glove leather. Latakia is a powerful tobacco: this is the “smoky scotch” of tobaccos that I discussed earlier. It is produced by smoke- and fire-curing the leaves over spices, herbs and aromatic woods. This is very similar to the process of peat smoking barley prior to fermentation in the whisky and scotch making process. It is precisely why the two items have such similar flavors and aromas. English blends sometimes contain up to 50% Latakia, and some smokers will put nothing in their pipes but 100% Latakia. Balls. One thing to note here is that this variety can sometimes get ashy toward the end, since it is such a dry tobacco. It rarely “bubbles” or boils as you smoke it, as it tends to burn cool (low sugar content).

Side-Note About Latakia: The smoking process associated with Latakia tobacco was first discovered when farmers forgot they had stored excess tobacco in the rafters of a barn where they used to cook. The smoke from all the burning wood wafted up and flavored the tobacco. When the farmers found the old tobacco in the rafters, this new, enjoyable flavor style was born.

Tobacco Cuts & Curing Processes

Like steak, there are several cuts of tobacco. However while each cut of steak has a different flavor because it’s from a different part of the animal, tobacco cuts have a more physical connotation: it’s all about the shape, size and manner of how the leaves are cut.

The curing and processing of tobacco is analogous to steak aging, marinating and applying varied cooking methods. The tobacco leaves can be dried, flavored and processed in a variety of ways prior to smoking, all to different results and imparting a wide variety of flavors.

Here’s a quick breakdown of the information you’ll need to know when you go out and buy some tobacco:

Cavendish: This special heating and curing process brings out the naturally sweet flavor of tobaccos. The result is a mild, light tasting and easy to pack product. Cavendish can be produced from any tobacco type, but mainly Virginia tobaccos are used because of the high sugar content that naturally occurs in the leaves. Examples include Black Cavendish, Navy Cavendish (aged with rum) and English Cavendish (fire-cured tobacco which is steamed and then stored under pressure to permit it to cure and ferment).

Casing: Simply put, this means adding flavoring to a tobacco. This is usually done by producing a fluid mixture of sugar, honey and/or other kinds of aromatic sweeteners and then soaking the tobacco. The goal is to produce a tobacco with a sweet and smooth aroma.

Air-Cured: Drying tobacco naturally, and sheltering it from sunlight in large barns causes sugar content to crystallize on the leaves. It usually takes about three months.

Fire-Cured: This  drying and curing method is achieved by a wood-fired smoke fumigation.

Sun-Cured: Most Oriental tobaccos are cured by simply baking in the sun, which is why they tend to be drier than other varieties.

Cake: This is tobacco that has been soaked in honey, which acts as a bonding agent as well as a sweetener.

Spun-Disc or Plug: Similar to cake, this is tobacco that has been soaked in a bonding agent (like sugary syrup or honey), but then pressed together by packing it into round molds or logs before packaging. If a piece is cut off its called a plug.

Flake Cut: Tobacco packaged as large, flat flakes. It must be rubbed out to separate the flakes, or folded and then simply inserted into a pipe and lit.

Rubbing Out: While often used as a term for masturbating, in the world of pipe tobacco it means rubbing flake or plug in the palm of the hand to loosen the tobacco prior to smoking.

Ready Rubbed: A flake-cut tobacco that has been rubbed out before packaging.

Shag: Tobacco that has been shredded very finely. This is what Sherlock Holmes smoked, which, at that time, was supposedly considered an inferior product.

Ribbon Cut: Tobacco cut into long, thin ribbons, though not as long or as fine as shag.

Cube Cut: Pressed tobacco chopped into small square pieces.

Navy Cut: Traditionally the tobacco was put in a long thin canvas tube and twisted up very tight. After time it became a thick rope of tobacco, approximately an inch in diameter. Similar to spun disc, if a piece was cut off it was called a plug. It is also commonly sliced, and is generally a slow burning tobacco.

Styles of Pipes

Similarly important to WHAT you’re smoking is the vessel in which you’re smoking it. The pipe you choose is an extension of yourself; it is a personality marker. Like fashion or clothing style, it is a deeply personal matter. It may even be the kind of Harry Potter wand bullshit where the pipe chooses you, rather than you choosing the pipe. You may be surprised in what ends up being your “fit.”

Most commercial or good quality pipes are carved from high density hard woods, like briar, that won’t ignite and turn to charcoal with frequent burning. This dense wood often has some pretty cool patterning in the grain as well.

However some are made from meerschaum, which is a mineral deposit that is carved and later polished with hardened bee’s wax. These are typically ornately designed, like sculptures.

meer-pipe

The meerschaum pipes will tend to turn slightly yellow over time as they become seasoned and used, with a dark brown or black interior in the bowl. They are said to impart a sweetness to the smoke that you don’t get with a wood pipe.

Other pipe styles are more natural, like those made from dried gourds, calabash pipes, or corn cobs. The calabash, which has a removable meerschaum bowl topper that traditionally rested in a hardened, hollow gourd, is what Sherlock Holmes smoked.

A photo posted by @pipebossoftheday on

A photo posted by @pipebossoftheday on

I suppose we could throw glass pipes and hookah pipes into the mix, but those are generally being used for illegal drugs, dried fruit or more harsh blends of non-pipe tobacco that aren’t very pleasing. Those pipes are more difficult to carry around for every day use too.

If you see the phrase “estate pipe,” it usually means that the pipe was used and is now being re-sold. Nice for decoration, perhaps.

In the realm of wood, where we will remain, there are “free-hand” natural cut, rough top, and smooth varieties. Below, the top pipe and right pipe represent smooth, elegant styles – more refined. The bottom, top right and top left represent natural cut styles – more rustic. On the left and lower left, you’ll see smooth styles but with rough tops. And on the bottom right you’ll see a stylized smooth pipe that still retains a natural, rough looking shape. As you can tell, there are lots of pipe styles out there. Picking a single one that suits you is often difficult. That’s why pipe smokers tend to collect several pipes, and choose which to smoke depending on their mood.

OLYMPUS DIGITAL CAMERA

A closer look at the bottom-most natural cut, free-hand pipe:

newpipeft2

I apologize for the repeat photos below, but I’m popping them in so you don’t have to scroll back up to see what I’m talking about.

In additional to the overall look, there’s also the stem length. Longer stems allow the smoke to cool down before it gets to your mouth, making for a more relaxed and smooth smoke. However, a long-stemmed pipe is not the most convenient thing to tote around and carry for the evening. As such, a chuchwarden pipe might be better suited for long bouts of reading or relaxing by the fireplace.

DSC08282

DSC08285

As you saw from the pipe wheel up above, a few of us prefer the traditional bowl style, or a smooth style, while others like a rustic horn pipe shape or a free-hand. Here’s a closer look at my horn:

DSC08281

It’s all a matter of preference. There really isn’t a difference on many of the styles other than what I mentioned about the stem length. However if you notice, in the image of the natural cut pipe, the pipe has a very large and deep bowl. When comparing the natural cut to the small churchwarden bowl, the natural pipe may stay lit for an hour as opposed to 15 or 20 minutes for the “churchie.”

newpipeft2

Same goes for these two pipes below. The churchwarden on the left is about half as deep as the rustic/natural topped pipe on the right:

DSC08315

These things need to be considered before lighting up or leaving the house with your pipe gear.

Pipe Gear

Pipe gear can range from tools and accessories to satchels and pouches. There’s a LOT of cool stuff you can pick up for your new and awesome hobby. Below are some examples:

Pipe Cleaners: Yes… these are actually used for something other than children’s craft-making. You stick them down the stem to remove excess gunk, sludge, moisture, tar, spittle, you name it…

DSC08298

Pipe Nail: A poor man’s pipe tool, this is primarily used for tamping down your tobacco as it burns (to keep a compact but well-breathing ember/smolder going). At the end of your smoke, the flattened point can be used to scrape out the ash and gunk. Picking up a pipe nail will only run you a buck or two at most.

DSC08293

Pipe Tool: A full fledged pipe tool looks a bit like a folding pocket knife. One side is a scraper, the other side is a poker. And the flat bottom portion is for tamping down your tobacco, like a pipe nail. Fancy pipe tools can range from $10 to $100 depending on the craftsmanship and materials involved.

DSC08294

DSC08297

Pipe Lighters: Special lighters like this Zippo are made for lighting pipes, as they have a cut-away hole for holding the lighter sideways, with the hole hovering over the bowl of your pipe as you light up.

DSC08288

Pipe Knocker: This cork doo-dad is for tapping against the side of your pipe bowl to get excess out before scraping out with a pipe tool. It’s safer than using your hand (burns suck), and it also protects the finish of your pipe so you don’t ruin it by tapping the bowl against something that could scratch or nick the wood.

DSC08289

Pouches: Simple. This accessory is for holding loose pipe tobacco that you may have purchased by the ounce at your local tobacconist or smoke shop.

DSC08302

Pipe Cases: These nice leather-bound satchels are for holding pipes and everything involved with pipe smoking all together in one easy-to-carry item. Plus they’re pretty sharp looking.

DSC08310

DSC08311

They even make these things for long-stemmed churchwardens:

DSC08313

DSC08314

Pipe Display: If you’re like me, you like to show off what you’ve got sometimes. These stands and display cases are perfect for classy, old school home decor.

DSC08285

I’ve even made some out of rock, to emphasize the natural, rustic look of this horn pipe:

DSC08281

Tobacco Jars: These are usually for storing your loose tobacco purchases. You should pop a small humidifier into the lid if you can to keep your tobacco moist. I use my jars for matches, since I have a humidor for the tobacco:

DSC08305

Speaking of humidors, a shot of mine is below, which I got from Carnivore Club. There are also other cool things too, like special pipe ash trays and schwag boxes for storing some or all of your shit:

20150618_173322

DSC08315

DSC08316

Packing Your Pipe

This here is a pretty good method for packing your pipe with tobacco in such a way as to preserve maximum air flow when pulling through the stem, but also allowing for a good burn, with which you won’t have to re-pack or re-light your pipe several times throughout the course of your smoke.

Your first pinch of tobacco should go into the pipe and be pressed down gently. A rule of thumb is to fill the bowl loosely and then pack it down so that the bowl is half full. Your second, and any successive pinches of tobacco, should be pushed down more firm as you go. When you fill from half to full again with the second pinch, you should pack down to 3/4. And a third pinch should pack down to 7/8. When you continue in this vein, you’re creating a more solid bump of tobacco at the top as opposed to the more loose shreds at the bottom. You want the tobacco to be a little loose at the bottom so that air can be pulled up the stem easier and allow for fresh oxygen to feed the flames and keep the pipe lit.

Check out the short demo video below for how to pack your pipe:

Lighting Your Pipe

Many people use a special lighter or their favorite fancy torches for lighting a pipe, but I like a good old fashioned pair of wood stick matches. Two matches, both simultaneously lit and held slightly apart from one another, makes for the perfect flame size to get a good, even light.

I prefer matches because they don’t impart a lighter fluid or butane smell/taste to the process. Torch style butane lighters can damage your pipe if the flame is too hot and concentrated. They can also burn your mouth if you pull too hard while lighting. The flames from those things are piercing, and can actually over-light your tobacco, burning it out too quickly, if you aren’t careful in how you apply the flame to the tobacco. My suggestion: don’t use a torch lighter.

If you’re just starting out, you may not have a cool lighter yet, and wood stick matches are typically free when you buy tobacco from the smoke shop. The only down side to matches is that it can be difficult to light if you are outside in a windy environment. That’s when a pipe Zippo comes in handy.

Okay so here’s how you actually do it: Strike your matches and hold them slightly apart. Make small circular motions over the top of your tobacco while you pull long, even and powerful puffs through the stem. About three to six good long pulls through the stem should do the trick to get a good light. If you do it right, you won’t have to light it again before you finish. See below for a short demo video:

Smoking Your Pipe

Piping should be a relaxing, soothing experience. If you find that you’re furiously puffing like a madman just to keep the embers glowing and billowing, then you’re probably doing it wrong. You should take occasional long pulls and allow the smoke to swirl around your mouth for a moment before blowing out. I don’t inhale.

While doing so, I occasionally will partially cover the top of the bowl with my thumb or palm to deprive the flame of oxygen prior to pulling through the stem. This technique keeps the embers smoldering nicely because when the flame gets the air it needs, it gets it in abundance. Think of each pull like a billows for a fire.

If you find that your smoke is thin and ashy, it probably means you’re losing your light. You should tamp down your tobacco occasionally as you smoke, with a pipe nail or pipe tool.

DSC08294

DSC08293

Pushing down gently or “tamping” the lit tobacco will keep your fire burning. A compact tobacco preserves heat for a longer, more steady burn. This will prevent your bowl from going out. Check out my video demo below:

I had a few decent smoke rings in there. I’m still working on the Gandalf ship technique though.

Once you get down to the bottom of the bowl, you may experience an ashy taste, or a chalky residue in your mouth. This usually happens when you’re running out of tobacco in the bowl, and you’re starting to pull in the ashes that remain in the bottom of the pipe. For me, this means it is time to either refill and repack the pipe, or put it out and put an end to the smoking session.

When ending your piping session, allow a few minutes of cool down time before you tap out the ashes and scrape out the excess. I also give a few gentle pushes of air through the stem and out the bowl too. This will dislodge any fluids, ash or chunks that may have gotten stuck at the bottom of the stem or bowl. Check out the demo:

Cleaning Your Pipe

You don’t have to clean your pipe after every smoke. In fact, allowing a bit of the tobacco residue to settle on the walls of the bowl will act to “season” your pipe. This is recommended with new pipes or pipes that haven’t been smoked many times yet, as seasoning the bowl actually protects the wood and makes for a more enjoyable, insulated, robust and flavorful smoke.

It was once recommended to me that I smoke specific types of tobacco in specific pipes. For example, use your English blends in Pipe A, and your aromatic Virginia’s in Pipe B. I never really followed that suggestion, because I prefer blends that contain both Latakia and sweet tobaccos. But I can see how some may prefer to smoke specific tobacco styles in an exclusive pipe for each, especially if the bowl becomes seasoned for that particular flavor profile.

Anyway it IS good to clean your pipe every once in a while to allow for better air flow and a cleaner, more fresh-tasting smoke. At the very least you’ll want to get that white/gray ashy stuff out, even if you want to allow the dark residue to cake up (for example if you are seasoning a new pipe).

Pipe cleaning is truly enjoyable for me. Here’s what I like to do:

First, work on a surface that’s easy to clean or wipe down afterward. Set yourself up with your pipe cleaners, pipe tools and a dry cloth.

Next, use your pipe tool scraper or the flat end of your pipe nail to lightly scrape the inside of the bowl in a circular motion. Do this a few times to get the bulk of hardened tobacco residue off the walls.

Then get a shot glass and fill it with whisky or scotch. This is not for drinking, per se, although you certainly could have a sip. But alcohol evaporates quickly, and, as such, is a great fluid solvent to use for cleaning up sticky, gunky stuff like tobacco residue. I prefer whisky because it tends to pair well with the flavor of the tobacco I smoke, but if you’re averse to whisky you can use vodka or some other neutral flavored liquor.

I use a cloth material to dip into the whisky and then rub out the inside of the bowl. Keep doing this until you’re satisfied with how clean the bowl is getting.

Note: it will probably never wipe completely clean, especially if you end up smoking often. There’s just a lot of black shit that embeds into the wood. The idea is to get the loose shit out so you have a clean smoke in your next puff.

Then dip your pipe cleaners in whisky and run them through the stem a few times to get the dark residue out of there. This will make for a better, cleaner pull on your next smoke. Again, do should this several times until you are satisfied with the amount of residue coming off. You should be able to get the pipe stem pretty clean inside since it isn’t made from absorbent wood.

Most pipes can be disassembled by detaching the stem from the bowl. You’ll want to do this to get all those nooks and crannies clean where they connect.

Finally, run a dry pipe cleaner through the stem to dry the inside, and wipe (or pat dry) the inside of the pipe bowl with a dry section of cloth. Then run a flame across the bowl to finish drying it, and to cook off any excess whisky left over in there from the cleaning.

Re-assemble your pipe and store it for your next use, or pack it with a fresh bowl of tobacco for a fresh smoke!

That’s pretty much it. Don’t forget to wipe down your pipe tool/pipe nail with a cloth to get the residue off before you put everything away. Use that whisky again if you have to.

Here’s a video demo of me cleaning one of my pipes:

So there you have it: a one-stop guide for all your pipe-smoking needs, provided by yours truly, Johnny Prime.

One word to the wise: don’t overdo it. I only smoke maybe once every month or so, and only that often around the holidays and in the colder months. Everything in moderation, as they say (including moderation). Anyway feel free to share this educational post with all of your friends, you pipe-hittin’ mutha fuckas!!!

Here’s all the demo vids together as one:

Still want to see more? Check out my dedicated pipe-smoking Instagram feed, @PipeBossOfTheDay, where I feature pipe smokers puffing away with a re-gram tool. Give me a follow!

UMAi Dry

UMAi Dry contacted me a few weeks back about their dry aging bags. I was intrigued by some of their promotional materials and video demos, so I told them to send me some samples to try out at home. I already had the sealer for use with my DIY sous vide machine, with which I made some kickass steaks.

Usually when I think about the aging process for steaks, I get overwhelmed and think I could never do it. This is something I should leave to the professionals. I worry about mold, bacteria, rancid meat, wasting money on failed attempts, etc. But with UMAi Dry this otherwise daunting task is boiled down to a super simple procedure. Essentially you just pop a hunk of beef in their special vacuum seal bags, put it in your fridge, and wait 35 days.

So I received my sample bags and ran out to the store to buy a nice rib roast, which I would later parse out into rib eye steaks after the aging is completed. NYC grocery stores don’t really have massive slabs of rib roasts sitting in the fridge section, so I had to ask the butcher what he had. He went to work for me, giving me a section of rib eyes with about four or five bones intact.

wpid-wp-1445965259561.jpg

DSC08472

DSC08468

DSC08469_2

DSC08475

DSC08474

DSC08473

I was a bit freaked when I saw the price tag on this fucker. The butcher told me that the beef was prime, but that he only charged me for choice.

wpid-wp-1445965692615.jpg

DSC08465

DSC08467

I guess that’s a good deal (several dollars per pound cheaper). But still… at $225 it could turn out to be a really fucking expensive mistake if I fuck anything up.

DSC08466

On the other hand, if this nearly 11lb hunk of prime rib eye ages nicely for 35 days, I could end up with several high quality rib eyes that would save me money on steakhouse dinners in the long run.

I took the gamble. I probably should have waited for a sale or something, but I was too excited to get started. About 30 minutes later I was starting the process of bagging and sealing.

DSC08470

DSC08476

I put some wax paper across the bones so that any sharp bits wouldn’t puncture or slice open the bag.

DSC08478

DSC08479

DSC08481

Meat condom:

DSC08482

DSC08484

DSC08487

DSC08491

DSC08497

DSC08498

DSC08500

DSC08501

DSC08502

Once sealed properly, it just goes into the fridge on a cookie rack or drying rack, so that air flow goes all around the bag.

DSC08504

Then we just wait 35 days, with an occasional flip here and there. Here’s a pair of shots after 5 days with a flip. As you can see, the meat is already starting to darken and dry where the bag is in contact with the flesh.

DSC08616

DSC08617

Even darker after another week. It’s forming a “bark”-like layer of beneficial mold that helps to tenderize the meat as it develops.

DSC08766

And another week or so. I notice it’s also shrinking. Dry-aging processes tend to cause the meat to desiccate to the point where you can lose almost a third of the original weight.

DSC08768

DSC08767

After 35 days, here is the unwrapping!

DSC09195

DSC09197

The outside bark, which has the texture of really hard beef jerky, needs to be sliced off of the underlying softened meat, and the tough skin membrane over the ribs needs to be peeled and picked off.

It’s an arduous task, but the end product is totally worth the effort. Here are some shots that my wife snapped of the slicing, trimming and portioning process.

DSC09198

DSC09231

DSC09239

DSC09201

DSC09203

DSC09206

DSC09207

DSC09209_2

DSC09215

DSC09222

DSC09227

DSC09228

The inside is so gorgeous. This shot looks like angel wings:

DSC09220

DSC09224

DSC09255

DSC09271

DSC09234

DSC09208

DSC09211

A great looking fat cap was still intact. I was worried that I would have to carve off too much of that, but we did pretty good.

DSC09229

DSC09276

DSC09257

DSC09259

DSC09266

I’ve saved all the bark slices to use in making another beef stock or broth at a later date.

DSC09260

I ended up with two thinner boneless cuts, so I seasoned them up right away and seared them off in a cast iron skillet with some butter, garlic and onions (I cut one to fit them in the pan better).

DSC09292

The result was awesome. Perfectly cooked, super flavorful and really well worth the wait! The fat was entirely edible. Very soft and buttery, like beef jelly.

DSC09294

DSC09297

Those were just a couple of small boneless cuts. This cowboy chop was pretty incredible:

DSC09451

DSC09453

DSC09455

DSC09457

DSC09460

DSC09465

Now I’m wondering if I should try this again and just leave the shit in the fridge for several months. The flavor was great on this stuff. It had a nice earthy smell; a well-endowed scent of mushroom or truffle, with a slight hint of blue cheese. Like heaven.

DSC09248

If you’re adventurous with home meal prep, I highly recommend this easy-to-use product. I think I still have a few extra bags, so the next time I have a little extra fat in my bank, I might go in for another dry-aging experiment: maybe strip loin next time.

Final note: if your fridge is generally full, but you still want to age beef at home, I suggest getting a mini fridge, or a smaller dedicated separate fridge, just for beef. Put your temperature setting to about 35 degrees, and get a fan in there somehow to circulate the air. Always keep the beef elevated off the surface on a baking rack or something, too.  No special aging bags necessary.

Guide to BBQ Styles

In case you’re from a different planet, barbecue is a culinary technique that involves cooking meat for long periods of time at low temperatures with smoke from a wood fire. BBQ pits add a distinctive smoky taste to the meat.

DSC08145

Clearly we’re not talking about what you do in your backyard on Memorial Day with your Weber propane grill. We’re not talking about slapping a piece of thin, raw beef onto a hot electric mesh of metal either.

DSC05343

That’s GRILLING. Never confuse it with real deal BBQ, which involves smoking a massive carcass for days on end, and the low-and-slow roasting and/or constant basting and sauce-mopping of meats for hours and hours. No my friends. This is a whole different beast. Speaking of different beasts, there’s really no limit on what animals can be cooked in this style.

DSC08225

In the American south and midwest, however, barbecue has become more than just a cooking style. It’s a way of life, as is often said, and it varies greatly from place to place. Regions differ on things like sauce or no sauce, what type of animal or cuts of meat are used, and even what types of wood is burned. This page will serve as your guide to understanding these great varieties.

Texas
May as well start with the big one.  Texas has regional styles within it’s own style. Central Texas “Hill Country” is known for its old meat markets, which were heavily influenced by German and Czech immigrants. Here, the focus is on the meat, so they use dry rubs (no sauce on the meat, or it is not a primary element to the food). Beef brisket and ribs are king, and sausage links are also prominent, with pecan and oak wood being used in most smokers. East Texas BBQ is pretty much split 50/50 between beef and pork, but, similar to southern styles, what you get is usually chopped rather than sliced, and served sandwich style with a tomato- and vinegar- based hot sauce.

20140827_193320_LLS

DSC08252

20150830_193701

North Carolina
North Carolina, like Texas, has variations within: eastern style and Lexington style (not to be confused with Lexington Steele). Three unifying things you need to know about NC BBQ: (1) the meat is PORK all the way; (2) said pork should be brushed with a spice and vinegar mix while cooking; and (3) hickory or oak wood is used in the smoker. Two differentiating things you need to know about NC BBQ: (1) eastern NC is a whole-hog BBQ, using the entire animal, while Lexington favors just the pork shoulder and ribs; and (2) eastern style NC BBQ favors an apple cider vinegar-based sauce, while the west prefers a ketchup- and brown sugar- based sauce.

20150830_193853

dino 6

South Carolina
Here, it’s all about the sauce differences, otherwise it is pretty much the same as North Carolina. Central South Carolina is typically BBQ with a mustard-based sauce known as “Carolina Gold.” The coast is all about pepper and vinegar, and the far west and north are into ketchup- and tomato- based sauces. Preferred cuts/dishes across the state are pork butt and ham.

DSC08224

DSC08153

Kansas City
This info holds for both Kansas and Missouri versions of Kansas City, as they are neighbors. But because of its geographic location, KCBBQ has a mix of culinary influences from all regions. And given its history as a hub for the meatpacking industry, Kansas City style BBQ embraces all kinds of meats. Everything is done “slow and low,” as they say, and usually with hickory wood, although all woods are used. Burnt ends are big here, and smothered with a thick and sweet, molasses- and tomato- based sauce, because, well, in Kansas City, “sauce is boss,” as they say.

20140827_193157_LLS

St. Louis
St. Louis-style barbecue consists of mainly pork dishes, a staple of which is the pork steak, which is sliced from the shoulder of the pig. However another item unique to the St. Louis area is crispy snoot. This nose and cheek cut is prepared by removing the nostrils and cooking until crispy. Similar to pork rinds, these can be presented many ways, but the two most common are either (1) covered in sauce, on a sandwich, or (2) broken into pieces and dipped in sauce.

DSC08182

Memphis
Pulled pork and pork ribs are both big for this style of ‘cue. The dry rub is usually paprika and garlic, but served with a thin and tangy tomato-based sauce. Wet ribs are also prominent as well. Hickory is the choice wood, although oak, cherry, pecan and apple are all used.

20150809_155331

Alabama
Alabama tends to be a mixture of Texas and Carolina styles, but they’re big on sandwiches and cole slaw. They usually go with pulled pork or pulled chicken, but ‘Bama’s signature is the white sauce that they use as a topper, which is a mayonnaise and vinegar concoction.

DSC08111

Kentucky
The thing to know about Kentucky BBQ is their use of mutton: older lamb and sheep. Don’t think of the word “old” as a bad thing. Lamb comes from a sheep that is less than one year old. Mutton comes from a sheep that is more than one year “old.” Kentucky mutton usually comes with a Worcestershire dip as well. Pork is prevalent here as well, but the mutton is what makes this region unique.

Virginia
I’m bogarting this description right from Wikipedia, since it is absolutely fascinating and I have nothing of my own to add to it: “While less prevalent than the other Southern styles, Virginia barbecue is a fair mixture of Carolina and Memphis barbecue. Originating in Hanover, Virginia in the 19th century, the traditional meat is pork (often Virginia ham) or chicken, although more gamy meals contain venison or squirrel. Unlike Carolina barbecue, the texture of meat is sweeter and finer. However, it does contain the smoky blend of Memphis barbecue. During Thomas Jefferson’s tenure as ambassador to France from 1784-89, he engaged in lengthy letter correspondence with James Madison regarding the preferred game for Virginia barbecue. While Jefferson exhibited a general preference for venison, Madison insisted that smaller critters were more consistent with the smokey flavor of the sauce. The key ingredients of Virginia barbecue are bourbon/wine, vinegar, peppers, corn, and a tomato-based sauce.”

California
I’ve decided to pull this directly from Wikipedia as well, since I never knew California had an official style of BBQ: “The original use of buried cooking in barbecue pits in North America was done by the Native Americans for thousands of years, including by the tribes of California. In the late 18th and early 19th centuries eras, when the territory became Spanish Las Californias and then Mexican Alta California, the Missions and ranchos of California had large cattle herds for hides and tallow use and export. At the end of the culling and leather tanning season large pit barbecues cooked the remaining meat. In the early days of California statehood after 1850 the Californios continued the outdoor cooking tradition for fiestas. In California a well-known barbecue dish is grilled tri-tip beef rump, sometimes cut into steaks. The Santa Maria Style BBQ, originally from the Central Coast of California, uses a portable ‘towed’ trailer version frequently seen at farmers markets. The old Mexican Ranchos of California would cook tri-tip over a pit of red oak, and simply season it with salt and garlic to enhance the flavor. It was served with pinqinto beans, pico de gallo and tortillas.”

Hawaii
Often overlooked is the luau, a polynesian tradition and celebration where whole hog is cooked. The centerpiece of any luau is kalua pork, which is a whole pig that is roasted in an imu pit – an underground oven traditionally made with lava rock – that cooks the animal for several hours, low and slow. The pig is ceremonially wrapped in banana leaves to impart sweetness and lock in moisture before being placed onto the coals.

20150905_175908

IMG_6529

IMG_6527

Hybrid Styles
Many other states, like Oklahoma, Arkansas and Georgia, are essentially hybrid forms of BBQ that exhibit techniques and flavors from the surrounding geographic areas of influence. New York City, on the other hand, is beginning to develop its own unique cultural hybrid BBQ style, as various African, Asian and Latin American immigrant communities weave the flavor profiles from their heritages into the American culinary tablecloth, so to speak. A true melting pot in every sense of the phrase, New York City has outlets for the flavors of African braai, Korean kimchi, Indian curry, Middle-Eastern cumin, Mexican mole and Brazilian churrasco/rodizio, just to name a few. In time, I see NYC as being a place where the boundaries of BBQ are expanded to a global level, as New Yorkers currently seem to be taking BBQ – something uniquely American – and applying it to various cuisines from all over the world. When that happens, everyone wins. Especially my stomach.

DSC07502

I realize that many BBQ aficionados might find my overview above to be a bit rudimentary. There’s so much more to know, and not even just about the meats. One could easily spend an entire day learning about the various side items that go along with American BBQ, for example. As a matter of fact, one of the most thorough and enjoyable resources I have come across for BBQ is a book called Be The BBQ Pitmaster, by Will Budiaman. This book is good for history, detailed discussions of the various regional techniques, tips for wood selection, smoking instructions, and even recipes from well known pit masters in each region. It’s a one-stop-shop for all your BBQ research and cooking application needs.

And if you are wondering what wines to pair with your BBQ, check out THIS ARTICLE by Bro BBQ.

Lastly, to see my small but growing collection of BBQ reviews, click on over to “The ‘Cue Review” now.

Cured and Smoked Salmon

Let me take a few moments to explain why I love this shit so much: Salmon that has been fucked with in some way (whether smoked or cured) is one of the few fish items that has an almost meaty persona. When you start sucking down slices of that beautifully bright colored shit, you almost feel like you’re eating raw beef. The texture of it, the chilled temperature, the addition of some capers, onion or a little olive oil… it’s difficult not to see the similarity to something like beef carpaccio. Just imagine this picture being a red color instead of pinkish-orange:

salmon

One thing I’ve come across in my chowing of this delicious stuff is that it is called by many names. Lox, cold-smoked salmon, Gravlax, etc… and then there is almost invariably a location element, which is sometimes just a way to add descriptive and fresh sounding words to a menu item: Nova Scotia, Scottish, Wild Alaskan, etc. What does it all mean? Check out the essentials below:

Lox: In the days of old, this was strictly sourced from salmon belly only, though now other parts of the fish are used. It is either brined or salt-cured, usually for a few weeks, but it is not smoked or cooked in any way. This would be the purist’s pick.

Gravlax: This shit is the Scandinavian version of lox. Dill, peppers, sugar, juniper berries, horseradish and even liquors like brandy or aquavit are used while curing to accent the flavor. It is not smoked, and it is often pressed while it cures, to eliminate moisture.

Nova Lox: This lox is cold-smoked after brining/curing, and, as the name obviously suggests, it hails from Nova Scotia. That being said, the words “Nova Lox” are increasingly being used to specify the curing process as opposed to being a strict geographical marker. Fuck that. Words have meaning, people. Let’s not get too crazy.

Cold-Smoked Salmon: Essentially it is Nova Lox that comes from a place other than Nova Scotia. Any part of the fish can be used (not just the belly), and “cold” is somewhat of a misnomer, as the temperature is typically about 80 degrees while it is exposed to smoke

Hot-Smoked Salmon: This is essentially BBQ’d salmon. The salmon gets completely cooked through. Like poached or grilled salmon would, the meat will flake apart. It has a smoky flavor but a more firm, dry texture.

So now you’re armed with the lingo, and you’re no longer a Nova Lox Novice: You’re a cold-smoked pro, and you know what to expect from your salmon. Which do you prefer?

What do I like? Pretty much all of it except for hot-smoked. I generally don’t like my salmon to be cooked, unless it’s on crispy skin. My ideal preparation would have all the spices and flavors from the Scandanavian Gravlax preparation, but it would also be cold-smoked to add a little more manliness. Fuck yeah… and with some capers, red onions and a little bit of olive oil or truffle oil on top…

DIY Sous Vide & The Searzall

Recently my cousin sent me a text message with some pretty alarming and exciting photos and videos.

Yeah, that’s right… the motherfucker made his own sous vide machine, cooked up some filets to medium rare, and then seared them the fuck off in a cast iron skillet to get some texture on the edges.

IMG_2345

IMG_2346

What exactly is a sous vide machine, for you non-food nerds? The words translated from French mean “under vacuum.” It is essentially a hot tub for meat. How it works: you place vacuum sealed meats into the water bath and leave them there until the meat comes up to the proper temperature, which is set and regulated with a water heater and temperature controller. You can’t overcook the meat! You get perfect medium rare shit every time, evenly cooked through and through.

As you can imagine, I was flipping out at what my cousin had achieved. I browsed some DIY sous vide instructional websites a few years back when I was living in a house on Long Island, but it seemed like a ton of effort. I thought to myself, “I’ll just get a real-deal machine someday.” But once I saw these things from my cousin, I knew it was time to pull the trigger.

Lucky for me, my cousin is super handy and craftsmanlike when it comes to stuff like this, and he has access to a bunch of great tools like dremels and drill presses.

A flurry of texts immediately ensued. It’d be fun to build one together, I thought. THIS LINK is the instructional we worked from. My cousin ordered a bunch of the materials online…

I pulled my cooler out of the closet, which would serve as the main cooking vessel or “hot tub” (and it saved me some bucks for not having to buy a plastic tub).

cooler

and I ordered a vacuum sealer via Amazon Prime…

81QTeq8J67L._SL1500_

I also nabbed a blow torch, a can of propane, and a Searzall, because I want to flame that shit sometimes instead of finishing in a pan. Plus, this works great if I ever do fish – the skin… oh maaaaan it gets crispy…

20150307_192249_LLS

20150308_154451_LLS

20150308_154609_LLS

20150308_160920_LLS

IMG_1925

I sent the dimensions of my cooler lid area to my cousin:

mark up

He used this to figure out how to cut the plexi down to size to serve as the top portion that suspends the water heater in position. He also built the temperature control housing, and wired the power supply for the temperature control unit and heater probe (thermometer).

IMG_2366

IMG_2373

IMG_2374

IMG_2376

IMG_2375

IMG_2368

DSC04698_2

DSC04699

I was initially concerned that the hinged top of my cooler wouldn’t close properly with the plexi in place. It turns out that closing the top tight isn’t too big of a problem when you’re using a nicely insulated vessel like a cooler. Also, we dropped the plexi to a lower lip within the cooler, so the thing closes nicely now:

DSC04701

Then you suction this to one of the walls. Essentially this is a water circulator. It keeps the water swirling around so that there are no warm or cold spots within the bath, which makes for a nice even cooking temperature.

DSC04700

BOOM! I can’t wait to fire this fucker up. I’m going to pick up some fish and beef right the fuck now.

Mead & Winemaking

In carrying on the tradition of my late grandfather, my dad and I make wine at home. In fact my cousin does as well.

After my grandfather passed, I convinced my dad that we should carry on the tradition. What started out as a simple kit wine merlot turned into buying grapes from a local vineyard and using our own crusher/destemmer to process our own wine.

grapes 004

grapes 011

grapes 015

grapes 018

grapes 021 edits

grapes 022

grapes 023

grapes 026

grapes 034

grapes 052 edits

grapes 060

grapes 074

grapes 079

grapes 081

grapes 082

grapes 090

grapes 096

grapes 098

grapes 100

My dad even converted half of his basement into a temperature controlled wine cellar. The only thing we don’t do is grow the grapes, but I’m still trying to convince my dad to plant some on the hill in his yard.

I made my first batch of bathtub wine in a NYC apartment back in 2003 or 2004 with frozen grape juice concentrate and bread yeast in an empty one-gallon milk container, using a balloon and a rubber band as my air lock. It was a fucking awful, headache-inducing monstrosity.

My dad, meanwhile, had picked up some good equipment. Carboys, primary fermenter buckets, bungs, air locks, siphon tubes, thermometers, acidity testing strips, etc. We used merlot juice that we picked up from a local home brew shop, and the end result was excellent. The early success inspired us to move on to actual grapes instead of juices. My dad’s first attempt with grapes was a pinot noir, notoriously fickle to make a good wine. The resulting wine was the best bottle of pinot I had ever tasted. We still talk about it today. It was absolutely amazing.

Another great batch was my and my wife’s wedding wine favors. We made blackberry merlot for our wedding favors. Awesome.

wedding wine

I like wine just as much as the next guy; I’m not a wine snob, and I usually prefer a beer or cocktail with my meals. Making wine is pretty damn simple though, so it is a great skill to have. The wine you end up with, if you know what you’re doing, is better than most of the store bought crap that you can find for under $100, so it’s worth it to get into this hobby if you are into wine.

Making mead is a very similar process, just cleaner and a little easier. If you don’t know, mead is honey-based wine as opposed to grape-based. The great thing about making mead is that you can really get experimental with the flavors. My first attempt at making mead was one of our best booze making endeavors to date. I used honey, blueberries, rose petals, cinnamon and cloves. It was a really nice spice wine type of drink. Strong and sweet, great for the holidays.

I’m writing this post because I’ve just started another batch of mead, only this time I stuck to just honey and spices. Ten pounds of honey, a bag of spices like star anise, cinnamon, cardamom, clove, black peppercorns and cilantro.

DSC03143

Here’s how you make mead:

First, you boil some water. Then you add the honey into the desired amount of water, skimming off any white scum that forms at the top of the liquid as you go. Since I was going for strong and sweet, I dissolved the honey into three gallons of water (total amount, after honey was added), but you could probably use a ratio of two or two and a half pounds per gallon if you want. Boil for about 30 minutes and then let the liquid cool down so it is no longer boiling/bubbling.

DSC03148

DSC03149

DSC03150

TIP: You may want to put your honey bottles into some hot water so the honey is easier to pour out, and you don’t have to burn your arms while waiting to pour all that honey out over a boiling pot of water and steam.

DSC03147_2

Sterilize your primary fermenting bucket as per the instructions on your packet of potassium metabisulfite. Don’t be frightened by this step. It’s really just a matter of mixing the power into the water at the right proportion, and then sloshing the water around in your equipment for a little bit. Then dump out and dry it off.

DSC03146

Pour the hot honey water over your bag of spices, which you should secure in a straining bag, and into a primary fermenting container (usually a bucket that you can later secure with an air lock).

DSC03145

DSC03153

Activate some yeast in a separate cup while you wait for your honey boil to drop down to about 120 degrees or less.

DSC03152

At this point you can add your citric acid (3/4 tsp), pectic enzyme (1.5 tsp), yeast nutrient (3 tsp) and any other things you might find that are helpful for the process.

DSC03144

Once it cools down, add your yeast and give the mixture a swirl before closing the bucket and affixing an air lock on the top.

DSC03154

What is an airlock? It’s a gas trap. It allows gas byproduct to escape the container without allowing air to get back in. Think of the toilet or sink J-trap. It essentially prevents the alcohol from turning into vinegar. When gas escapes, the air lock will bubble up, as seen below:

DSC03157

At the peak of fermentation (yeast eating sugars and releasing lees (sediment), alcohol and gas as waste byproducts), this airlock will be rumbling pretty regularly. At first it may take a few days to get started.

Next step is to pretty much wait. Just leave it alone, keeping the bucket in an undisturbed place that is room temperature or slightly more (maybe 70-75 degrees). When the air bubbles pretty much stop, you are ready to siphon the mead off the dregs and into a secondary fermenting container, or carboy. Place a siphon tube down toward the bottom of the bucket without entering the sediment. Raise the bucket high up onto a table, and line up your carboy or secondary fermenter nearby on the floor. Siphon the liquid from bucket to carboy, and then discard the sediment at the bottom of the bucket. Attach an air lock to the carboy and let it stay that way for a month or two.

picture 027

If there is more build up of sediment at that time, rack it off again (siphon it off) and into another carboy.

IMG_0026

Repeat until the mead no longer drops off any sediment. In the picture below, you’ll see a good three to four inches of sediment at the bottom of the one-gallon carboy. This was my first batch of blueberry rose mead.

wine sediment

Once you are confident that the fermentation has stopped, you’ve racked your wine/mead off the sediment a few times, and no more sediment is falling out of the liquid, then it is time for bottling and/or, soon enough, drinking!

UPDATED PHOTOS – the brown, murky liquid in one of the above pictures (slightly blurry) has now fermented into this golden-amber beauty:

DSC04127_2

The liquid was once sticky to the touch, due to the sugar content. All that sugar has now turned into alcohol. The mead is strong, sweet, and comforting.

My father and I racked it off the sediment almost two months to the day after we initially began the project:

DSC04128

DSC04132_2

Then we added a clarifying agent to pull out some of the remaining suspended sediment:

DSC04134

DSC04133

It is now crystal clear. One more racking and then another period of waiting until we can bottle it up.